
The first thing to know is the trick that makes this work: pinecones float, and a floating cone stays brown. I always set a plate or a brick right on top of them in the bucket so every cone stays fully under the bleach-and-water mix the whole time. After that, this is one of the easiest little “wait for the magic” projects I’ve done outdoors—about a dollar of bleach, almost no hands-on time, and then a few days of patience while nature does the pretty part.
If you like simple projects that feel a little surprising, this one is for you. The cones come out of the bucket looking barely changed, which honestly made me doubt it the first time, but after a good rinse and two or three sunny days on a baking sheet, they dry into the softest pale driftwood cream. I love turning some into a mantel garland and piling the extras into a wooden bowl. Just keep it plain and safe: gloves on, outdoors only, and only bleach plus water in the bucket.
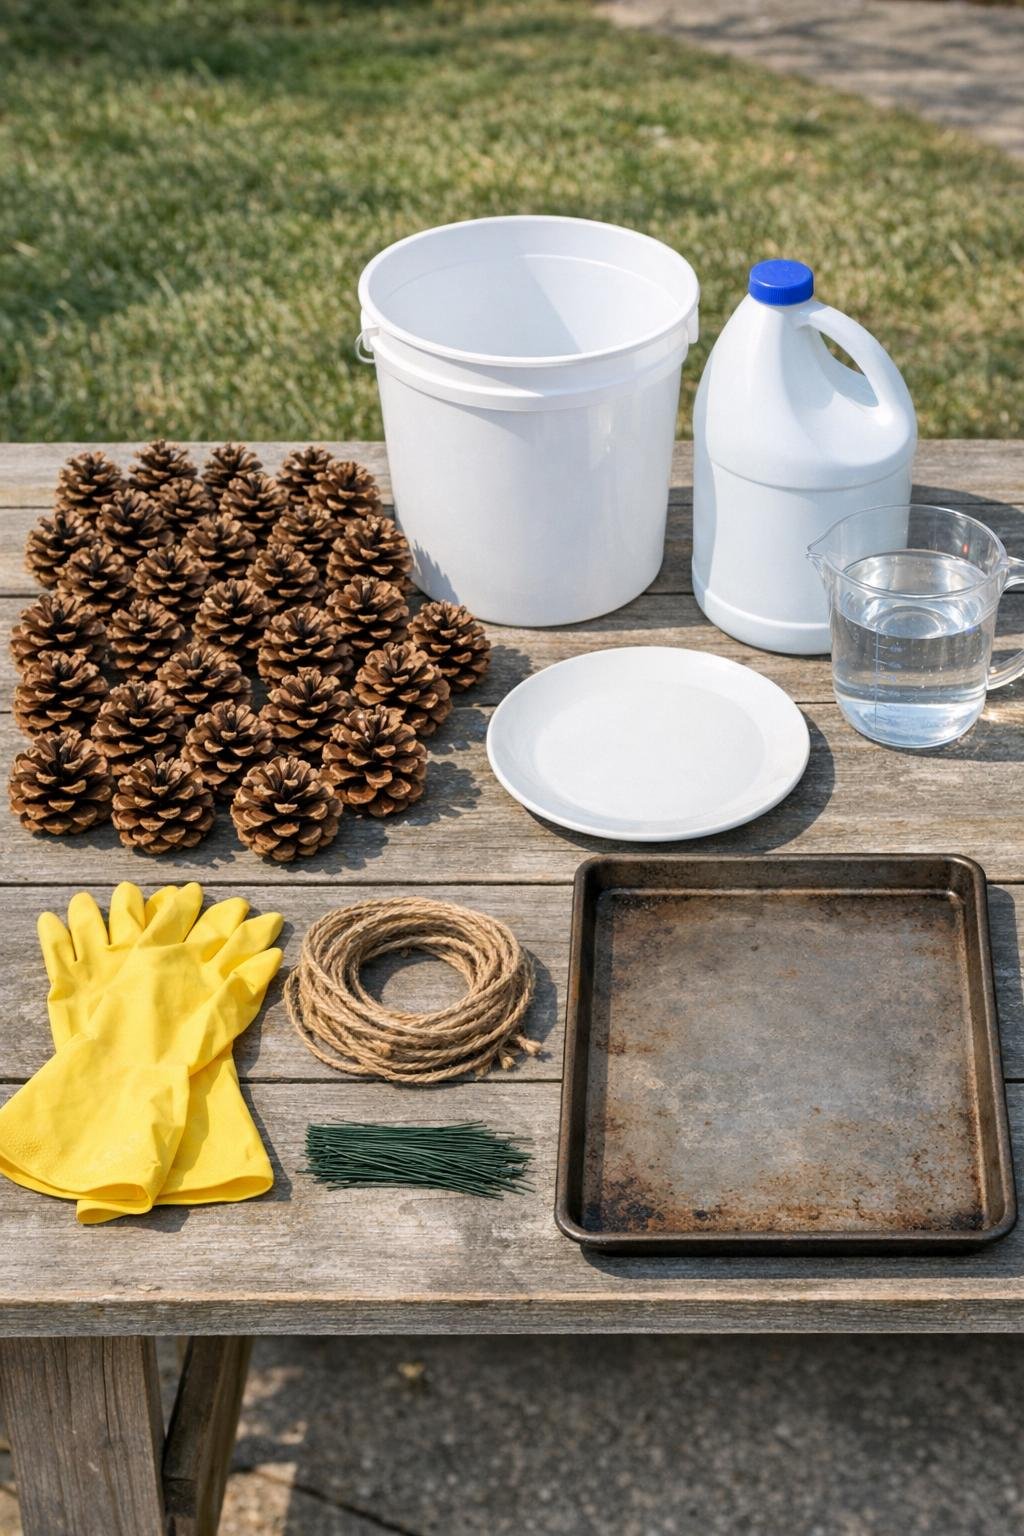
Materials
Instructions
1. Set everything up outdoors and put on gloves. Pour 1 gallon of plain bleach and 1 gallon of water into the bucket, and do not add anything else.
2. Drop all 30 pinecones into the bucket and stir them down with a gloved hand. Set a plate or brick on top so every cone stays completely underwater, because any cone that floats will keep its brown color.
3. Let the pinecones soak for 24 hours and no longer. They may look barely changed when you lift the plate, and that is completely normal.
4. Remove the cones with gloved hands and rinse them very well with clean water outdoors. Spread them in a single layer on the baking sheet.
5. Leave the pinecones in the sun for 2 to 3 days until fully dry. As they dry, closed cones reopen and the color shifts into a pale driftwood cream—that is the part that surprises everybody.
6. Check that the cones are completely dry before bringing them inside. Once dry, the bleach smell is gone.
7. Cut or gather 12 feet of jute twine and lay it out straight on a table. Space 18 to 20 pinecones along it, leaving 4 to 6 inches between cones for a full mantel-length garland.
8. Wrap one 6-inch piece of floral wire around the base scales of each pinecone and twist it tight. Twist the wire ends around the jute twine so each cone hangs securely.
9. Fluff and adjust the spacing so the garland looks balanced and full. Use the remaining 10 to 12 pinecones as a loose centerpiece in a wooden bowl.
10. Drape the garland along the mantel and tuck the bowl of extra pinecones nearby if you like. The whole project is mostly waiting time, but the finished look feels special for almost no effort.

Variations & Tips
If your cones stay dark: They probably floated. Make sure every pinecone is fully submerged under a plate or brick for the full 24 hours.
For smaller cones: Use 24 to 36 small pinecones and shorten the spacing to 3 to 4 inches so the garland still looks full.
If you prefer tying instead of wiring: Wrap a short piece of jute around the base scales of each cone and knot it onto the main twine. It takes a little longer, but it gives a softer rustic look.
For a fuller mantel: Double the twine and make two swags instead of one straight line. I love this when I’m decorating for family gatherings because it fills the space beautifully without adding much extra work.
For picky decorators: If your family likes things simple, leave the pinecones plain and natural-looking. If they enjoy a dressier style, weave a little greenery through the garland after it’s hung.
Important safety note: Keep this project outdoors while soaking and rinsing, wear gloves the whole time, and use only plain bleach and water in the bucket. Do not soak longer than 24 hours.