
If you have a broken black umbrella hiding in a closet, this is the kind of project that makes you feel wildly clever with almost no real effort. The whole trick is built right into the umbrella: when you cut the canopy off along the center seam and open the pieces flat, each half already looks like a bat wing because the ribs become the wing bones and the scalloped edge between them does the rest. I love a DIY like that, especially in the middle of a busy week when I want something high impact for the porch without committing my entire Saturday.
This one is perfect if you want a big Halloween decoration that reads from the street, costs almost nothing, and stores flat for next year. A large golf umbrella gives you a wingspan close to five feet, so it looks dramatic fast, but the build is still very doable in about an hour.
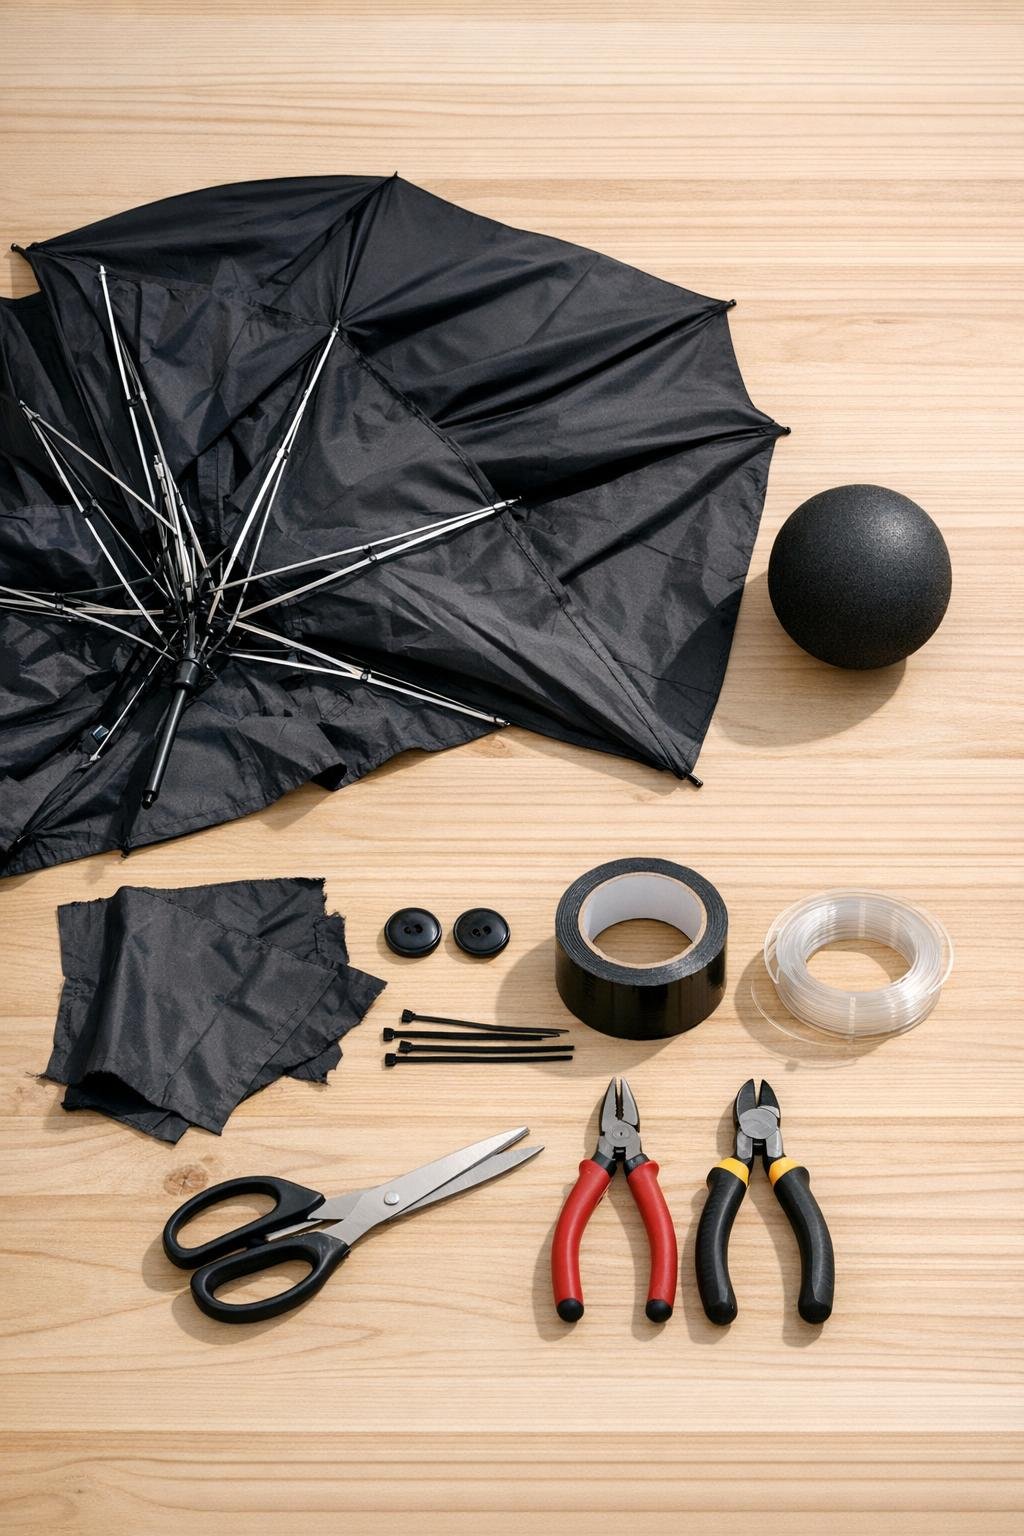
Materials
Instructions
1. Open the broken black umbrella and study the center seam running from top to edge, because that seam is the shortcut that makes the whole project work. You’re going to turn each half of the canopy into a wing, with the stitched-in ribs acting as the bat’s wing bones and the scalloped edge already reading like real bat wings.
2. Cut the canopy free from the umbrella frame carefully, keeping the fabric attached to the ribs on each side as much as possible. Separate it along the center seam so you end up with two matching wing halves instead of a pile of loose fabric.
3. Trim away any extra center fabric, stretcher pieces, or dangling hardware so each half opens flat and clean. Leave the main ribs in place, since those are what give the wings structure and that realistic bat shape.
4. Use pliers to bend the two ribs nearest the center outward on each wing half. This slight bend is what keeps the wings arched and spread instead of drooping straight down, and it makes a huge difference in how dramatic the bat looks once it’s hanging.
5. Cut an 8- to 10-inch section of the umbrella shaft to use as the spine if it is not already loose from the broken umbrella. Lay the two wing halves side by side with their inner edges touching and position the shaft section vertically between them.
6. Duct tape the inner edge of one wing to the shaft, then tape the other wing to the opposite side so the spine holds both halves together firmly. Add a second layer of tape across the center front and back until the body feels solid when you lift it.
7. Wrap the foam ball in a piece of leftover black canopy fabric, pulling it snug so the surface looks smooth and dark. Tape the fabric at the back or bottom of the ball where it won’t show, then tape the covered ball to the top of the spine between the wings.
8. Cut two pointed ear shapes from leftover black canopy fabric, about 3 inches tall, and tape them to the top sides of the head. Angle them slightly outward so they show up clearly from below on the porch.
9. Glue or tape two black buttons onto the front of the head for eyes, spacing them about 1 1/2 inches apart. If the head fabric looks loose anywhere, smooth it and add one more small strip of tape on the back.
10. Reinforce the center connection with a few extra wraps of black duct tape anywhere the wings flex too much. Check the silhouette from a few feet back and tweak the bent ribs with pliers until both wings arch evenly.
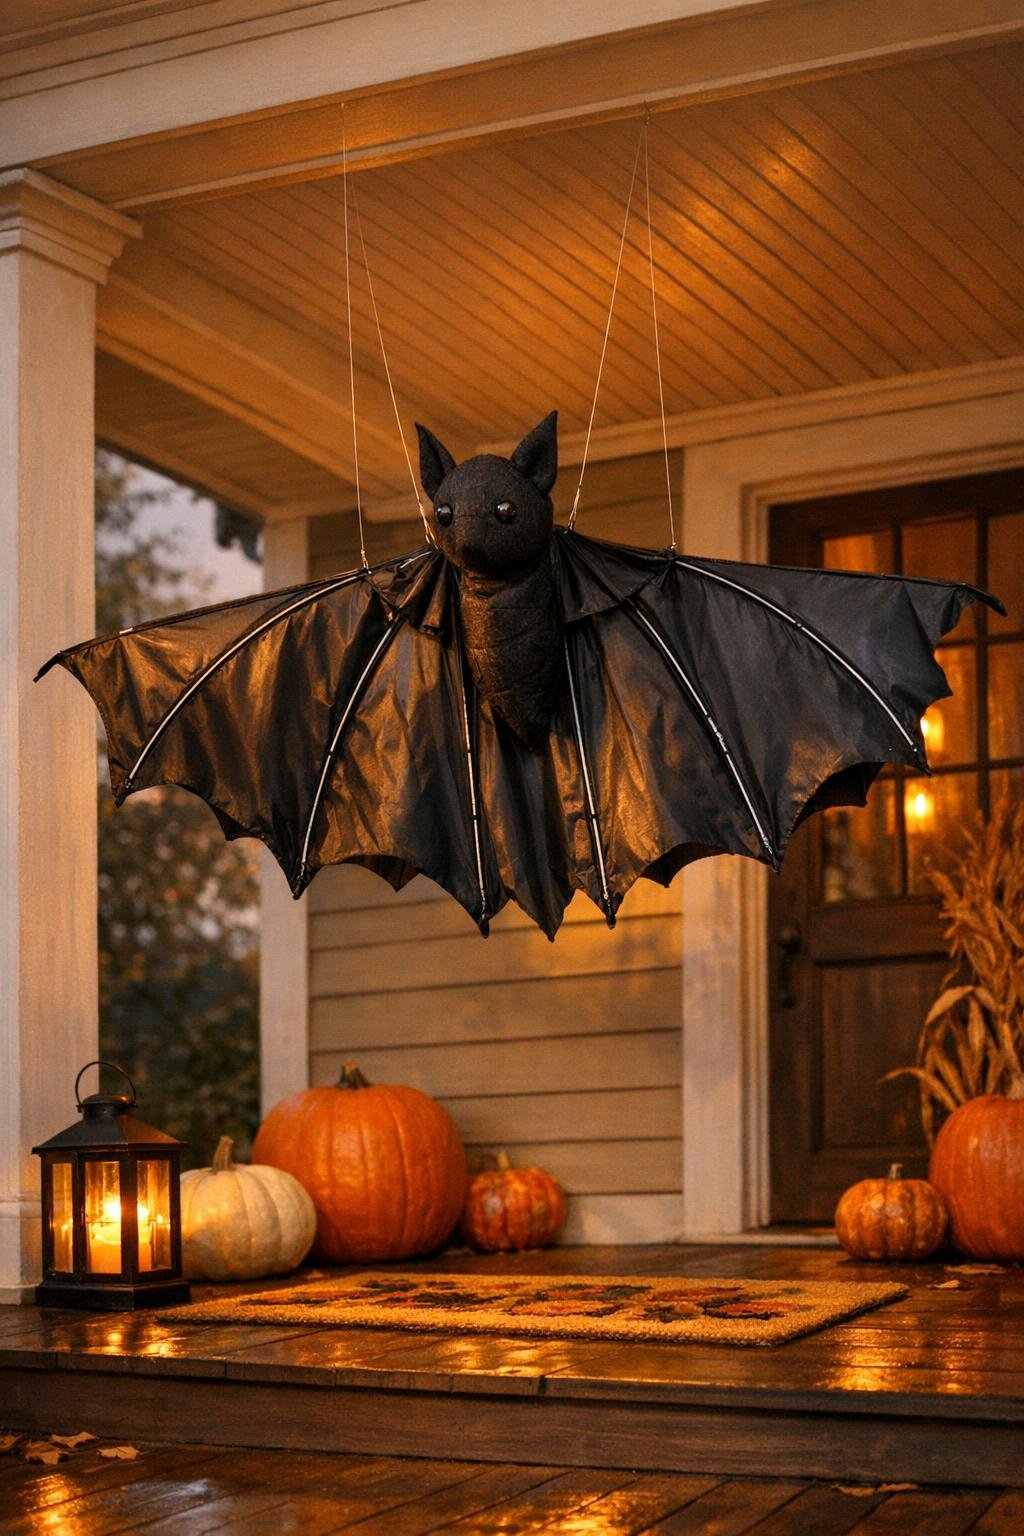
11. To hang it, tie two lengths of clear fishing line around the spine and upper wing area and suspend the bat from the porch ceiling so it swings slightly. If you’d rather mount it flat, use black zip ties to attach the spine and wing centers to a porch railing with the wings spread wide.
12. Fluff the wings one last time by gently opening the rib spacing and smoothing the fabric between them. Once it’s up, the nearly five-foot wingspan does all the work, and the best part is that you can snip the hanging line and store the whole thing flat after the season.
Variations & Tips
Use the biggest umbrella you have: A golf umbrella gives the most satisfying scale, and this is one of those projects where bigger really is better. If all you have is a standard umbrella, make two bats and hang them at different heights.
Make it porch-motion friendly: I like hanging lightweight decorations where they catch a little breeze, because movement does half the spooky work for you. Use two lines instead of one if your porch gets windy and you want less spinning.
Keep the center neat: Black duct tape blends surprisingly well with the umbrella fabric, so don’t be shy about using enough to make the spine feel sturdy. A tidy center section is what makes the project look intentional instead of cobbled together.
Add a mouth if you want more personality: A small crescent cut from leftover fabric or a line of white paint pens on a scrap insert can give the face a more cartoon-spooky look. I’d keep it simple, though, because the giant wing shape is really the star.
Store it flat for next year: This is my favorite kind of seasonal DIY because it earns a big visual payoff without taking over the storage closet. Lay it flat on a shelf or slide it behind a bin, and avoid stacking heavy boxes on top of the bent ribs.
Try a railing mount for more control: If you want the wings to stay fully spread for party night or trick-or-treat, zip tying it to the porch railing works beautifully. It also keeps the bat at eye level, which makes the button eyes and head show up better after dark.