
The trick is wonderfully simple, and I’ll tell you right up front because it’s what makes the whole thing work: stuff one white plastic grocery bag with two crumpled bags to make a round head, twist it shut, and tie the handles in a knot around that twist. That knot becomes the neck, and the loose handles read as little trailing arms once the ghost is hanging. After that, you add a fluttery shredded body from a second bag, draw on a face, and suddenly a plain old grocery sack turns into something that dances in the breeze better than a store-bought decoration ever could.
I love a project like this because it costs next to nothing, takes about twenty minutes for a whole group of ghosts, and holds up beautifully outdoors. If you’ve got a tree by the walk, a porch ceiling, or even one good branch that catches a bit of air, this is for you. The movement is the entire effect, so I always say don’t overthink it—just make plenty, hang them at different heights, and let the wind do the rest.
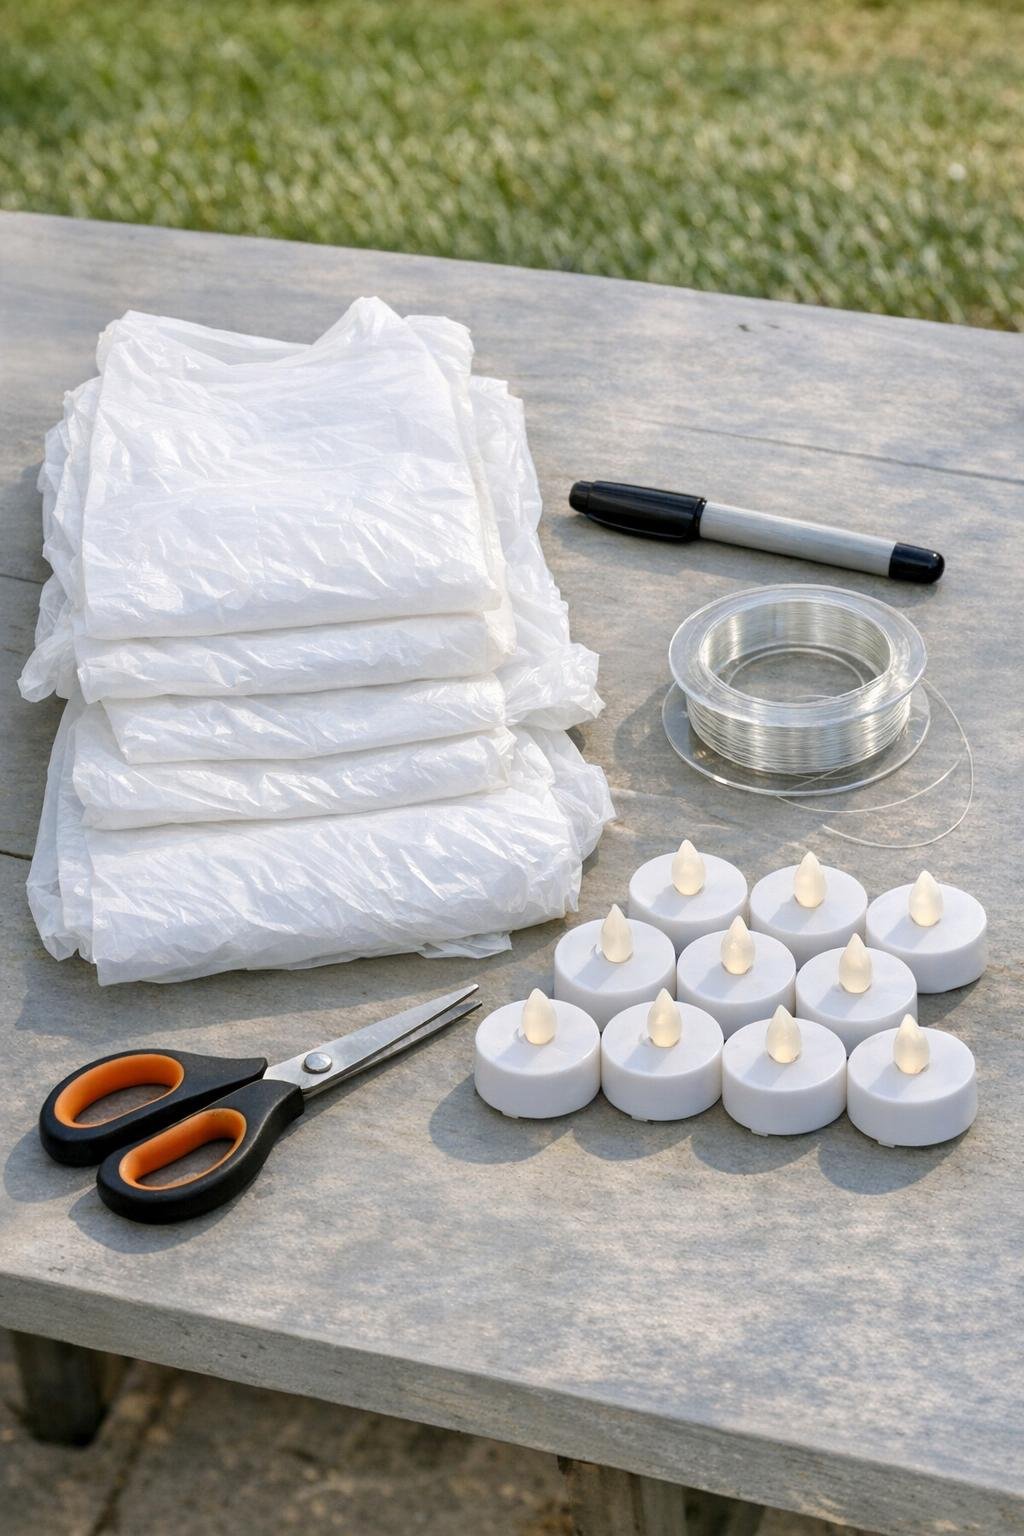
1. Sort your bags into sets of three for each ghost: one outer head bag, two stuffing bags, and one more bag for the shredded body. Keep everything by the tree or porch so you can work assembly-line style.
2. Crumple two bags tightly into loose balls and stuff them down into one white grocery bag until you get a nice round head about the size of a small melon. Smooth the outside with your hands so the head looks full instead of lumpy.
3. Twist the bag tightly just under the stuffed round head to make a neck. Pull the handles around that twisted section and tie them into a firm knot; this knot holds the head in place and leaves the handle ends loose like wispy arms.
4. Use the black marker to draw two big black oval eyes and one open mouth on the front of the head. Make the features oversized so they read clearly from the yard and porch steps.
5. Take a second white bag for the body and cut the sealed bottom seam completely off. Flatten that bag, then cut upward from the bottom edge into long strips about 1 inch wide, stopping a few inches before the top so the bag stays together.
6. Gather the uncut top of that shredded bag and tie it snugly just under the neck knot of the ghost. Fluff and separate the strips with your fingers so the body looks full and ragged instead of stuck together.
7. Repeat the same process until you’ve made all 10 ghosts from your 20 main bags. Work in batches—stuff all the heads first, then tie all the necks, then draw faces, then add all the shredded bodies.
8. Cut lengths of fishing line from 3 to 5 feet long so the ghosts can hang at different heights. Tie each length tightly around the neck knot, because that’s the strongest spot and keeps the head upright.
9. For the ghosts closest to the front door, tuck one LED tea light up inside the head behind the face so it gives a soft glow at night. If needed, use a tiny loop of clear tape inside the plastic to keep the tea light from sliding down.
10. Hang the ghosts from tree branches and the porch ceiling at staggered heights, leaving a little space between each one so they can drift freely. Put them where there’s the slightest airflow, because that gentle motion is what makes them look wonderfully spooky.
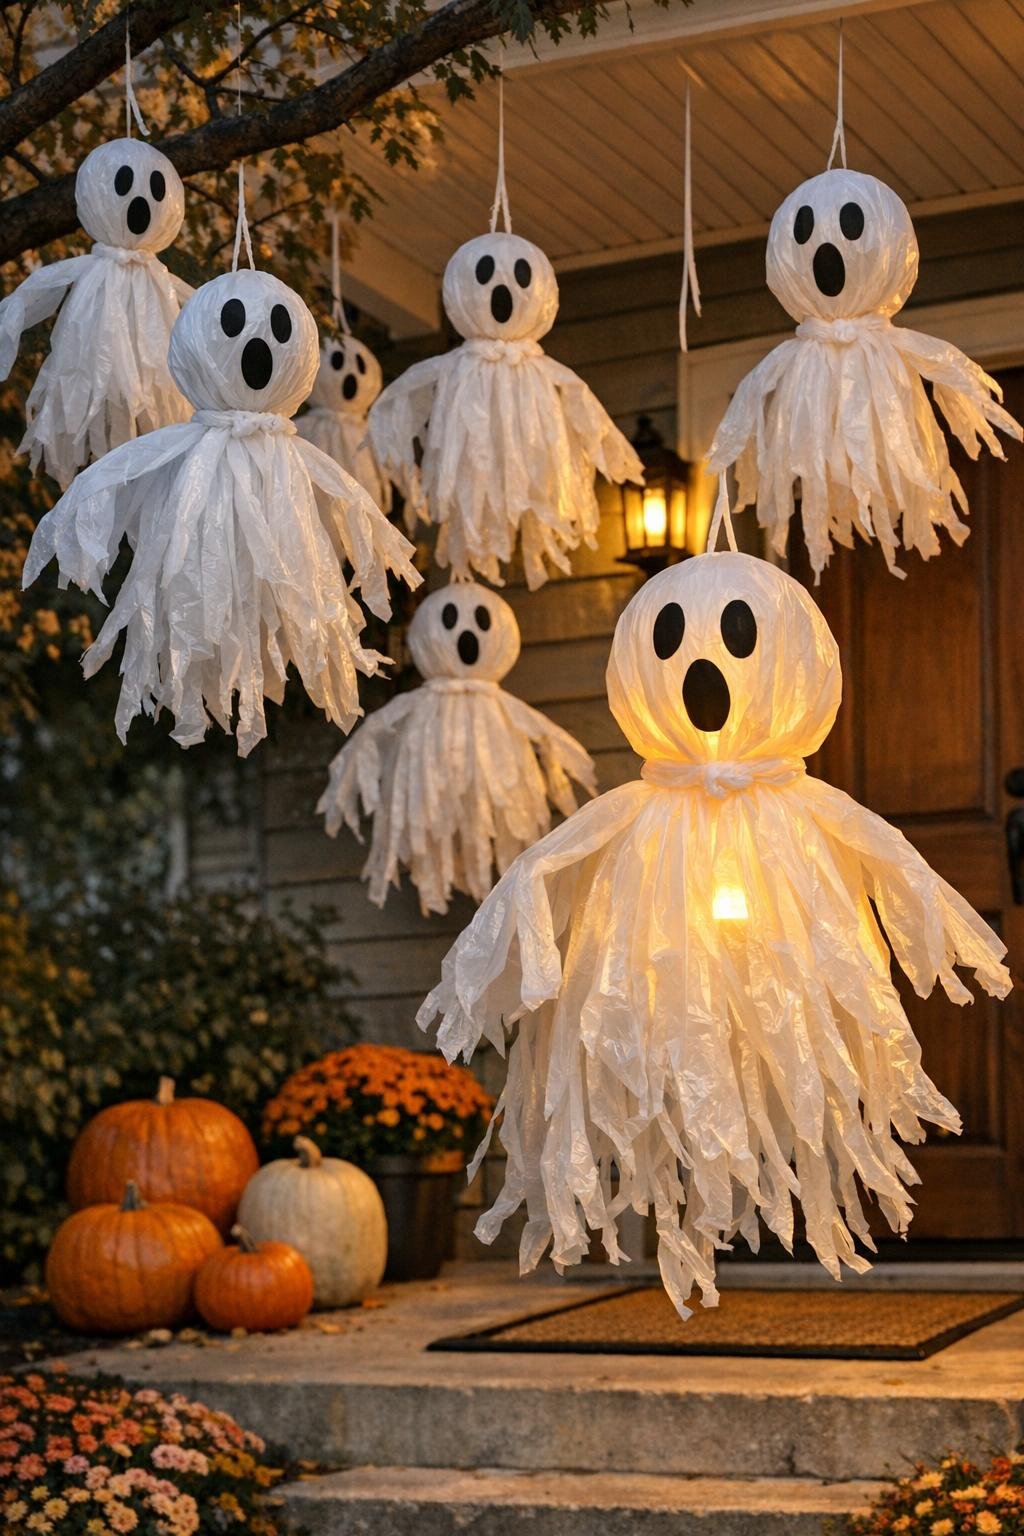
For extra flutter: Cut some body strips narrower than 1 inch and leave others wider. That mix catches the air better and gives the ghosts a fuller, more tattered look.
For a fuller display: Cluster three or four ghosts in one tree limb area and then trail the rest toward the porch. I’ve found that a grouped arrangement looks much richer than spacing them all evenly apart.
For better nighttime glow: Use the tea lights only in the ghosts nearest the door or walkway where people will actually notice them. You don’t need one in every head to get a good effect.
For rainy weather: Leave them out without worry. Plastic bags and fishing line shrug off rain, and once the breeze picks up again they go right back to floating and swaying.
For cleaner faces: Draw the eyes first, then the mouth, with the head resting against your palm so the plastic stays taut. Big simple features always look spookier from a distance than small fussy ones.
For hanging success: Avoid still corners under a roofline with no air movement. Even the prettiest ghosts fall flat if they can’t stir, so I always test a spot with one ghost before hanging the whole bunch.