
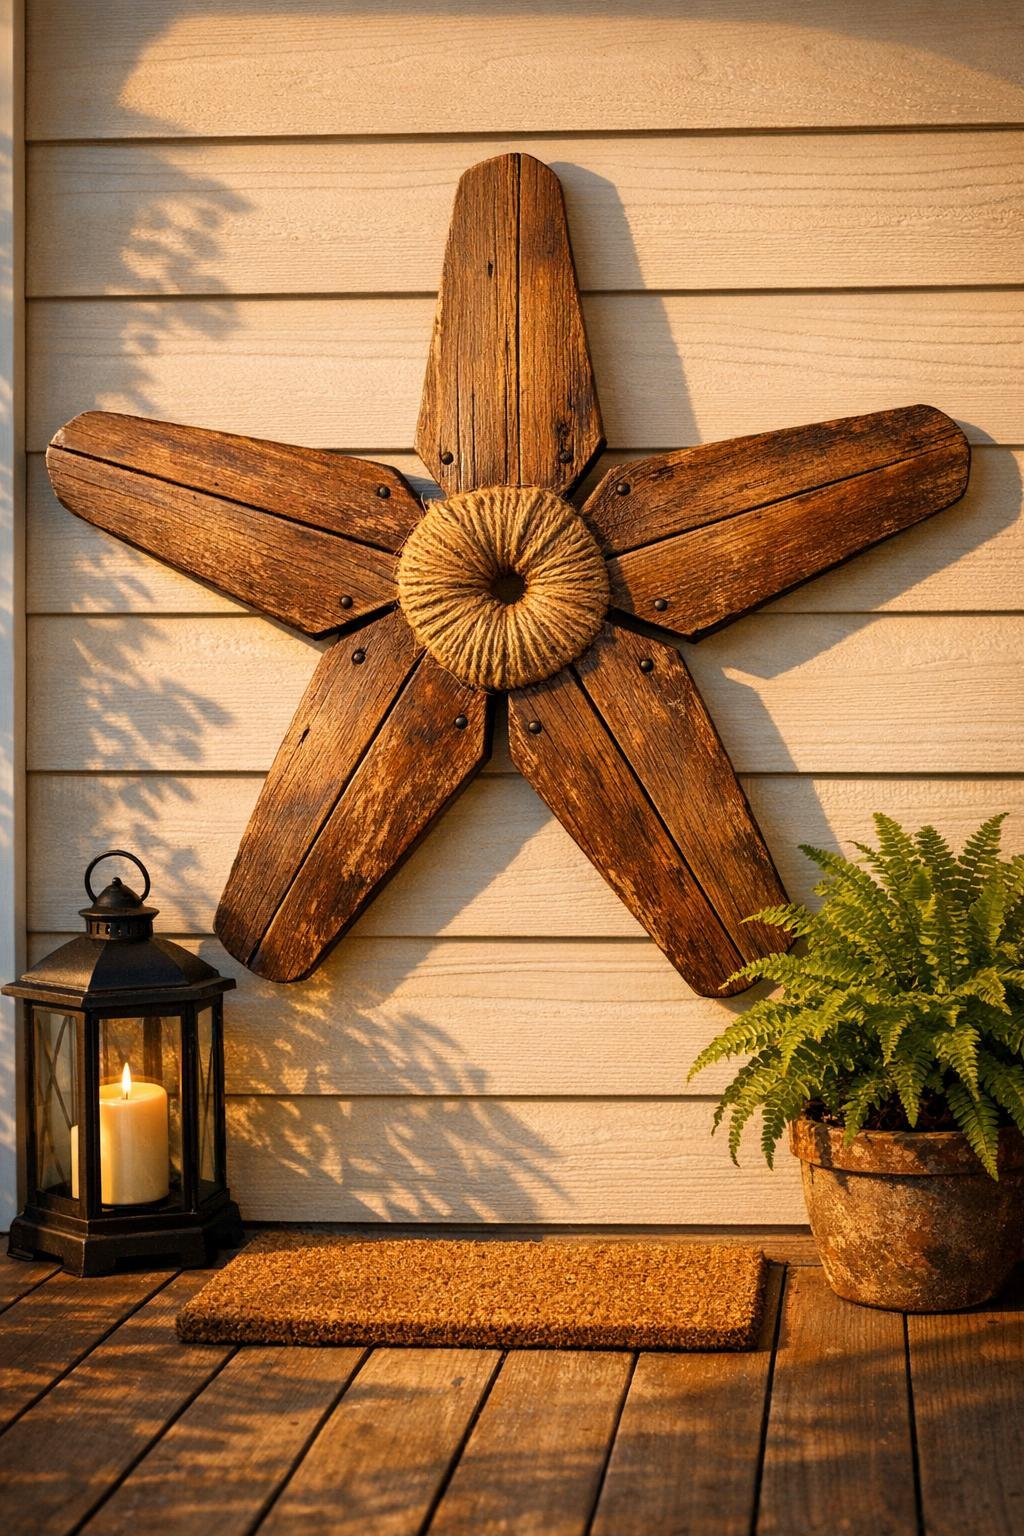
Five old ceiling fan blades arranged in a circle sound a little odd until you see them lock into a bold wooden wall star. I love projects like this because they use a humble household piece in a way that still lets its original shape shine, and the long tapered blades do almost all of the design work for you.
This version keeps the weathered wood look from the fan blades, then cleans it up with simple finishing touches so the piece looks intentional instead of improvised. If you have basic tools and a free afternoon, this is a very approachable upcycle that works beautifully on a porch wall, over a mantel, or anywhere you want a large statement piece without spending much.
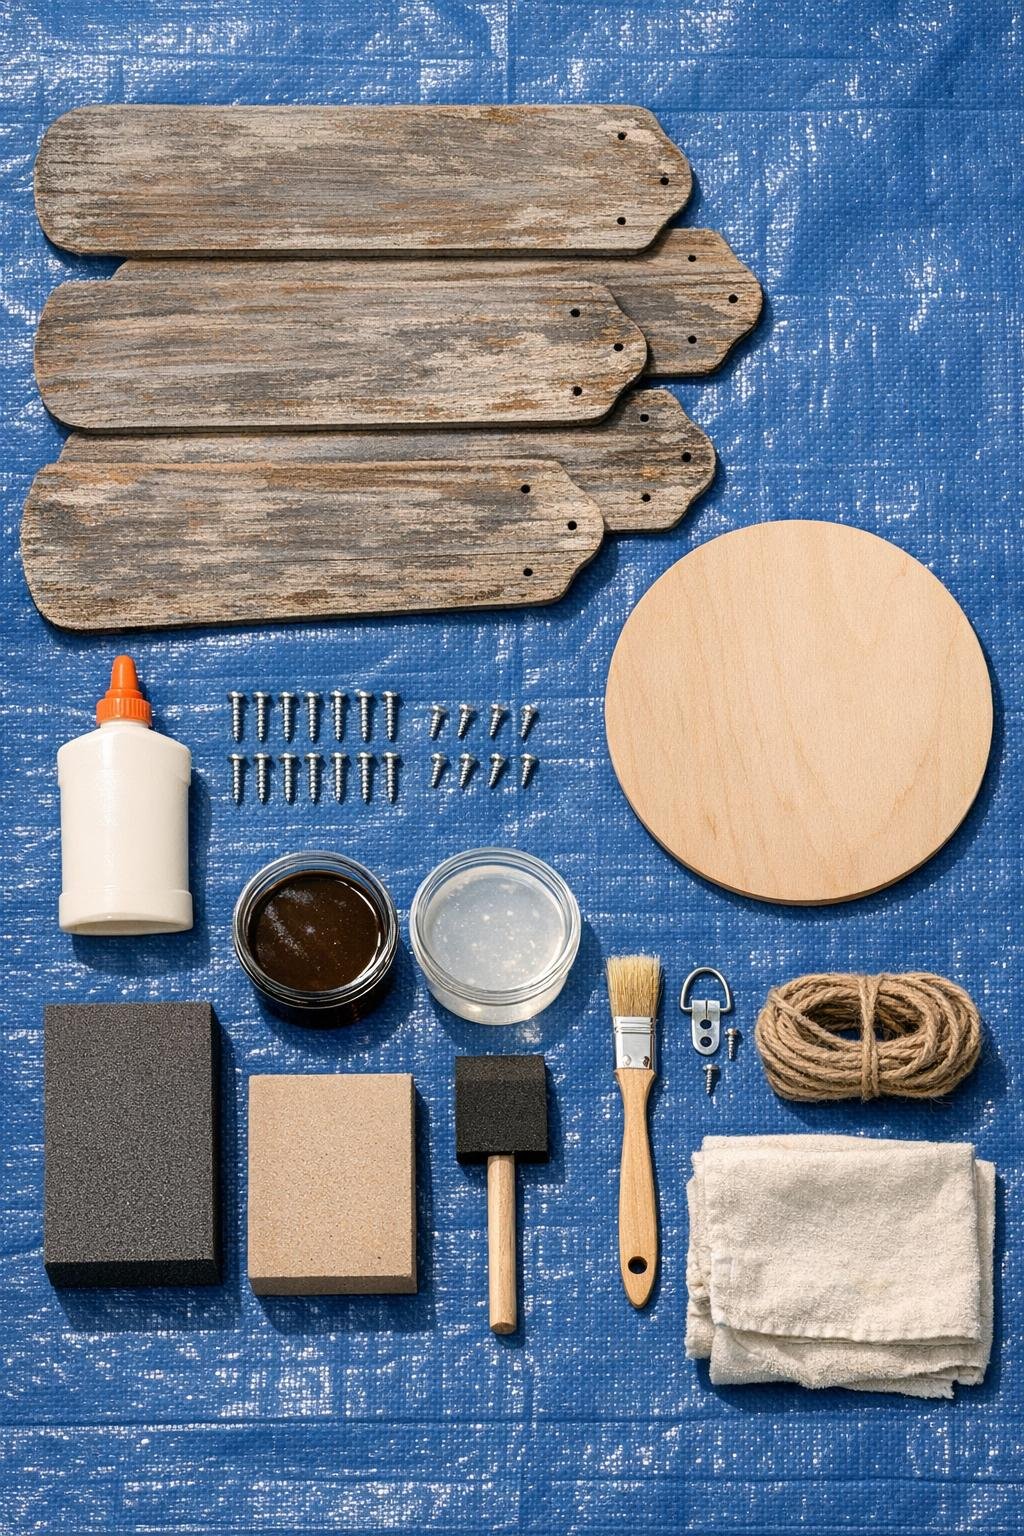
Materials
Instructions
1. Remove any remaining brackets, rubber pads, or hardware from the five ceiling fan blades, then wipe them clean so you can see the wood grain and check for cracks.
2. Sand both sides and the edges of each blade with 120-grit, then smooth with 220-grit, keeping the weathered character but taking off splinters and loose finish.
3. Brush stain lightly over the blades if you want a richer, more even finish, then wipe off the excess and let them dry completely; if the existing patina already looks great, just skip to sealing.
4. Seal the front, back, and edges of all five blades with a thin coat of matte topcoat, and do the same to the plywood disk so the finished star has a consistent low-sheen finish.
5. Lay the plywood disk centered on your work surface and arrange the five fan blades around it in a star pattern, overlapping their wider ends evenly so each point is spaced the same distance apart.
6. Mark the position of each blade on the back of the plywood disk with pencil so you can return them to the same spots during assembly.
7. Add a small bead of wood glue where the first blade meets the plywood disk, press it in place, and drive in two screws through the disk into the blade end; repeat with the remaining four blades.
8. Turn the piece carefully and check the spacing from the front, then make small adjustments before the glue grabs so the five points look balanced and the circle in the center stays even.
9. If you want a fuller, more polished look, wrap jute twine twice around the center where the blades meet and knot it neatly on the back, or add a small jute bow at one point of the star.
10. Attach the D-ring hanger to the back of the plywood disk near the top point, making sure it is centered so the star hangs straight.
11. Let the glue and finish cure fully, then hang the star on a sturdy wall hook and step back to make sure the points sit level.
Variations & Tips
Painted farmhouse look: If your blades are mismatched or heavily worn, paint them all matte white, black, or deep navy after sanding, then distress the edges lightly so the star still has dimension.
Rustic center detail: A small metal washer cluster, wood medallion, or round tin plate over the center can dress up the join if you prefer a more finished focal point.
For outdoor use: Use exterior-grade sealer and hang the star in a covered area rather than direct rain; old fan blades hold up much better when they stay mostly dry.
Symmetry trick: Before screwing anything down, measure from the tip of each blade to the center of the plywood disk so all five points extend the same distance.
Safer hanging: This piece is lighter than it looks, but it still needs a solid hook or screw anchored well into the wall, especially if you hang it on a porch where wind can catch it.
Seasonal styling: I like this star plain year-round, but a removable ribbon, tiny string lights, or a tucked bit of faux greenery can shift it for holidays without changing the structure.