
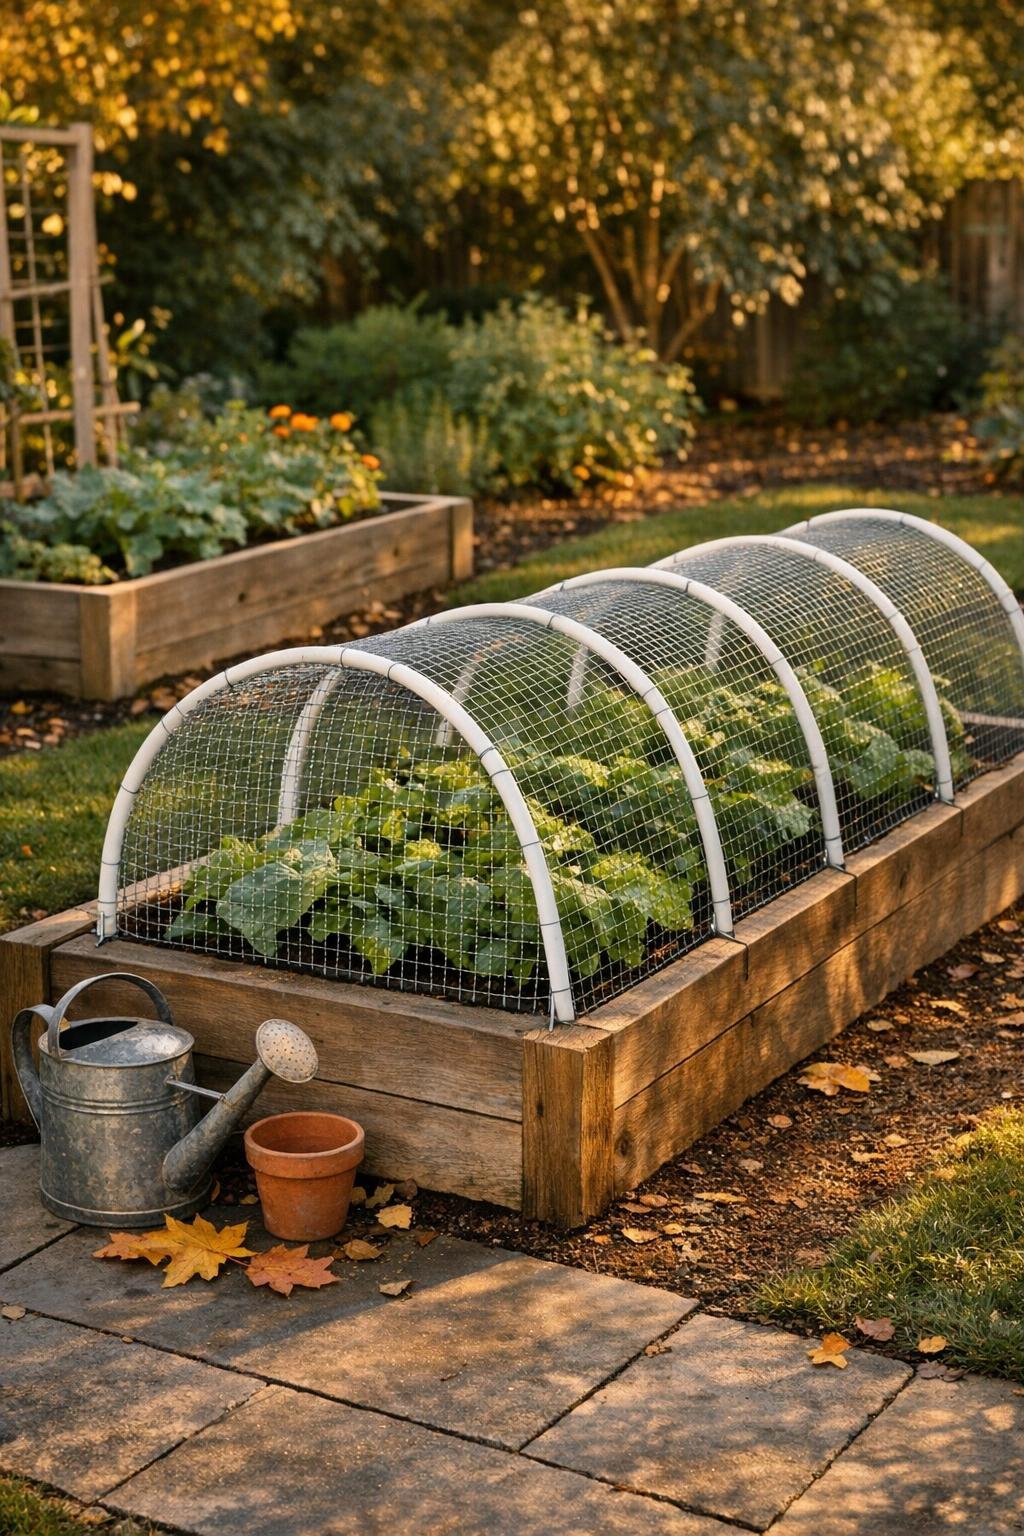
When the garden is winding down but rabbits, squirrels, and neighborhood cats are still treating your raised beds like an open invitation, this simple tunnel barrier is one of the smartest little fixes I know. You slice one side of white PVC pipe, bend it into hoops, and pair it with just two other basic shed staples to make a low protective tunnel that looks surprisingly neat and intentional instead of cobbled together at dusk with whatever was nearby.
I like this kind of project because it has the same appeal as a good weeknight recipe: a short ingredient list, straightforward technique, and a result that looks far more polished than the effort suggests. This version is sized to give a single 4 x 8 foot raised bed generous coverage, with enough arches and netting to look finished and hold up through the end of the season.
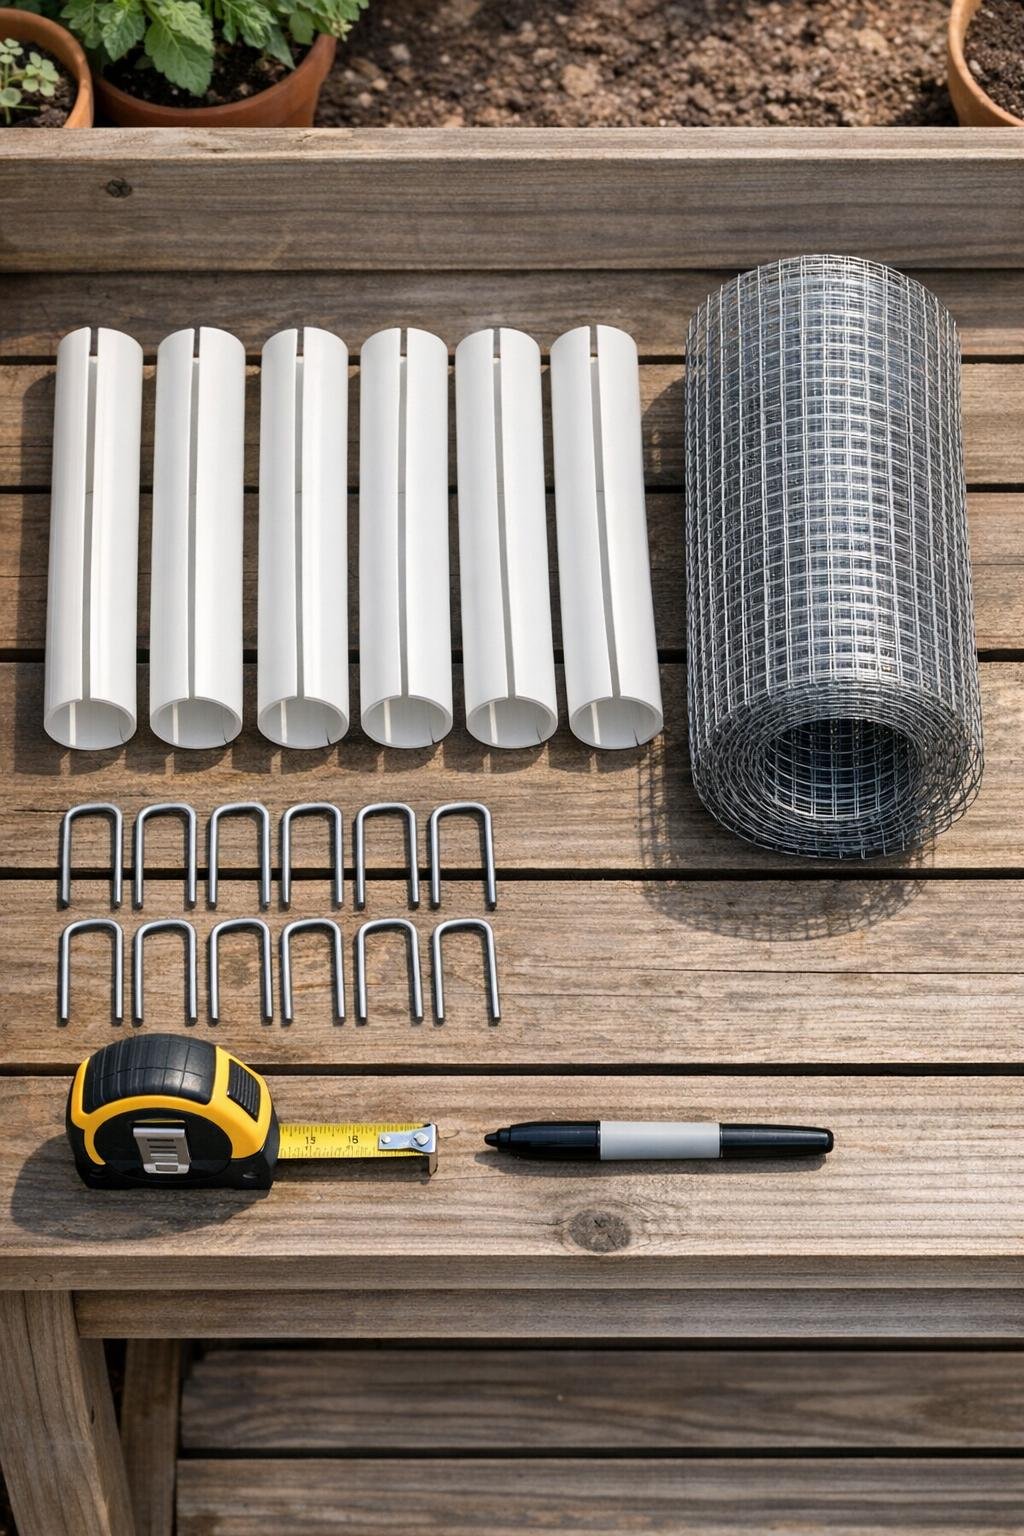
Materials
3/4-inch white PVC pipe, 3 pieces at 10 feet long
Instructions
1. Cut each 10-foot PVC pipe into two 5-foot lengths so you have 6 equal sections for the tunnel hoops.
2. Mark a straight line down the full length of each PVC section and make a lengthwise slice through one side only, creating a slit that lets the pipe flex more easily into an arch.
3. Wrap a short piece of outdoor tape around each end of every slit pipe to reduce the chance of cracking and to keep the cut edges looking tidy.
4. Space the 6 PVC pieces evenly down the 8-foot length of the raised bed, placing one hoop near each end and the remaining 4 about 18 inches apart.
5. Press the ends of each slit pipe into the soil inside the bed, one end on each side, bending the pipe into a smooth hoop so it forms a low tunnel over the planting area.
6. Anchor each hoop by pushing one landscape staple over the pipe at each side of the bed, pinning the pipe base firmly so the arches cannot twist loose in wind.
7. Unroll the hardware cloth or poultry netting and drape it over the full set of hoops, centering it so the mesh reaches down both sides with a little extra at the ends.
8. Attach the mesh to every hoop with zip ties at the top center and along both shoulders of the arch, using about 3 to 4 ties per hoop for a snug, even fit.
9. Fold the extra mesh neatly at both ends like wrapping a parcel, then secure those folds to the end hoops with more zip ties so the tunnel is closed against critters.
10. Use the remaining landscape staples to pin the bottom edges of the mesh to the soil wherever there are gaps, especially at the corners and along any side that lifts.
11. Trim off the zip tie tails and tuck any sharp mesh points downward or inward so the finished barrier looks clean and is safer to work around when watering or harvesting.
12. If you want easy access, leave one long side lightly stapled in just two spots so you can lift it like a flap and set it back down after tending the bed.
Variations & Tips
For taller crops: Use 6-foot PVC sections instead of 5-foot sections if you need more headroom for lettuce, kale, or young brassicas that still have a lot of growing left to do.
For lighter protection: Swap the hardware cloth for bird netting if your main issue is squirrels or birds rather than rabbits or cats, but keep the same hoop spacing so the tunnel still looks full and structured.
For easier opening: Replace a few zip ties on one side with reusable hook-and-loop garden ties so you can open the tunnel quickly without cutting anything.
For windy spots: Add 4 more landscape staples along the long edges and one extra zip tie per hoop; that little bit of redundancy makes a noticeable difference after a blustery night.
For a cleaner finish: Keep all the slit sides of the PVC facing downward or inward so the arches look uniform from the path side of the bed.
My practical note: If the PVC feels stubborn in cool weather, set it in the sun for 10 to 15 minutes before bending. Just like bringing dough or butter to the right temperature in the kitchen, a small prep step makes the whole process easier and neater.