
There’s a reason this little cardboard-tube trick is everywhere right now: it turns ordinary washcloths into sturdy rolled “petals” that build a basket fast, with almost no sewing and very little fuss. For this version, I’m using that simple cinching method to make an owl basket with lots of texture, a rounded body, big eyes, and enough structure to actually hold small items on a dresser, bathroom counter, or nursery shelf.
I love projects like this because they remind me of good kitchen problem-solving: take humble materials, use them in a smart way, and suddenly they do much more than you expected. If you can roll, cinch, glue, and layer pieces neatly, you can make this. It’s especially nice for anyone who wants a handmade gift or storage piece that looks detailed without requiring advanced crafting skills.
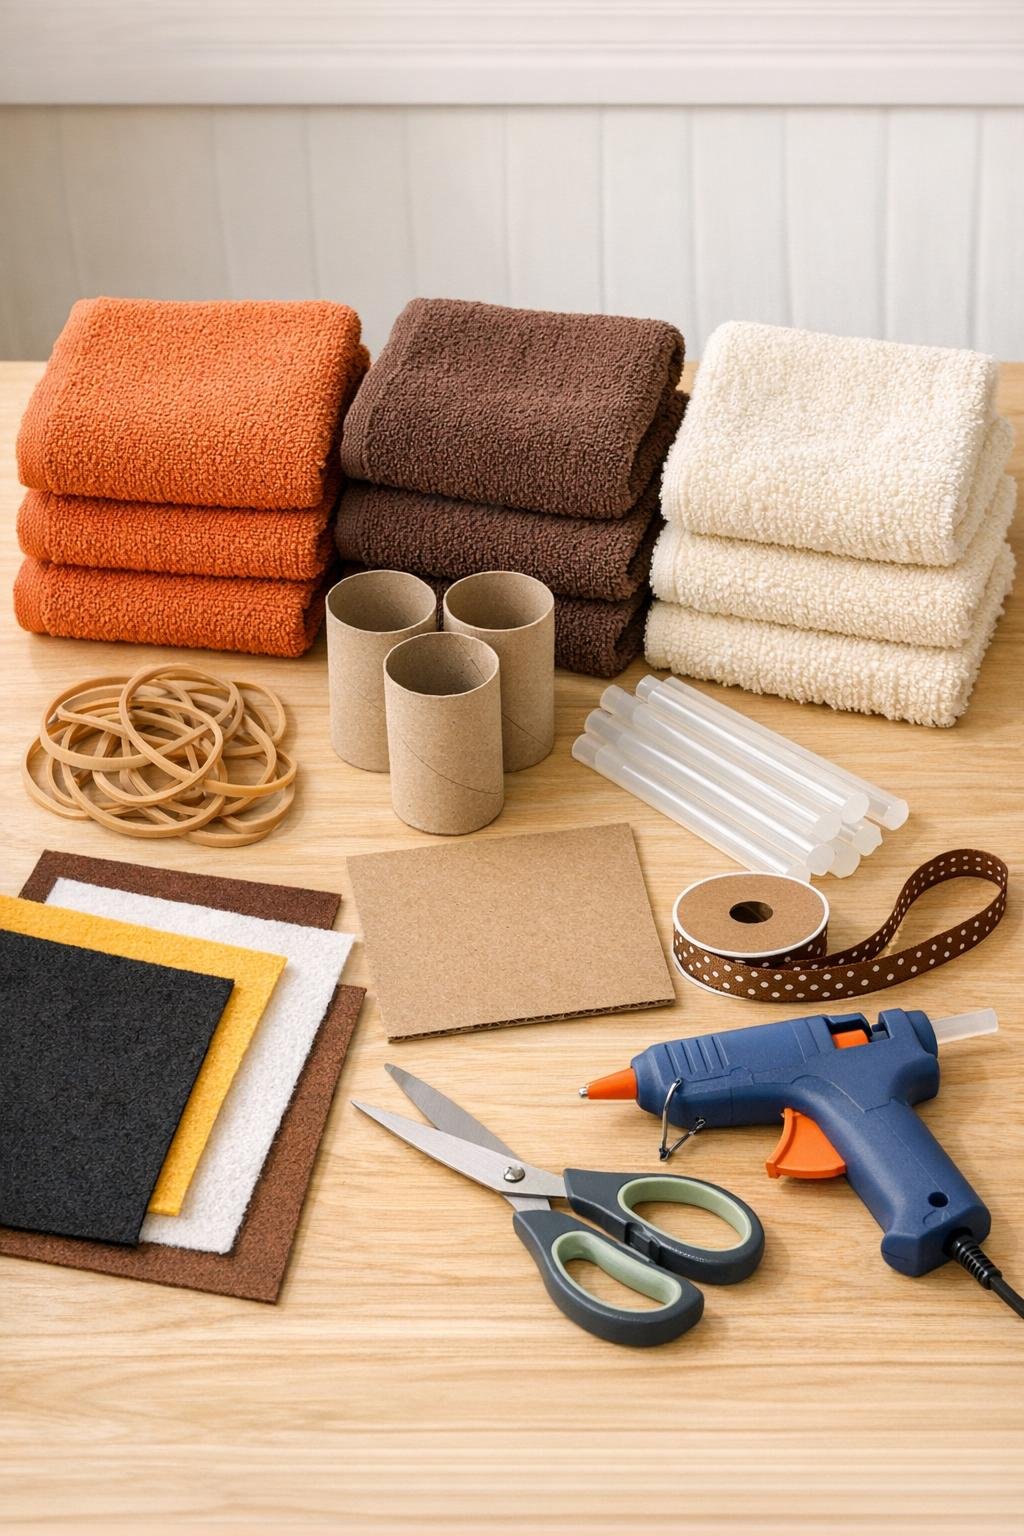
Materials
8 rust orange washcloths, standard 12 x 12 inch size, for the owl body
Instructions
1. Cut 10 cardboard tubes to 3 inches long, then slide one rust orange washcloth around each tube so the cloth wraps evenly and the open ends meet in back.
2. Cinch each wrapped tube tightly at the center with a rubber band so it forms a bow-like double roll, then fluff the two rounded sides until they look even and full.
3. Cut a sturdy cardboard base into an 8-inch circle, then cut a second cardboard ring about 8 inches wide with a 5-inch opening to reinforce the basket rim later.
4. Hot-glue six rust orange rolls upright around the outer edge of the circle, placing them snugly side by side to form the basket body with a rounded owl shape.
5. Glue the remaining four rust orange rolls across the back and upper sides, overlapping slightly so the body becomes taller and fuller in back like a perched owl.
6. Fold the cream washcloth into a long padded strip, tuck a little fiberfill inside, and glue it vertically onto the front center as the owl’s soft belly panel.
7. Cut two wing shapes from the dark brown felt, about 5 inches tall each, and glue them to the left and right sides so they extend from mid-body toward the front.
8. Cut the lightweight cardboard into a rounded face panel about 5 inches wide, add a thin layer of fiberfill, and cover it tightly with one dark brown washcloth or a piece cut from it to create the owl’s head and brow area.
9. Glue the face panel to the upper front of the basket, letting it rise above the rim slightly so the basket keeps an owl silhouette with a defined head.
10. Cut two large white felt circles about 3 inches wide, glue on the black pupils, and attach them side by side on the face panel for oversized owl eyes.
11. Cut a small diamond or triangle from the mustard felt, fold it slightly down the center, and glue it between the eyes as a raised beak.
12. Add two small dark brown felt brow or ear-tuft shapes above the eyes, then glue the cardboard rim ring inside the top opening to strengthen the basket and keep the mouth of the basket round.
13. Wrap ribbon or jute trim around the top rim, overlapping the ends neatly in back, and tack it down with hot glue for a polished finish that hides the inner support.
14. If you like, cut two small feet from the mustard felt and glue them at the front base, then press every roll, wing, and facial detail into alignment and let the glue cool completely before using the basket.
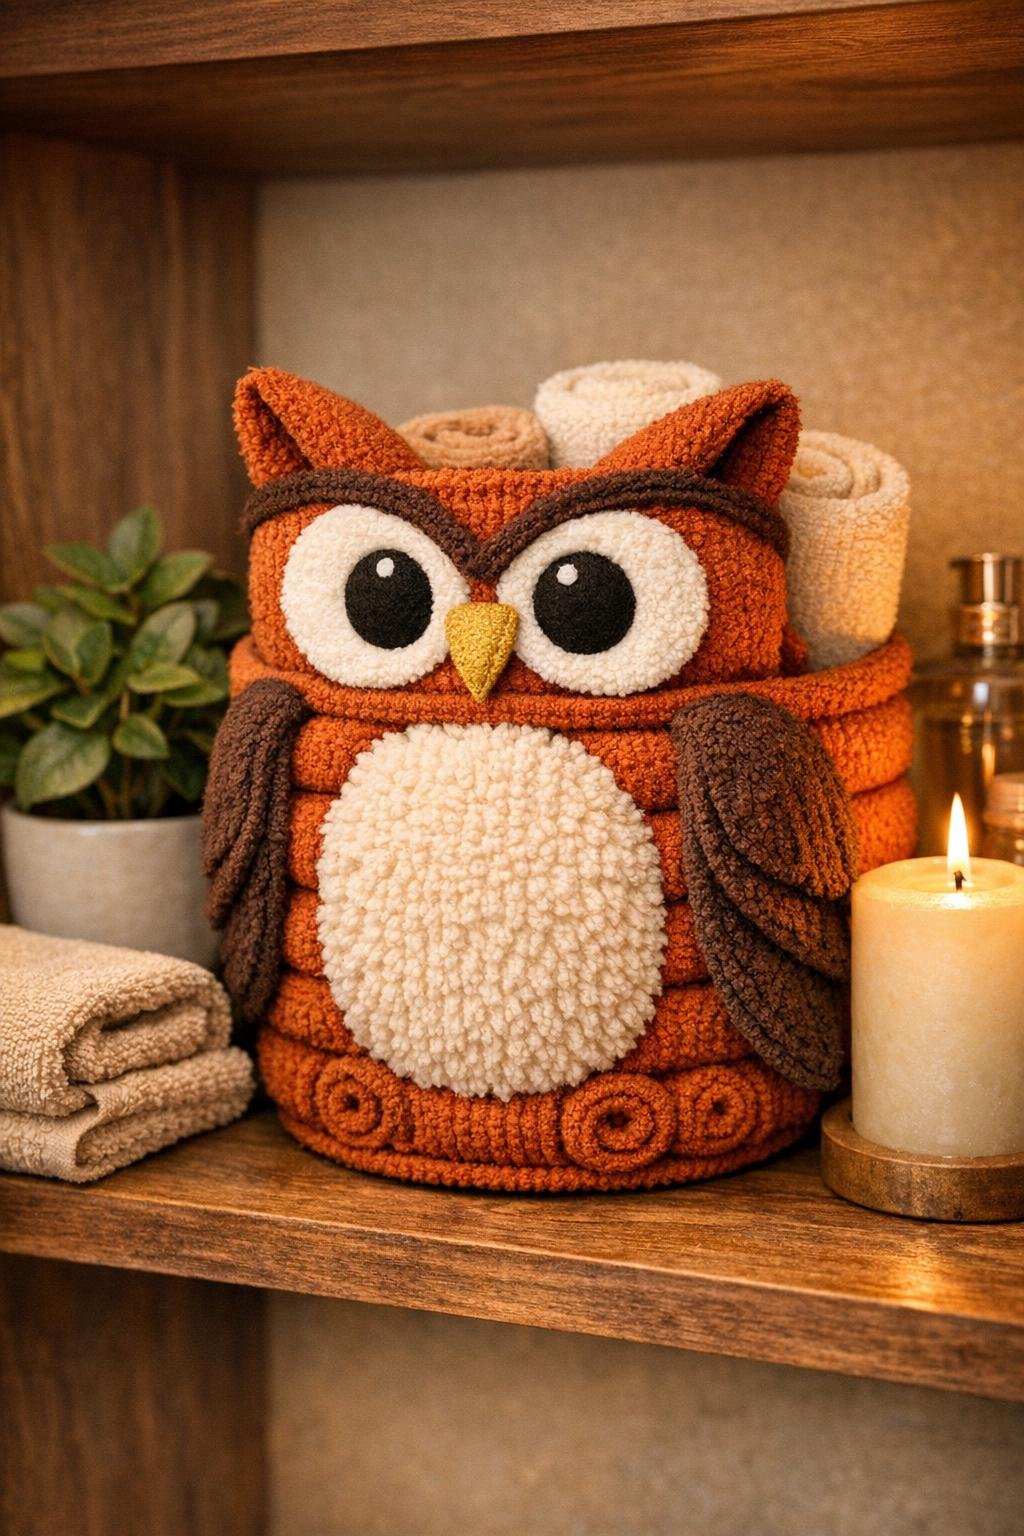
Variations & Tips
Bathroom gift basket version: Fill the finished owl with soaps, lip balm, bath salts, or travel lotions. It makes the whole project feel intentional, and the basket is sturdy enough to be useful after the gift items are removed.
Use a warmer or moodier palette: Rust orange and brown make a very classic owl, but cranberry, tan, cream, and charcoal are also lovely. I’d keep the belly lighter than the body so the owl shape reads clearly from across the room.
Keep the opening practical: When you glue on the face and upper rolls, avoid covering too much of the top opening. I always check that my hand can still fit inside comfortably before the glue sets.
Make it firmer: If your washcloths are very soft and floppy, add an extra strip of cardboard inside the back wall and cover it with another folded washcloth roll. That little bit of hidden structure makes a surprising difference.
No-sew detail trick: Felt is ideal here because it cuts cleanly and doesn’t fray. In cooking, garnish matters because it helps the dish look finished; in crafts, it’s the same story, and the eyes, beak, and rim trim are what take this from clever to genuinely charming.
Kid-room adaptation: Skip buttons and use felt pupils only if the basket will sit in a child’s room or nursery. You’ll still get the same expressive owl face with a softer, safer finish.