
I’ve always believed a bedroom feels calmer when the little everyday things have a proper place, and socks are one of those funny items that can turn a tidy drawer into a jumble in no time. This organizer uses rolled socks tucked into a simple honeycomb divider set inside a shallow basket, and it creates that neat, satisfying look that makes getting dressed feel easier. It’s practical, yes, but it also has a cozy old-fashioned charm, especially when you use soft wool socks in a mix of warm colors.
What I like most is that this project looks far fancier than it is. The basket keeps everything contained, the cardboard divider holds each pair upright, and the honeycomb pattern gives the whole thing a polished finish without requiring fancy tools. If you want a bedroom storage project that is quick, useful, and pretty enough that guests really do ask about it, this one is a good little afternoon make.
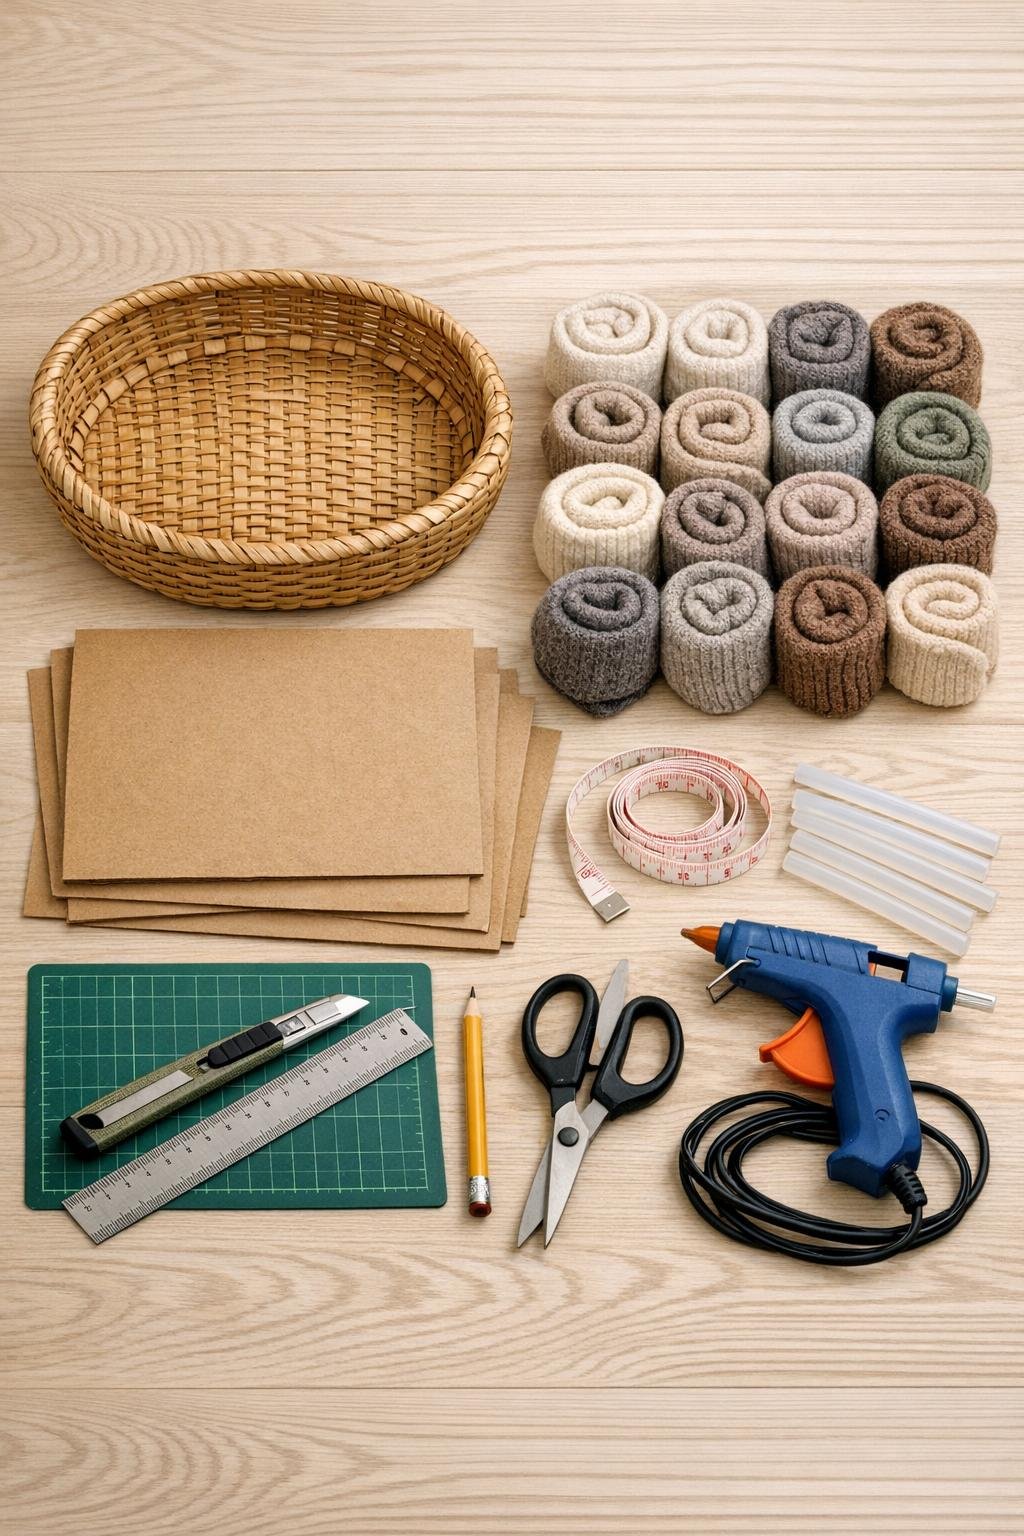
Materials
Instructions
1. Measure the inside of your shallow basket at the base, not the top rim, since that is where the divider will sit snugly. Write down the inside length, width, and depth so your honeycomb insert fits without bowing.
2. Cut the cotton fabric or felt to fit the basket bottom and sides with about 1 inch extra all around, then smooth it into the basket and secure it with short strips of double-sided tape. This gives the organizer a soft finished interior and keeps the cardboard from scraping the basket.
3. Cut 10 to 14 cardboard strips to the basket depth, making each strip 3 inches tall and 10 inches long or sized to match your basket width. Try to keep every strip the same height so the honeycomb cells look orderly once assembled.
4. Mark slots halfway down the strips, spacing them 2 1/2 inches apart from center to center. Cut halfway through each strip at the marks, with half the strips cut from the top down and the other half cut from the bottom up so they can slide together.
5. Slide the strips together one by one to form a honeycomb-style grid, adjusting the spacing until the cells are even and open enough to hold rolled socks upright. If your basket is slightly tapered, pinch the outer cells inward a bit so the divider follows the basket shape.
6. Test-fit the divider inside the lined basket, then trim any outer edges that press too tightly against the sides. The insert should sit flat and fill the basket comfortably without buckling.
7. If you want a cleaner finish, wrap the top edges of the cardboard strips with narrow bands of kraft paper or contact paper and secure them with craft glue. This simple extra step makes the organizer look more polished and helps the divider hold up better over time.
8. Add a tiny dot of hot glue at a few outside intersections only, just enough to keep the honeycomb from shifting when you lift the basket. Leave the inner cells unglued so the grid keeps a little flexibility.
9. Roll each pair of socks into a firm bundle, then fold the cuff over the roll to make a smooth little parcel that holds its shape. I like to match similar colors together so the whole basket has that cozy, quilt-like look.
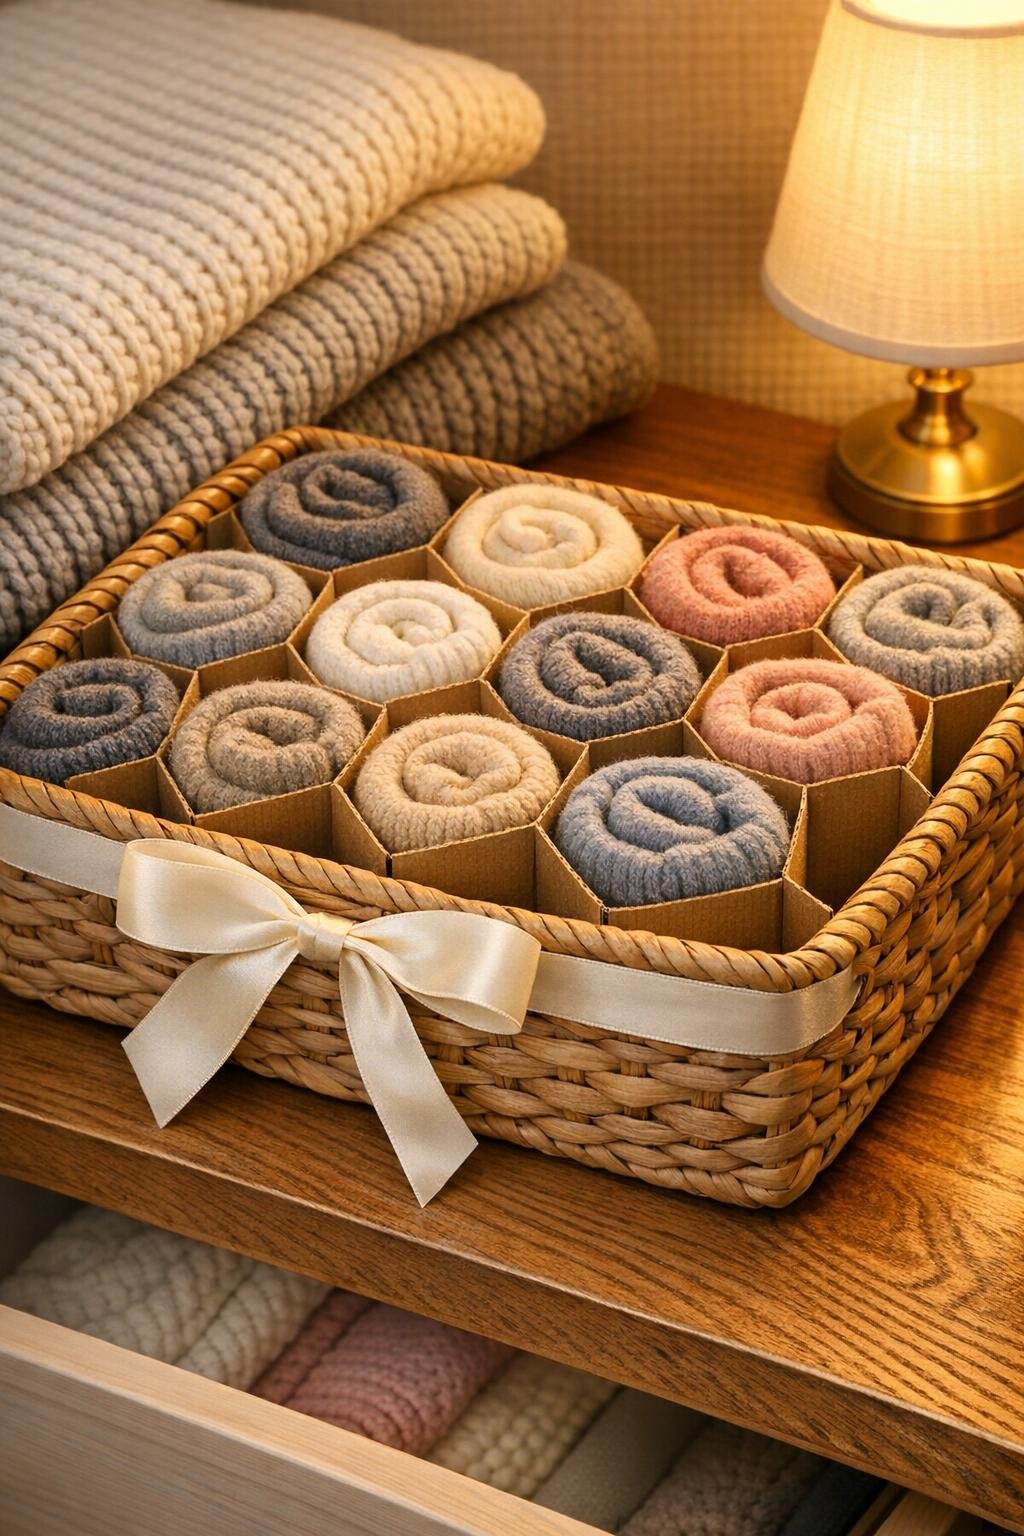
10. Fill each honeycomb cell with one rolled sock pair, alternating colors and textures for a full, inviting look. Pack the basket generously so the organizer appears abundant and keeps the socks standing upright.
11. Tie the ribbon into a simple bow around one basket handle or at the front edge if your basket has no handles, and glue it in place if needed. That little finishing touch gives the project the sort of charm that makes it feel intentional instead of makeshift.
12. Set the basket inside a dresser drawer, on a bedroom shelf, or on top of a storage bench where the socks are easy to reach. Once everything is in place, fluff and straighten the rolls so the honeycomb pattern shows clearly from above.
Variations & Tips
For smaller drawers: Cut shorter cardboard strips and make tighter cells around 2 inches wide for children’s socks or ankle socks. This keeps little pairs from sinking down into oversized compartments.
For a sturdier divider: Use double-wall cardboard or glue two layers of regular cardboard together before cutting your strips. I’ve found this especially helpful in homes where baskets get pulled out often.
For a prettier finish: Cover the visible cardboard with linen-look contact paper, leftover wallpaper, or neutral fabric before assembling the honeycomb. It softens the utilitarian look and helps the piece blend into a bedroom nicely.
For color sorting: Arrange socks from cream to charcoal, or sort by family member if the basket is shared. A little order like that saves time on busy mornings.
For easy upkeep: Make a couple of extra empty cells so freshly washed socks can be dropped in quickly before you match everything properly. That small bit of breathing room keeps the organizer from looking overstuffed.
My favorite practical tip: If your basket has a slightly uneven base, glue a rectangle of cardboard under the fabric lining first to create a flat platform. It takes just a minute and helps every honeycomb cell sit straighter.