
I love a project that looks far more complicated than it really is, and this woven clothespin harvest bowl is exactly that kind of craft. By stacking simple wooden dollar store clothespins in a spiral, you get a sculptural bowl with beautiful movement, plenty of texture, and that warm natural-wood look that works from late summer all the way through Thanksgiving.
This is a great weekend or even one-evening project if you want something eye-catching for a table, entry console, or kitchen island without pulling out a whole workshop's worth of tools. I’m always looking for décor that feels polished but still fits into a busy week, and this one checks all the boxes because the materials are inexpensive, the process is repetitive in the best way, and the finished bowl looks genuinely special.
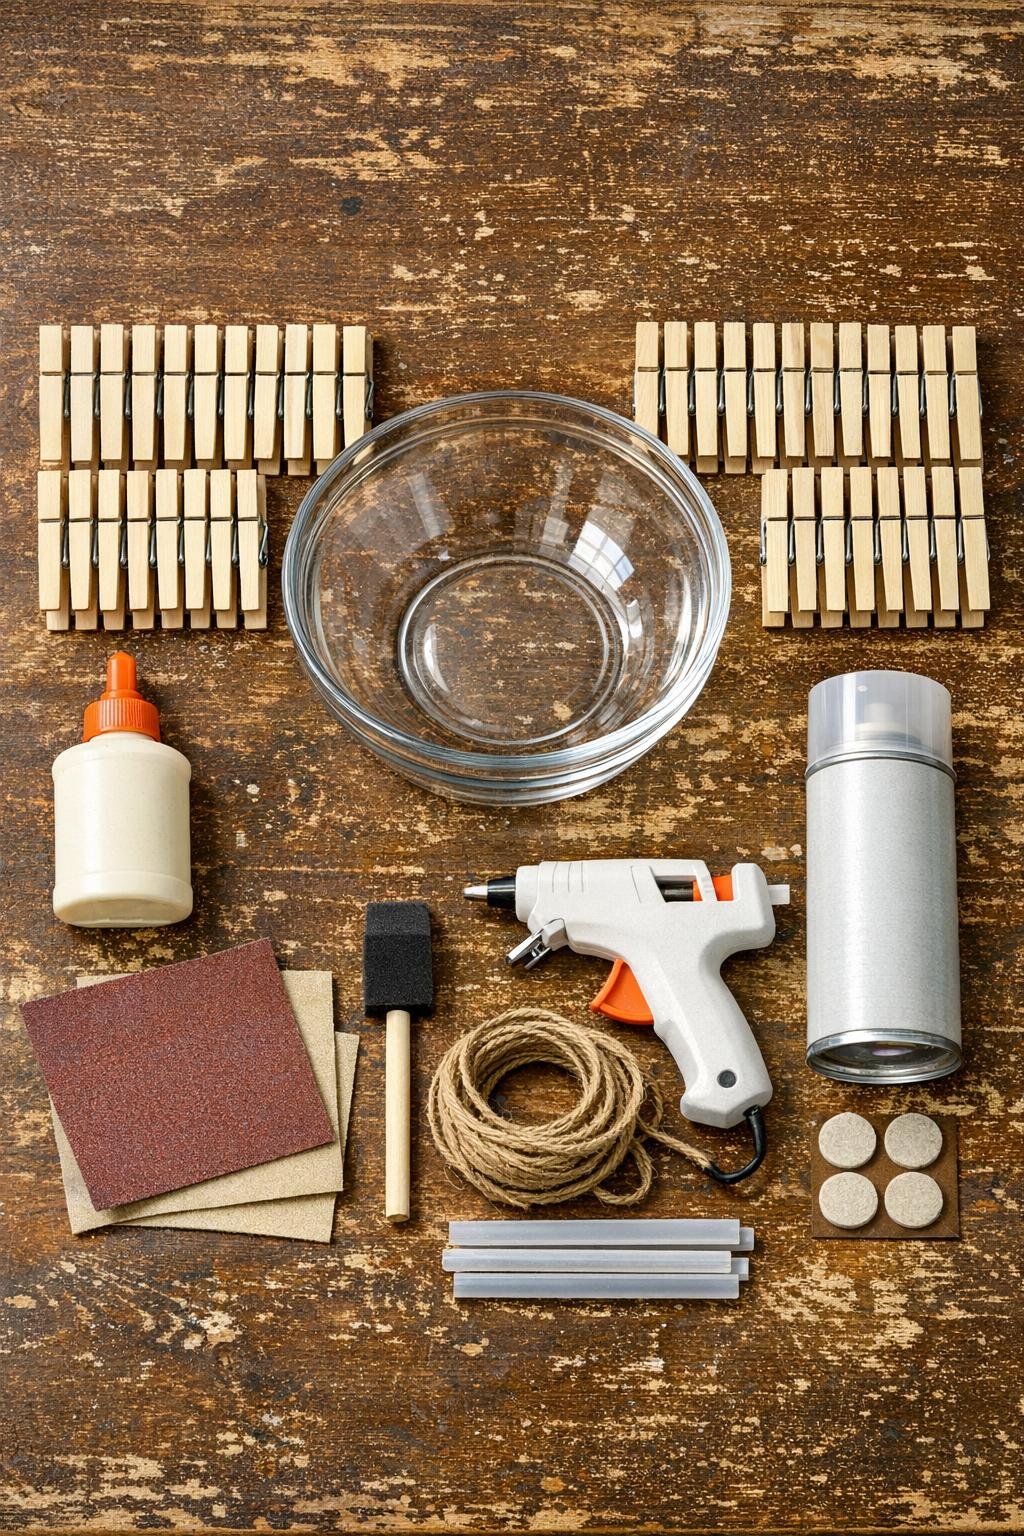
Materials
Instructions
1. Pull each clothespin apart by removing the metal spring, then sort the 80 wooden halves into a neat pile with the grooves facing the same direction. Sand away any splinters with 120-grit paper, then smooth the visible edges with 220-grit so the finished bowl feels polished in your hands.
2. Turn the glass mixing bowl upside down on your table and lightly wipe it clean so the wood pieces sit flat against it. This upside-down bowl is your form, and using it keeps the spiral even and gives the harvest bowl its rounded shape.
3. Make the center by laying 4 clothespin halves in a tight pinwheel on the very top middle of the glass bowl, overlapping the wide ends slightly to create a small spiral hub. Add a tiny dab of hot glue to tack them in place, then reinforce each overlap with a thin line of wood glue.
4. Continue the spiral by adding clothespin halves one at a time, always overlapping the previous piece by about 1/2 inch and rotating slightly so the pattern gently widens. Keep the grooved side facing outward for texture, and alternate your placement carefully so the spiral stays balanced instead of drifting to one side.
5. Build out the base until the spiral reaches about 5 inches across, checking every few pieces that the overlap is consistent and the center still looks tight. Use just enough hot glue to hold each piece quickly, then run a small bead of wood glue at the contact points for a stronger finished bowl.
6. Start curving the sides by letting each new round drop slightly lower down the glass bowl instead of staying flat across the top. This gradual downward shift is what changes the spiral from a coaster-like shape into a generous open bowl.
7. Keep stacking and weaving the clothespin halves in the same direction until you’ve used nearly all 80 halves, filling the bowl form with dense, even coverage. Press pieces snugly together as you go so there are no awkward gaps and the finished shape looks full and intentional.
8. Finish the rim with your last pieces placed a little closer together and aligned neatly so the top edge looks smooth and complete. If one section feels uneven, trim the visual bulk by shifting a piece before the glue fully sets rather than forcing extra pieces into the gap.
9. Let the bowl dry on the form for at least 1 hour, or longer if your wood glue needs it, then gently lift the clothespin bowl off the glass form. Turn it right side up and check the inside and outside for any loose joints, adding a touch more glue wherever the spiral needs reinforcement.
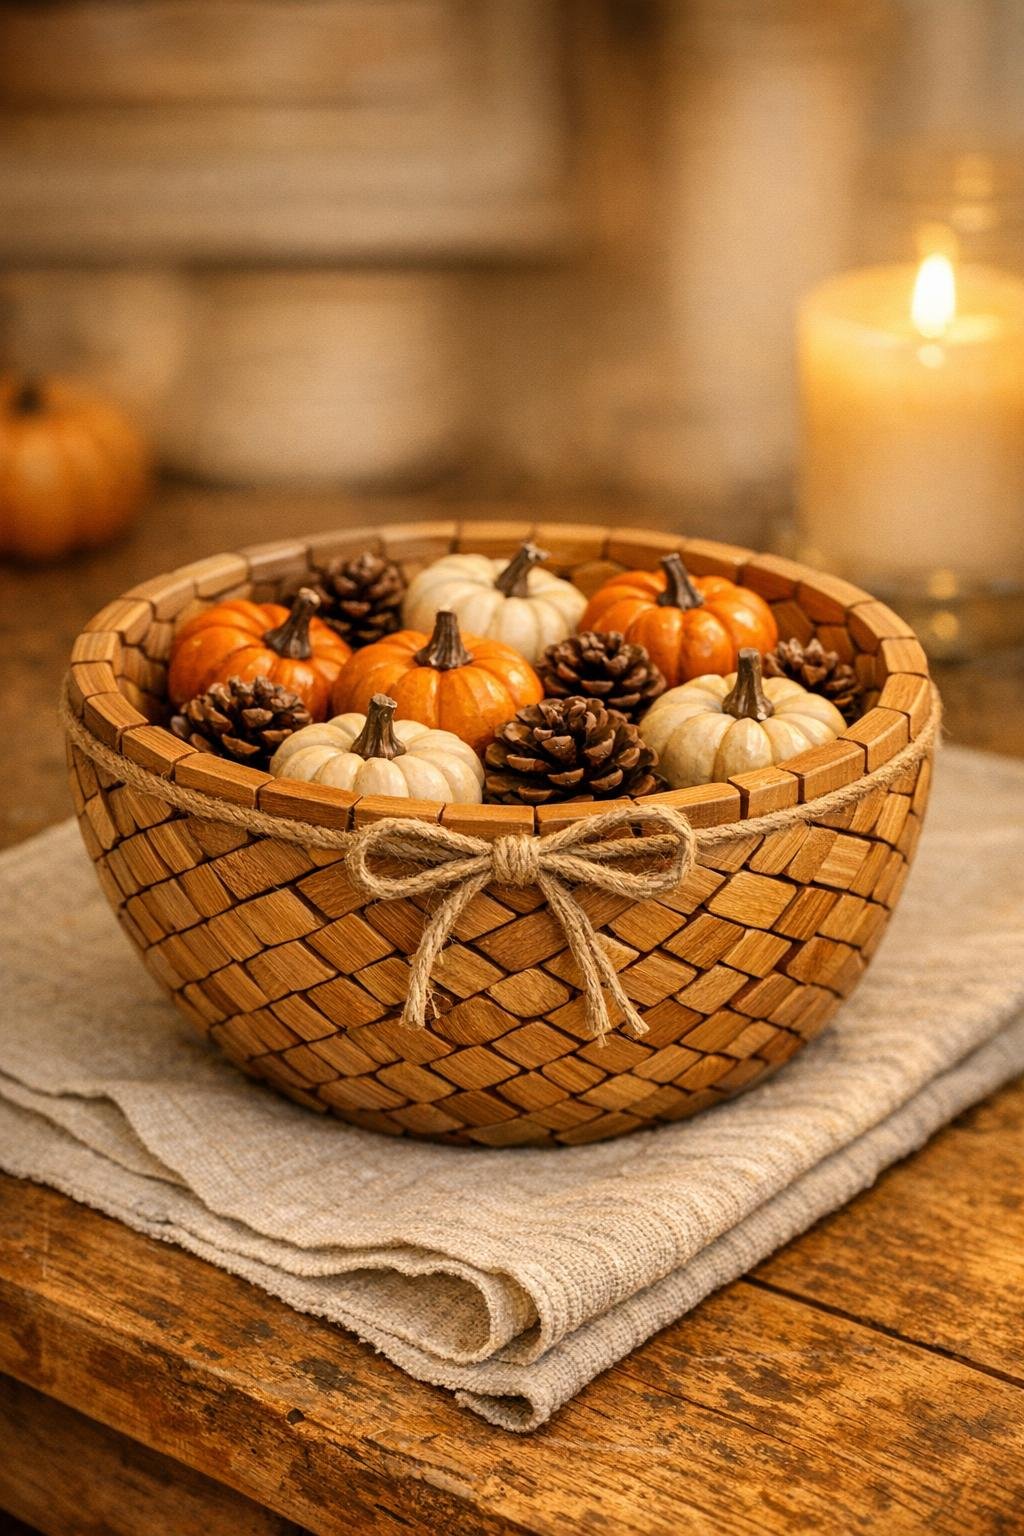
10. Brush on a thin coat of clear matte or satin sealer over the entire bowl, inside and out, to deepen the wood tone slightly and protect it from dust and handling. Once dry, add felt pads to the bottom contact points so it sits nicely on a table, and tie a small jute bow around one section of the rim if you want a softer harvest-style finish.
Variations & Tips
For a darker fall look: Brush the clothespin halves with diluted walnut stain before assembly, then let them dry fully before gluing. I like this version when I’m decorating with deeper oranges, brass, and darker wood tones.
If you want extra strength: Use wood glue at every overlap and let the bowl dry overnight on the form. It takes longer, but it makes the bowl feel much sturdier if you plan to fill it with decorative filler.
Best things to display inside: This bowl is ideal for faux pears, mini pumpkins, pinecones, wrapped treats, or bagged potpourri. I would not use it for loose unwrapped food unless you add a removable liner.
To keep the shape even: Step back every 8 to 10 pieces and look at the bowl from all sides. I do this with most repetitive projects because it saves me from discovering a lopsided section when I’m almost done.
For a cleaner finish: Wipe away hot glue strings as you go and sand any rough spots before sealing. Those two little cleanup steps make a budget project look much more polished.
Easy holiday swap: Skip the jute bow and tuck in fairy lights, ornaments, or winter greenery to carry the bowl into Christmas. The natural wood spiral is neutral enough to work for more than one season, which is always a win in my house.