
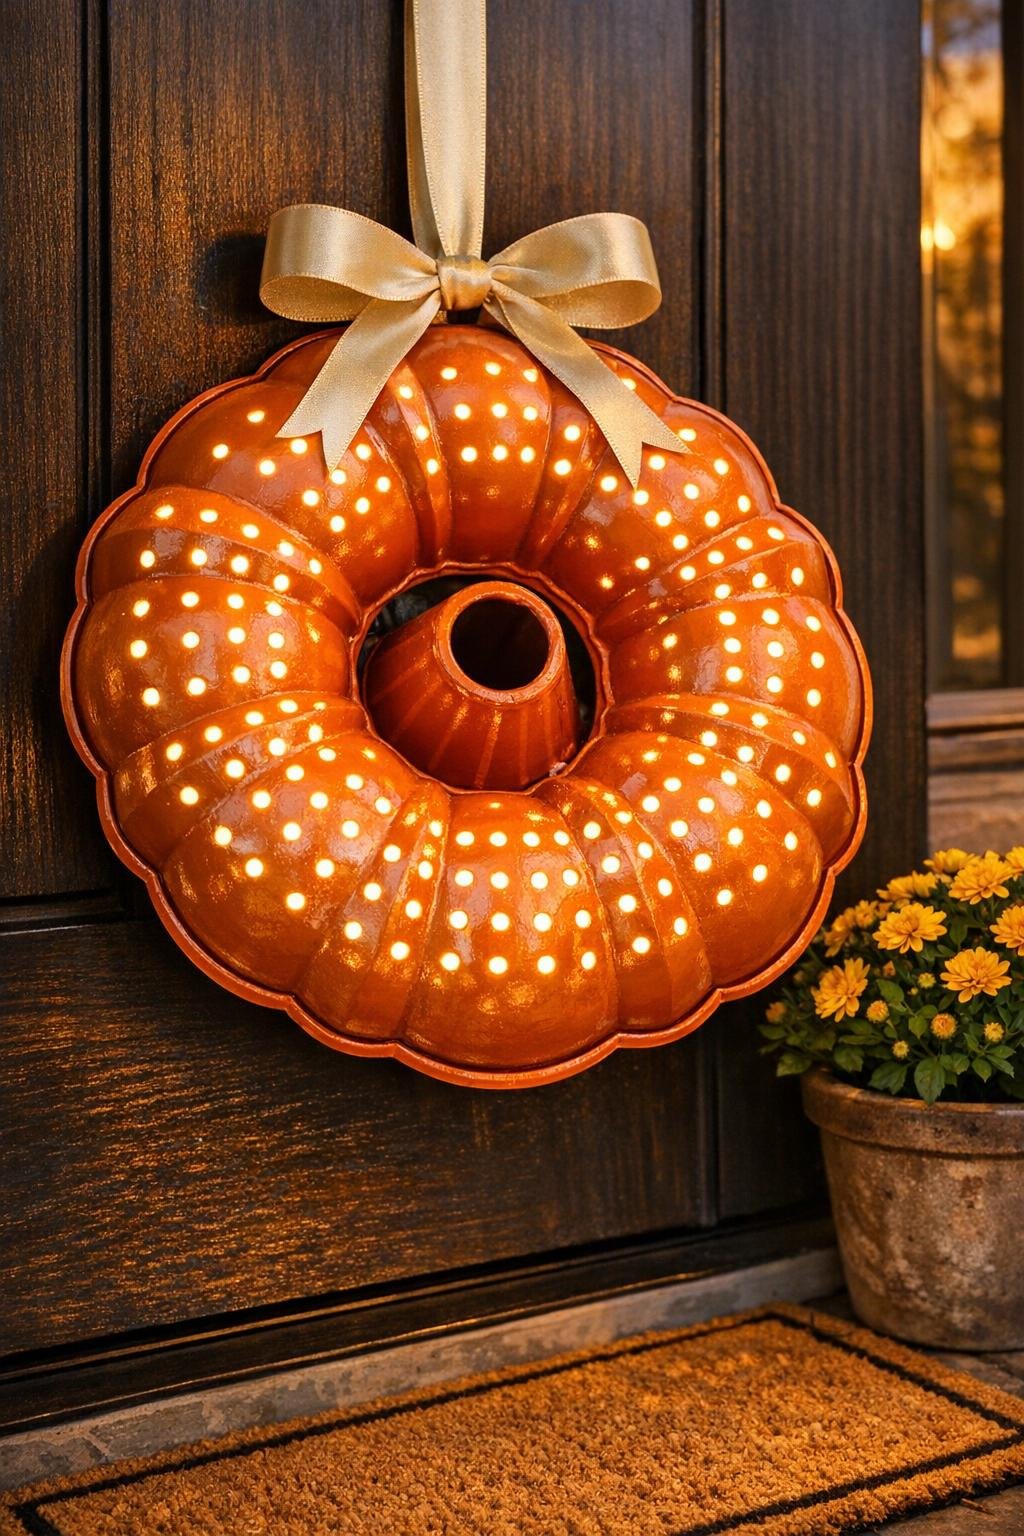
This wreath starts with one of my favorite kinds of DIY supplies: the odd little thrift-store find that looks like nothing special until you give it one smart twist. An old metal bundt pan, a strand of fairy lights, and a little spray paint turn into a glowing front-door wreath with plenty of charm and almost no fuss. It’s inexpensive, fast, and the finished look has that clever “how did you make that?” appeal people always notice.
I especially like this project for anyone who wants a seasonal door decoration without dealing with a bulky grapevine wreath or loads of florals. The pan already gives you that classic round wreath shape, and once the lights are tucked through the punched holes, it has a warm, twinkly look that feels polished for very little effort.

Materials
Instructions
1. Wash and dry the bundt pan well, then remove any stickers or residue so the paint will stick smoothly.
2. Set the pan face down over the scrap block of wood, centering it so the metal is supported anywhere you plan to punch holes.
3. Mark or eyeball a loose ring of light holes around the slope of the pan, spacing them about 1 to 1 1/2 inches apart so the lights will look full without overcrowding.
4. Wearing gloves, place the nail on each spot and tap it with the hammer to punch clean holes through the pan, making about 30 to 40 holes in an uneven-but-balanced ring.
5. Check both sides for sharp burrs; if needed, lightly sand the roughest edges so the light wire will feed through more easily from the back.
6. Move the pan to a protected painting area and spray on 2 to 3 light coats of orange or black paint, covering the inside, outside, and center tube; let it dry fully between coats.
7. Insert the batteries into the fairy lights and test the strand before threading so you know every bulb is working.
8. Starting near the top of the wreath, push each fairy light from the back of the pan through a punched hole so the glowing bulbs sit on the front and the wire stays mostly hidden behind.
9. Continue filling holes all the way around, letting a few extra lights weave between holes on the back for dense sparkle across the whole ring.
10. Tuck the battery pack neatly inside the center tube, securing it temporarily with a small piece of painter’s tape if needed so it stays hidden and balanced.
11. Thread the ribbon through the center hole and tie or knot it into a hanging loop, then adjust the bow or tails so the wreath hangs straight.
12. Turn the lights on, dim the room or step outside to check the glow, and make small spacing adjustments until the ring of light looks even and generous.
Variations & Tips
Color choice: Orange gives this wreath a cheerful pumpkin-season look, while black feels dramatic and a little moodier for Halloween. If your door is dark, orange usually pops more clearly from the street.
Pan selection: Thin aluminum thrifted pans are the easiest to punch cleanly. Skip heavy cast metal pans, because they are difficult to pierce and much more likely to dent or frustrate you.
Hole spacing: A loose ring pattern looks better than perfectly rigid rows. I aim for enough holes to create a full sparkle, but I leave a little irregularity so it feels handmade rather than mechanical.
Light safety: Feed the lights from the back, not the front, so the wire does not scrape across any sharp metal edges. Battery fairy lights are the easiest choice here because there is no cord dangling down the door.
Door-friendly hanging: If your ribbon loop feels slippery, tie the ribbon through the center and then hang it from a removable wreath hook. That keeps the wreath stable and makes battery changes simple.
Finishing touch: A small bow at the top or slightly off to one side adds a polished look without covering the glow. I’d keep embellishments simple, because the lit metal wreath is the star of the show.