
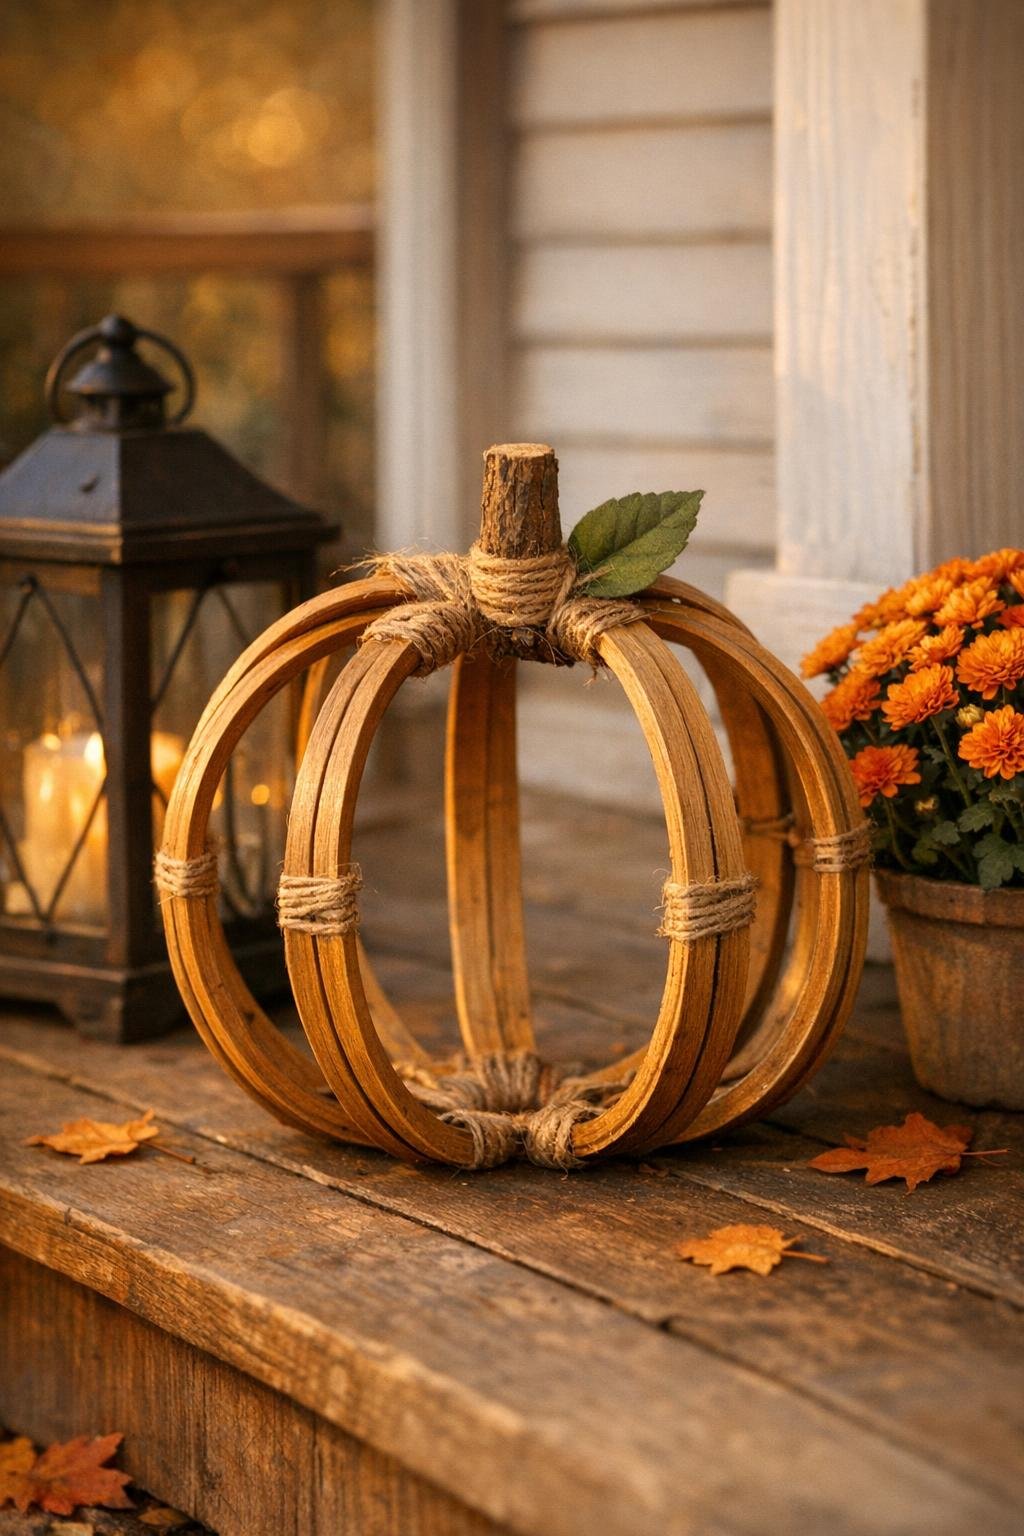
I love a project that looks like you spent all afternoon on it when it really comes together before dinner, and this embroidery hoop pumpkin is exactly that kind of porch decor. With four matching thrifted hoops, a little twine, and a stick for the stem, you can make a big, airy pumpkin that feels charming, handmade, and just a little bit farmhouse without getting fussy.
This is a wonderful beginner project because there’s no cutting, sewing, or painting required unless you want to add extra touches at the end. I especially like it for front porches, entry tables, and mantel displays, because it has that open, sculptural look that fills a space nicely while still being lightweight and easy to store.
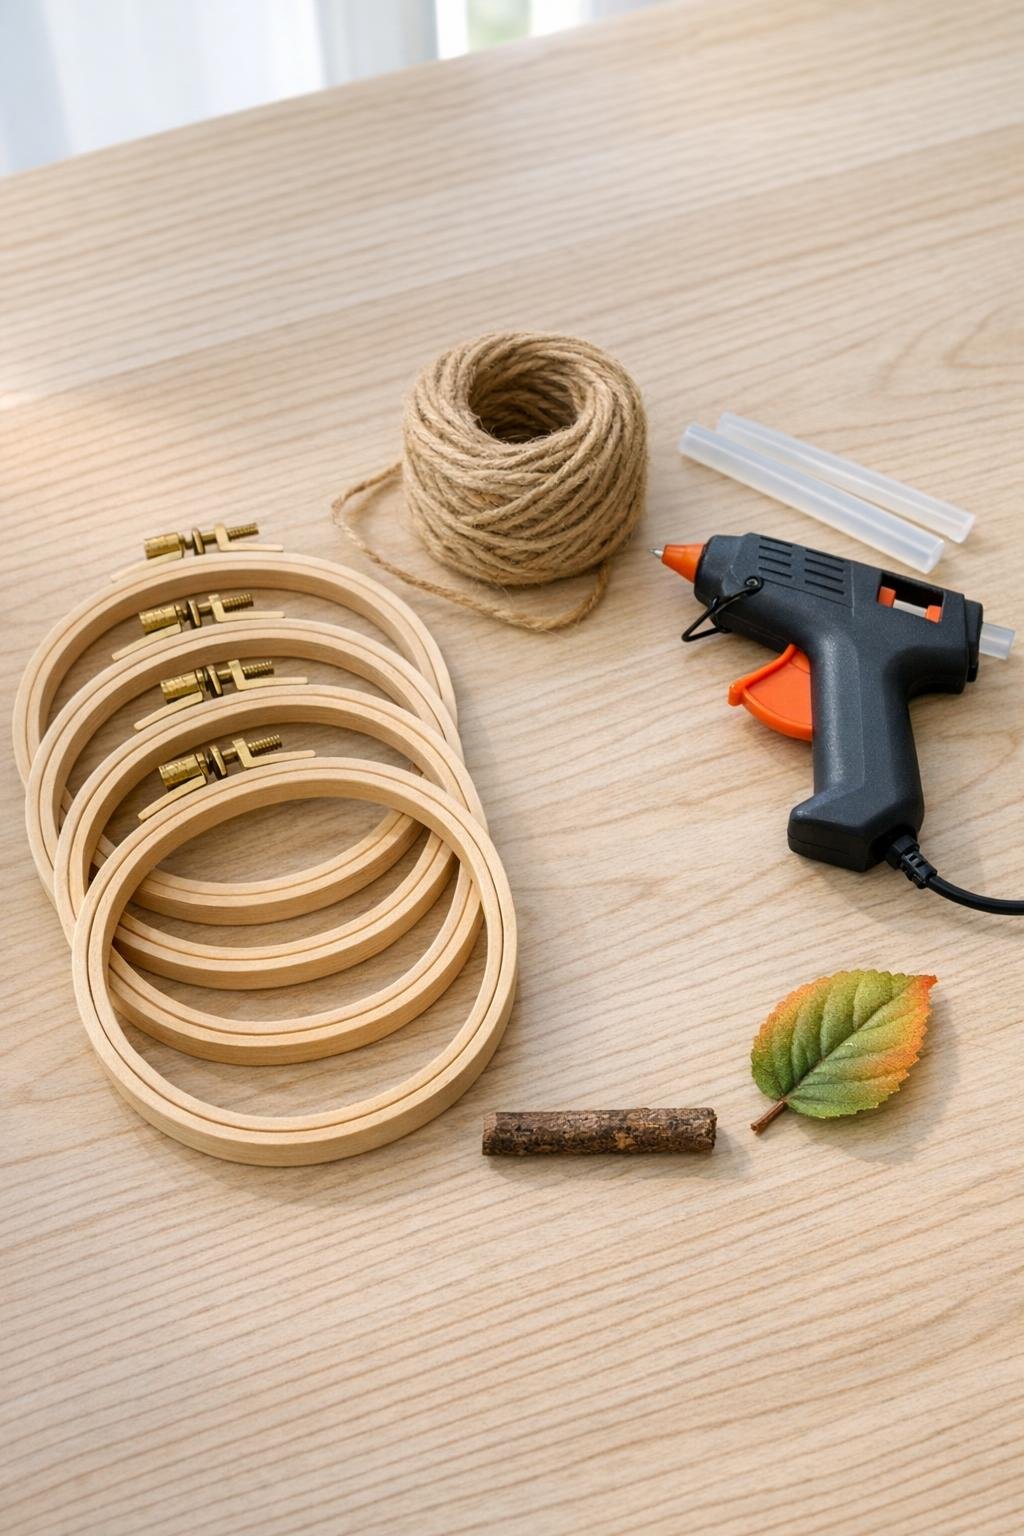
Materials
4 wooden embroidery hoops, all the same size, 8 to 10 inches wide
Instructions
1. Remove any fabric and hardware packaging from the hoops, then make sure all four hoops are the same size and shape. If any screws are loose, tighten them so the hoops sit evenly.
2. Stack the four hoops together loosely and rotate them so they begin to spread apart like pumpkin sections. Look straight down from above and adjust until the spacing feels balanced all the way around.
3. Add a small dot of hot glue where all the hoops cross at the top, holding them together for a few seconds until the shape stays put. Repeat with another small dot of hot glue at the bottom crossing point.
4. Cut a 36-inch length of twine and start wrapping it tightly around the top glued crossing point. Cover the glue completely and keep wrapping until you have a neat band about 1 inch tall.
5. Tie off or glue the end of the twine at the back, then trim any loose fibers. This wrapped section gives the pumpkin a finished look and helps lock the hoops together even more securely.
6. Add a pea-sized dot of hot glue into the center of the wrapped top section and press in your stick or cinnamon stick as the stem. Hold it upright until the glue grabs.
7. If you’re using a faux leaf, tuck it beside the stem and secure it with a tiny dab of hot glue underneath. Angle it slightly forward so it shows nicely from the front.
8. Stand the pumpkin upright and check the shape one more time from the front and from above. Gently nudge the hoops so the sections are evenly spaced and the pumpkin looks full and symmetrical before the glue fully cools.
Variations & Tips
Use matching hoops: This is the biggest secret to a polished pumpkin. Even a small size difference can make the shape lean to one side, so I always check them carefully before I start.
Try a cinnamon stick stem: If you want a little extra fall charm, a cinnamon stick makes a lovely stem and smells wonderful when you first bring it inside. It’s one of those tiny details that makes a simple craft feel special.
Add a bow carefully: A small ribbon bow tied under the stem can be sweet, especially if you’re decorating a covered porch. Keep it small so it doesn’t hide the clean hoop shape.
Make a larger display: Group two or three pumpkins in different hoop diameters, like 8-inch, 10-inch, and 12-inch sets, for a fuller porch arrangement. I’d still use four hoops per pumpkin so each one looks nice and rounded.
For picky decorators: In my house, everybody has opinions about holiday decor, just like they do about dinner, so I keep one pumpkin very plain and one dressed up with a leaf or bow. If your family likes things simple, the basic twine-and-stem version is still beautiful.
Keep it protected: This project does best on a covered porch or indoors since embroidery hoops and hot glue don’t love heavy rain. If you want it outside longer, place it near the door where it’s sheltered from the weather.
Check from above before the glue sets: The top view tells you everything. If the sections look evenly fanned from above, the finished pumpkin will look tidy and balanced from the front too.