
There are a lot of fancy garden gadgets out there, but some of the handiest fixes I’ve ever used came straight out of the shed and the kitchen drawer. This simple fall garden bed cover anchor system uses aluminum loaf pans, a hammer, and sturdy garden pegs to make broad, low-profile anchors that hold row covers, frost cloth, or plastic sheeting down without tearing them up or letting the wind sneak underneath.
I like this sort of project because it solves a real problem in about half an hour, and it does it with things many of us already have on hand. If you’ve ever walked out on a blustery October morning to find your bed cover flapping halfway into the next county, this is for you. The wide pan shape spreads pressure over a larger area, so your cover stays put and your fabric lasts longer.
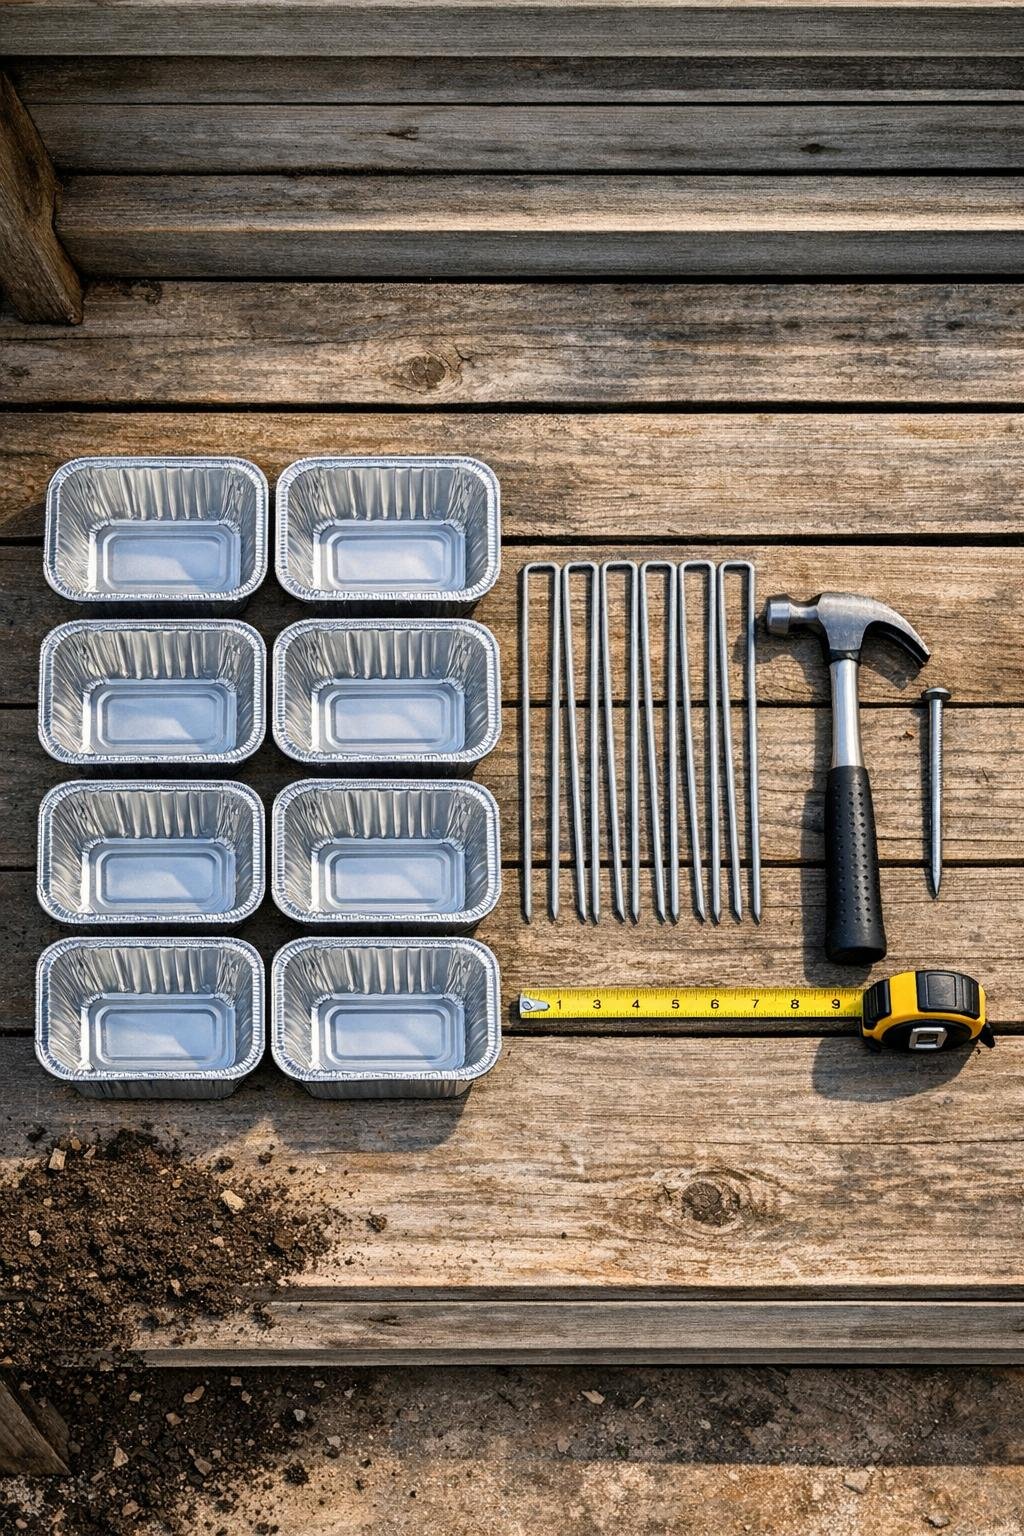
Materials
Instructions
1. Set your row cover, frost cloth, or plastic over the garden bed and leave 8 to 12 inches of extra material lying flat on the soil all the way around.
2. Mark each aluminum loaf pan for two holes on each long side, placing the holes about 1 inch down from the rim and 1 1/2 inches in from each end.
3. Put on your gloves, set one pan on a scrap board or firm soil, and use the nail and hammer to punch the four marked holes; repeat for all 6 pans.
4. If any hole edges are sharp or bent inward, flatten them gently with the hammer so the landscape staples will slide through easily and the cover fabric won’t snag.
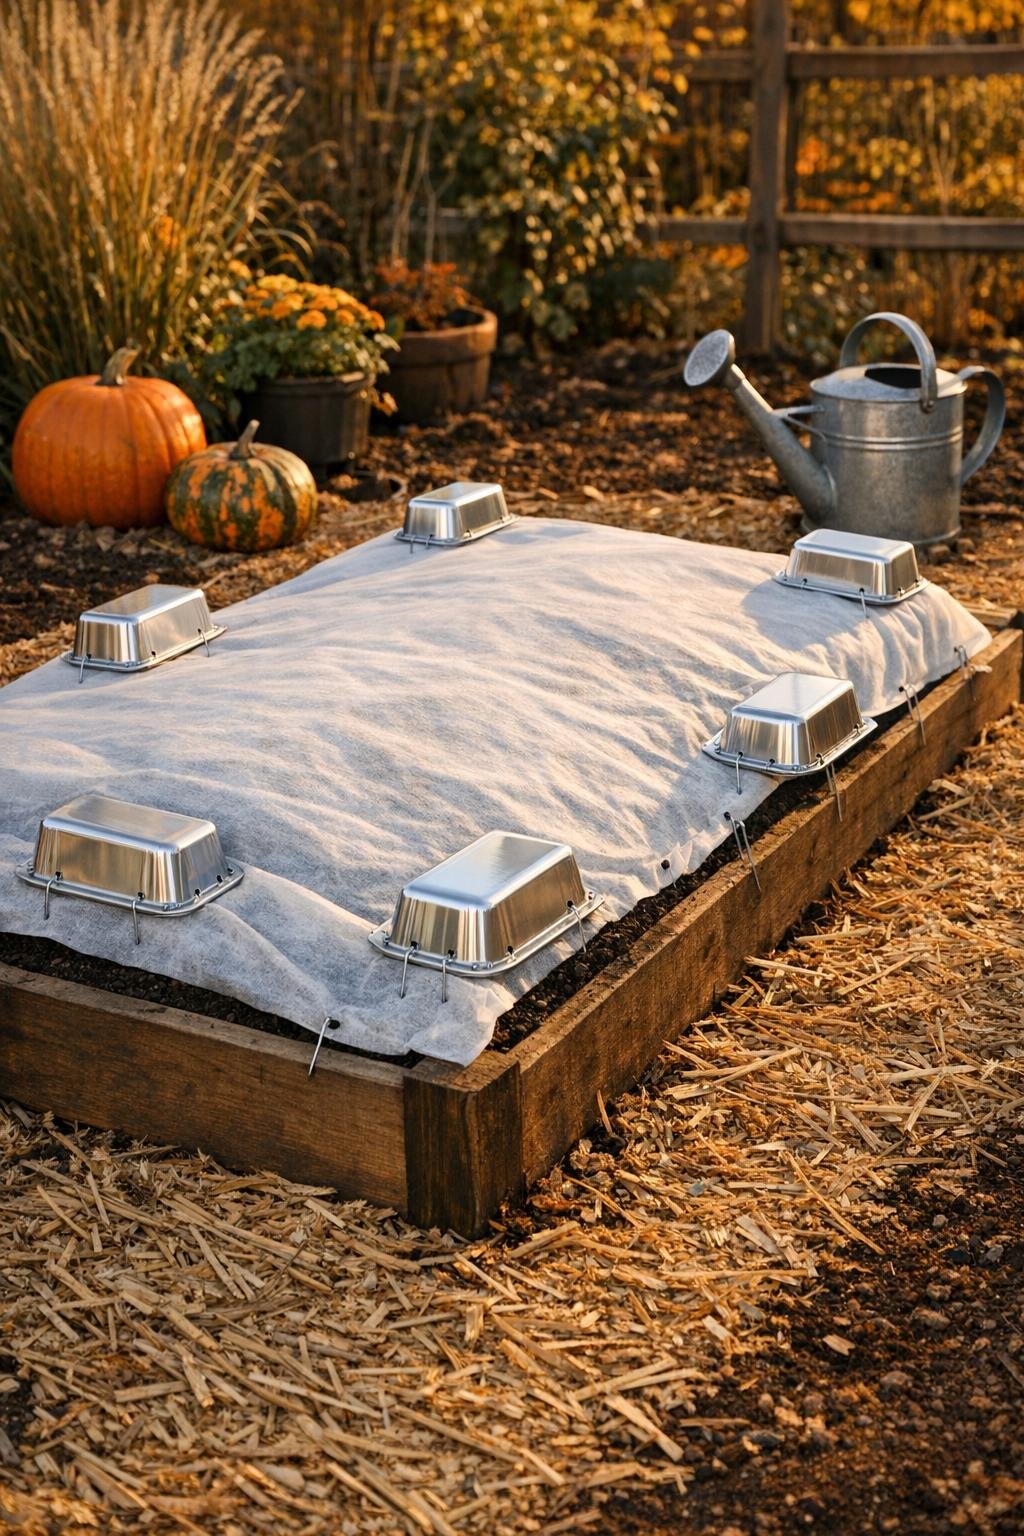
5. Space the pans around the garden bed wherever wind usually lifts the cover most, using 2 pans on each long side and 1 pan on each end for a typical 4 x 8 foot bed.
6. Pull the cover material smooth, then set each loaf pan upside down over the edge of the fabric so the broad top of the pan presses the cover flat against the soil.
7. Push one 10-inch landscape staple through the pair of holes on one side of a pan and into the soil, then push a second staple through the pair of holes on the other side.
8. Tap each staple down with the hammer until the pan sits snugly against the cover and the cover is pinned firmly to the ground without being cut or overly stretched.
9. Repeat with all remaining pans, checking that the fabric stays evenly tensioned and that no gap remains where cold wind can sneak underneath.
10. Where the soil is uneven, scrape a shallow flat spot with your trowel before stapling the pan down so the anchor makes full contact with the ground.
11. For extra windy spots, mound 1 to 2 inches of soil over the outer edges of the pans after staking them, leaving most of the shiny top visible so you can find and remove them easily later.
12. Test the system by tugging lightly on the cover at a few points; if a section shifts, add one more pan anchor there until the whole bed feels secure and weather-ready.
Variations & Tips
For larger beds: Use 8 to 10 loaf pans instead of 6 so the cover is held every 2 to 3 feet. I’ve learned over the years that wind always finds the one place you thought would be fine without support.
For lighter fabrics: Add a folded strip of scrap burlap or old cotton sheet under each pan before staking it down. That little cushion is a good way to protect especially thin row cover from wear.
If your soil is hard: Water the anchor spots lightly first or use a screwdriver to start pilot holes for the staples. Fall ground can bake up tougher than a pie crust left too long in the oven.
To prevent rust marks: Choose galvanized or stainless landscape staples if you can. They hold up better through wet spells and store nicely for next season.
For plastic sheeting: Keep the cover slightly loose rather than drum-tight so it can flex in wind without tearing. The broad loaf pan top is what does the work, so you don’t need to pull the plastic hard.
Easy seasonal storage: At the end of the season, rinse off the pans, flatten any bent corners with the hammer, and stack them in the shed with the staples nested inside. It’s the kind of thrifty little system my generation has always appreciated: simple, useful, and ready to go again next year.