
There’s something mighty satisfying about turning plain little odds and ends into a garden detail that looks far pricier than it is. For this project, I use short sections of white PVC pipe with the bottoms cut off, plus two easy dollar-store finds, to make sturdy raised bed marker stakes that hold up through the end of the season and still look neat enough that folks stop and ask where they came from.
I like this kind of project because it’s practical first and pretty second, which is how most good garden things ought to be. If you’ve got raised beds full of late tomatoes, beans, herbs, or fall greens and you want your rows labeled in a clean, polished way, this is one of those simple afternoon makes that gives the whole bed a tidier, more finished look.
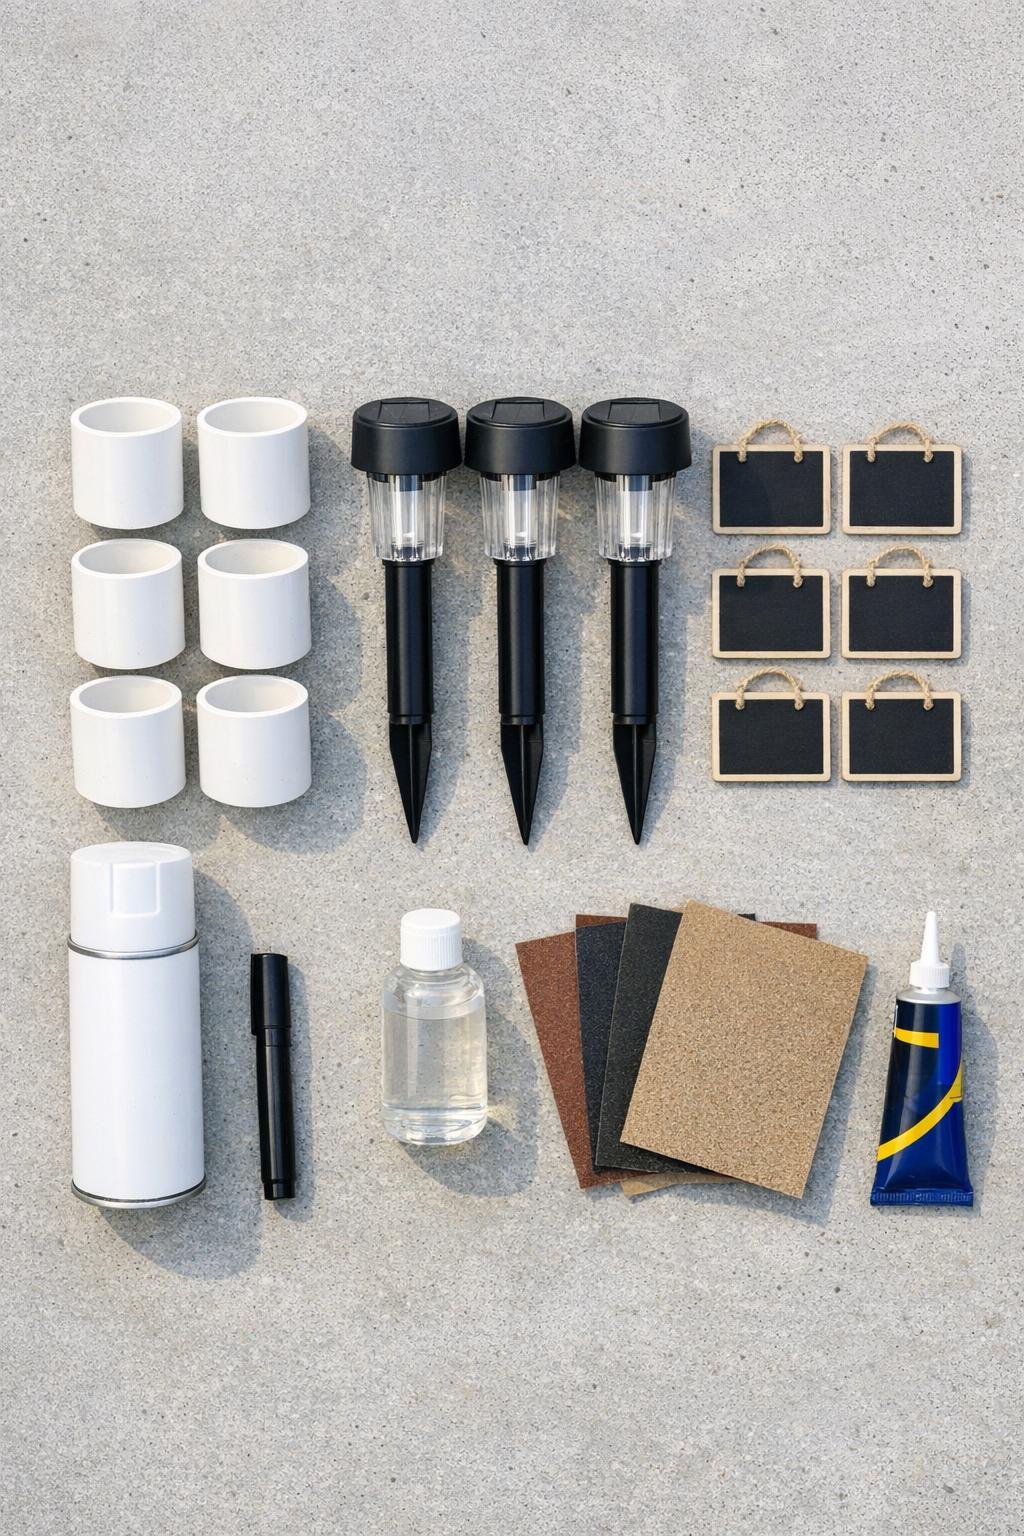
Materials
White PVC pipe, 3-inch diameter, 3 sections cut 8 inches long
Instructions
1. Cut three 8-inch lengths of white PVC pipe, then cut the bottom edge off each section in a gentle point or angled stake shape so each piece can slide into the soil more easily.
2. Sand the cut edges inside and out until they’re smooth to the touch, then wipe every pipe section clean with rubbing alcohol so paint and glue will stick well.
3. Take apart the three solar stake lights and keep the decorative light tops and center posts; set aside any extra ground spikes you won’t need for this build.
4. Spray the PVC sections with a light, even coat of white paint made for plastic, even if they already look white, because that fresh coat gives them a clean matched finish; let them dry fully.
5. Remove any strings or jute from the chalkboard tags, then lightly sand the backs and wipe them clean so the adhesive gets a strong grip.
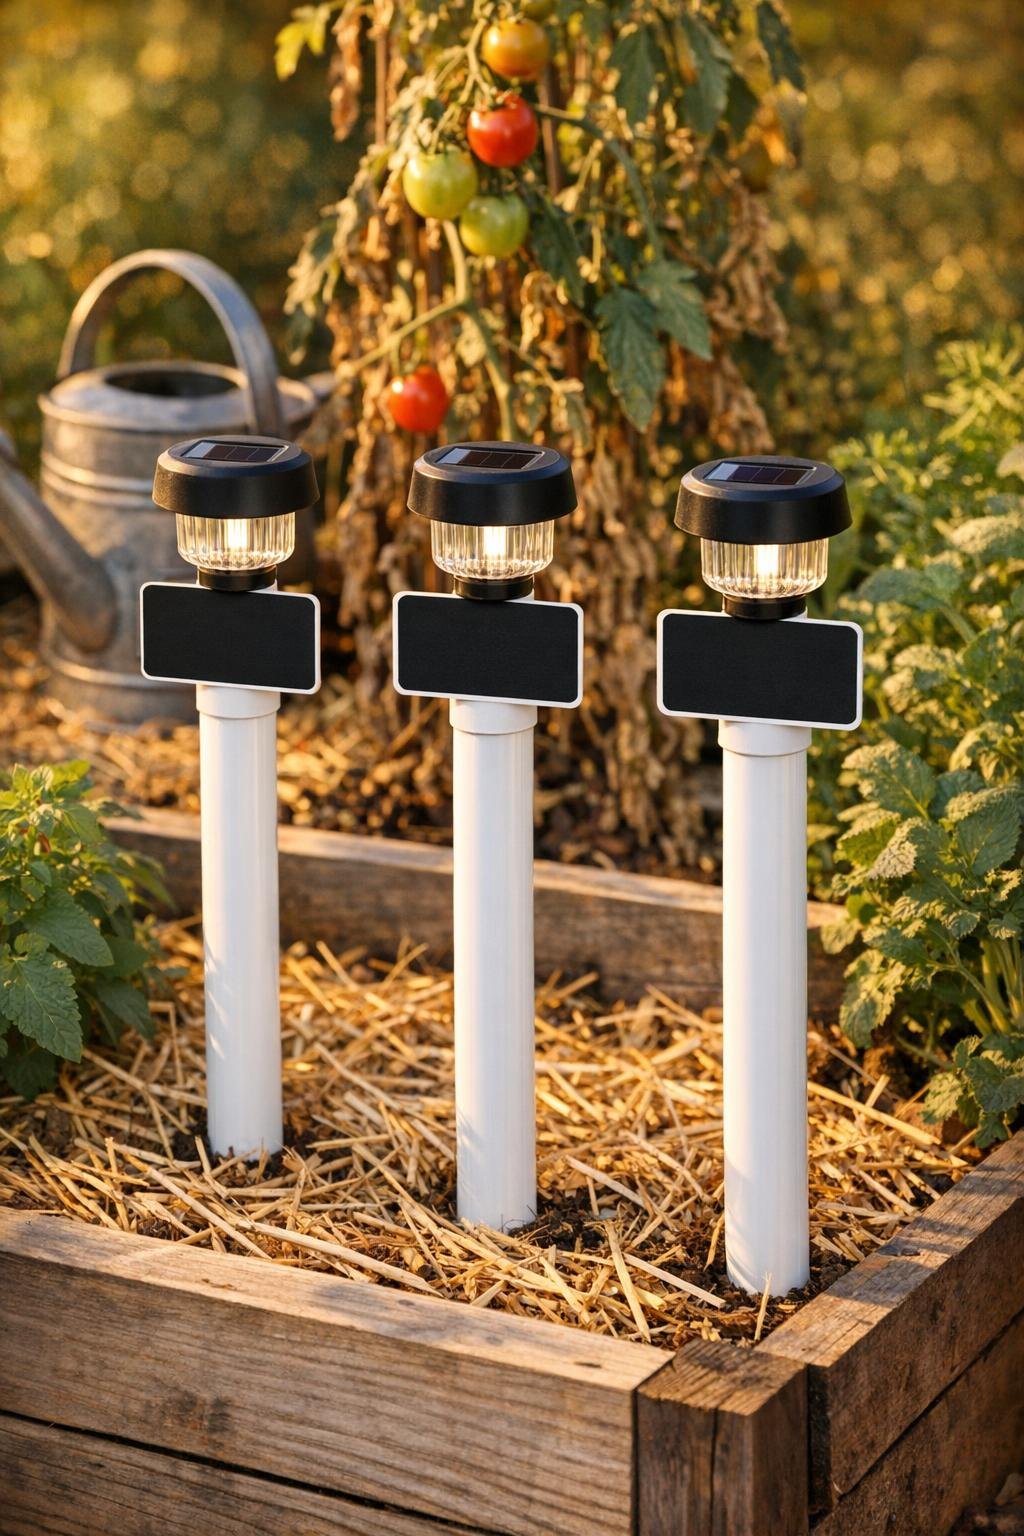
6. Glue two chalkboard tags back-to-back around the center post of each solar light, lining them up carefully so you create a double-sided plant marker sign; let the adhesive cure according to the package directions.
7. Test-fit each assembled solar marker into a PVC section, and if the fit is loose, add a spoonful or two of pebbles or coarse sand inside the PVC first to give the stake a little weight and help it stand straighter in the bed.
8. Secure the solar post inside the top center of each PVC section with adhesive, keeping the marker sign facing front and back; let everything dry undisturbed until firm.
9. Write the plant names on both sides of each chalkboard tag with the black paint pen or a contrasting paint marker, using large simple lettering that can be read from the garden path.
10. Spray the finished markers with a light coat of clear outdoor sealer, avoiding the solar panel tops, then let them dry before pressing the pointed PVC ends into the corners or front edge of your raised beds.
Variations & Tips
For a more vintage garden look: Use matte clear sealer and slightly distress the PVC with very fine sandpaper after painting; it softens that bright hardware-store finish and makes the stakes look a little more settled into the garden.
If your beds stay damp: Choose waterproof epoxy instead of basic craft glue. In my experience, anything living outdoors near watered vegetables needs the tougher adhesive if you want it to last the whole season.
For bigger raised beds: Make the PVC sections 10 to 12 inches long instead of 8 inches so the markers stand taller above sprawling plants like squash, tomatoes, or late cucumbers.
To keep the writing crisp: Use a paint pen instead of chalk. Chalk has its charm, but by the time dew, rain, and my grandkids’ fingers get to it, it usually turns into a smudge.
For a night garden accent: Pick solar lights with a warm glow rather than cool blue-white. That little bit of evening light along the beds makes the whole garden feel cared for, especially in late summer when dusk comes gentle and slow.
Easy seasonal refresh: At the end of the season, wipe the tags clean, touch up the paint if needed, and relabel them for fall greens or next spring’s starts. That’s the sort of thrift my mother always admired—make it once, use it again, and make it pretty while you’re at it.