
When fall winds start whipping across an open bed, the lightweight row covers and frost blankets I rely on can turn into sails in a hurry. This simple garden-bed wind anchor solves that problem with three humble shed staples: tennis balls, landscape staples, and a length of garden twine. Once the tennis balls are sliced, they turn into soft, grippy anchor caps that help hold fabric down without tearing it up.
I love this project because it is fast, inexpensive, and genuinely useful right when the weather gets unpredictable. If you have raised beds, in-ground vegetable rows, or newly mulched beds that need cover protection, this is the kind of practical little fix that earns a permanent spot in the garden tote.
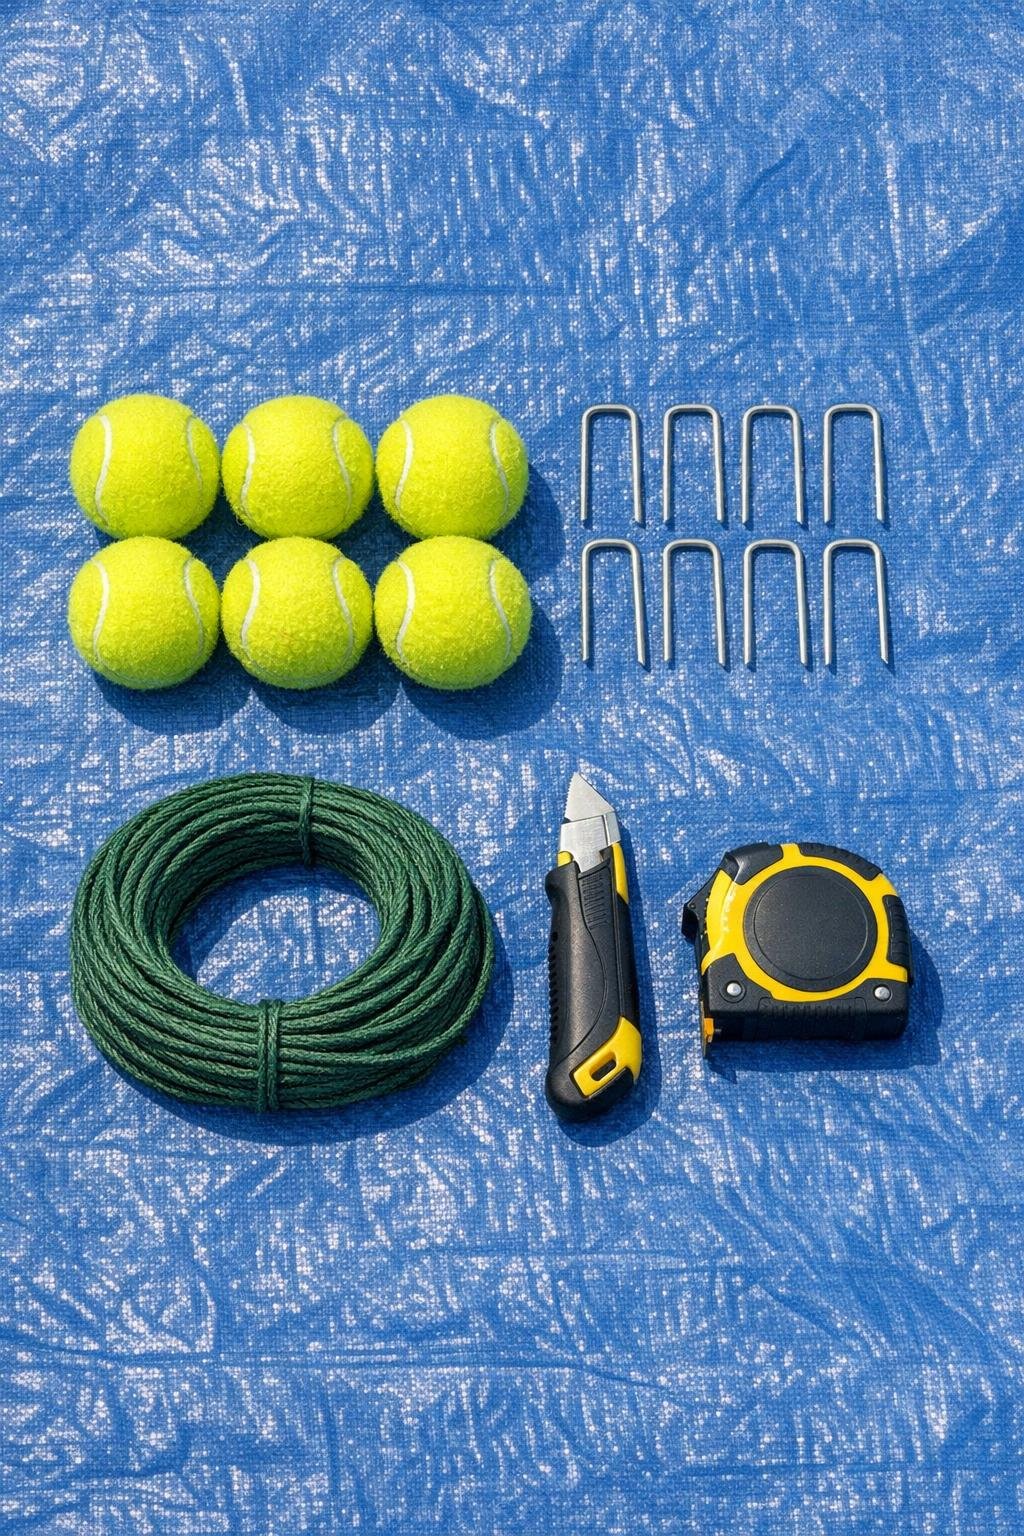
Materials
Instructions
1. Spread the blue tarp on a flat surface and set out the tennis balls, staples, and pre-cut twine lengths so everything is easy to grab.
2. Cut one deep slit in each tennis ball, about 1 1/2 inches long, just wide enough for a landscape staple or a bundle of fabric and twine to slip into the opening.
3. Tie one 24-inch piece of garden twine around the center bar of each landscape staple with a firm double knot, leaving two even tails.
4. Push the tied center of each staple into the slit of a tennis ball so the ball becomes a soft cap over the metal anchor point.
5. Drape your row cover or frost cloth over the garden bed, leaving at least 8 to 10 inches of extra fabric around the edges for anchoring.
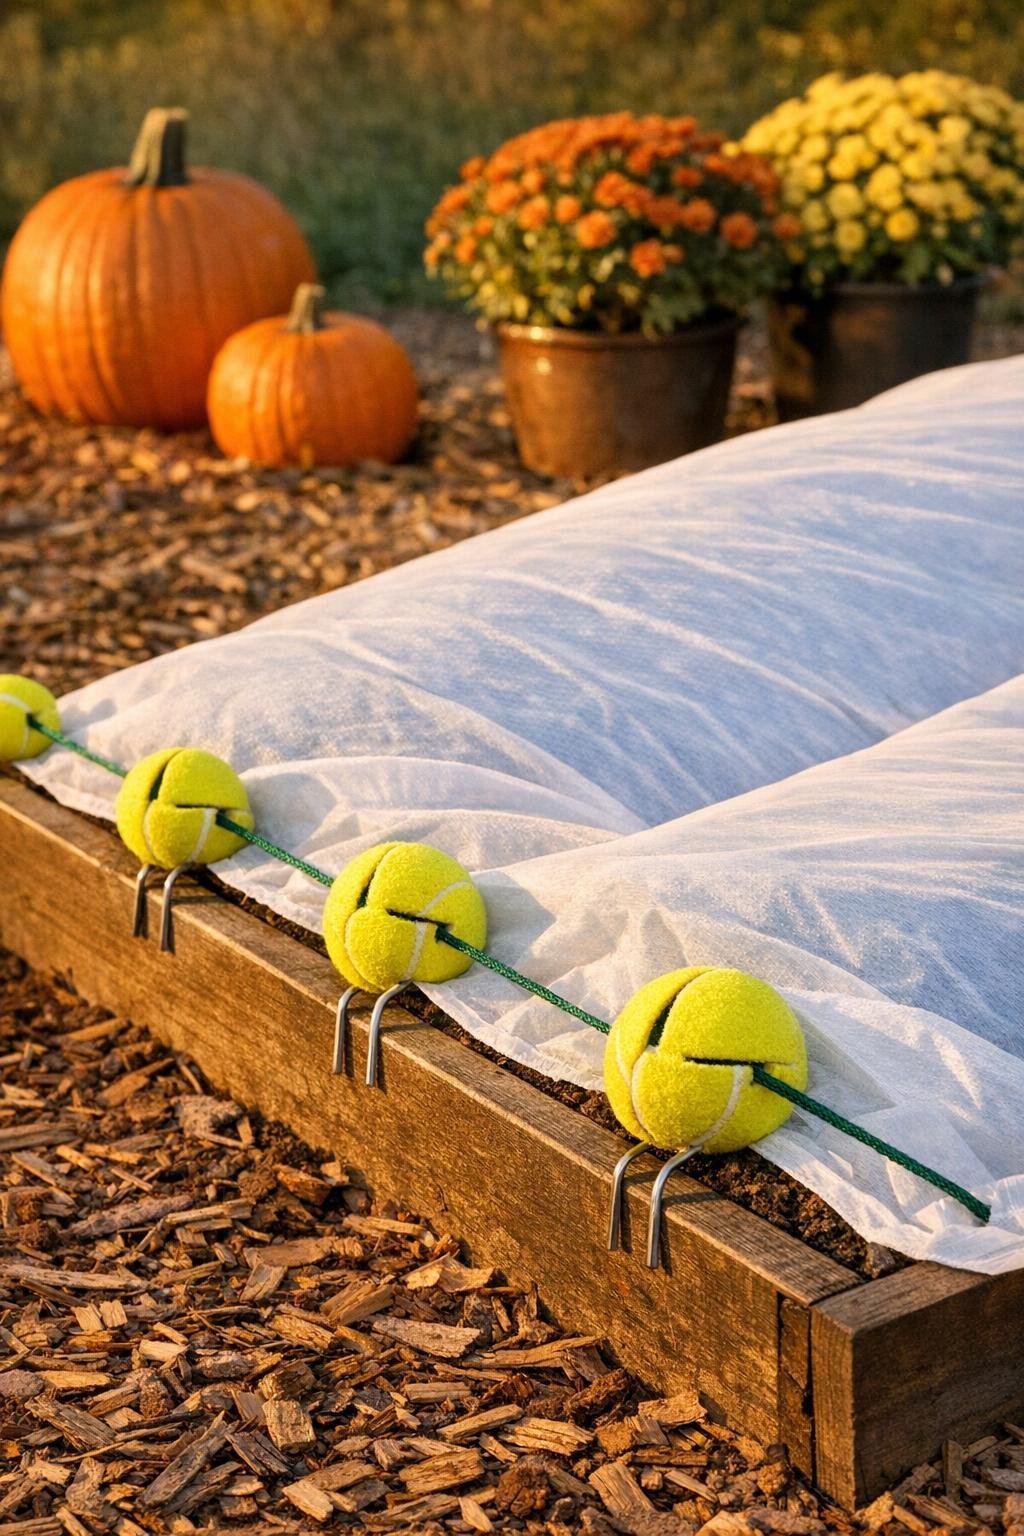
6. Gather a small pinch of cover fabric at one corner, place it under the twine at one anchor, and press the staple legs through the fabric edge area and into the soil so the tennis ball sits on top as a cushion.
7. Repeat at the remaining corners, then add the rest of the anchors evenly along the long sides every 18 to 24 inches so the cover stays snug instead of ballooning.
8. If the bed is especially windy, tie the twine tails from neighboring anchors together loosely over the cover edge to create a little extra hold without pulling the fabric too tight.
9. Walk the perimeter and adjust each tennis ball so it lies flat against the fabric, covering any sharp contact point and spreading the pressure over a wider area.
10. Test the setup by lifting the cover gently in one spot; if it shifts too easily, add more staples between anchors until the cover feels secure and evenly tensioned.
Variations & Tips
For raised beds: Place anchors just outside the wood frame when possible so the fabric drapes cleanly and the tennis balls are easy to spot and remove later.
For low tunnels: Use these anchors over the cover where it meets the soil at the sides of hoop tunnels; they work especially well when wind likes to sneak underneath.
Use worn tennis balls: This is a perfect reuse project for scuffed balls that are too flat for play but still have enough outer fuzz to grip fabric gently.
Cut carefully: I find it easiest to start the slit with the tip of the knife, then deepen it in short passes instead of trying to force one long cut through the rubber shell.
Add more coverage: On a standard 4-by-8-foot bed, twelve anchors give a much better hold than just weighting the corners, especially in blustery Midwestern weather.
Store them assembled: Keep the tennis balls, staples, and twine already put together in a bucket near the shed so you can get a cover secured before a sudden cold front rolls in.