
Broken crayons are one of those little household leftovers that seem too colorful to throw away and too small to keep using. This project turns them into bright, stained-glass-style ornaments by melting the pieces inside metal cookie cutters, and it’s one of the easiest crafty uses for that crayon jar most of us have tucked in a drawer somewhere.
I like this kind of project for the same reason I like a good kitchen salvage recipe: you’re taking odds and ends and turning them into something cheerful and giftable with almost no fuss. If you can chop, fill, and bake carefully, you can make a whole batch in an hour, and the finished ornaments have that polished look that makes people ask where you bought them.
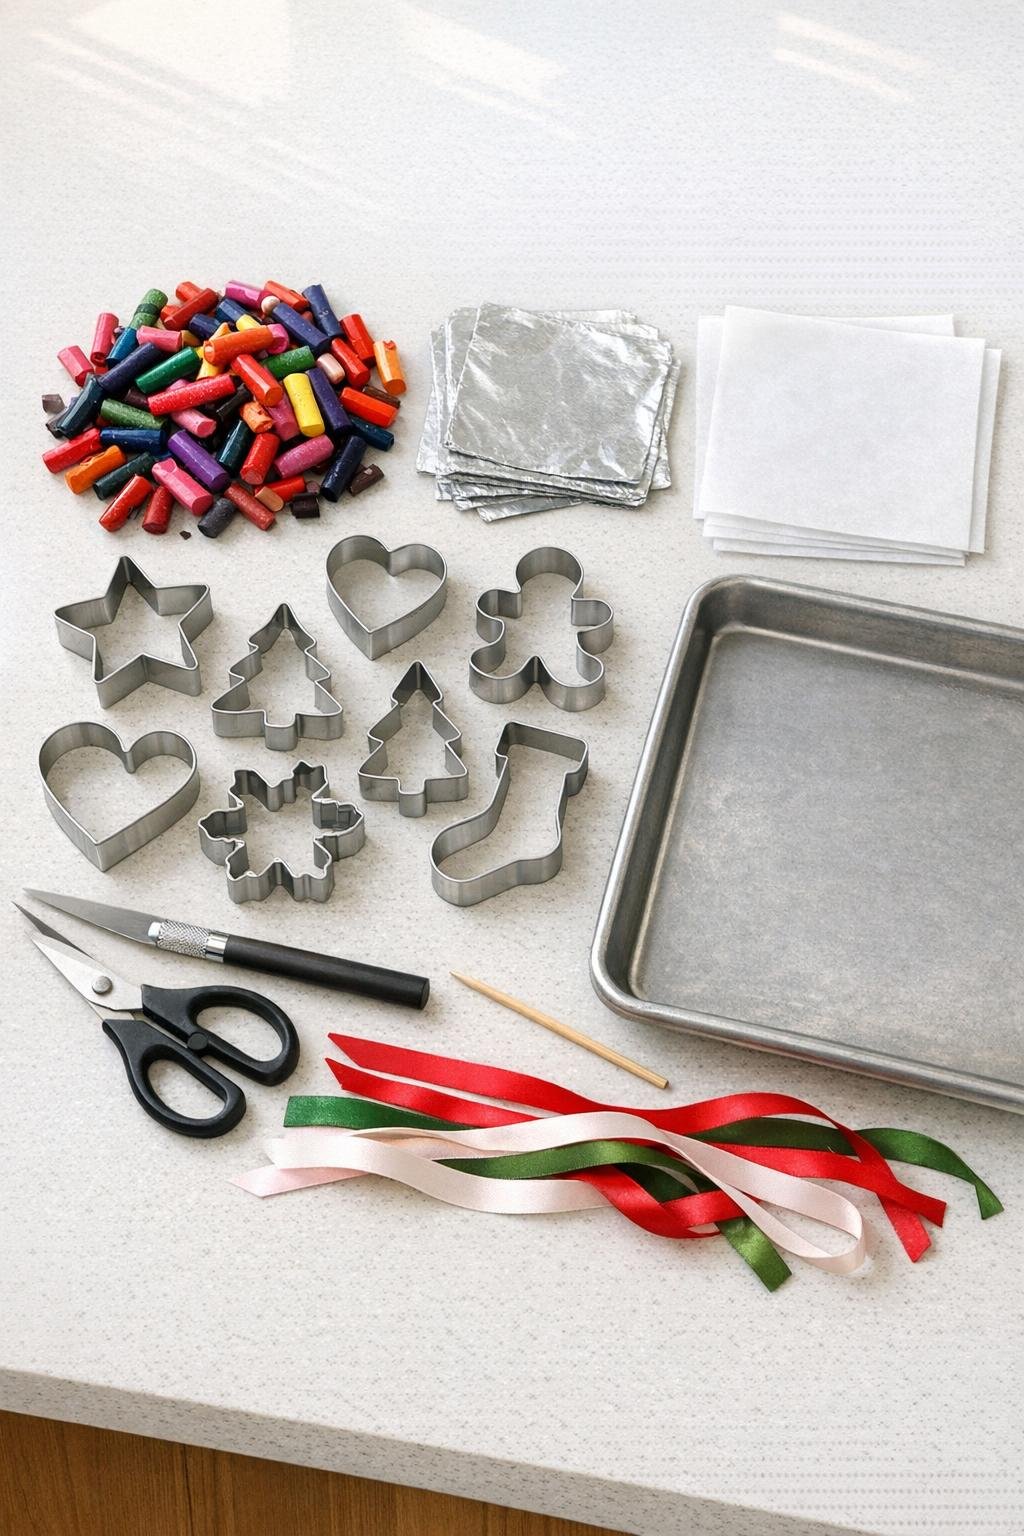
Materials
Instructions
1. Preheat your oven to 250°F and line the baking sheet with parchment paper. Open a window or turn on the vent fan, since melted crayons have a noticeable waxy smell.
2. Peel all paper from the crayons and cut or snap them into small pieces about 1/4 to 1/2 inch long. Mix colors loosely if you want a marbled look, or sort them by palette for cleaner color stories.
3. Set each cookie cutter on its own foil square and crimp the foil tightly up around the outside base to seal the bottom edge. Press firmly all the way around so melted wax cannot easily slip underneath.
4. Arrange the foil-sealed cutters on the parchment-lined baking sheet, leaving a little space between them. Make sure they sit level so the melted wax settles evenly.
5. Fill each cutter with crayon pieces almost to the top, packing the colors densely for a rich finished ornament. As the wax melts down, a full cutter gives you the bold, jewel-like coverage that makes these look finished instead of patchy.
6. Bake for 8 to 10 minutes, just until the crayon pieces melt into smooth pools. If you see a few dry lumps, give them another minute or two, but do not overbake.
7. Carefully remove the pan and use a skewer to pop any large bubbles or gently swirl neighboring colors together if needed. Work quickly and lightly so the colors stay vivid rather than muddy.
8. Let the ornaments cool completely on the baking sheet without moving them, about 30 to 40 minutes. This is the part people rush, but shifting the cutters too soon can crack the wax or pull it away from the edges.
9. Once fully cool, peel away the foil from the bottoms and trim any thin wax drips with your fingers or a craft knife. Leave the wax inside the cookie cutter, since the metal frame is what makes the ornament sturdy and easy to hang.
10. Thread one ribbon through the top opening of each cookie cutter and tie a loop or bow for hanging. If you want a cleaner finish, trim the ribbon tails at an angle and make sure any rough wax edges face the back.

Variations & Tips
Color planning: Analogous colors like blue-green-teal or red-pink-orange melt into especially pretty ornaments. If you mix every color together, you’ll usually get a browner result, much like over-stirring too many ingredients in the kitchen.
Best cutter shapes: Simple shapes with broader centers, like stars, hearts, circles, trees, and gingerbread people, work better than very narrow or highly detailed cutters. Tiny corners can be charming, but they are also where wax is most likely to leak.
For cleaner edges: Press the foil firmly right at the outer seam where the cutter meets the pan, then set the cutter down and press again once it’s on the parchment. A little seepage is normal, but a tight seal makes a big difference.
For a more translucent look: Use lighter crayons and avoid overfilling with very dark shades. Yellows, light blues, pinks, and white mixed with brighter colors tend to catch window light beautifully.
Gift idea: Tie two or three ornaments together with a longer ribbon and tuck them into a bakery box or kraft gift bag. It’s an inexpensive handmade gift that feels surprisingly special.
Safety note: Use old cookie cutters dedicated to crafts only after this project. Wax residue is hard to remove completely, so I treat these the same way I would any tool that has crossed from kitchen duty into craft duty.