
When I need a simple little season-stretcher in the garden, I still reach for the kinds of things most folks would toss in the recycling bin. This raised bed corner warmer is one of those old practical tricks that feels straight out of a farm kitchen and potting shed life—because it is. By punching ventilation holes in aluminum soup cans and pairing them with one common yard item, you can make a gentle corner cloche that helps hold a bit of daytime warmth around tender seedlings on chilly spring nights.
I like this project for gardeners who want a real, usable solution without spending much money or fussing with fancy supplies. It is especially handy for the corners of raised beds, where cold air seems to settle and young plants can use a little extra shelter. My dad used tricks like this with transplants when the weather couldn’t make up its mind, and I still think those old methods have plenty of good sense in them.
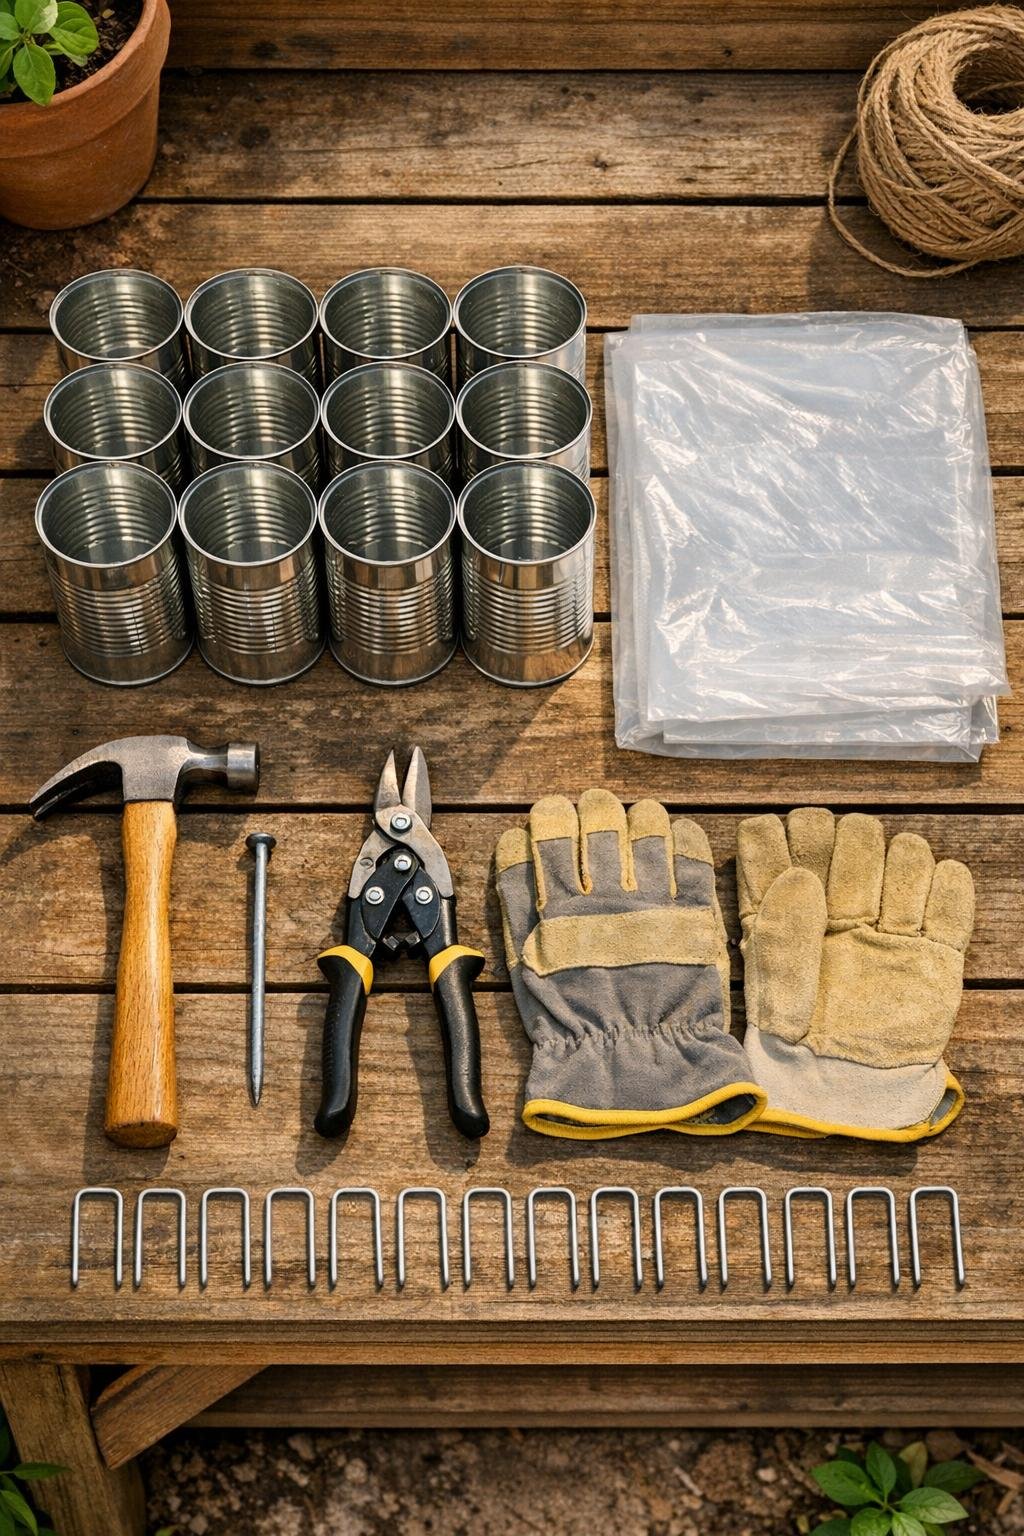
Materials
12 empty aluminum soup cans, standard 10.5-ounce size, labels removed and washed clean
Instructions
1. Wash and dry the soup cans well, then remove the paper labels and any sticky residue so the cans do not hold extra moisture or mildew in the bed corners.
2. Put on gloves and use the hammer and nail to punch 10 to 12 drainage and vent holes around the lower half of each can, spacing them about 1 inch apart in staggered rows.
3. Turn each can over and gently flatten any sharp raised metal around the holes with the hammer so the finished warmer is safer to handle and less likely to tear the plastic.
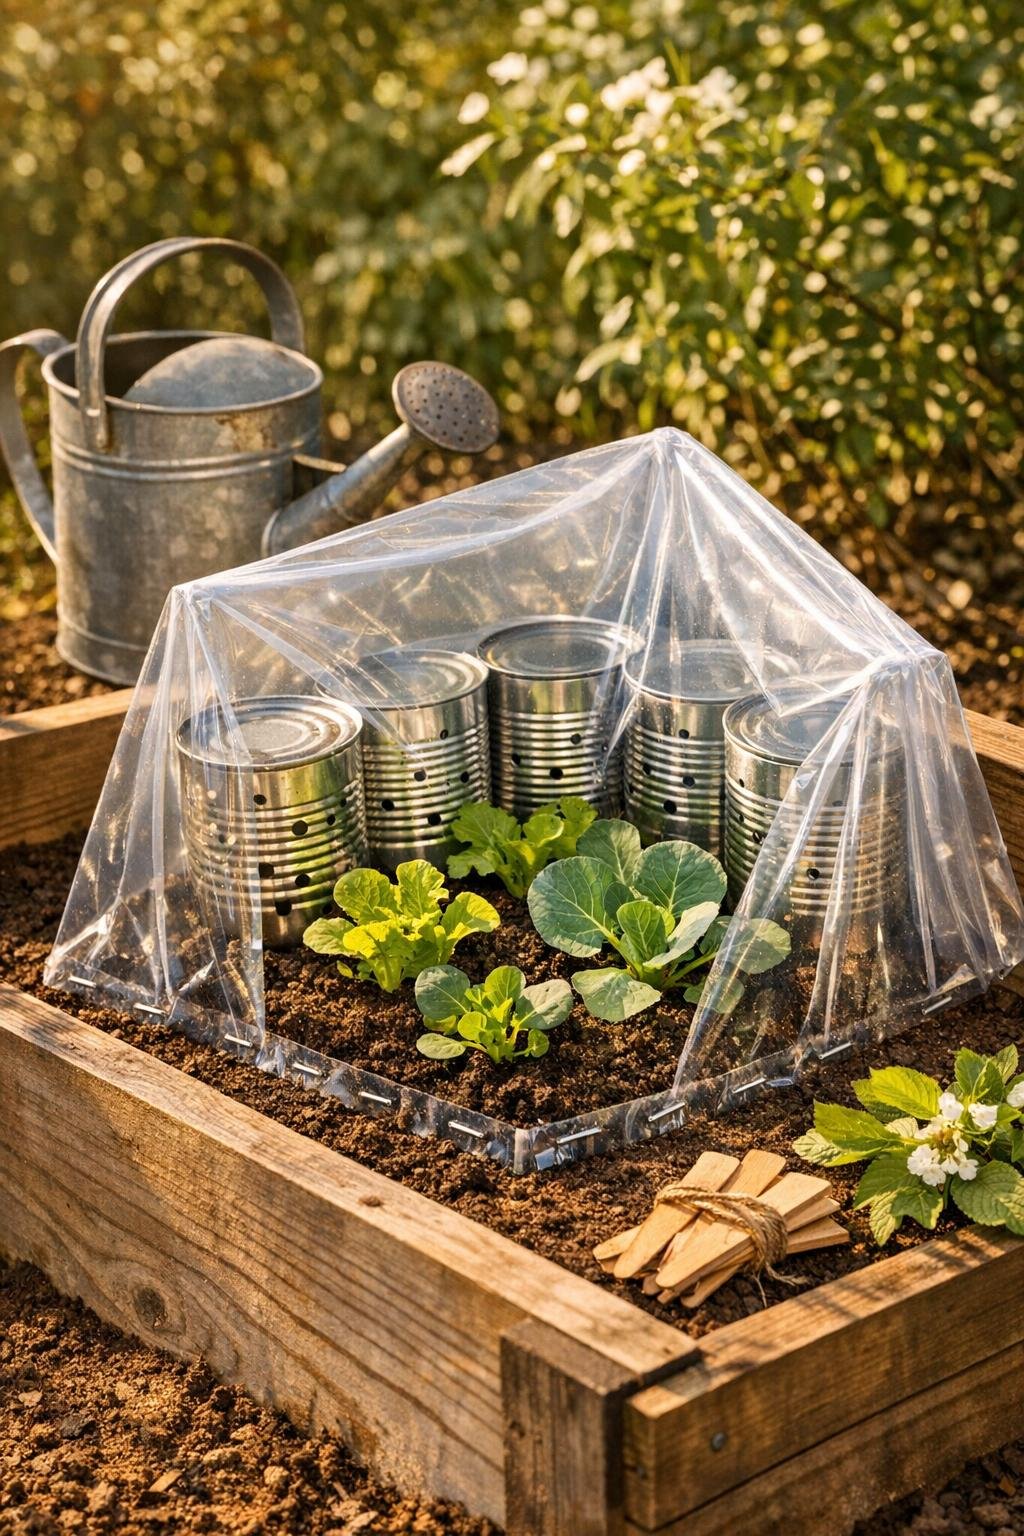
4. Set three cans in each corner of the raised bed, open ends down, making a right-angle cluster with one can along each side and one tucked between them to create a sturdy low support.
5. Repeat with the remaining cans so all four corners of the raised bed have matching support clusters, pressing each can about 1 inch into the soil so it stays put.
6. Cut the bottom seam from the clear lawn and leaf bag, then cut up one side so it opens into one large flat sheet of plastic.
7. Drape the clear plastic across one corner cluster at a time, shaping it into a loose tent that covers the bed corner and reaches 6 to 8 inches beyond the cans on both sides.
8. Secure the plastic edges to the soil with three landscape staples along each side, pulling it snug enough to resist wind but leaving a little height so the plastic does not rest directly on the plants.
9. Use short pieces of clear tape only where needed to pinch and hold the plastic neatly at the top of the corner, making a more tailored shape that sheds dew and light rain.
10. Open one lower edge on mild sunny afternoons for ventilation, then tuck it back down before evening so the corner warmer captures the day’s leftover warmth overnight.
11. Leave the warmers in place during cold snaps, but remove them once nighttime temperatures stay reliably mild so the plants can harden off naturally.
Variations & Tips
For extra-cold nights: Lay a dark stone or brick beside the seedlings under the plastic during the day; it will soak up warmth and slowly release it after sunset.
For taller plants: Add a fourth or fifth can in the same corner cluster to lift the plastic a little higher without changing the basic design.
For windy gardens: Use more landscape staples and mound a little loose soil along the plastic edges so cold drafts do not sneak underneath.
For moisture control: If you notice heavy condensation by midday, lift one side for an hour or two so the seedlings stay protected but not soggy.
Safer handling: Aluminum can edges can be surprisingly sharp, so I always flatten rough spots well and keep gloves on while punching holes and setting the cans in place.
Best use: This works especially well for spring transplants like lettuce, cabbage, kale, and broccoli, or for giving direct-sown seeds a head start in a stubbornly cool bed corner.
Reuse tip: At the end of the chilly spell, rinse the cans, fold the plastic sheet, and tuck everything onto a shed shelf; you can use the same little warmers again next season.