
There’s something so satisfying about turning packaging that would normally head straight to the recycling bin into seasonal décor that actually looks charming. This project takes a pair of plain gray paper egg cartons and transforms them into a playful hanging decoration with lots of personality, and it’s exactly the kind of low-cost craft I love squeezing into a busy afternoon.
If you want a Halloween craft that’s easy, inexpensive, and realistic to finish in one sitting, this is a great one. The cutting is simple once you see the shape, and the finished strand has enough movement and detail to look surprisingly polished on a mantel, entryway mirror, or covered porch.
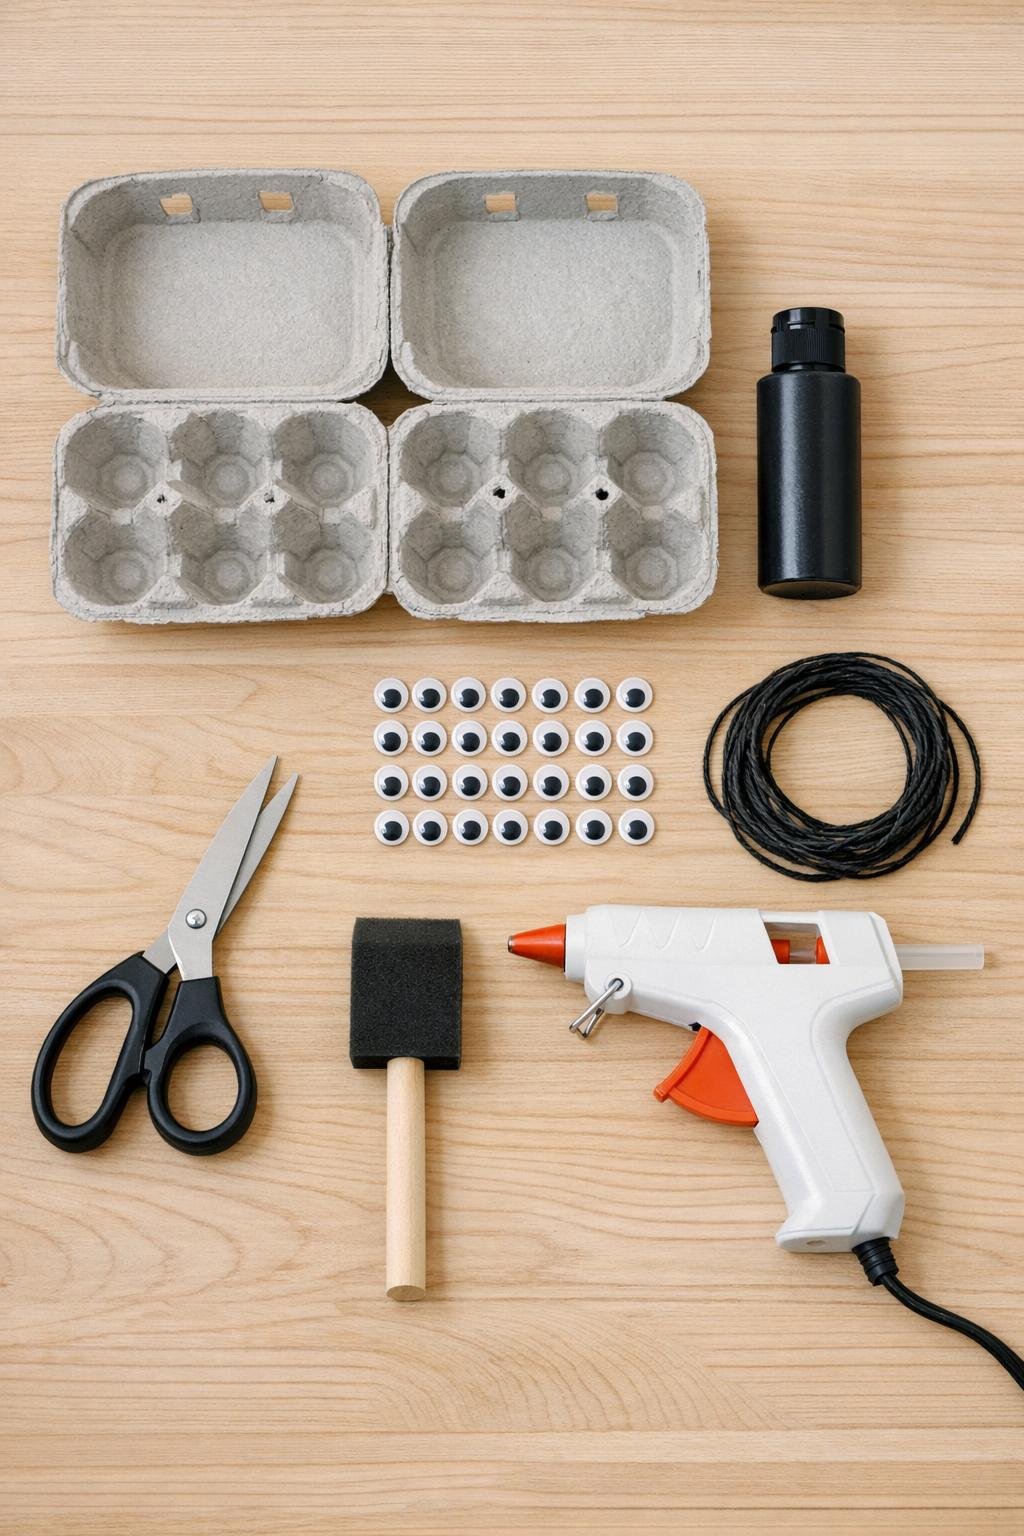
1. Open both egg cartons and cut off the lids and side flaps so you’re left with just the cup sections. Trim away any rough torn edges so the rows are easier to cut cleanly.
2. Cut each carton into strips of three cups, working straight down between the columns. Two 12-egg cartons will give you eight three-cup sections total.
3. Shape one strip into a bat by keeping the middle cup as the body and trimming the two outer cups into wings. Round the top edges slightly, then cut small scallops along the lower edges of both side cups so they read like bat wings.
4. Repeat with the remaining strips, keeping the wing curves similar so the garland looks cohesive when hung together. Don’t worry if each bat is a little different; that handmade variety makes the strand look fuller and more lively.
5. Set the bat shapes on your scrap cardboard or wax paper and paint the top side black with the foam brush, working paint into all the grooves and cut edges. Let the first coat dry completely before deciding it looks patchy, because the carton will soak up a lot of paint at first.
6. Flip the bats over and paint the backs black, then let them dry fully. Add a second coat on both sides so the finish looks rich and even instead of dusty gray peeking through.
7. Once the paint is fully dry, hot glue two googly eyes onto the front of each middle cup near the top. Press each pair in place for a few seconds so they adhere well to the textured surface.
8. Use a skewer or pencil tip to poke one small hole near the top of each wing, placing the holes evenly so the bats will hang level. Make the holes just large enough for the twine to pass through without tearing the carton.
9. Cut the black twine to 8 feet and wrap a small piece of tape around one end if you want an easier threading tip. Thread the bats onto the twine, spacing them about 6 to 8 inches apart, and leave extra length at both ends for hanging.
10. Tie a small knot at each end of the twine for hanging and adjust the bats so they face forward and sit at slightly playful angles. Fluff the strand with your hands and hang it indoors or on a covered porch where it will stay dry.
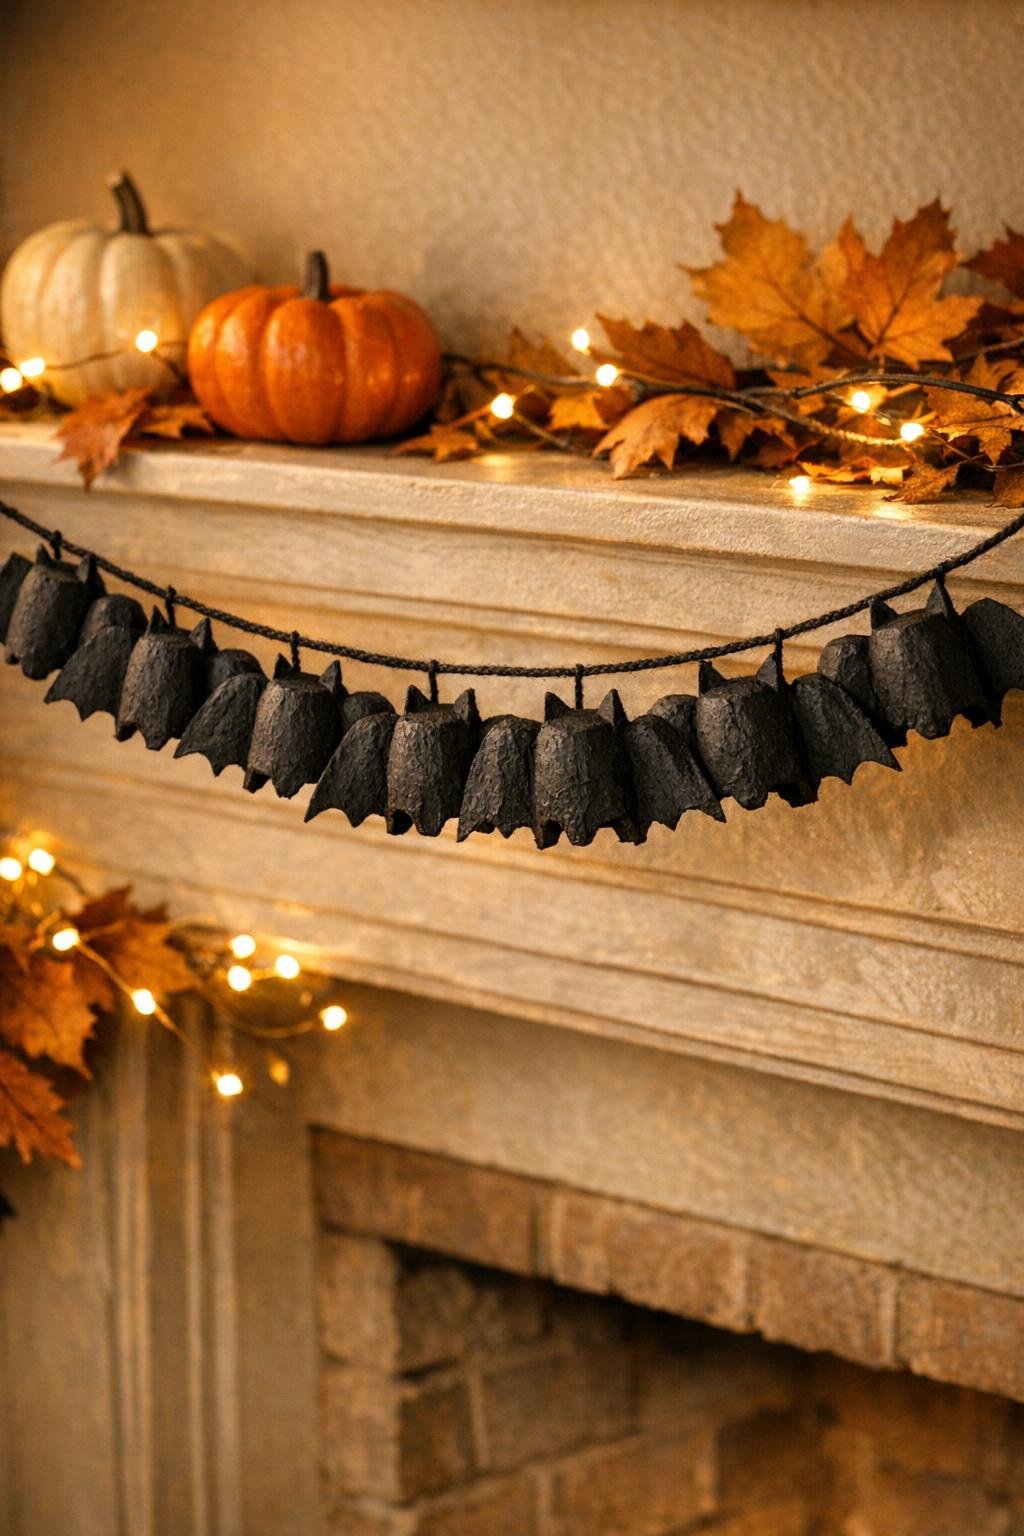
Make it fuller: If you want a more dramatic look, shorten the spacing to 4 to 5 inches between bats so the garland reads denser across a mantel or doorway.
Add a face detail: Tiny white paint dots on the eyes or little painted fangs can add extra personality, but I like to keep those details minimal so the bat shape stays the star.
Use the right carton: This works best with gray paper-pulp cartons only. Foam cartons don’t cut and paint the same way, and the finished shape won’t have that nice matte handmade look.
Plan for two coats: The first time I made these, I thought one coat would be enough, and the carton drank up the paint almost immediately. A second coat makes a huge difference and gives the bats that solid, inky black finish.
Hang smart: These are best indoors or on a covered porch because moisture will soften the carton. If you’re decorating outside under cover, keep them away from direct rain and heavy dampness.
Try an easier paint setup: If you’re short on time, paint all the fronts first, let them dry while you clean up or start dinner, then come back for the backs. That break makes this project feel especially manageable on a weekday.