
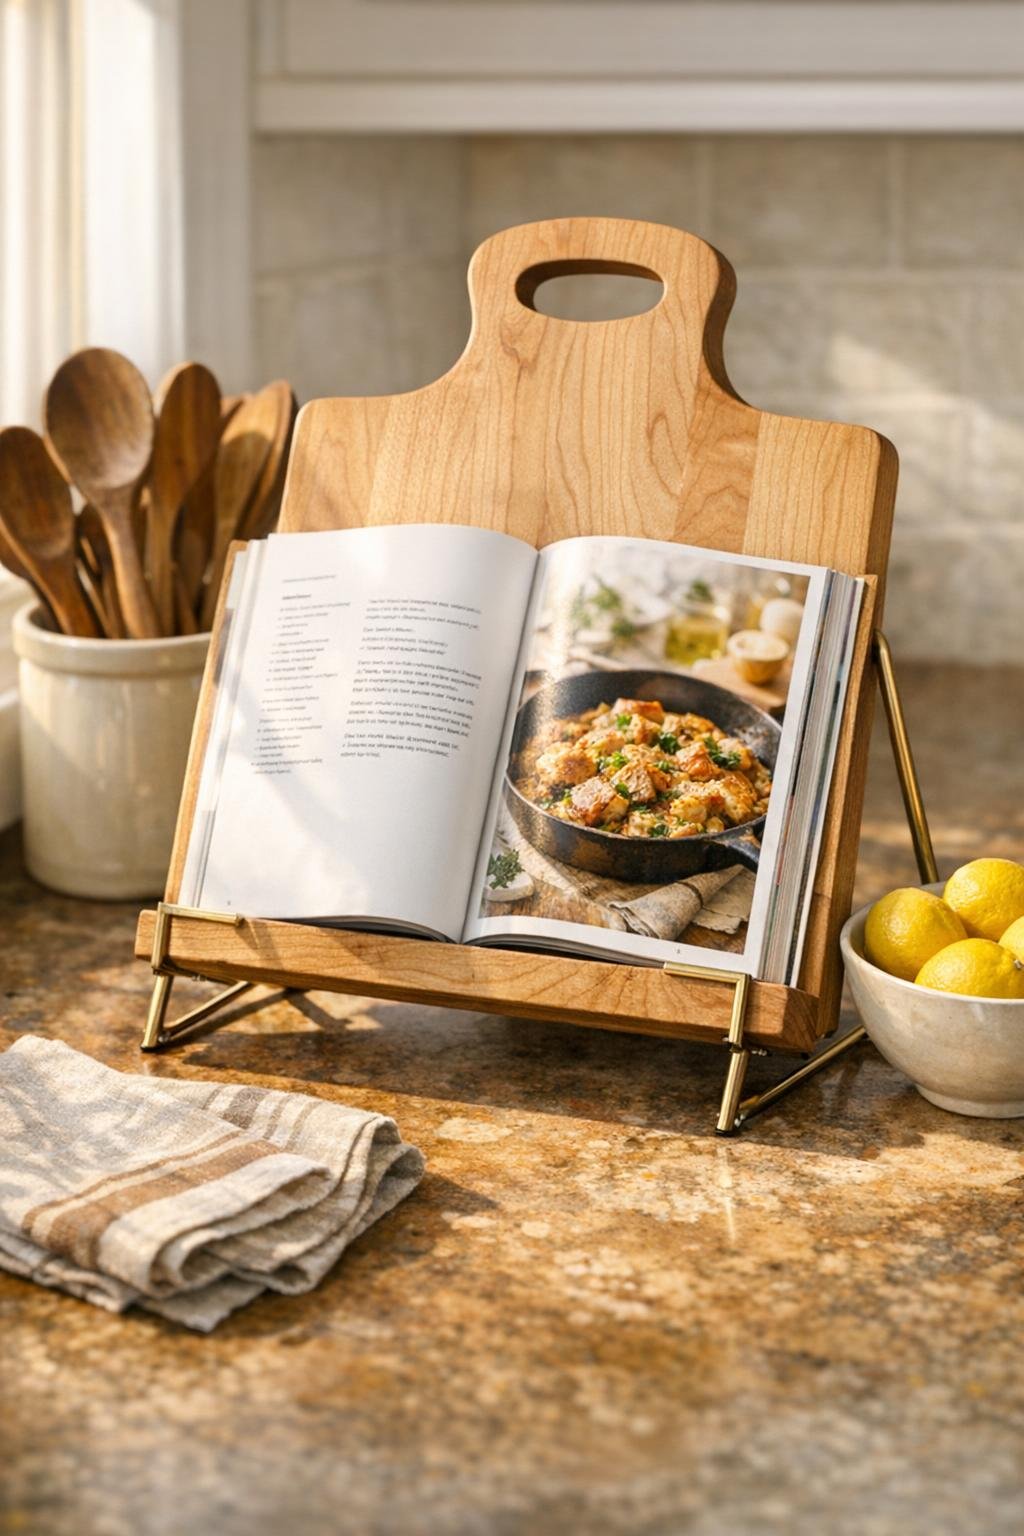
This little kitchen project is one of those ideas I wish I had started using years ago. By sliding a sturdy wooden cutting board into a large brass picture frame easel, you get a beautiful cookbook stand that looks polished on the counter, keeps recipes upright and easy to read, and takes only a few minutes to put together.
I especially love projects like this because they solve a real everyday problem without turning into a whole weekend job. If you cook often, bake with the kids, or just want your kitchen to feel a bit more put together, this is an easy upgrade that looks far more expensive than it is.
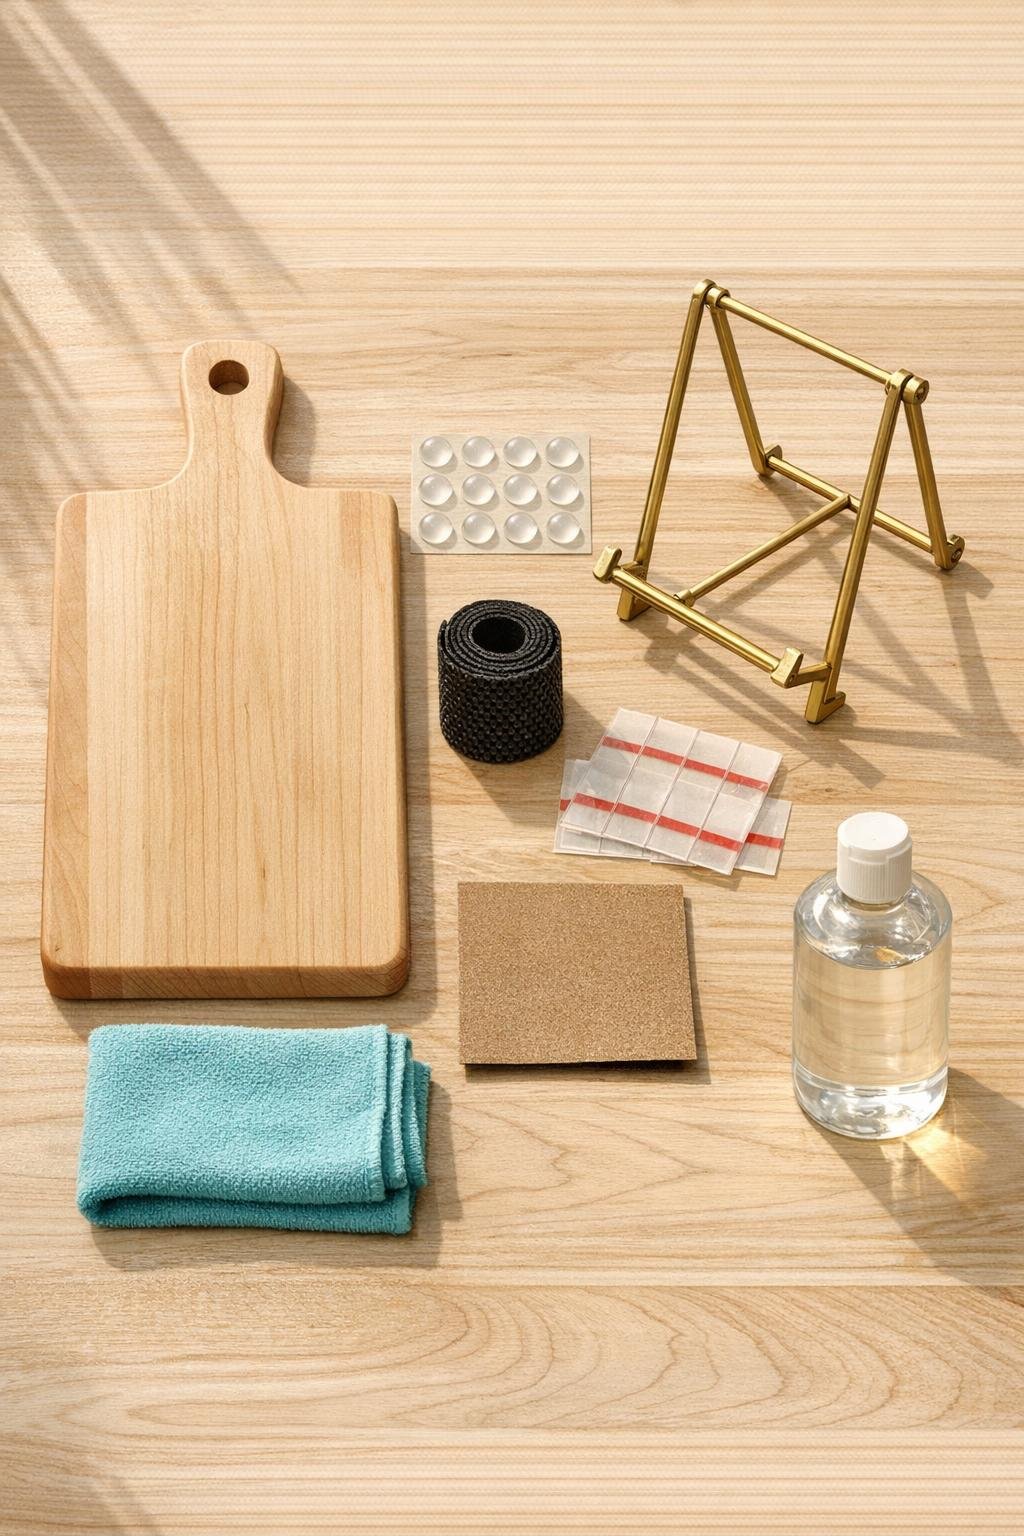
Materials
1 thick maple cutting board, about 10 x 16 inches and 3/4 to 1 inch thick
Instructions
1. Set the brass easel on your counter and test the cutting board in the lower ledge to make sure the board sits securely and leans back at a comfortable reading angle.
2. Wipe the cutting board and easel clean with the microfiber cloth so the finished stand looks tidy and any adhesive will stick properly.
3. Lightly sand any rough spot on the cutting board edges or handle opening with the fine-grit sandpaper, then wipe away the dust.
4. Rub a small amount of mineral oil or board conditioner over the wood, let it soak in for a few minutes, and buff off the extra so the maple grain looks rich and finished.
5. Stick two clear rubber bumpers on the back lower area of the cutting board where it will rest against the easel, and add two more near the bottom front corners if needed to keep it from shifting.
6. Cut the non-slip shelf liner to fit the easel's lower ledge, then attach it with the clear mounting tape so the cutting board has a cushioned, grippy place to sit.
7. Slide the cutting board into the brass easel and center it so the board sits evenly, with the handle opening at the top adding a pretty finished look.
8. Open a cookbook on the stand and check the balance; if the pages make it slide, add one more small rubber bumper or a second layer of shelf liner on the ledge for extra grip.
9. Place the stand where you usually prep meals, keeping it close enough to read easily but far enough from the stove and sink to avoid splatters and steam.
Variations & Tips
For bigger cookbooks: Choose a heavier easel with a wider base and a deeper bottom lip if you use large hardback cookbooks often. Those chunky family cookbooks need a little extra support.
For tablet recipes: This stand also works nicely for a tablet if you add an extra rubber bumper or a slightly taller strip of non-slip liner along the ledge to keep the device from sliding.
Wood choice: Maple gives a classic kitchen look, but walnut or acacia are lovely too. I tend to pick a board that already matches my cabinets or utensils so it feels intentional.
Keep it easy to clean: Since this sits near food prep, wipe the board and easel regularly with a barely damp cloth and dry right away. I would skip soaking or spraying harsh cleaners directly onto the brass.
Make it gift-worthy: If you are giving this as a housewarming or wedding gift, tuck a favorite family recipe card into a cookbook and tie a soft ribbon around the closed stand. It feels thoughtful without making the project any harder.
For busy family kitchens: If little hands are often helping in the kitchen like they were in mine when my kids were younger, place the stand at the back corner of the counter so recipe pages stay cleaner and the whole setup is less likely to get bumped.