
There are a few spots in a kitchen that seem determined to fall into chaos, and pan lids are one of them. I have spent more years than I care to count wrestling a clattery pile of lids from the back of a lower cabinet, usually right when supper was already on the stove. This little trick turns a simple bamboo dish drying rack on its side and makes it work hard as a tidy pan lid organizer, and it is one of those plain, sensible ideas that feels like something our mothers or grandmothers would have done without making a fuss about it.
What I like most about this project is that it is quick, inexpensive, and truly useful for an everyday cook. If you have a deep lower cabinet and a handful of skillet, saucepan, or Dutch oven lids that like to slide around, this gives each one a proper place without any complicated building.
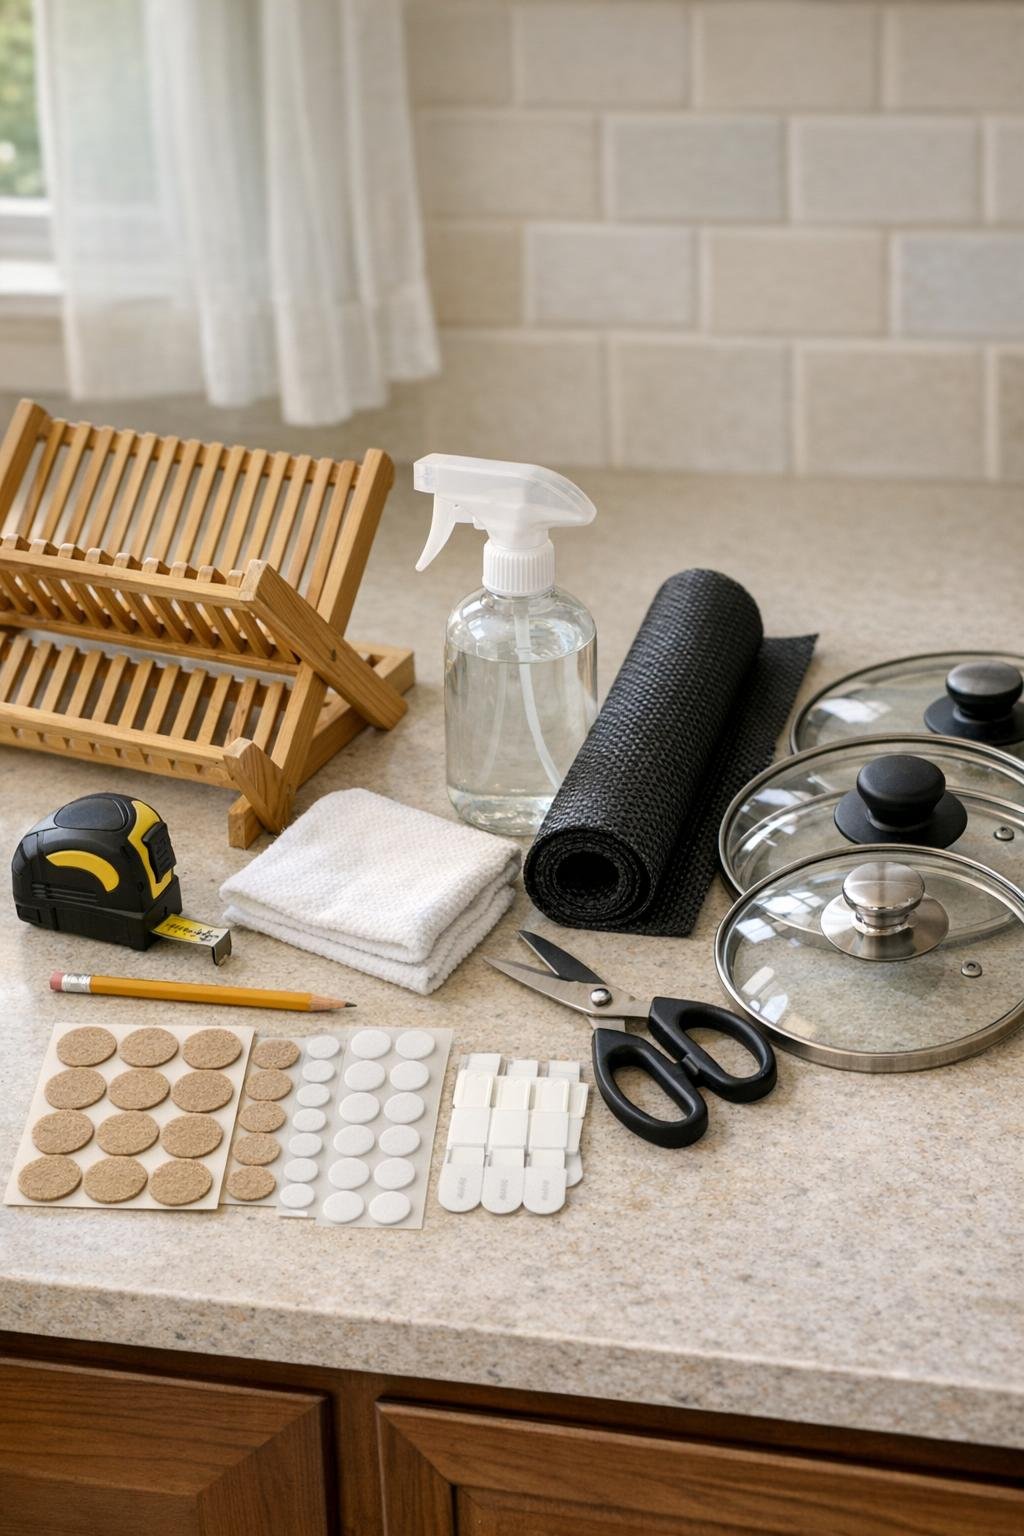
Materials
1 small bamboo dish drying rack, about 12 to 14 inches long x 5 to 6 inches wide x 4 to 5 inches tall
Instructions
1. Empty the deep lower cabinet completely and wipe out the base, sides, and back so the rack will sit on a clean, grease-free surface.
2. Measure the cabinet interior width, depth, and height, then measure your bamboo drying rack to be sure it fits sideways with enough room for the lids to slide in and out easily.
3. Cut a piece of non-slip cabinet liner to fit the section of cabinet floor where the rack will sit, making it slightly larger than the rack footprint for better grip.
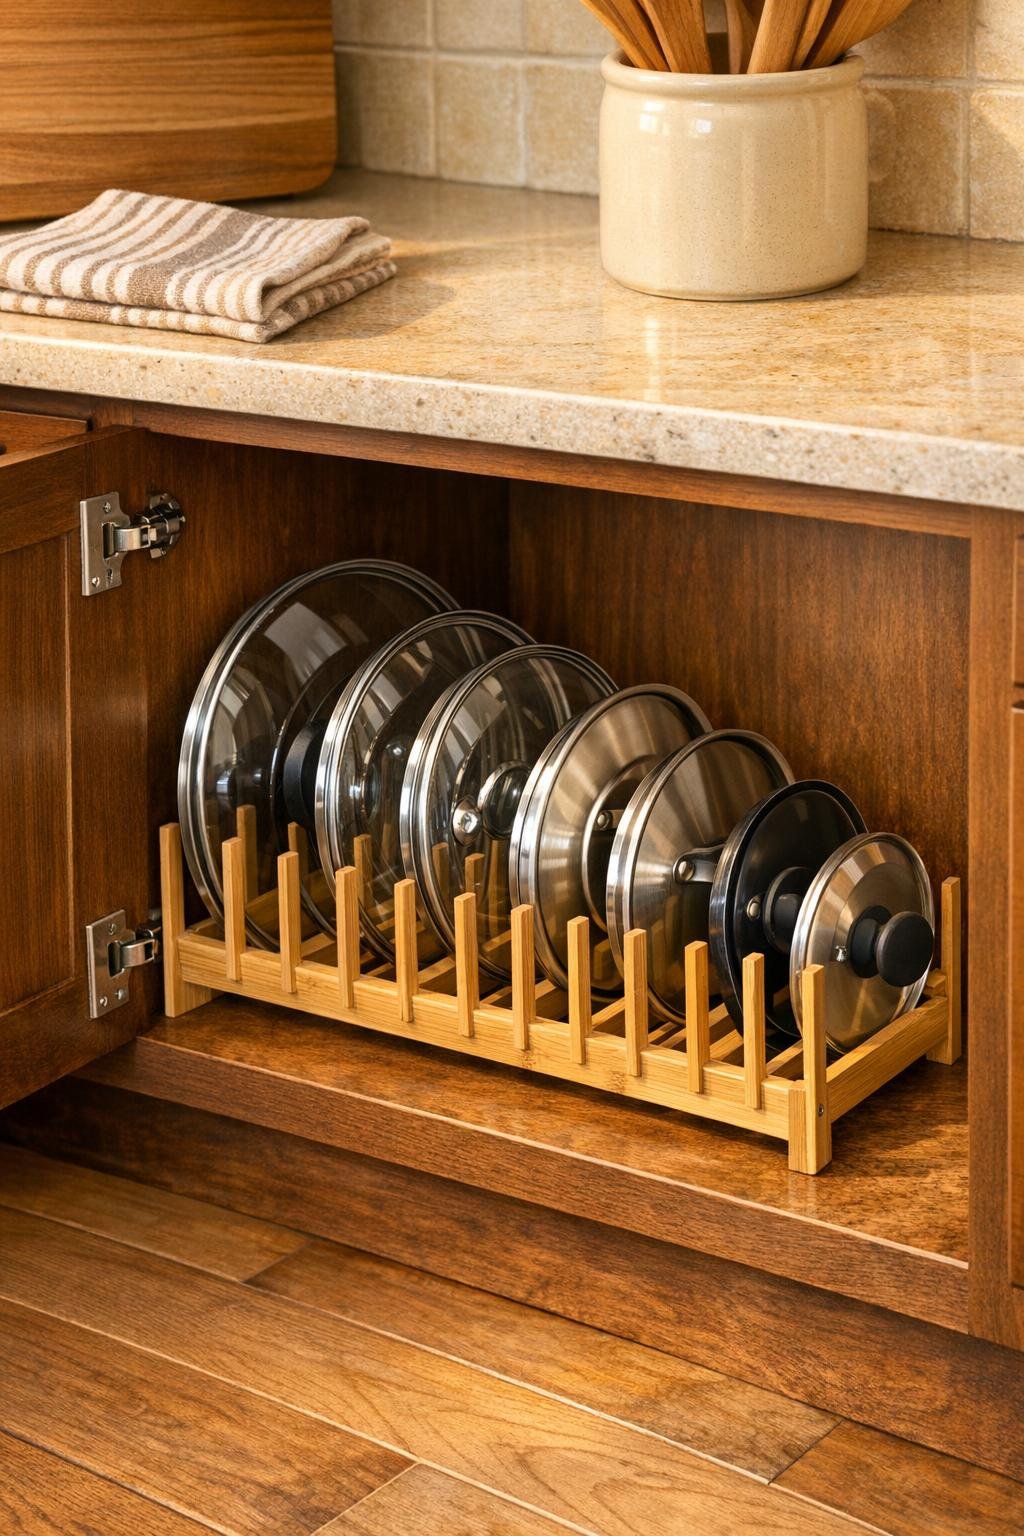
4. Set the liner inside the cabinet and press it flat, then place the bamboo drying rack sideways so the vertical plate slots now run front to back like lid dividers.
5. Test a few lids in the slots, starting with your largest lids at the back and medium and smaller lids toward the front, adjusting the rack angle so handles do not bump the cabinet frame.
6. Remove the lids and add adhesive felt pads under the rack corners if the bamboo feels rough or if you want a softer, quieter contact point against the cabinet floor.
7. If the rack tends to shift, attach 2 to 4 removable mounting strips or gel adhesive dots under the rack base, then press it firmly back onto the liner so it stays put but can still be removed later.
8. Load the lids back into the rack, alternating handle directions when needed so you can fit more pieces neatly without crowding.
9. Group lids by size or by the pans you use most often, keeping everyday skillet and saucepan lids near the cabinet opening for the easiest reach.
10. Slide a baking sheet, splatter screen, or thin cutting board into any extra end space if your cabinet is wide enough, leaving the lid section easy to see and grab.
11. Give each lid a quick pull test to make sure nothing catches, then close the cabinet door and enjoy the rare pleasure of a cabinet that stays orderly even during a busy week of cooking.
Variations & Tips
For extra-deep cabinets: If your cabinet is especially deep, place the rack a few inches back from the front edge so lid handles do not jut out, then use the front space for flat trivets or oven mitts.
For heavy glass lids: Put the heaviest lids in every other slot rather than every slot to give them a little more breathing room and make them easier to lift out.
For a neater look: Arrange lids from largest in back to smallest in front. It sounds simple, but that stepped look makes the whole cabinet easier on the eyes and easier to use.
For wider cabinets: Use two matching small bamboo drying racks side by side to create a generous storage station for pan lids, baking sheets, and splatter guards.
To protect the cabinet: Felt pads and liner are worth the minute it takes to add them. They cut down on rattling and help keep both the cabinet floor and the rack in good condition.
My best practical tip: Do not cram every single lid you own into one rack. Leave just a little wiggle room between pieces, and the organizer will stay pleasant to use instead of turning into another crowded corner.