
There’s something especially satisfying about taking a plain little dollar-store find and pushing it just far enough that folks have to do a double take. This project starts with those lightweight plastic pumpkins many of us have tucked in a holiday bin somewhere, and with one messy, simple step, turns them into something far moodier and more dramatic for a porch, mantel, or Halloween table.
I’ve always had a soft spot for decorations that look like they’ve been around for years, the way old harvest pieces in country store windows used to have that weathered, eerie charm. If you like Halloween decor with character but don’t want a fussy project, this one is easy to make, wonderfully forgiving, and a good excuse to put on gloves and have a little fun with texture and paint.
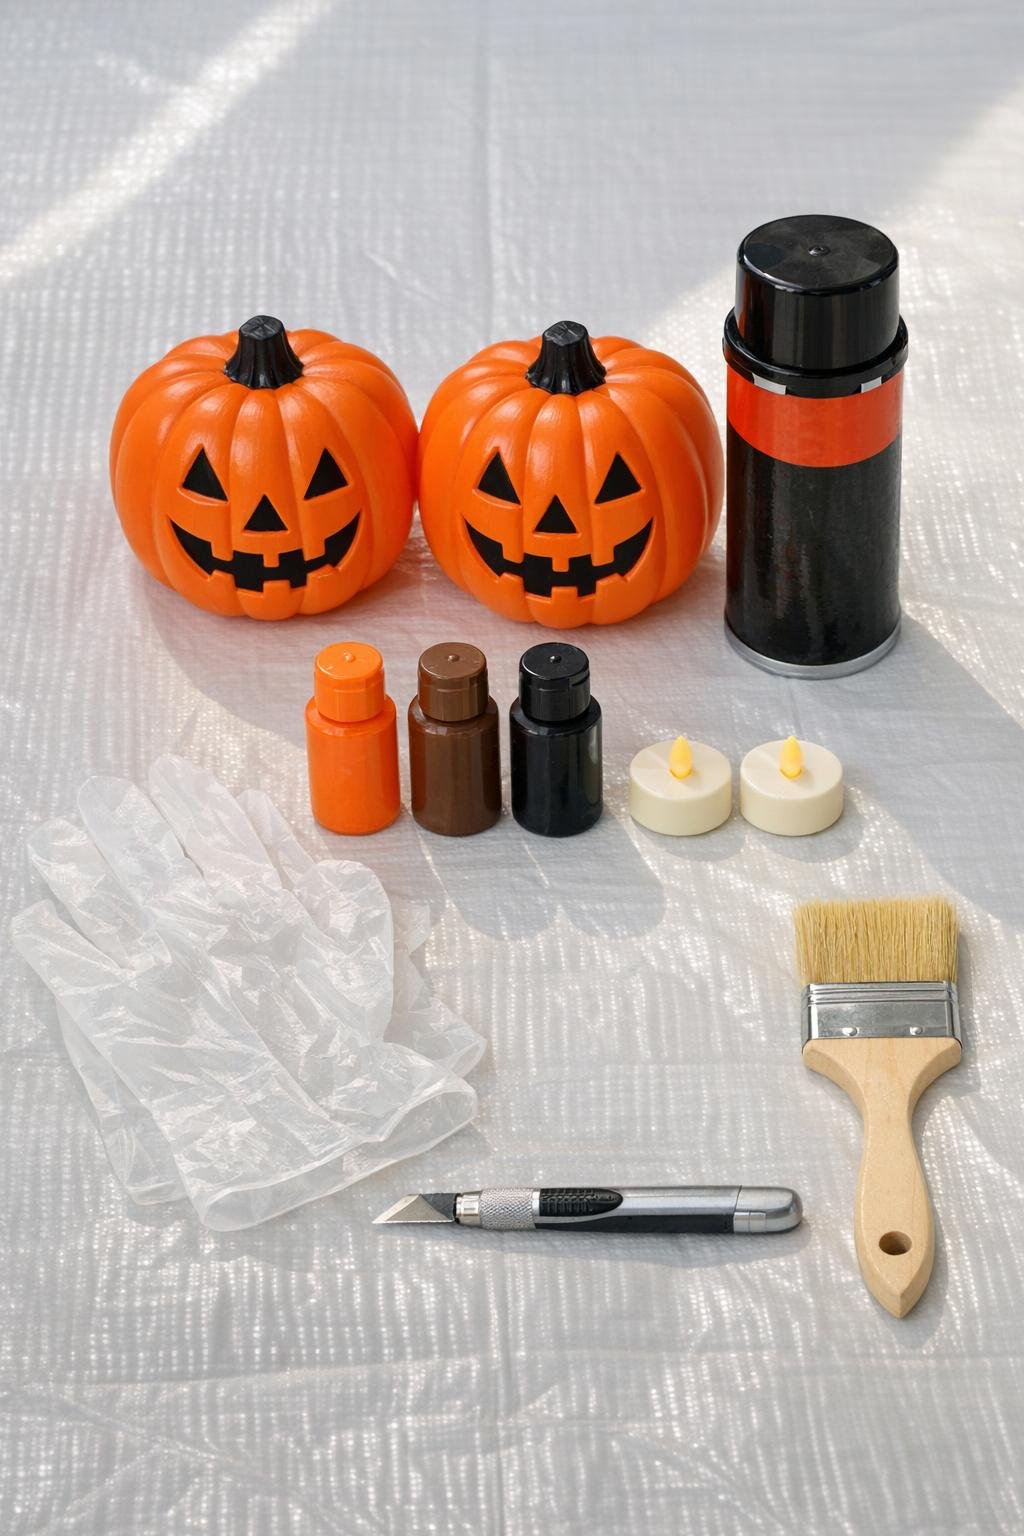
Materials
Instructions
1. Cover your work surface with a tarp or trash bag, then set the plastic pumpkins upright and make sure they’re clean and dry so the foam will cling well.
2. Put on disposable gloves and shake the expanding foam can according to the can directions, usually for about 30 to 60 seconds.
3. Spray a thick bead of foam over the top of the first pumpkin and let it run down the sides in uneven drips, leaving some orange plastic visible so the pumpkin shape still shows through.
4. Repeat on the second pumpkin, adding extra foam around the stem, the face openings, and a few spots near the bottom for a sagging, melted look.
5. Let the foam expand and harden completely until it feels firm, following the can directions; I usually give it several hours so I’m not fighting sticky spots.
6. Use a craft knife to trim away any long spikes or awkward blobs, shaping the foam into soft rotten ridges, collapsed edges, and uneven folds without cutting off too much.
7. Brush orange acrylic paint over the exposed foam first, working it into every crevice so the new texture blends back into the pumpkin instead of looking like separate pieces.
8. While the orange paint is still slightly damp, dry-brush brown over the deeper folds and around the stem, then add black sparingly into cracks, around the eyes and mouth, and along the lowest drips to create a rotten, shadowy finish.
9. Let the paint dry fully, then check the balance of the color and add one more light pass of black or brown anywhere you want the pumpkin to look deeper, dirtier, or more sunken.
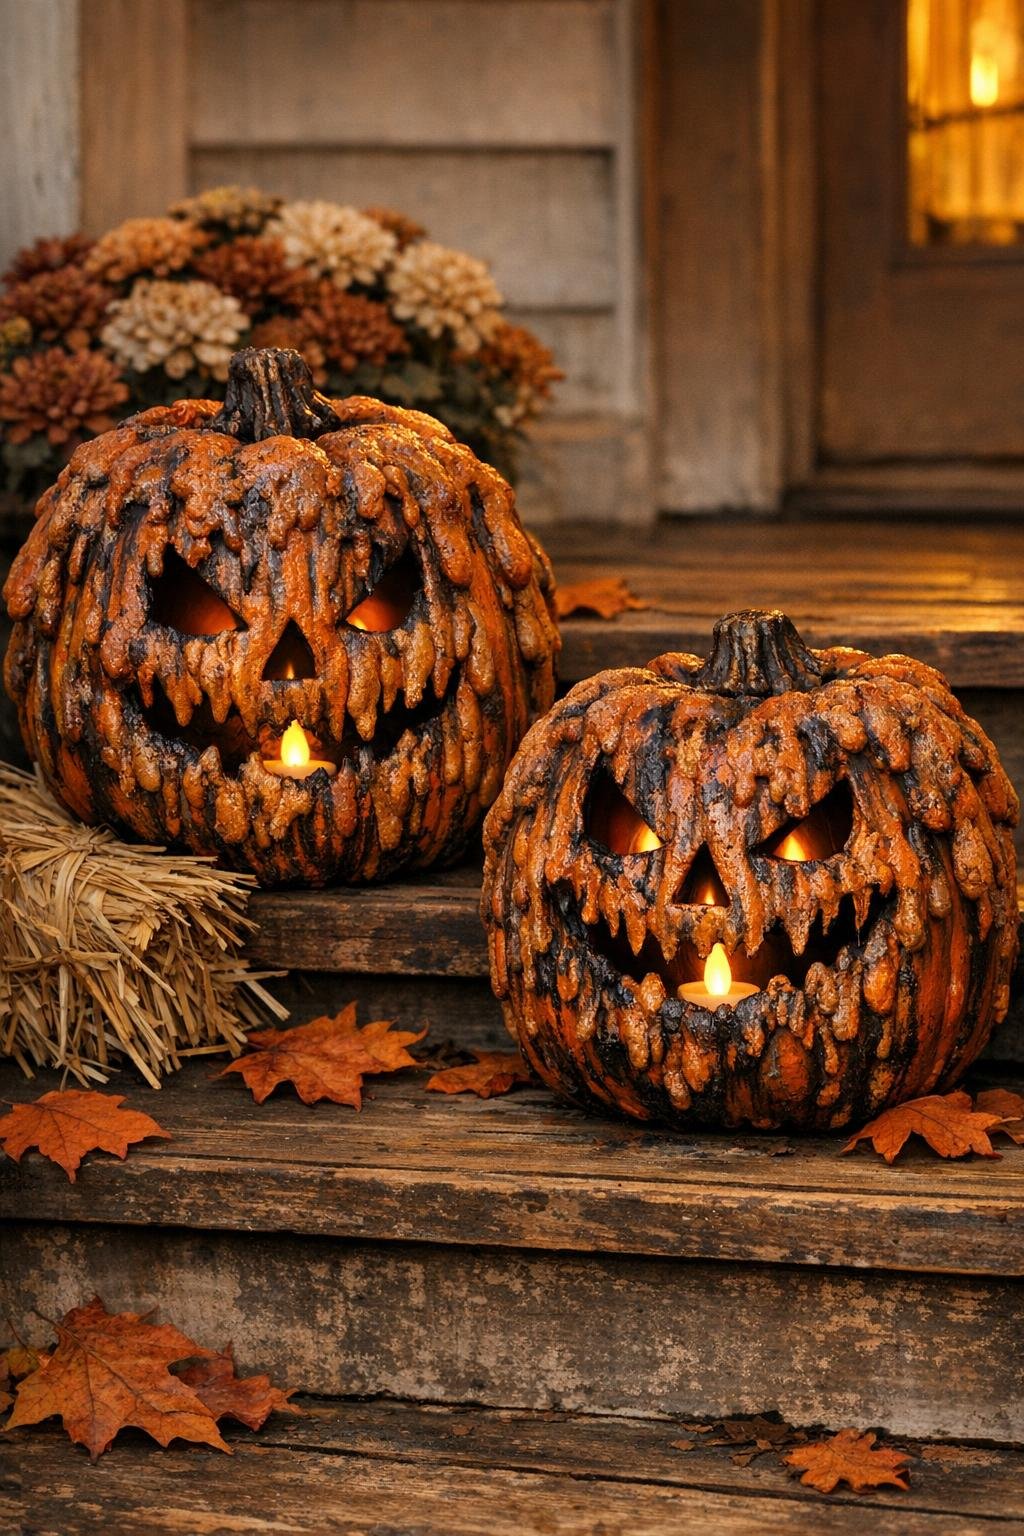
10. Place one battery tea light inside each pumpkin so the face glows through the openings and the shadows catch all that lumpy texture.
11. Arrange the pumpkins together on a porch step, entry table, or mantel with enough space around them for the melted sides and dripping shapes to be seen.
Variations & Tips
For a darker aged look: Use a heavier dry-brush of black around the carved face and under the foam drips, then soften it with a little orange over the top so the shading looks natural instead of flat.
If your foam expands too much: Don’t worry a bit. Once it cures, you can trim it back with the craft knife, and honestly, those oddball lumps often end up looking more convincingly rotten than anything you could plan.
For the best texture: Apply the foam in thick wandering lines rather than trying to coat the whole pumpkin. Leaving patches of the original plastic showing makes the final piece look fuller and more believable.
Display tip: These look strongest grouped in pairs or trios with a little height variation, so if you make more later, stagger them on steps or crates for a bigger haunted-harvest effect.
Indoor decorating note: Stick with battery tea lights only. They give you that cozy flicker without heat, and they’re much kinder to plastic and paint.
Painting shortcut: If you’re in a hurry, cover everything with orange first and focus your brown and black only in the low spots. That quick layering still gives plenty of depth.