
There’s something deeply satisfying about turning a pile of broken flowerpots into a garden helper that looks downright charming. This little pre-frost root insulator is one of those practical country ideas I love most: it uses baked terracotta shards and one humble yard staple to protect the crown and root zone of perennial plants before the first hard freeze, while still looking tidy enough that folks think you bought it at a garden center.
Out where I live, we learn not to waste a sound thing, even when it’s broken. I’ve used this method around mums, coral bells, salvias, and young peonies when the weather turns sharp. It’s especially good for gardeners who want a quick, sturdy, natural-looking cover that helps buffer temperature swings without fussing over fussy supplies.
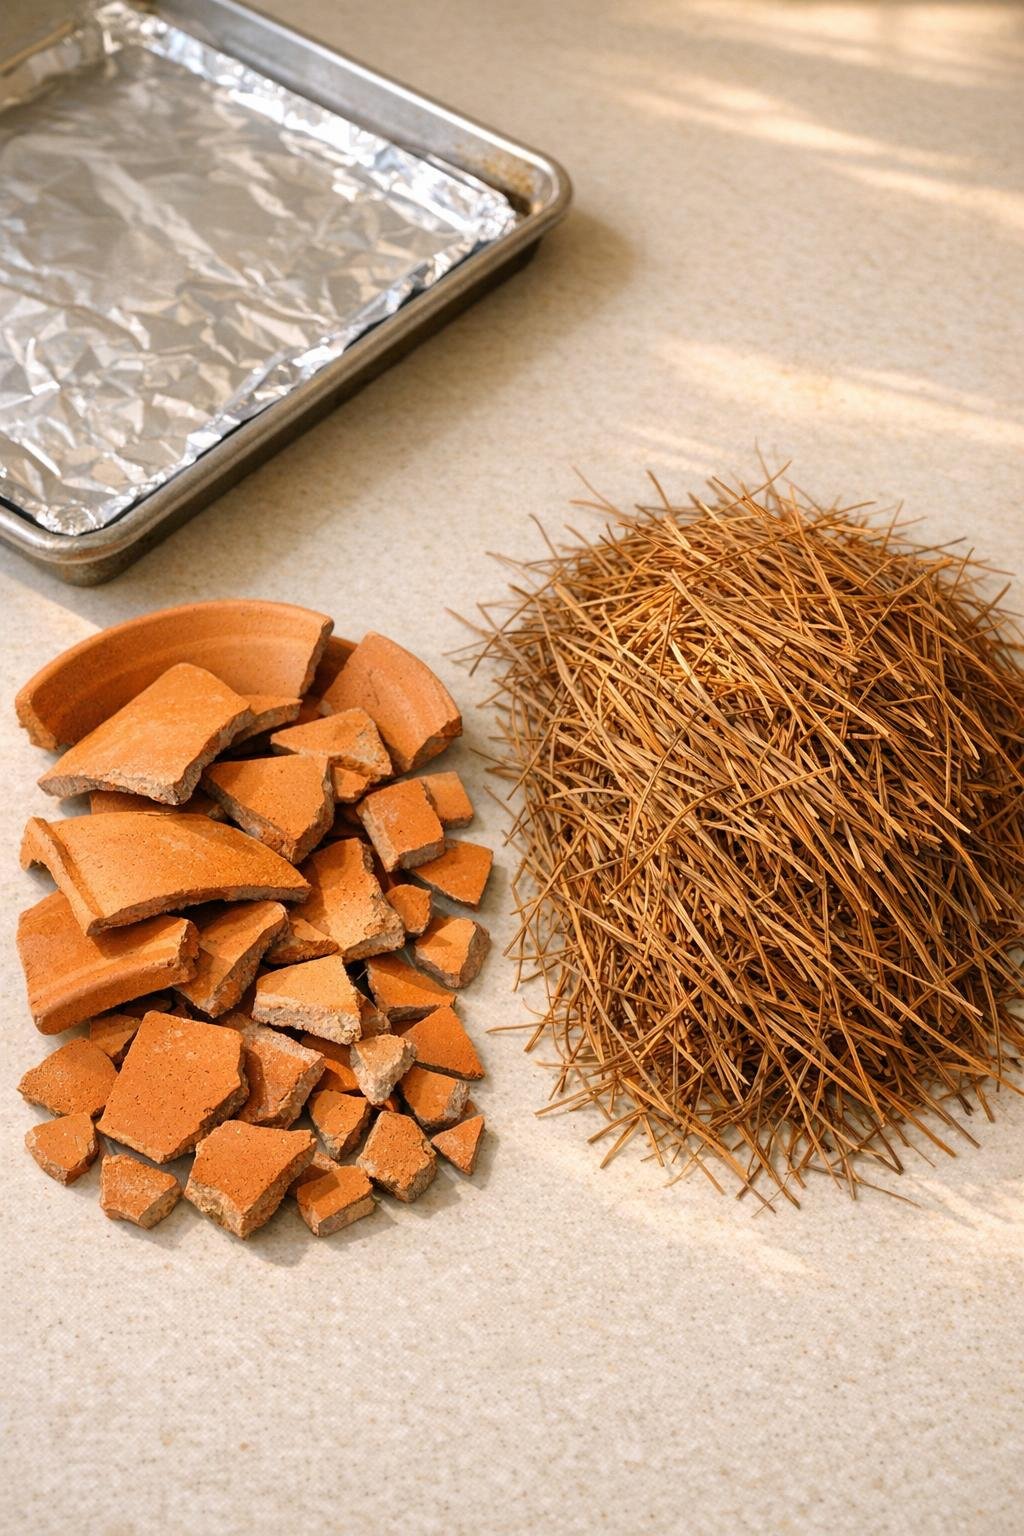
Materials
Instructions
1. Brush loose soil off the broken terracotta pieces, then spread them in a single layer on a foil-lined baking sheet. Bake at 250°F for 20 to 25 minutes to dry them thoroughly, then let them cool completely.
2. Pull any weeds from around your perennial and water the bed lightly if the soil is bone dry; damp soil holds steadier warmth than powder-dry ground. Keep the plant crown uncovered and visible.
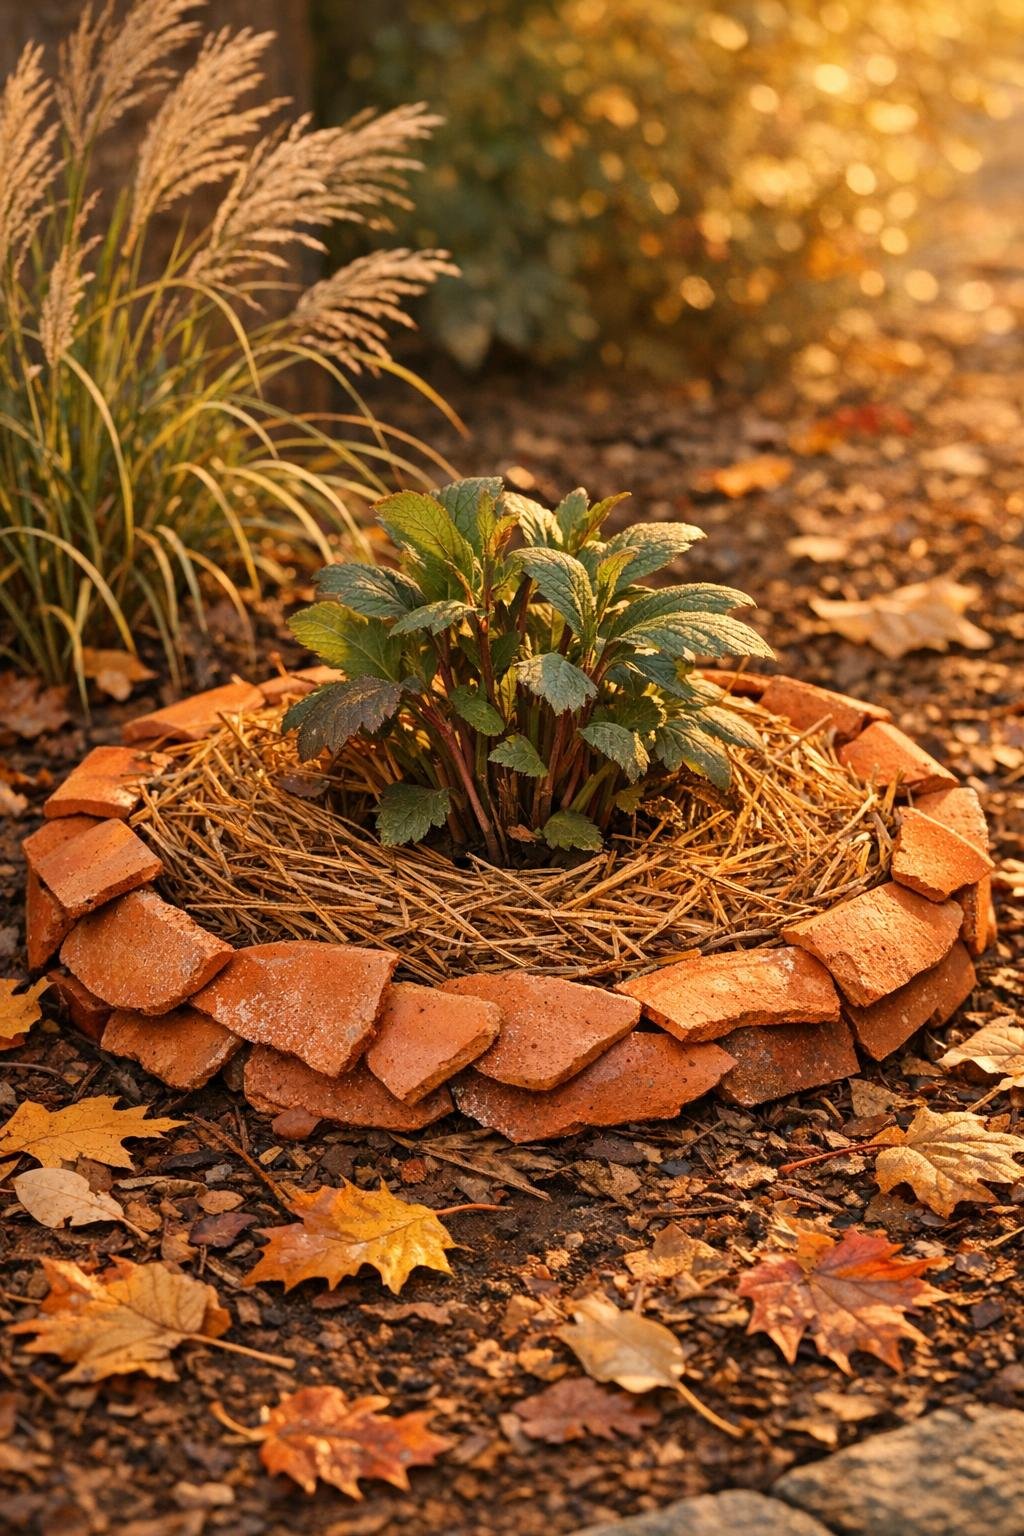
3. Fluff the pine straw with your hands and make a thick ring around the plant, 3 to 4 inches deep and about 12 to 18 inches wide, depending on the size of the perennial. Leave a 2- to 3-inch open space right around the crown so moisture does not sit against the stem base.
4. Press the largest terracotta shards upright into the outer edge of the pine straw ring, overlapping them slightly like little roof tiles. Circle the entire plant so the shards create a low retaining wall that helps hold the straw in place.
5. Tuck medium and small shards into gaps, angling them inward just a bit so the ring looks full and finished. Build the wall to about 4 to 6 inches high for a noticeably protective collar.
6. Add another light handful or two of pine straw inside the terracotta ring if needed, then settle everything gently with your hands so the surface looks mounded and even. The finished insulator should look generous, not skimpy, with the straw fully contained and the crown still breathing.
7. Check the ring after the first windy day and after your first light frost, pressing any shifted shards back into place. Leave the insulator on through the frost cycle, then lift away some straw in early spring as new growth starts moving.
Variations & Tips
Best plants for this: I like this most for shallow-rooted or crown-sensitive perennials that appreciate protection from repeated freeze-thaw cycles, such as coral bells, mums, dianthus, and newly planted divisions.
If you do not have pine straw: Clean, dry chopped leaves can work in a pinch, but pine straw sheds water well and settles less, so it gives a tidier, longer-lasting ring.
For larger plants: Make two concentric rings of shards with extra pine straw packed between them. That fuller build looks handsome in the bed and gives broader insulation over the root zone.
On baking the shards: The baking step helps dry the clay and knocks back lingering dampness, which is especially useful if the pots sat outside in wet weather. Let them cool fully before handling so they stay easy and safe to place.
Keep the crown open: This is the one place not to overdo it. I always leave breathing room at the center, because even a good insulator can cause rot if mulch is packed against the plant itself.
Make it look store-bought: Use the biggest shards on the outside and keep the top line of the ring fairly even. That little bit of order is what gives the whole thing that “where did you get that?” look.