
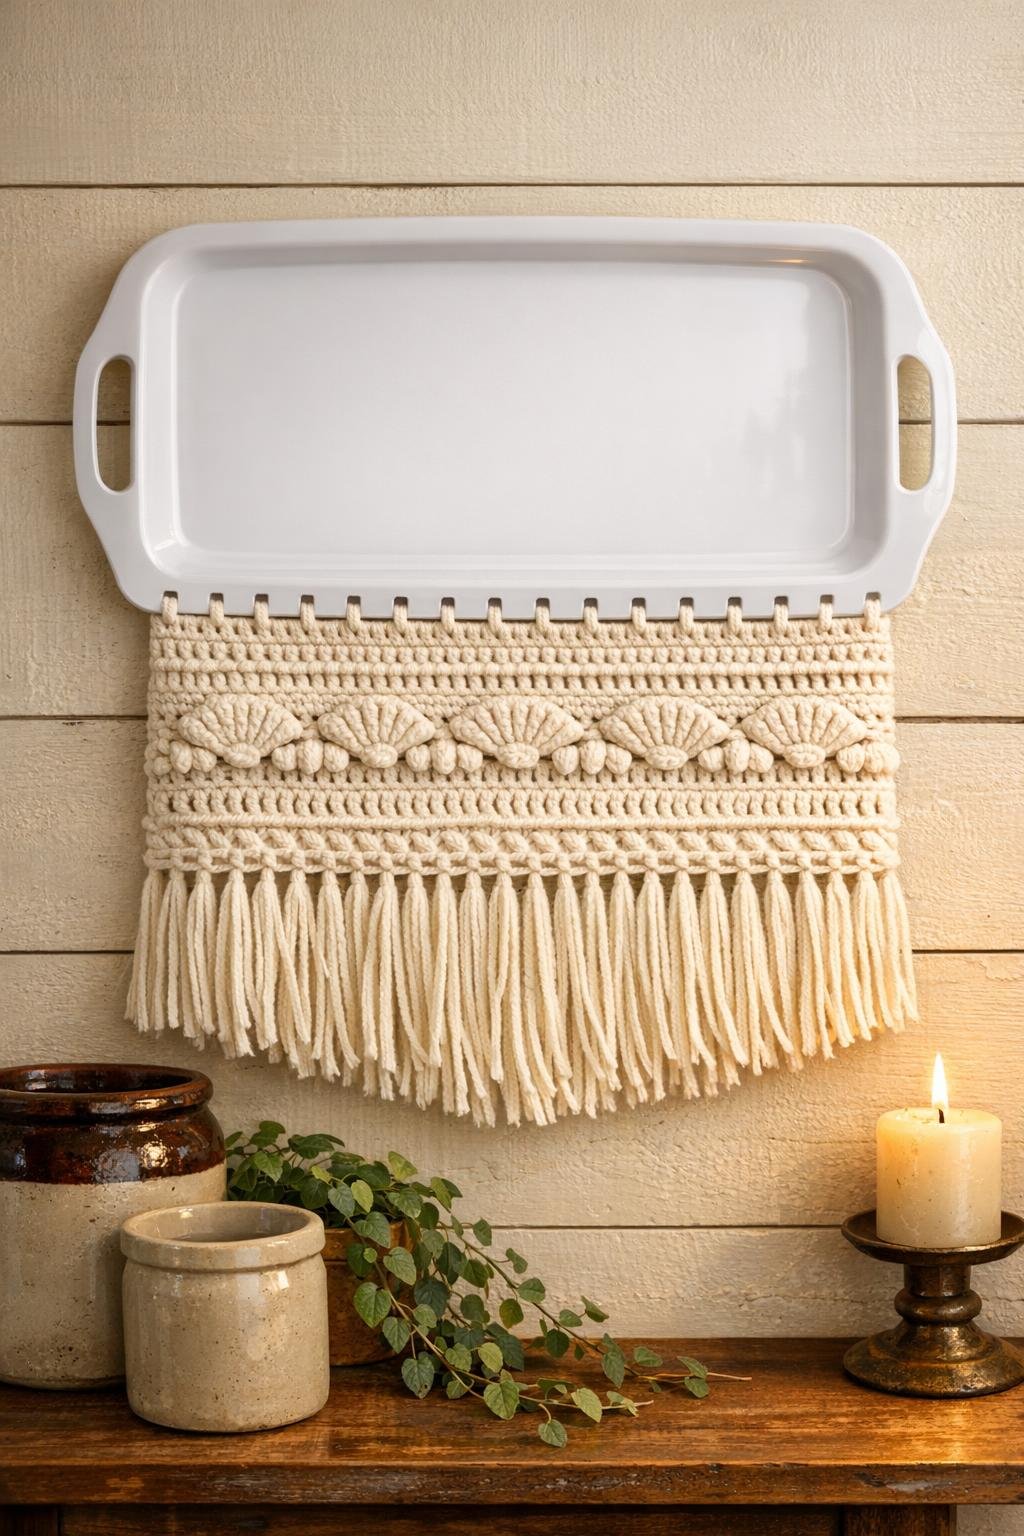
There’s something awfully satisfying about turning a plain little dollar store find into something that looks thoughtful and handmade, and this crochet wall hanging does exactly that. We’re taking a white plastic serving tray, cutting 12 evenly spaced slots into it, and using those openings as the base for a soft cotton yarn design that becomes part wall art, part texture piece, and part conversation starter.
I love a project like this because it doesn’t ask you to be fancy, only a little patient. If you know a few basic crochet stitches, you can make it; and even if you’re still learning, this is a forgiving sort of craft, the kind I would have happily worked on at the kitchen table with a cup of coffee nearby. The tray stays clearly visible, which is what makes the finished piece so charming—it still reads as that humble serving tray, just dressed up into something nobody expects.
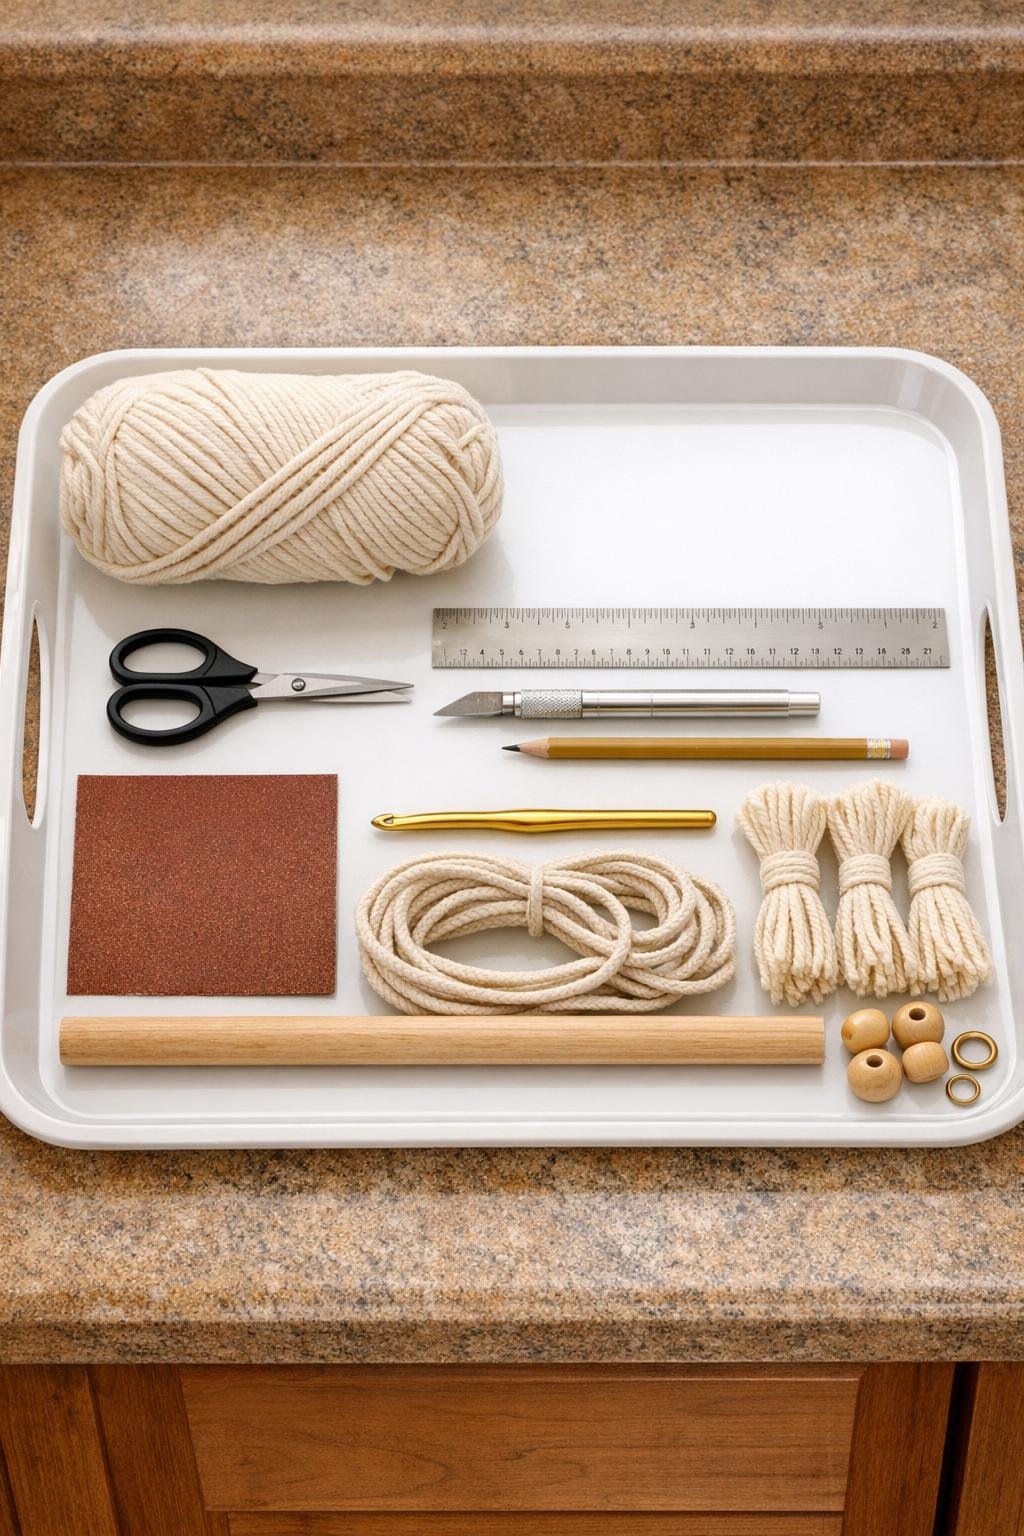
Materials
1 white plastic dollar store serving tray, approximately 10 x 14 inches
Instructions
1. Wash and dry the white plastic tray, then decide which short end will be the top and which long edge will become the crocheted hanging area. A clean tray is easier to mark and gives the finished piece a neater look.
2. Use the ruler to mark 12 evenly spaced slot positions along the lower long edge of the tray, centering them across the width. Make each slot about 1/4 inch wide and 1/2 inch deep so the yarn has room to sit without crowding.
3. Set the tray on the cutting mat and carefully cut out all 12 slots with the craft knife, working slowly so the edges stay as straight as possible. Smooth each opening with fine sandpaper so the cotton yarn won’t snag while you crochet.
4. Make a slip knot and pull the yarn through the far left slot from back to front, then single crochet evenly across the 12 slots to create your foundation row. Work 2 single crochet stitches into each slot so you end with 24 stitches total.
5. Chain 1, turn the tray so the crocheted edge faces you comfortably, and single crochet across for the second row. This row fills in the base and helps the yarn sit snugly against the plastic edge.
6. Begin shaping the wall hanging by working Row 3 as 1 single crochet in the first stitch, then a repeating pattern of 1 half double crochet, 1 double crochet, 1 double crochet, 1 half double crochet, and 1 single crochet across the row. This gentle rise and fall gives the hanging a soft scalloped look without making it fussy.
7. Chain 1 and work Row 4 in decorative arches by making 1 single crochet, chain 3, skip 1 stitch, then repeat across, ending with 1 single crochet. These little openings lighten the design and make the next row look fuller.
8. Chain 3 and fill each chain-3 arch with 4 double crochet stitches, anchoring with a single crochet in each solid stitch between arches. By the end of this row, the hanging should look fuller, layered, and nicely draped beneath the tray.
9. If you want a slightly deeper piece, add one more row of shell detail by working 5 double crochet stitches into every other arch and a single crochet into the arch between. Keep the stitches relaxed so the hanging drapes instead of puckering.
10. Fasten off and weave the yarn tail back through nearby stitches, then trim it neatly. Cut 12 strands of yarn, fold them in half, and add them as small fringe knots across the lower edge wherever the piece needs a little more softness and balance.
11. Tie the cotton cord securely to both tray handles or to two drilled or existing upper openings if your tray style has them, then knot the cord at the top for hanging. Slide the wooden dowel through the upper handle area or lash it neatly across the back if you want the tray to hang straighter and look more finished.
12. Hang the piece and make small adjustments with your fingers so the crochet arches, shells, and fringe spread evenly. Add a tiny dot of glue to the cord knots or fringe knots if you’d like extra security.
Variations & Tips
Use a different stitch pattern: If you prefer a simpler look, work all single crochet and half double crochet rows; if you like more texture, alternate shell rows with open chain rows.
Try a soft color change: Cream is lovely and classic, but this also looks beautiful in oatmeal, pale sage, dusty blue, or two neutral shades worked in stripes.
Mind the slot edges: Plastic can be rough after cutting, and that’s the quickest way to fray cotton yarn. I always take an extra minute with sandpaper, because it saves a whole lot of muttering later.
Make it fuller, not longer: If your tray is small, add richness with one extra shell row and a denser fringe instead of too many rows of length. That keeps the proportions handsome and makes the piece look intentional.
Add a finished touch: A wrapped top cord, a small wooden bead on each hanging-cord end, or a neat line of fringe trimming makes this feel polished without spoiling its homemade sweetness.
Hang it in the right spot: This piece is happiest where texture can shine—near an entry table, in a craft room, or on a kitchen wall where that white tray and cream yarn can catch the light. It has that old-fashioned usefulness-turned-beauty quality I’ve always loved in handmade things.