
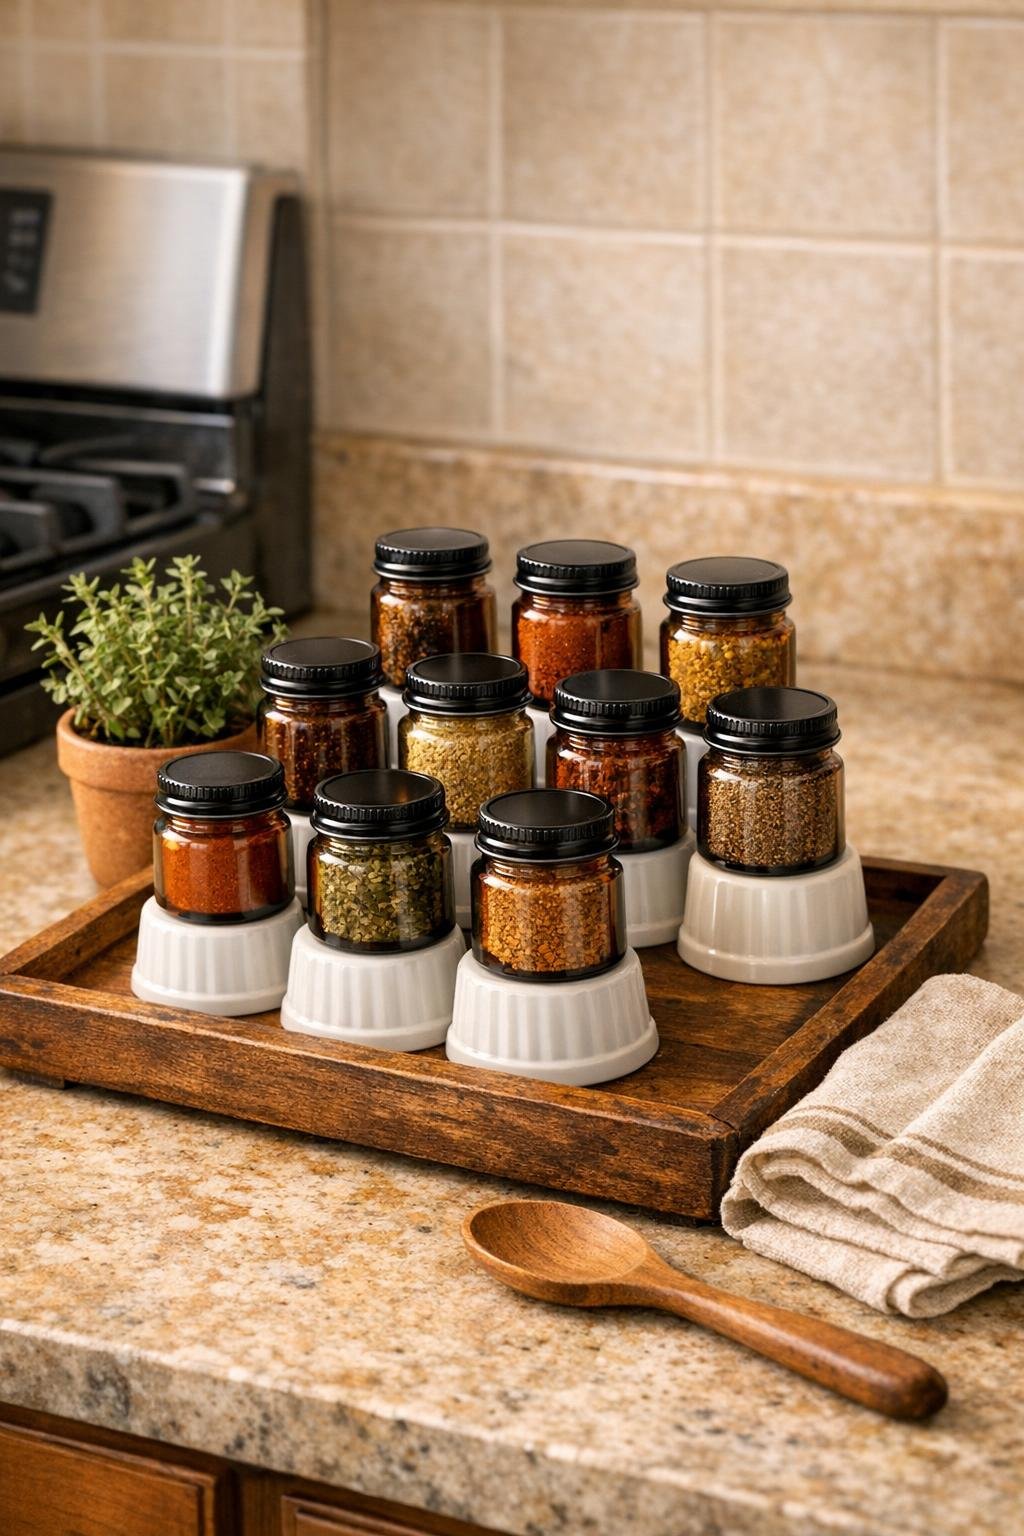
This little kitchen organizer is one of those projects that looks oddly fancy even though it’s built from the simplest things: small spice jars, upside-down ramekins, and a wooden tray. By lifting each jar on its own pedestal, you create a riser display that makes labels easier to see, keeps everyday spices feeling tidy, and turns a hard-working countertop corner into something that actually looks styled.
I especially love this kind of project for busy family kitchens, because it doesn’t ask for power tools, complicated measuring, or a whole afternoon. If you can line things up neatly and use a bit of adhesive, you can make this. I designed this version to feel full and useful rather than skimpy, with enough jars to make the tray look generous and polished while still leaving room to grab what you need when dinner gets hectic.
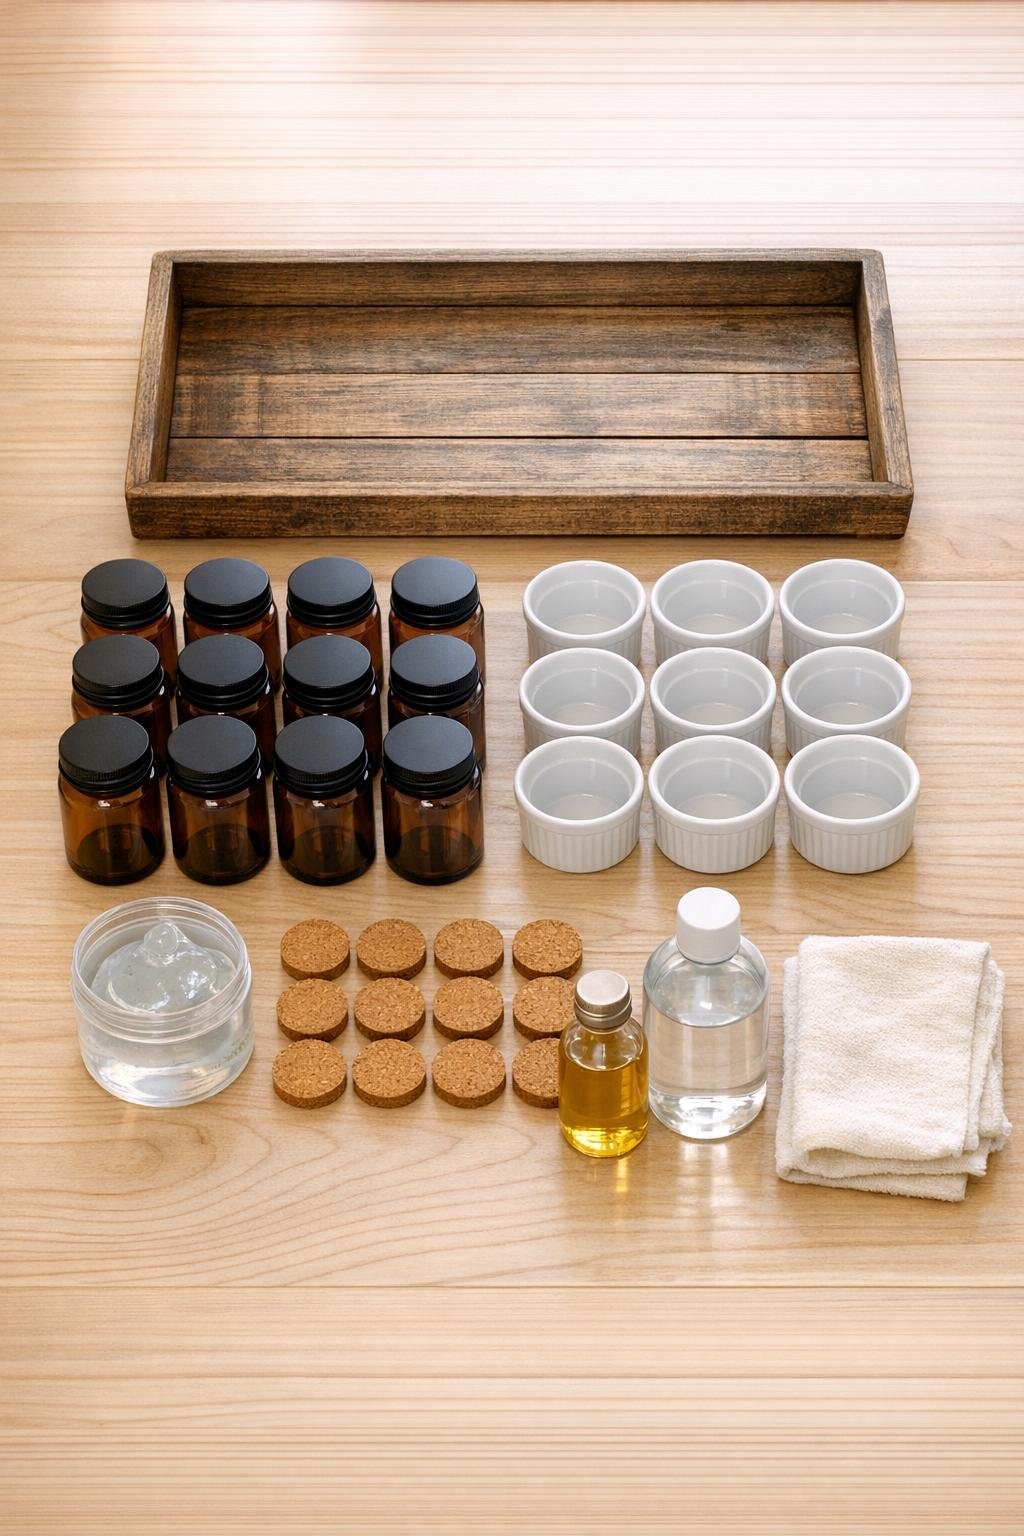
Materials
Instructions
1. Wipe the wooden tray, ramekins, and spice jars with a cloth lightly dampened with rubbing alcohol to remove dust and oils, then let everything dry completely.
2. Rub a thin coat of food-safe wood conditioner or mineral oil over the tray, working it into the grain, and buff off the extra so the wood looks richer but not greasy.
3. Turn the ramekins upside down and arrange 12 of them on the tray in 3 rows of 4, leaving about 1 inch between each one so the jars won’t bump when you reach for them.
4. Place one cork or grip pad on the center of each upside-down ramekin to soften contact and help keep each jar from sliding.
5. Add a small pea-sized dab of clear museum gel on top of each pad if you want the jars held more securely while still removable for washing and refilling.
6. Set one amber glass spice jar on top of each prepared ramekin and press lightly so it sits level; adjust the spacing until all 12 jars look even on the tray.
7. Fill the jars with your most-used spices, keeping everyday staples like garlic powder, paprika, cinnamon, oregano, chili powder, cumin, onion powder, Italian seasoning, black pepper, sea salt, parsley, and smoked paprika close at hand.
8. Label the lids or the lower sides of the jars so you can read them quickly from above or from the front, depending on where the tray will sit in your kitchen.
9. Test the setup by lifting and replacing each jar once; if one wobbles, center it again and add a touch more museum gel underneath.
10. Set the finished tray near your cooking zone, leaving a few inches of clearance around it so the elevated jars feel decorative but still practical during weeknight meals.
Variations & Tips
For picky-cook households: If your family rotates through the same six seasonings every night, make a half-size version with 6 jars and 6 ramekins on a smaller 12 x 8 inch tray so the favorites stay front and center.
For extra stability: If your counter gets bumped a lot, choose ramekins with a flat base rim and use museum gel both under the ramekins and under the jars so the whole tray stays put better.
For easy cleanup: Keep the adhesive removable rather than permanent glue; that way you can lift the jars and wash the tray and ramekins without fuss.
For a more finished look: Matching amber jars make the display feel intentional, but clear jars work too if you love seeing the color of the spices. White ramekins are especially nice because they keep the whole setup bright and clean-looking.
For smarter organization: Group baking spices on one row and savory spices on the others, or arrange by how often you cook with them so the busiest jars sit in the front row.
For giftable style: This makes a sweet housewarming or holiday gift if you pre-fill the jars with fresh spices and tuck a ribbon around the tray handles.
Tray tip: A tray with a slight lip is best because it frames the risers and catches little spills before they spread across the counter.
Ramekin tip: Try to keep all the ramekins the same height so the finished riser looks polished instead of patchy.