
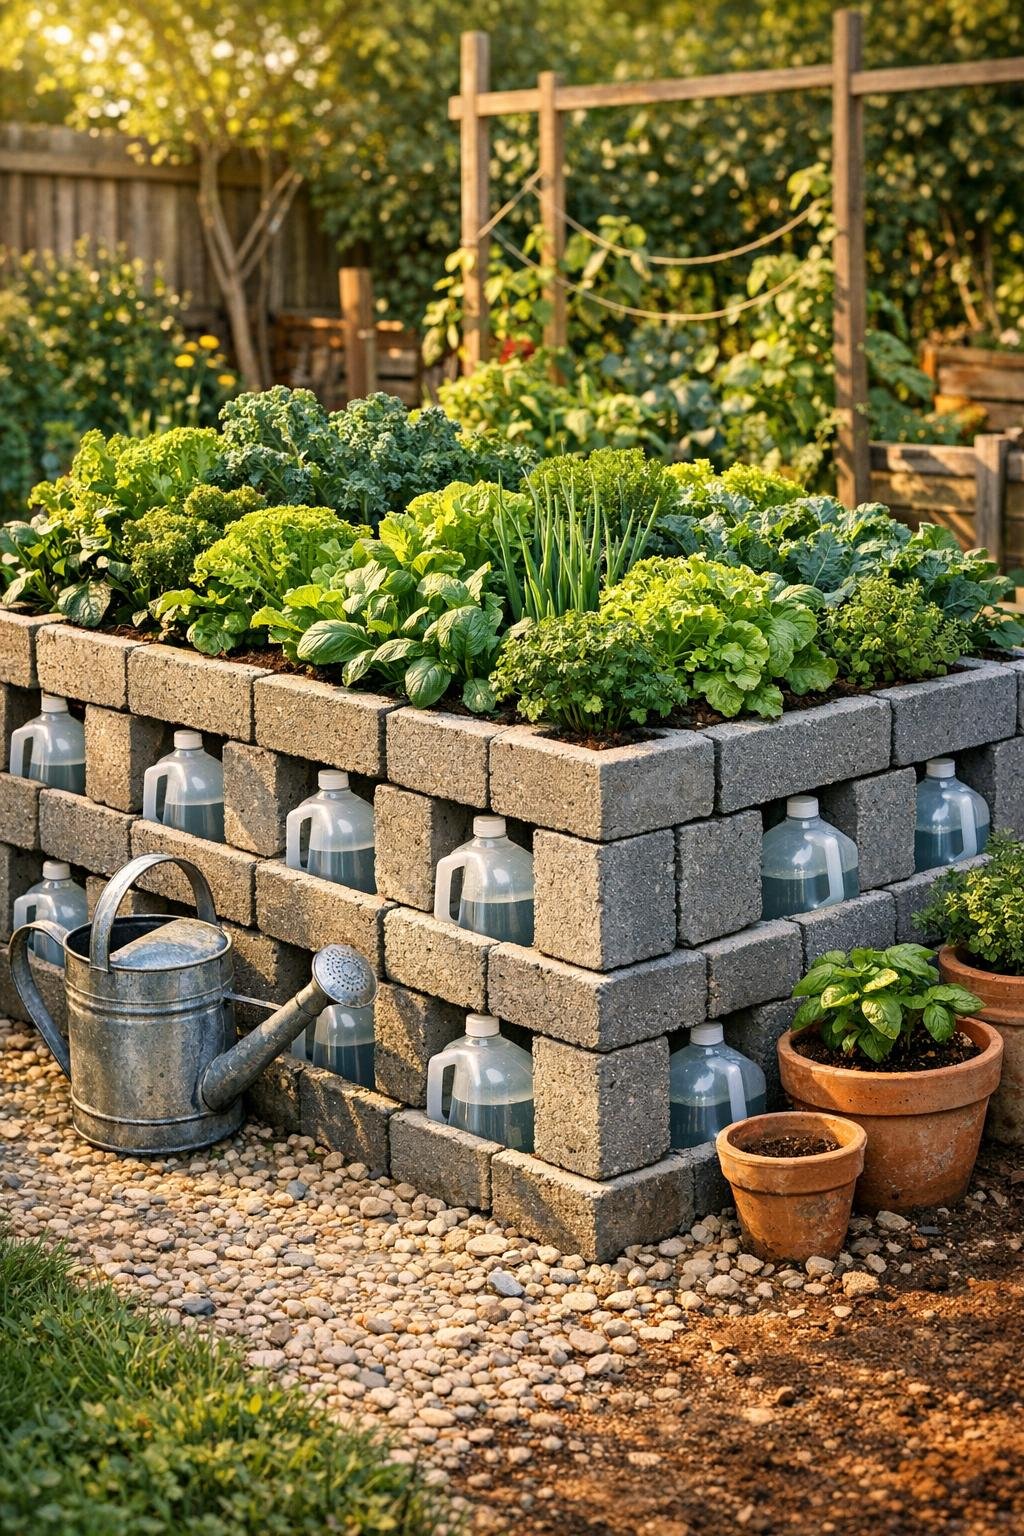
I love a garden project that pulls double duty, and this one does exactly that. By stacking plain gray cinder blocks into a sturdy raised bed and filling those hollow openings with water bottles, you create a simple thermal-mass system that helps moderate cold swings before a frost. The blocks soak up daytime warmth, the water holds onto it, and together they give tender plants a little more grace on chilly spring and fall nights.
What makes this especially satisfying is that it looks far more finished than the materials suggest. Around here, folks are used to seeing cinder blocks tucked behind sheds or stacked by the barn, but set them neatly into a handsome planting bed and suddenly the whole thing looks intentional and downright smart. If you want a practical raised bed that feels substantial, costs less than lumber, and gives you a head start on cool-weather gardening, this is a mighty good weekend project.
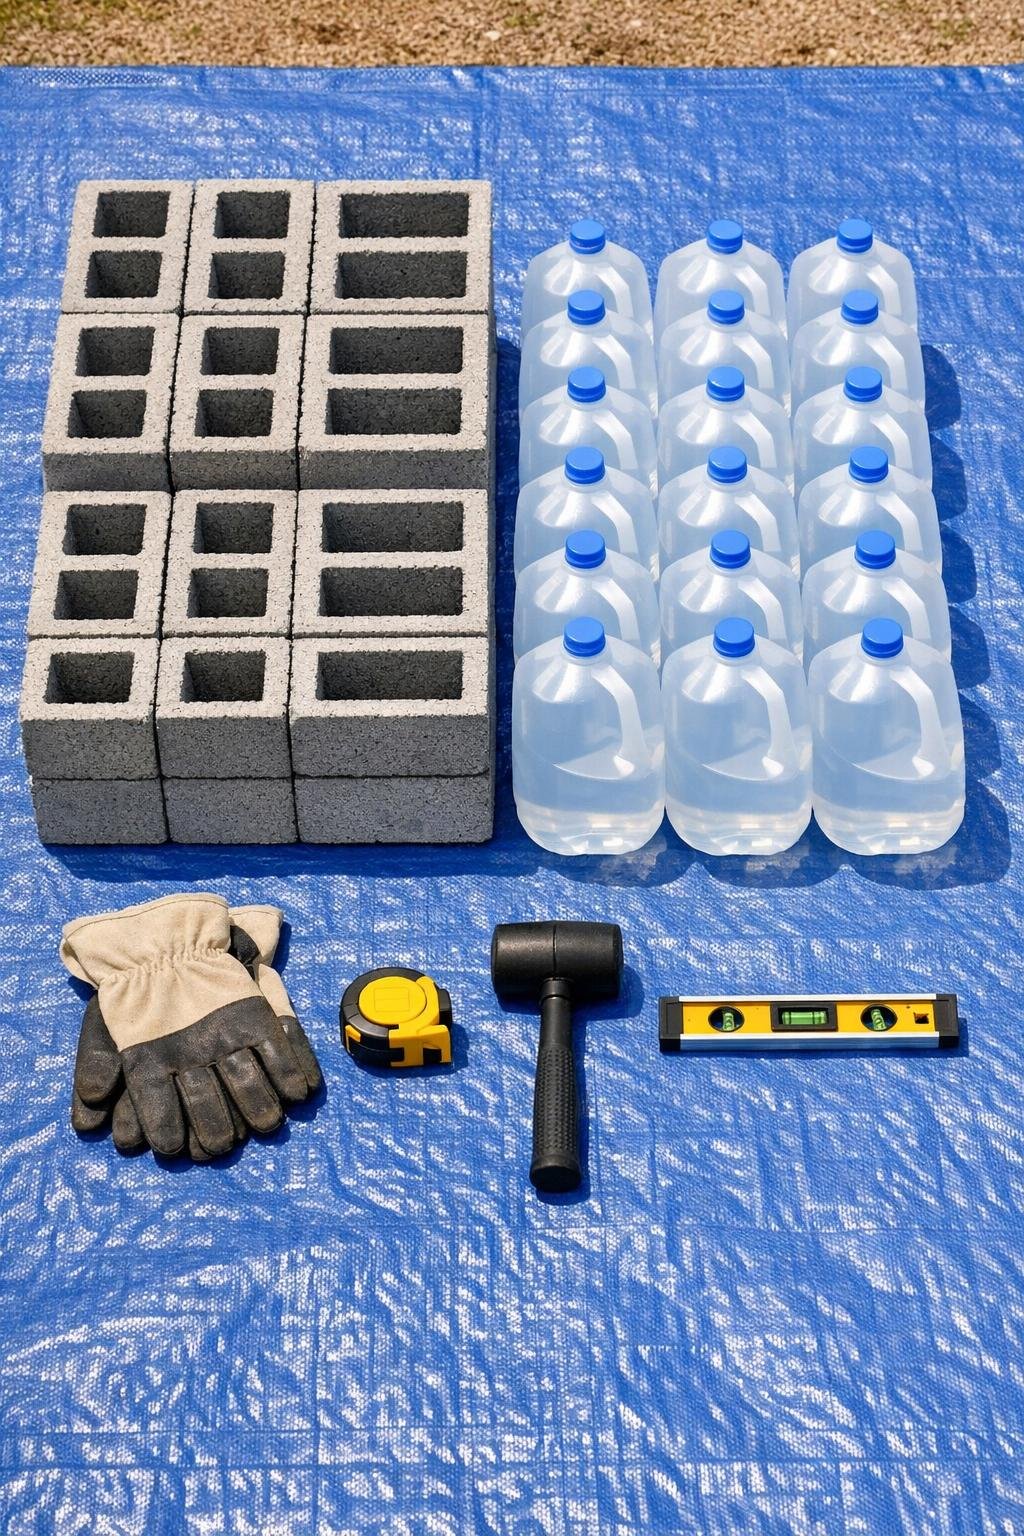
Instructions
1. Choose a level, full-sun spot and measure out a rectangle 8 feet long by 4 feet wide. Set the blue tarp alongside the area so you have a clean place to stage blocks and soil.
2. Clear away grass and weeds from the footprint, then rake the ground as flat as you can. Check in both directions with a level, because a tidy first course makes the whole bed look store-bought.
3. Lay 10 cinder blocks on their sides in a rectangle for the first course, with the hollow openings facing outward and up where possible. Use 3 blocks on each short end and 5 blocks on each long side, overlapping the corners for strength.
4. Tap each block into place with the rubber mallet and check for level as you go. Small adjustments now save you from a wobbly second row later.
5. Stack the second course with 10 more blocks, offsetting the joints like bricks so the seams do not line up. Keep the hollows exposed to the outside, because those cavities are what turn this into a thermal-mass bed.
6. Add 4 extra cinder blocks centered along the long sides if you want broader planting pockets and a more substantial look. This little bit of extra mass also helps the bed hold warmth more steadily overnight.
7. Slide one filled 1-gallon water jug into each outer block opening that will hold it snugly, placing the capped side inward if that fits best. The jugs should sit low and secure, with as much of their surface surrounded by block as possible.
8. Mix the raised bed soil and compost on the tarp, then shovel it into the center of the bed until it is filled to within 2 inches of the top. That rich, deep fill gives you enough rooting room for greens, onions, radishes, and early-season transplants.
9. Water the soil deeply so it settles, then top it off with more mix if needed. A settled bed always looks more finished than one that sinks in the middle after the first rain.
10. Tuck a little extra compost into any top-facing block openings you are not using for water jugs and plant them with herbs, lettuce, or trailing flowers. I like this part because it softens the masonry and gives the bed that “where did you buy that?” look.
11. Mulch the soil surface with a 1-inch layer of fine mulch or straw to reduce heat loss and keep moisture even. Leave a little space around seed rows or transplants so stems stay dry.
12. Plant your cool-season crops in the center bed and place the most frost-sensitive seedlings nearest the warmest block edges. On sunny days, the blocks and water will gather heat; on cold nights, they release it slowly right where those young plants need it.
Variations & Tips
For colder nights: Add a loose row-cover fabric or an old sheet over hoops above the bed in the evening. The block-and-water system works even better when you trap that stored warmth around the plants.
For a prettier finish: Sweep the block faces clean and edge the bed with gravel, brick chips, or a narrow mulch path. It frames the bed beautifully and makes the whole build look planned rather than improvised.
For planting pockets: Use the top-facing openings for shallow-rooted herbs, leaf lettuce, alyssum, or nasturtiums. Those planted edges are what really dress up the plain blocks and make neighbors stop to ask about them.
For maximum thermal mass: Dark-colored water containers absorb warmth a bit faster than clear ones, though clear jugs are easier to find. If you switch colors, keep them fully capped and filled so they stay heavy and stable in the cavities.
For long-term stability: If your ground is soft, scrape down to firm soil and add a thin layer of compacted sand under the first course. Out here in the Midwest, a freeze-thaw season will test any shortcut, and a solid base is worth the extra few minutes.
Best crops for this bed: Try spinach, lettuce, kale, radishes, green onions, parsley, cilantro, and cabbage starts. They all appreciate the moderated temperatures and make the bed look lush in a hurry.