
Every fall, I end up with bags and bags of leaves that are far too valuable to send to the curb. This simple leaf mold bin turns those dry leaves into dark, crumbly garden gold with almost no work, and it’s one of the easiest big-payoff garden projects I make when the season is winding down. If you’ve got a small yard, a corner by the fence, or just want a tidy place to stash shredded leaves, this is a wonderfully practical build.
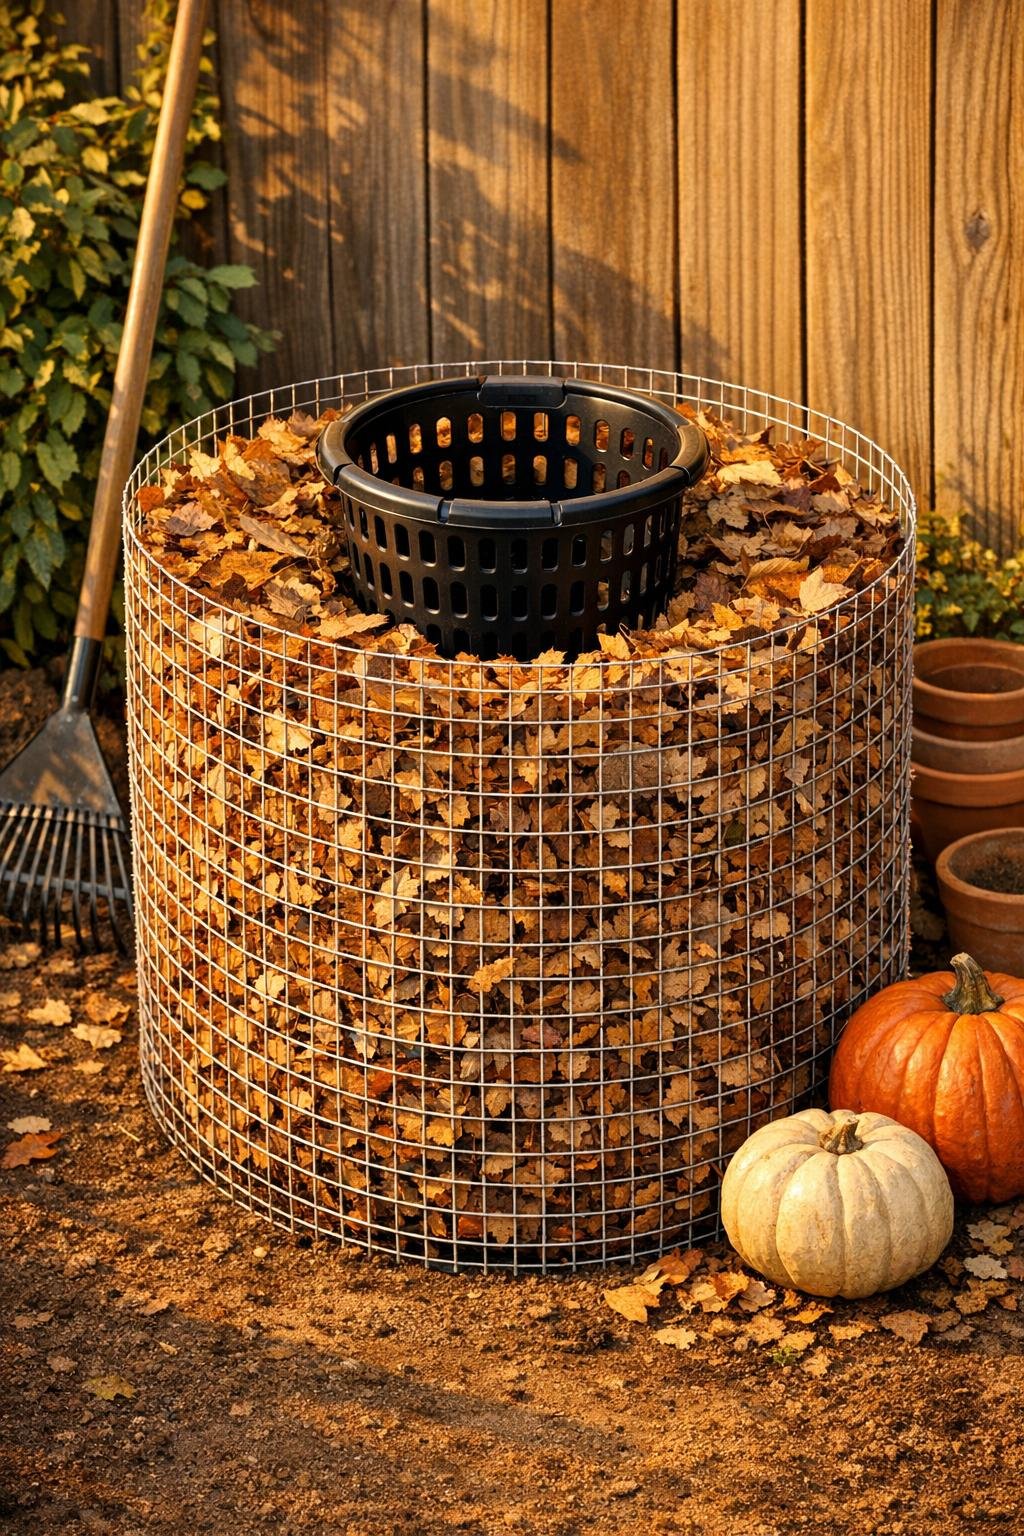
What I love most is that it uses wire hardware cloth plus two easy dollar store finds to make a roomy, breathable bin that actually looks neat instead of like a random pile in the yard. I built this to be large enough to hold a generous amount of leaves so they can break down properly, but it still comes together fast and doesn’t ask much of you beyond a little cutting and stacking.
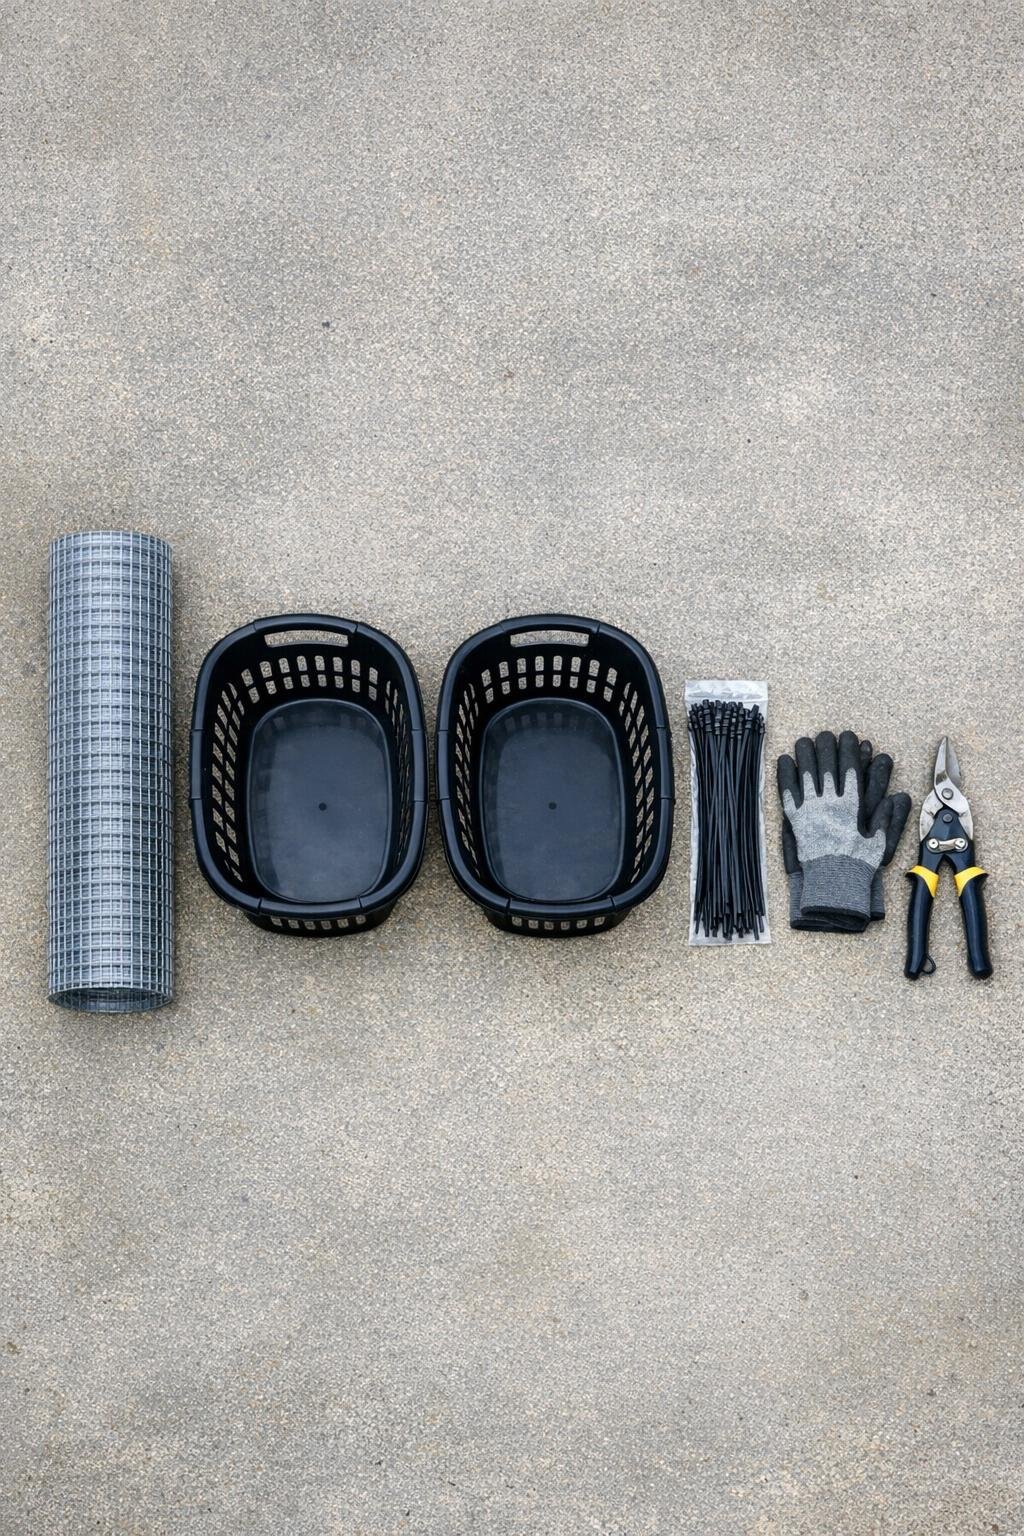
Materials
Galvanized wire hardware cloth, 1 roll, 24 inches wide x 10 feet long, 1/2-inch mesh
Instructions
1. Unroll the hardware cloth on a flat concrete or driveway surface, put on gloves, and cut a 72-inch length with tin snips.
2. Fold over any sharp cut wires along the long edges by about 1/2 inch so the bin is safer to handle and holds its shape better.
3. Stand the cut hardware cloth on its long edge and curve it into a cylinder about 23 inches across, overlapping the ends by one full mesh square.
4. Thread zip ties through the overlapping mesh from top to bottom, using 6 to 8 ties to fasten the cylinder securely into a freestanding wire bin.
5. Turn both plastic laundry baskets upside down and press one down into the center of the wire cylinder from the top, then set the second basket right-side up inside the first to create a stacked center column with lots of airflow.
6. Adjust the baskets so they sit snugly in the middle of the cylinder and leave an even ring of space all the way around for the leaves.
7. Move the bin to its permanent garden spot, ideally on bare soil or grass so helpful worms and microbes can work up into the leaves.
8. Fill the outer ring around the baskets with dry leaves, packing them lightly as you go until the leaves reach the top edge of the wire.
9. Sprinkle water over every 6 to 8 inches of leaves so the pile feels like a wrung-out sponge, damp but not soggy.
10. Add more leaves as the pile settles over the next week, keeping the center basket column open so air can move through and speed up decomposition.
11. If you want faster breakdown, pull the top basket out every couple of weeks and wiggle the lower one slightly to open air channels before tucking it back into place.
12. Let the leaves sit through winter and into the next growing season, then lift out the baskets and scoop out the dark leaf mold from the ring around the center column.
Variations & Tips
For faster results: Shredded leaves break down much quicker than whole ones. If I run the mower over a leaf pile first, I usually get a richer, more even leaf mold sooner.
For small yards: Cut the hardware cloth shorter and make a narrower cylinder, but keep enough width to leave a good ring of leaves around the center baskets. You want airflow and volume, not a skinny tube.
For windy spots: Push a couple of garden stakes just outside the wire and zip-tie the bin to them. That keeps the cylinder round and stops it from shifting when it’s newly filled.
For picky gardeners who want it neater: Use matching black zip ties and face the seam toward the back fence or shrubs. It blends in nicely once the leaves settle and the garden quiets down for winter.
Moisture check: If the leaves look dry and papery after a few weeks, add more water. If they smell sour or look slimy, they’re too wet, so remove one basket for a day and let extra air in.
Best way to use the finished leaf mold: I spread it around perennials, mix it into vegetable beds, and tuck it around shrubs like a soft, soil-improving mulch. It’s one of those simple garden habits that pays you back all year long.