
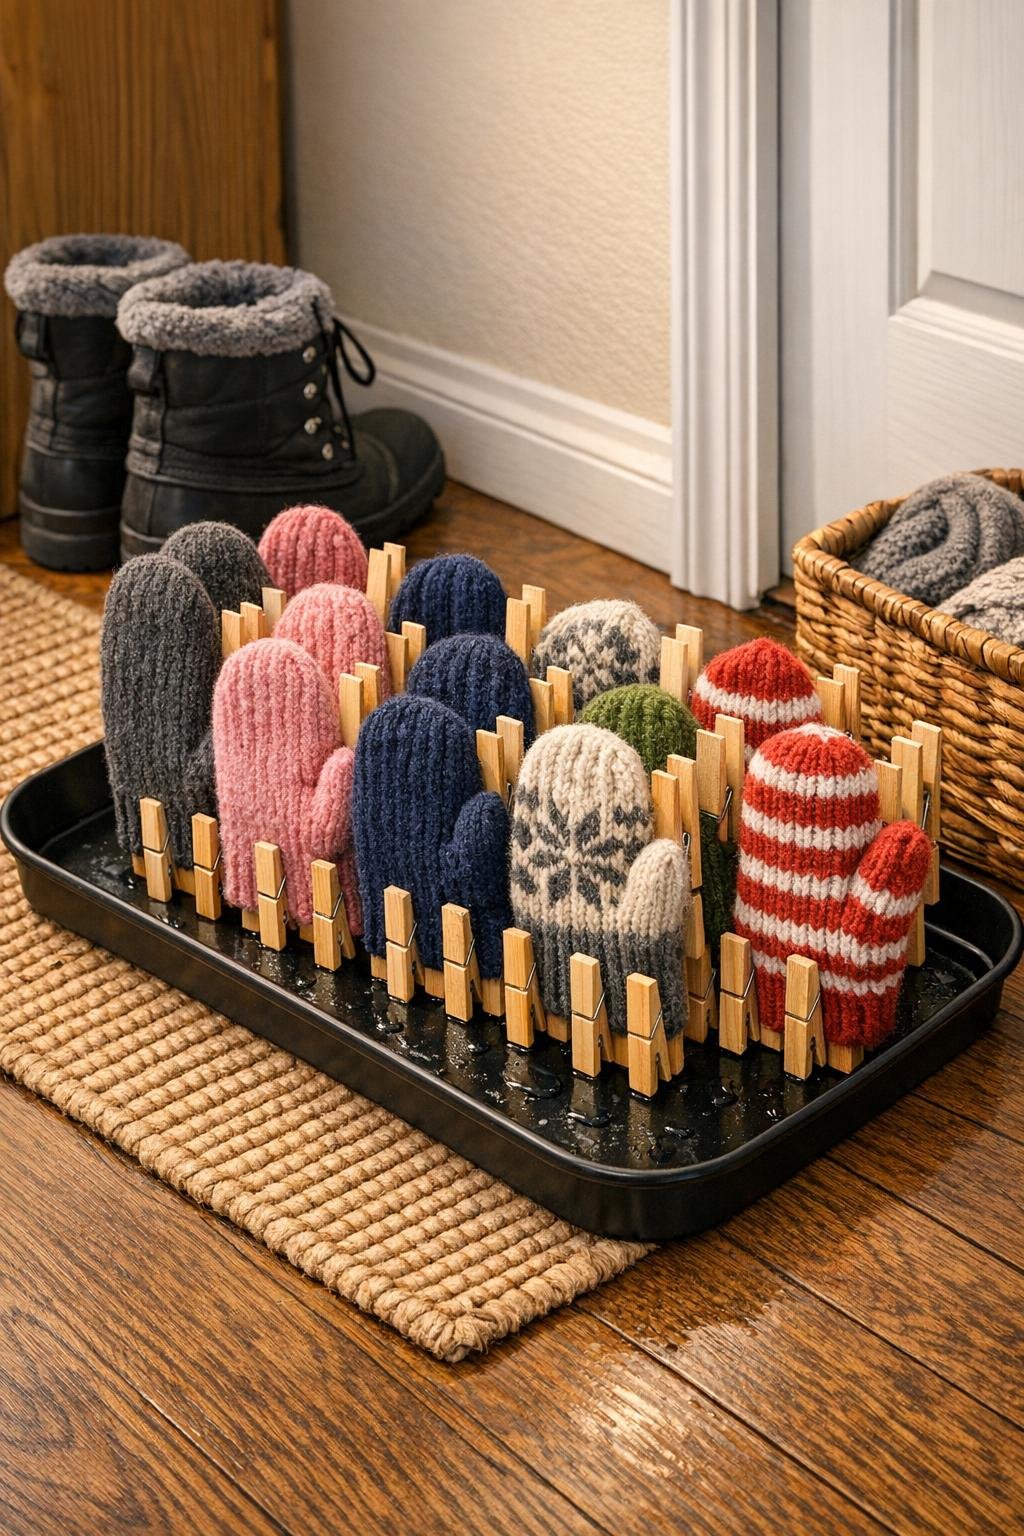
There are some projects that solve a real everyday nuisance, and this little hallway mitten dryer is exactly that kind of fix. If you live where snow, slush, and wet gloves are just part of winter life, you know how quickly a small entryway can turn into a soggy jumble. By gluing rows of wooden clothespins inside a shallow boot tray, you get a neat place to clip up damp mittens so they can drip, dry, and stay contained in one tidy spot.
I’m especially fond of projects like this because they’re simple, practical, and make a house run smoother without costing much. This one is perfect for a narrow hallway, mudroom corner, or apartment entry where floor space is precious, and it has that honest, hardworking look I always appreciate—nothing fussy, just a clever solution that earns its keep every winter long.
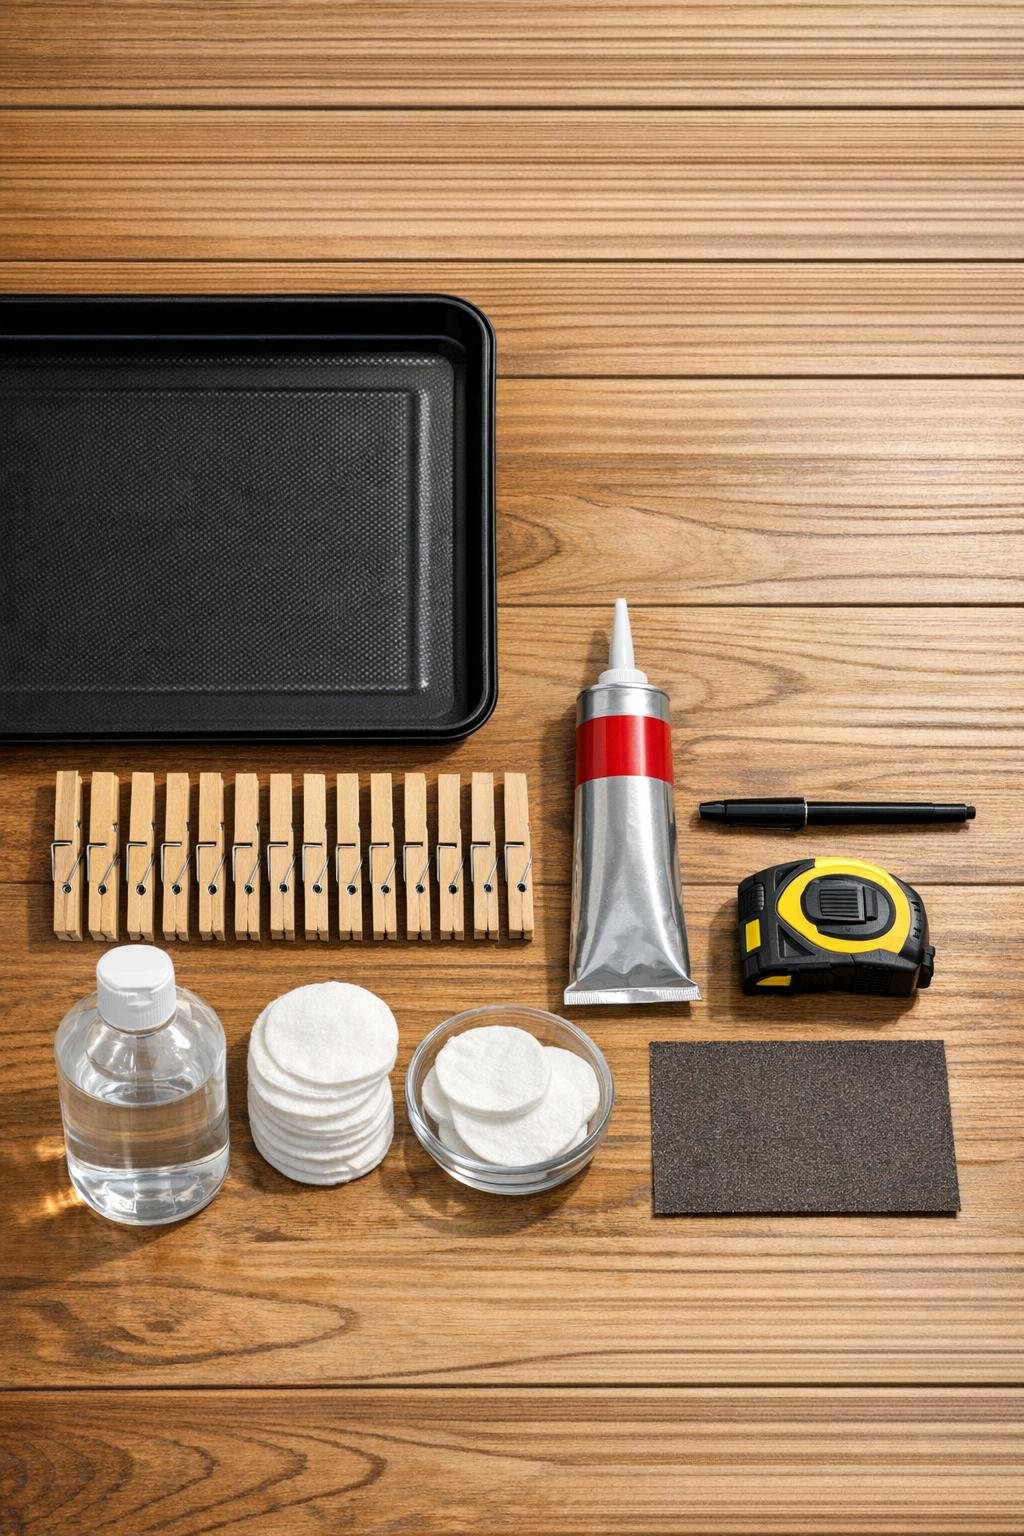
Materials
Instructions
1. Wipe the inside of the boot tray thoroughly with rubbing alcohol and let it dry completely so the adhesive will grip well.
2. Lightly sand the spots where the clothespins will be glued, focusing on the tray bottom and lower inside walls if needed, then wipe away all dust.
3. Arrange the clothespins inside the tray before gluing, placing them in 4 evenly spaced rows of 6 clothespins with the pin mouths facing upward so mittens can clip on easily.
4. Use the measuring tape and marker to make small guide marks so each row stays straight and leaves about 1 to 1.5 inches between clothespins for airflow.
5. Run a small bead of construction adhesive along the flat side of one clothespin and press it firmly onto the marked spot in the tray, holding it for a few seconds so it stays put.
6. Repeat with the remaining clothespins, keeping the rows aligned and the springs all pointing the same direction for a tidy, finished look.
7. Check the spacing one last time, then leave the tray flat and undisturbed for the full cure time listed on the adhesive, usually 24 hours.
8. If you’d like, stick adhesive felt pads underneath the tray corners so it won’t scratch wood or tile floors in the hallway.
9. Set the finished tray by the door and clip wet mittens, gloves, or even small knit hats onto the clothespins so melting snow drips neatly into the tray instead of onto the floor.
Variations & Tips
For bigger family loads: Use a longer boot tray, around 36 to 40 inches, and increase to 30 or 32 clothespins so each person has a few dedicated spots.
For extra drying airflow: Leave a slightly wider gap between rows if your mittens are thick wool or heavily insulated, because a little breathing room helps them dry faster.
For a cleaner finish: Wipe away any squeezed-out adhesive right after placing each clothespin so the tray looks neat and intentional once cured.
For easier use with children: Angle the front row of clothespins very slightly upward so little hands can clip mittens on and off without tipping the tray.
For mixed winter gear: This same tray works beautifully for gloves, earmuffs, baby socks, and knit caps, and I’ve found it especially handy after sledding days when everything seems to come in damp at once.
Placement tip: Keep the tray near a heat register or along an entry wall, but not so close to direct high heat that it softens the adhesive before it has fully cured.