
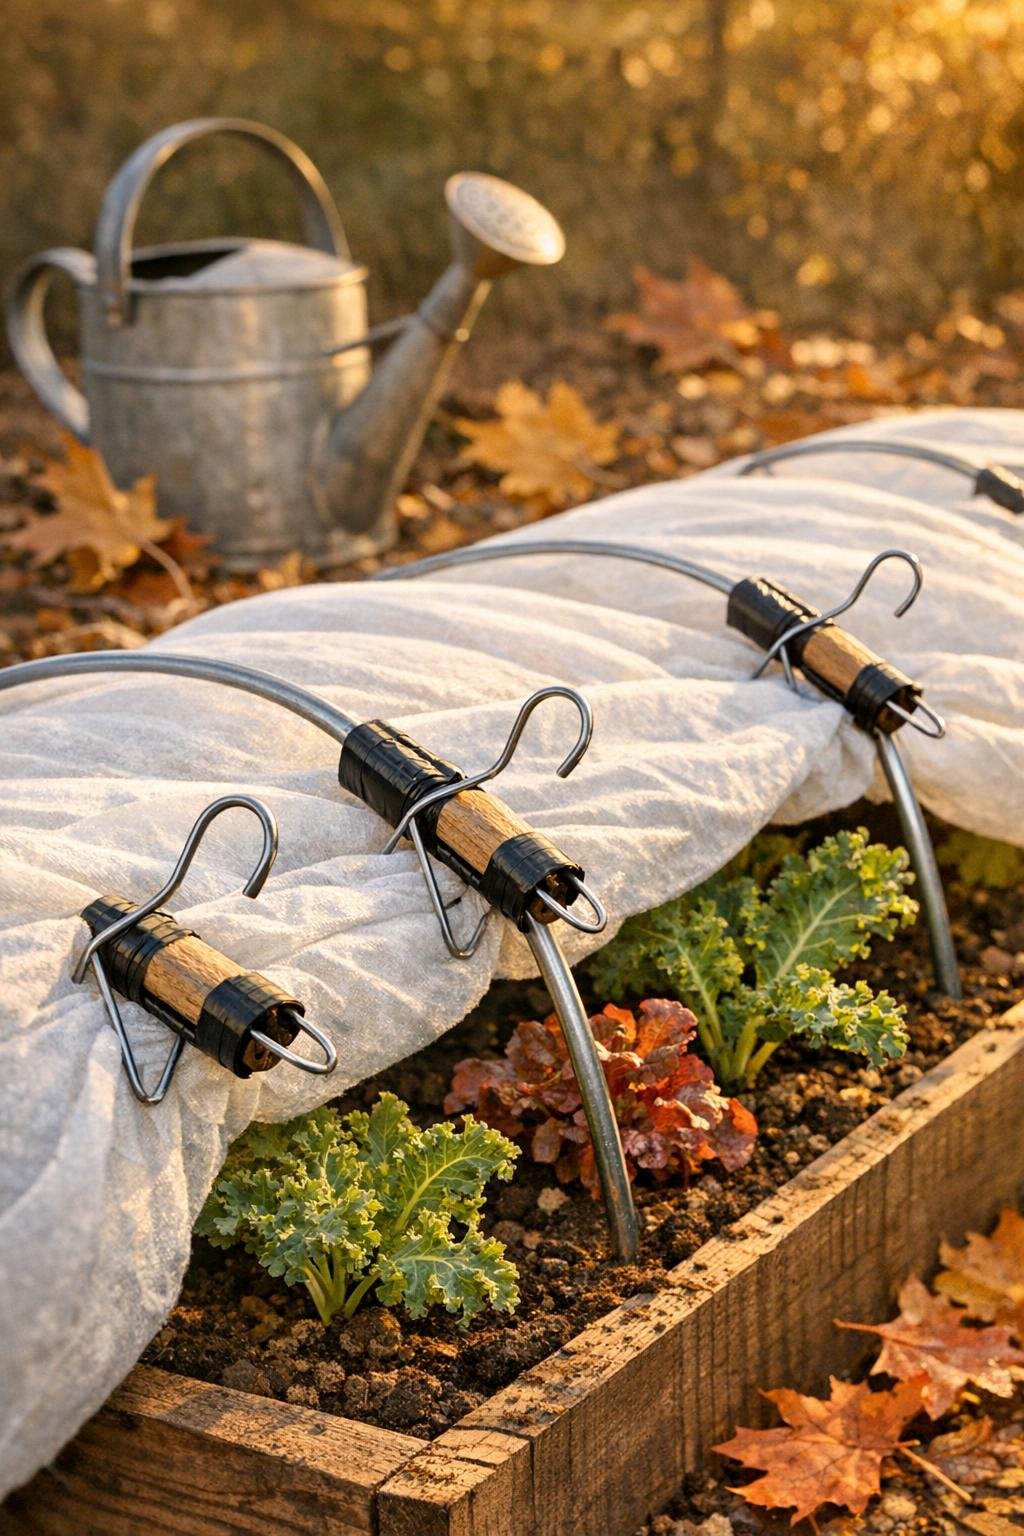
If you’ve ever rushed outside on a chilly fall evening to throw “something, anything” over your lettuce or baby spinach, this little garden hack is exactly the kind of project that earns a permanent spot in the shed. I love a DIY that uses up odds and ends I already have, and this row cover clamp is one of those wonderfully practical fixes: cut the bottoms off wire coat hangers, pair them with two super-common shed items, and you get sturdy little clamps that hold frost cloth, plastic, or insect netting snugly onto low hoops or raised-bed frames.
What I like most is that these are fast, cheap, and genuinely useful during that busy stretch of fall when I’m balancing work, dinner, and trying to keep the garden going just a few weeks longer. If you’ve got a small vegetable bed and want something stronger than clothespins but easier than buying specialty clips, this is a great afternoon project.
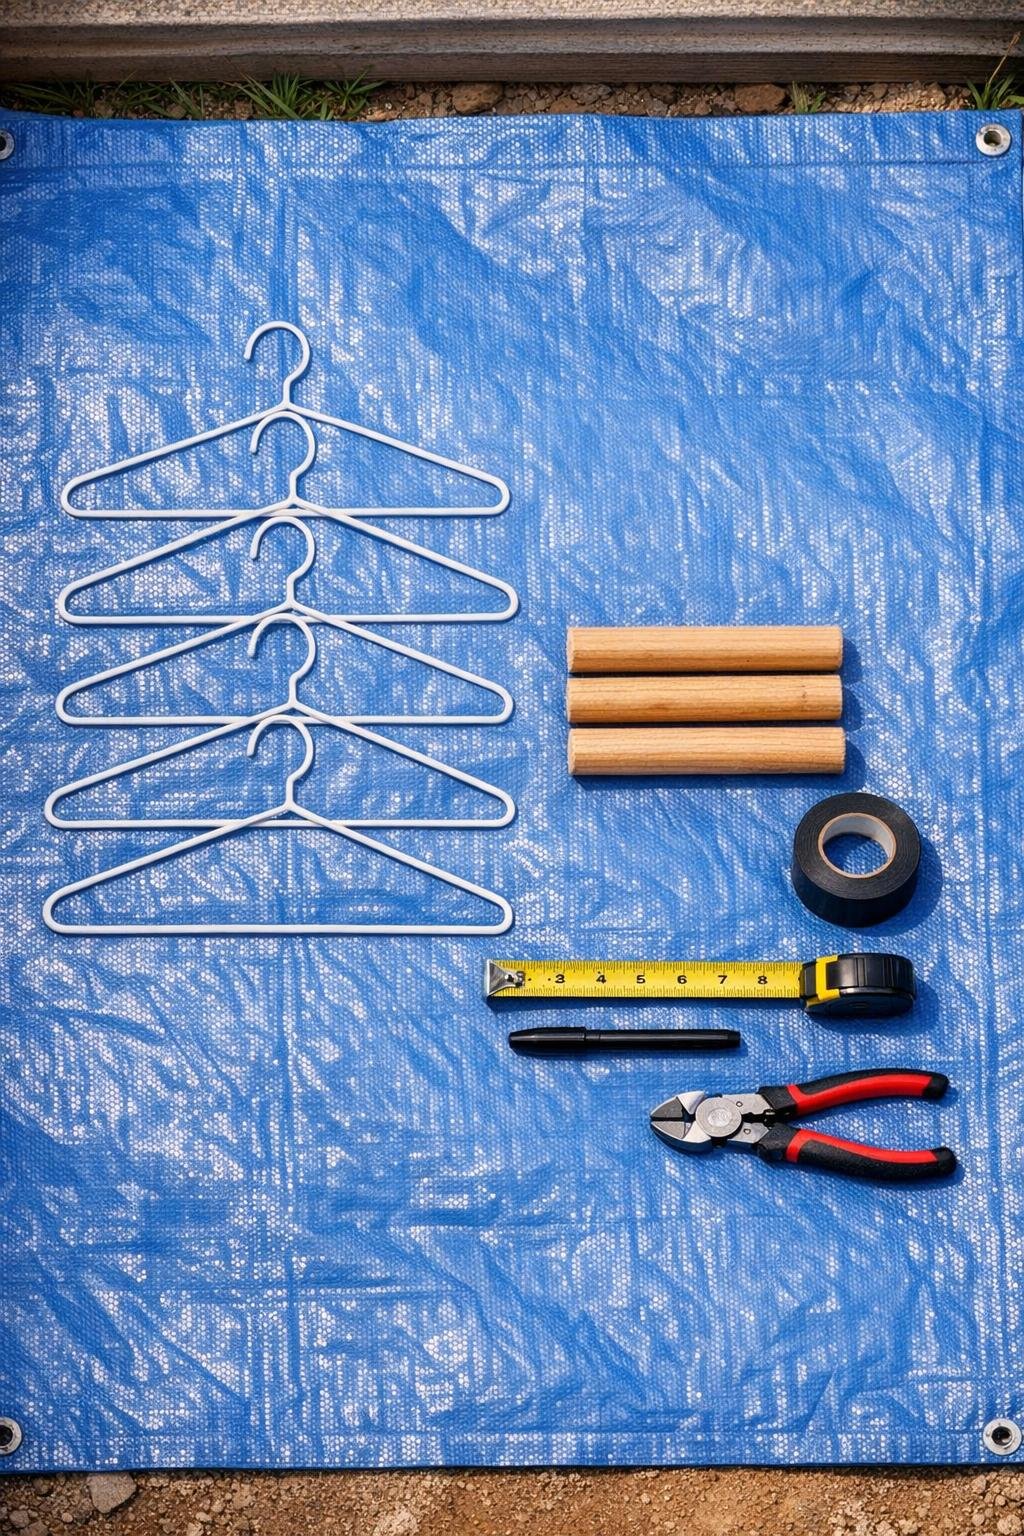
Materials
Instructions
1. Cut each broom handle or old tool handle into 12-inch sections, then sand the cut ends smooth so they’re easy to grip and won’t snag your row cover fabric.
2. On each wire coat hanger, use the wire cutters to remove the entire bottom horizontal section as close to the lower corners as possible, leaving you with a hooked top and two wire arms.
3. Straighten each hanger’s two side wires slightly with pliers so they form a wide springy U-shape under the hanger hook, which will become the clamp body.
4. Mark the center of each 12-inch wood handle section, then place two prepared hanger pieces side by side so their hooks face upward and their wire arms run down along the wood like a pair of jaws.
5. Wrap electrical tape tightly around the midpoint of the wood handle and over the inner wire sections, building up a secure band about 2 inches wide so the wire pieces are anchored firmly to the handle.
6. Add a second heavy layer of tape over the first, stretching it as you wrap to create a snug, slightly cushioned grip that keeps the wires from shifting during use.
7. Bend the lower wire ends inward with pliers so the two sides meet more closely, creating spring tension that will pinch row cover fabric against a hoop, board edge, or raised-bed frame.
8. Test the clamp by squeezing the hooked tops together to open the jaws, then clip it over a folded scrap of frost cloth and a garden hoop; adjust the wire angle until it grips firmly without tearing the fabric.
9. Repeat with the remaining materials to make 3 sturdy clamps, which is enough to secure one side or one end of a small fall bed while still being quick to build in one session.
10. Use the finished clamps to hold frost blanket, bird netting, or light greenhouse plastic over your garden bed, spacing them about 18 to 24 inches apart anywhere wind likes to lift the cover.
Variations & Tips
For wider beds: Make 5 to 7 clamps instead of 3 so you can secure both long sides of the bed and the loose ends too. I’ve learned the hard way that one windy night will find every gap you leave.
Use different handle scraps: Old rake handles, broken shovel handles, or even thick hardwood dowels work well as long as they’re sturdy and comfortable to hold.
For delicate fabric: Wrap a final outer layer of tape around the wire contact points so the clamp edges feel smoother against lightweight insect mesh or thin frost cloth.
Add more grip: If your plastic sheeting tends to slip, tuck a folded strip of rubber shelf liner inside the clamp jaws before clipping it on.
Rust prevention: If the hangers have exposed metal where you cut them, dab on a little exterior paint or clear sealer before assembly to help them last through damp weather.
Storage tip: I keep mine hanging right by the back door on a nail through one of the wire hooks, because anything I can grab in ten seconds is far more likely to get used on a busy weeknight.