
There are a few winter projects that make a house feel loved before anyone even steps inside, and this is one of them. I start with a row of plain pantry cans filled with ice, a hammer, and a little patience, and by the end those humble cans turn into something that glows and sparkles in the cold evening air. It has that old-fashioned punched-tin charm I’ve always admired at holiday markets, but made from everyday things most of us already have on hand.
If you’re comfortable with simple handwork and you want a Christmas porch piece that looks far fancier than it costs, this is a wonderful one to try. The frozen cans make the metal easy to punch without crumpling, and stacking 15 of them into a tall pyramid gives you a generous 3-foot display with plenty of twinkle once a light is tucked inside. I love projects like this because they feel thrifty and practical at the start, then downright magical after sunset.
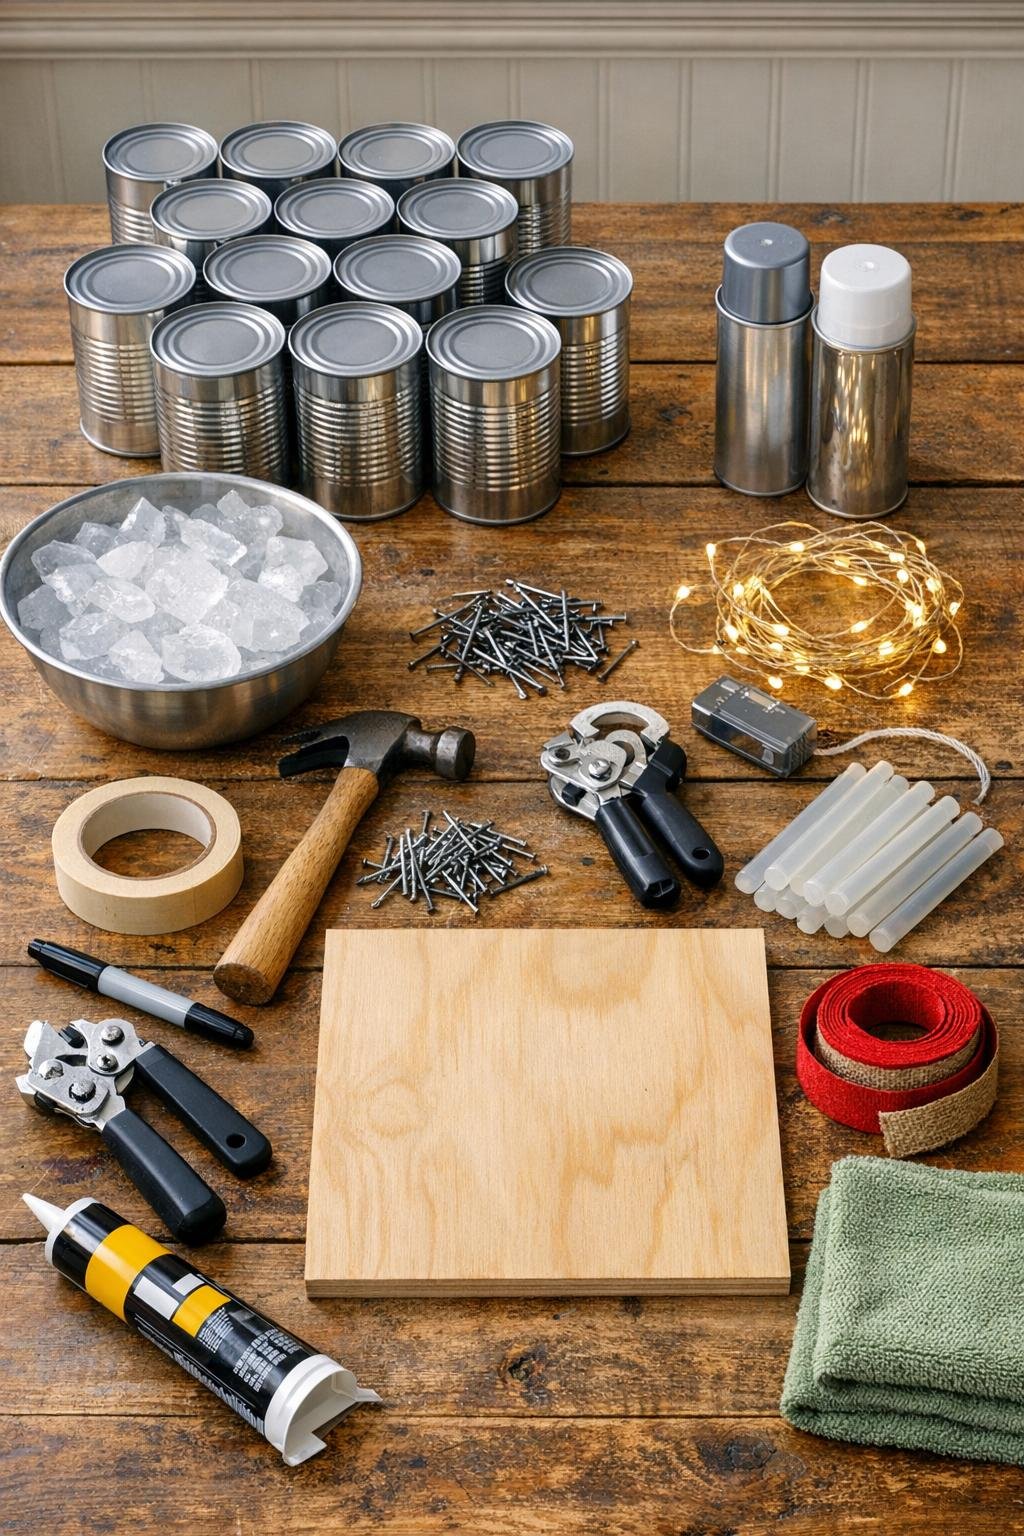
Materials
Instructions
1. Fill each clean soup can with water to about 1/4 inch below the rim and freeze until solid, at least overnight. I set mine on a tray so they stay upright and don’t tip over in the freezer.
2. Dry the frozen cans and set all 15 on a folded towel on the counter in three straight rows so they don’t slide while you work. Keep the cans label-free and evenly oriented so the finished tree looks tidy and intentional.
3. Wrap a band of masking tape around each can about 1 inch down from the top rim and another band about 1 inch up from the bottom. These bands give you clean margins and help your punched pattern look polished instead of random.
4. Draw simple hole patterns between the tape bands with the marker, mixing stars, dots, short vertical lines, and tiny diamond shapes. Use 3 or 4 repeating designs across the 15 cans so the finished tree has variety but still feels coordinated.
5. Set the tip of a 1-inch nail on one marked dot and tap gently with the hammer until the nail pierces the can wall into the ice. Work one hole at a time, turning the can as you go, and keep the holes about 1/4 to 1/2 inch apart for a strong glow without weakening the metal.
6. Punch all 15 cans, using the 1-inch nails for most of the design and the 1.5-inch nails only where you want a few larger accent holes. If any can begins to thaw and soften, return it to the freezer for 20 to 30 minutes before finishing.
7. Open the top of each can with the manual can opener and pour out the ice. Rinse the cans, let them dry fully, and peel away the tape so the clean unpunched borders are visible.
8. Spray-paint the outside of all 15 cans in two light coats of metallic silver or satin white, letting the first coat dry before adding the second. Once dry, seal them with one even coat of clear outdoor sealer for a smoother, finished look and better porch durability.
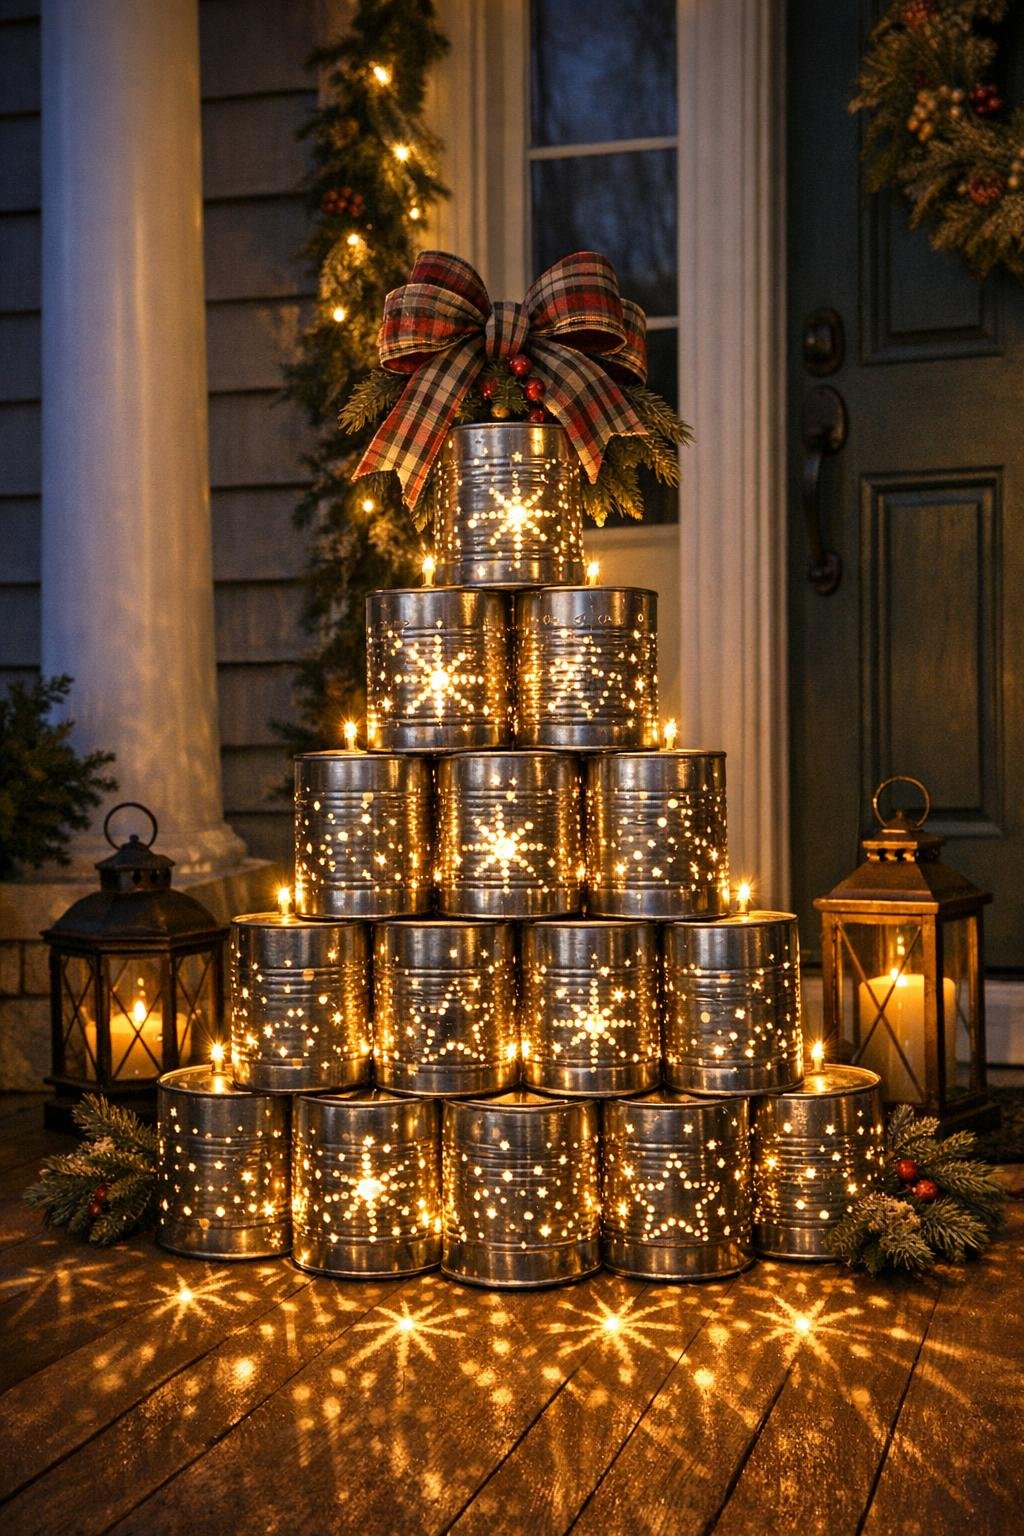
9. Arrange the cans on the wood base into a 5-4-3-2-1 pyramid to form a Christmas tree shape about 3 feet tall, with the open ends facing downward over the base. Test the spacing before gluing so the stack looks centered and symmetrical from the front.
10. Glue the bottom row of 5 cans to the base with outdoor construction adhesive, then add a little hot glue for a quick hold while it sets. Stack and glue the remaining rows in the same way, nesting each upper can into the shallow valleys between the two cans below it.
11. Tuck the fairy lights up through the back and weave the silver wire in and around the stacked cans so the bulbs sit inside and behind the punched holes. Concentrate extra lights in the lower three rows so the whole tree glows evenly instead of looking dim at the bottom.
12. Hide the battery pack behind the base or beneath a little cluster of faux evergreen sprigs, then glue or tie on a generous wired-ribbon bow near the top or at the base. Step back, turn on the lights, and make any tiny adjustments so the glow shines clearly through the punched patterns.
Variations & Tips
For a brighter glow: Use 100 lights rather than 50, and keep most of them threaded through the center and lower rows. That fuller lighting is what gives you those beautiful starry reflections on the porch floor and wall.
If you prefer a vintage look: Choose satin white paint instead of silver, then lightly dry-brush a little gray over the edges after it dries. It gives the cans that old punched-tin ornament feeling without making the project any harder.
For easier pattern making: Dot your design with the marker first and repeat the same 3 patterns across all 15 cans. I’ve learned over the years that repeating a motif is what makes handmade work look elegant instead of busy.
To make it sturdier outdoors: Use a heavier wood base and add a bead of adhesive wherever the cans touch each other, not just where they touch the row below. If your porch gets strong wind, nestle a few small stones inside the bottom row before final gluing for extra weight.
For a topper: Bend a small piece of wire into a star and tuck it into the top can with a dab of hot glue. It’s a simple finishing touch, but it makes the whole piece feel complete.
Storage tip: After Christmas, remove the light strand if you can, wrap it separately, and store the tree in a large box with crumpled paper around the sides. The punched cans hold up well, but they stay prettiest if they aren’t pressed hard by heavier decorations.