
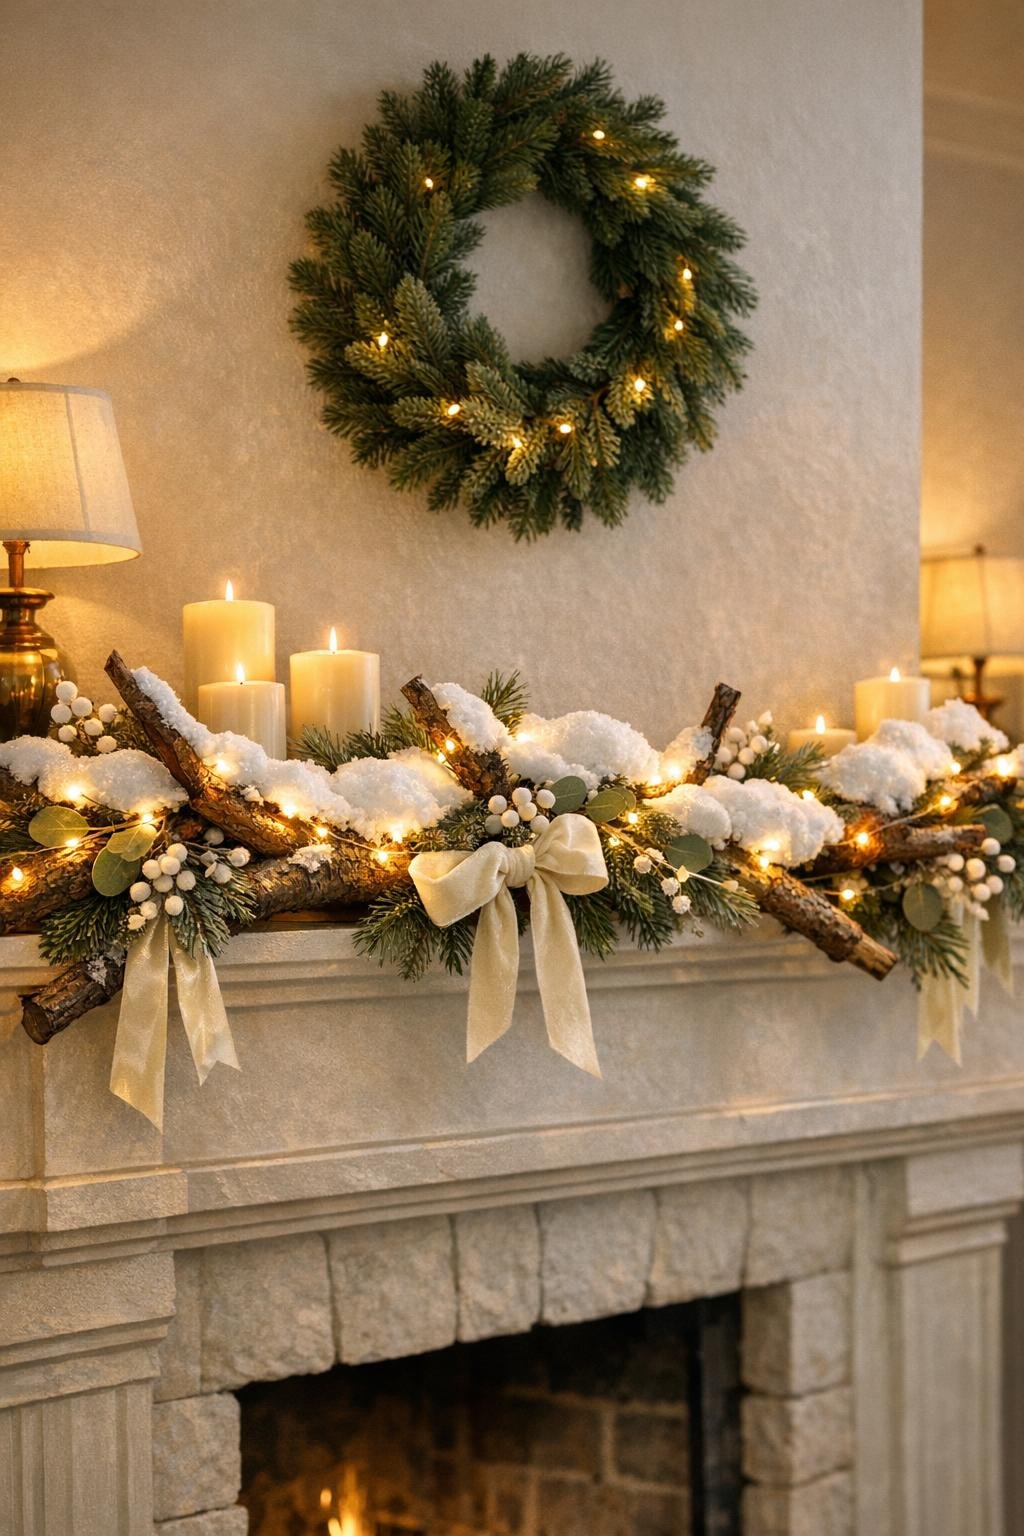
This winter mantel garland starts with the most ordinary thing in the yard: three fallen branches. I love projects like this because they use inexpensive, everyday materials but can still land in that polished, magazine-worthy place once you layer on the right finish. In this case, the expanding foam does the hard work of building soft, dimensional snow drifts that actually sit on the branches the way real snow would.
If you want a dramatic winter mantel piece without paying florist-shop prices, this is a satisfying one to make. The steps are simple, but the result is full-scale and elegant, especially once the branches are lit and tucked with a few easy finishing touches. As someone who cooks for a crowd and thinks a lot about presentation, I approach decorating the same way: build a generous base, add contrast, then finish with those little details that make everything look intentional.

Materials
Instructions
1. Brush the branches clean, trim off any ragged twig ends, and let them dry fully if they were outdoors in damp weather. Lay the tarp down and set the branches on kraft paper or cardboard so the foam will not stick to your floor.
2. Put on gloves and shake the expanding foam can thoroughly. Squirt an uneven bead along the top side of each branch and onto a few upper side twigs, leaving some bare wood visible so the finished piece still reads as real winter branches.
3. Let the foam expand undisturbed until it puffs into rounded drifts, then add small extra mounds anywhere the branch looks skimpy. Keep the heaviest buildup near branch forks and on top of thicker sections, just like snow would naturally collect.
4. Allow the foam to cure completely according to the can directions, usually 8 hours or overnight. Once hard, use your fingers to snap off any thin strings and trim only the obviously unnatural spikes with scissors or a craft knife.
5. Brush a full coat of white gesso or primer over every bit of exposed foam, working it into creases and around the edges where foam meets wood. Let it dry completely so the yellow disappears and the texture starts to read like packed snow.
6. Dry-brush matte white acrylic paint over the primed foam for an opaque snowy finish, then add a whisper of soft ivory in a few low spots to keep the snow from looking flat and chalky. Leave the bark mostly natural for contrast, painting only accidental foam smudges on the wood.
7. While the paint is still slightly tacky, sprinkle Epsom salt over the snow areas and press it in gently with your gloved fingertips. Dust a lighter sprinkle of iridescent glitter over the top for an icy sparkle rather than a glitter-craft look.
8. Mist the snow sections with clear matte sealer and let them dry, then add a second light coat to lock everything down. This step keeps the salt and sparkle in place and gives the drifts a crisp, frosted finish.
9. Twist the three branches together into one long mantel garland arrangement, overlapping the thicker ends by 4 to 6 inches so the piece spans roughly 5 to 6 feet. Secure the overlaps with floral wire first, then reinforce discreetly with white zip ties hidden behind the branches.
10. Wrap the warm white micro LED lights through the branch structure, weaving them close to the snow drifts and out toward a few twig tips for depth. Hide the battery packs at the back ends of the garland where they can sit behind books, a vase, or mantel décor.
11. Hot-glue faux pine picks, eucalyptus sprigs, and berry stems into the branch overlaps and a few central pockets so the greenery looks tucked into the snowy wood rather than stuck on top. Keep these accents light and airy; the snow-covered branches should remain the star.
12. Tie a soft bow from the velvet ribbon or cut the ribbon into two shorter tails and weave them loosely near one side of the garland for a finished mantel look. Add felt pads to any spots that will touch the mantel, then place the garland and fluff the twigs so the lights, snow drifts, and accents all show from the front.
Variations & Tips
For a longer mantel: If your mantel is wider than 6 feet, add a fourth branch and one extra light strand rather than stretching the arrangement thin. This project looks best when it feels full and layered.
For a more natural snow effect: Build the foam in irregular patches instead of a straight line. Real snow settles in drifts, pockets, and thicker pillows at branch joints, and that little bit of randomness is what makes the finish convincing.
If the foam expands too much: Let it cure completely before trimming. Trying to shape it while wet usually makes a mess, rather like slicing into a bake before it sets.
For a brighter white finish: Use two coats of white paint over the primer before adding the salt. The yellow undertone of fresh foam needs full coverage or it will show through in warm room lighting.
Battery pack placement: I like to hide the packs behind a stack of books, a lantern, or a vase at each end of the mantel. That keeps the glow visible without leaving modern plastic boxes in plain sight.
Skip the glitter if you prefer: Use only Epsom salt for a beautiful crystalline finish. It reflects light in a subtler, icier way that reads very elegant in the evening.
Use collected branches safely: Choose solid, dry branches without active insects or soft rotten spots. If needed, let them sit in a warm garage for a day or two before crafting so they are clean and stable indoors.
Make it removable for storage: Instead of fully gluing every accent, wire in a few greenery picks so you can take the garland apart more easily after the season. Store it in a long wreath box or a lidded under-bed bin lined with tissue paper.