
I never walk past the stack of old folding TV trays at Goodwill anymore. In my town, they usually sit there in a crooked little pile for $3 to $8 each, and while most people see scratched wood and wobbly legs, I see a weekend project with good bones. They’re light, easy to paint, and just the right size for all kinds of useful upgrades around the house.
If you’ve got one tucked in a closet or you spot a plain wooden set at the thrift store, here are 20 smart ways to turn it into something genuinely pretty and practical. I kept these ideas varied on purpose, from kid-friendly and pet-friendly builds to a few seasonal favorites for colder months, and every one of them can be done without a full workshop.
1. Two-tone striped top
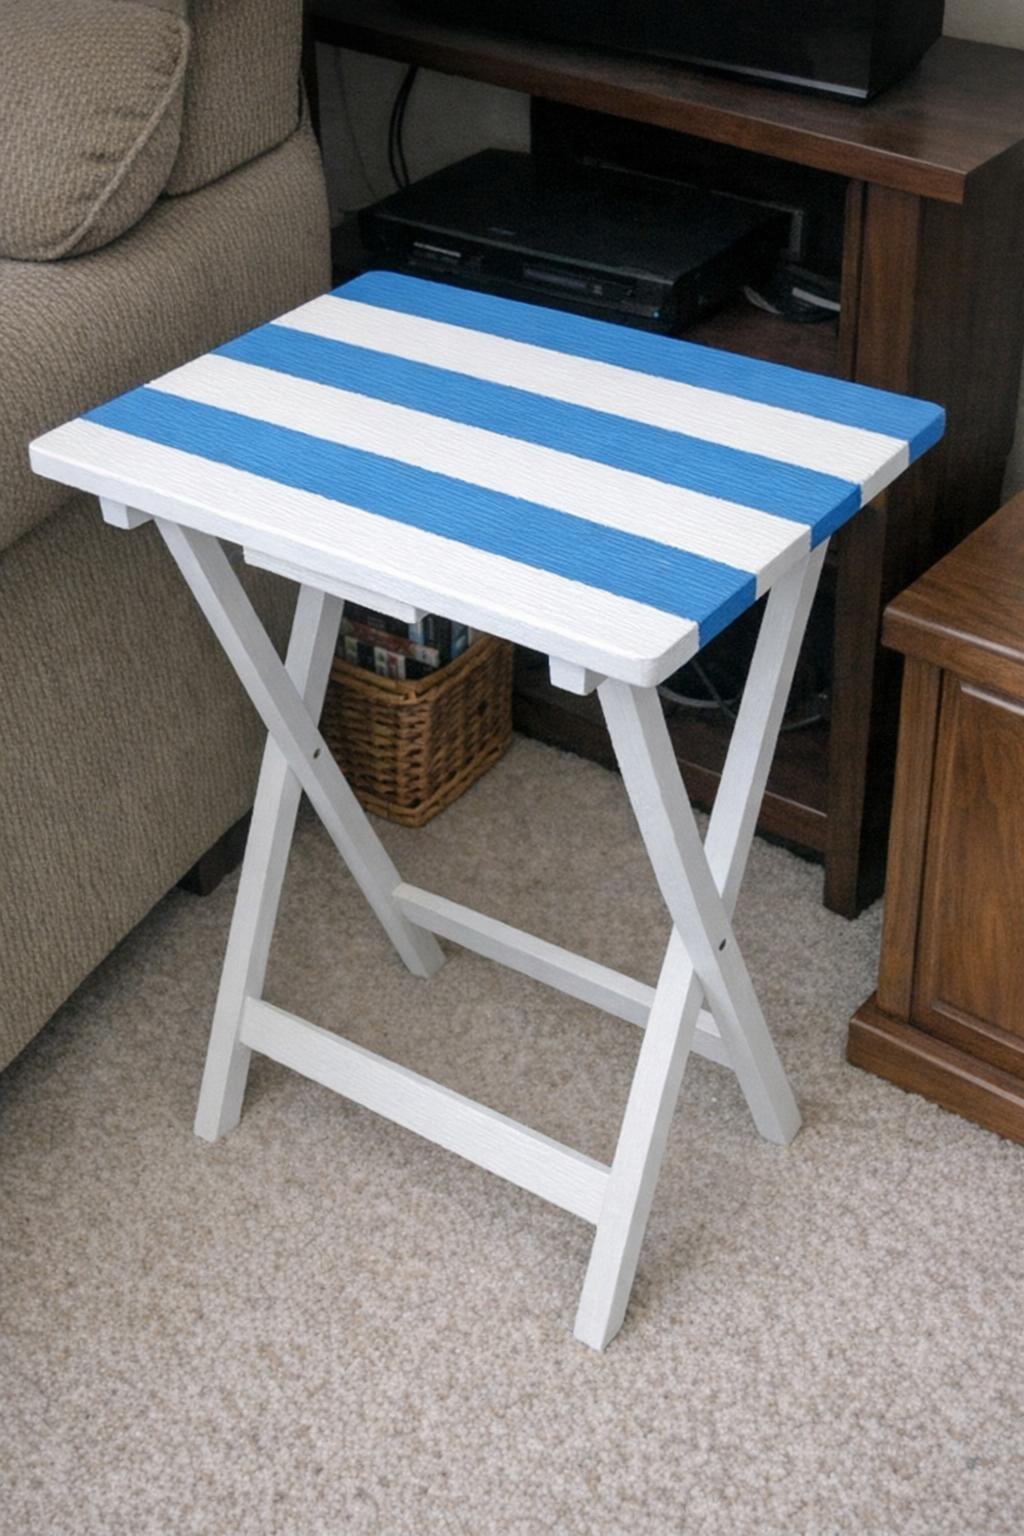
A simple striped top is one of the easiest ways to make an old tray look custom. Start with a sanded, clean surface and lay down 1-inch painter’s tape stripes across the top, spacing them edge to edge. I like using two chalk-paint colors with some contrast, such as soft cream and dusty blue, then applying two thin coats of each color and peeling the tape while the second coat is still a little tacky.
Once it dries overnight, buff on a coat of clear wax to soften the finish and protect it from drink rings. This works especially well on trays with a 14-by-19-inch top because the stripes feel crisp without looking busy. In a family room, it ends up looking like a little boutique accent table instead of thrift-store furniture.
2. Penny-tile mosaic outdoor side table
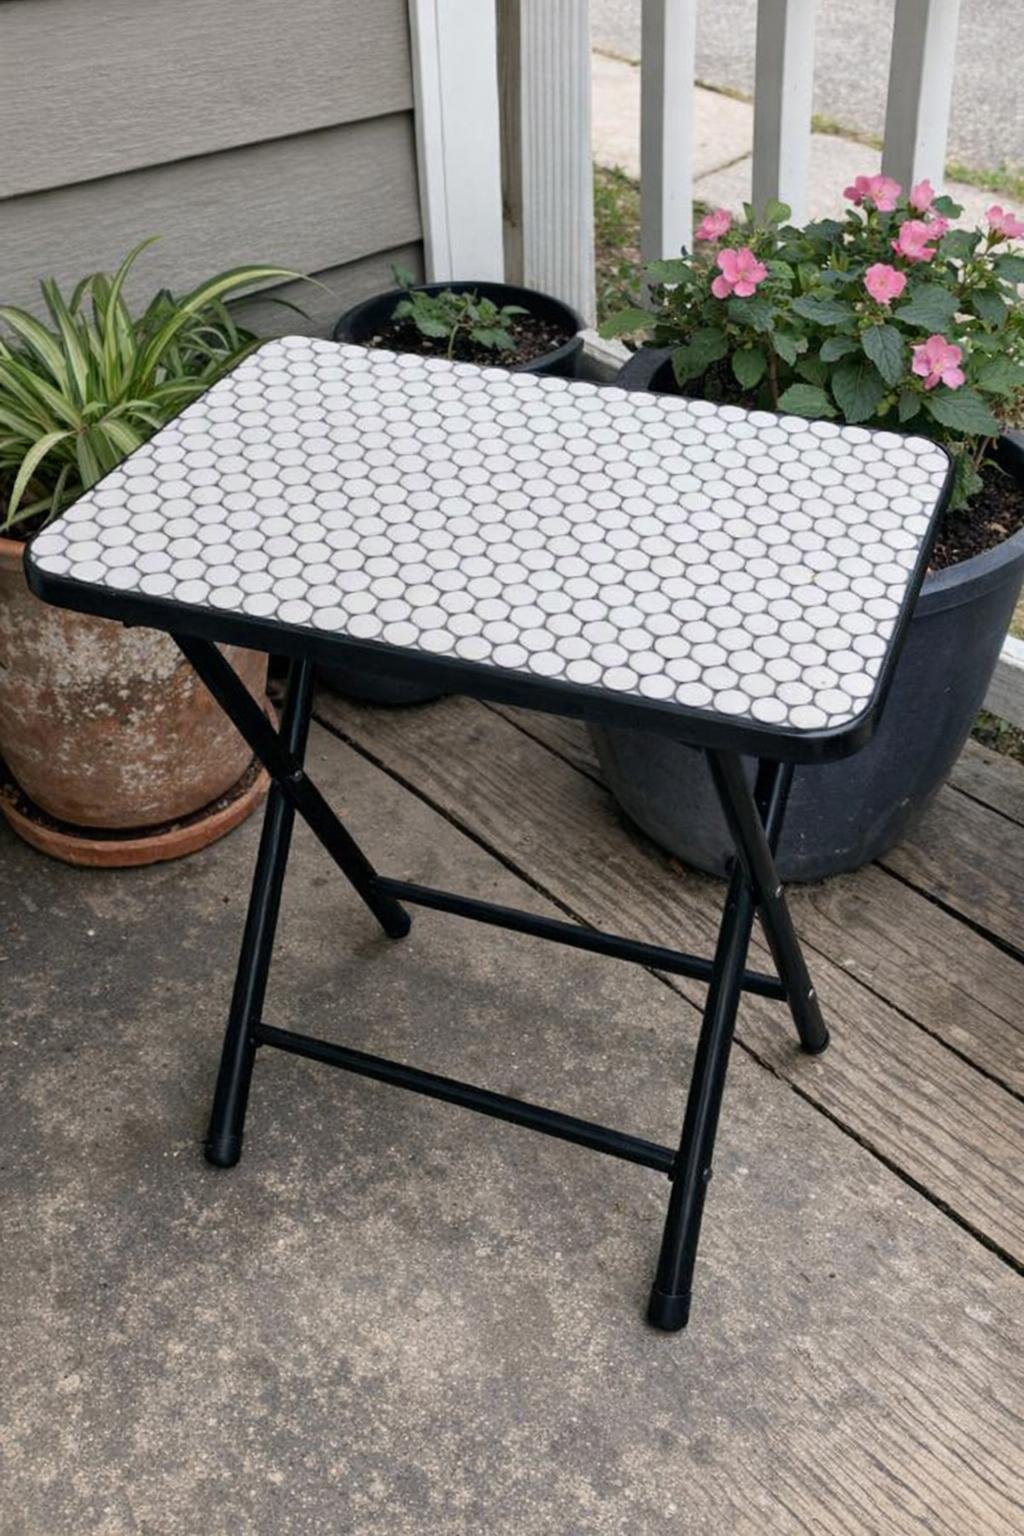
If the top is too beat up to save, cover it with a sheet of penny tile. One 12-by-12-inch sheet or two smaller sheets can be cut to fit most tray tops, then glued down with thin-set adhesive or a strong construction adhesive rated for tile. After it sets, spread grout into the gaps with a rubber float, wipe the surface with a damp sponge, and let it cure for a full day.
Seal both the grout and the top so it can handle porch humidity and splashes from planters. The finished table is heavy enough to feel sturdier outdoors, and the little round tiles photograph beautifully with terra-cotta pots, lanterns, or a glass of lemonade on top.
3. Coastal nightstand
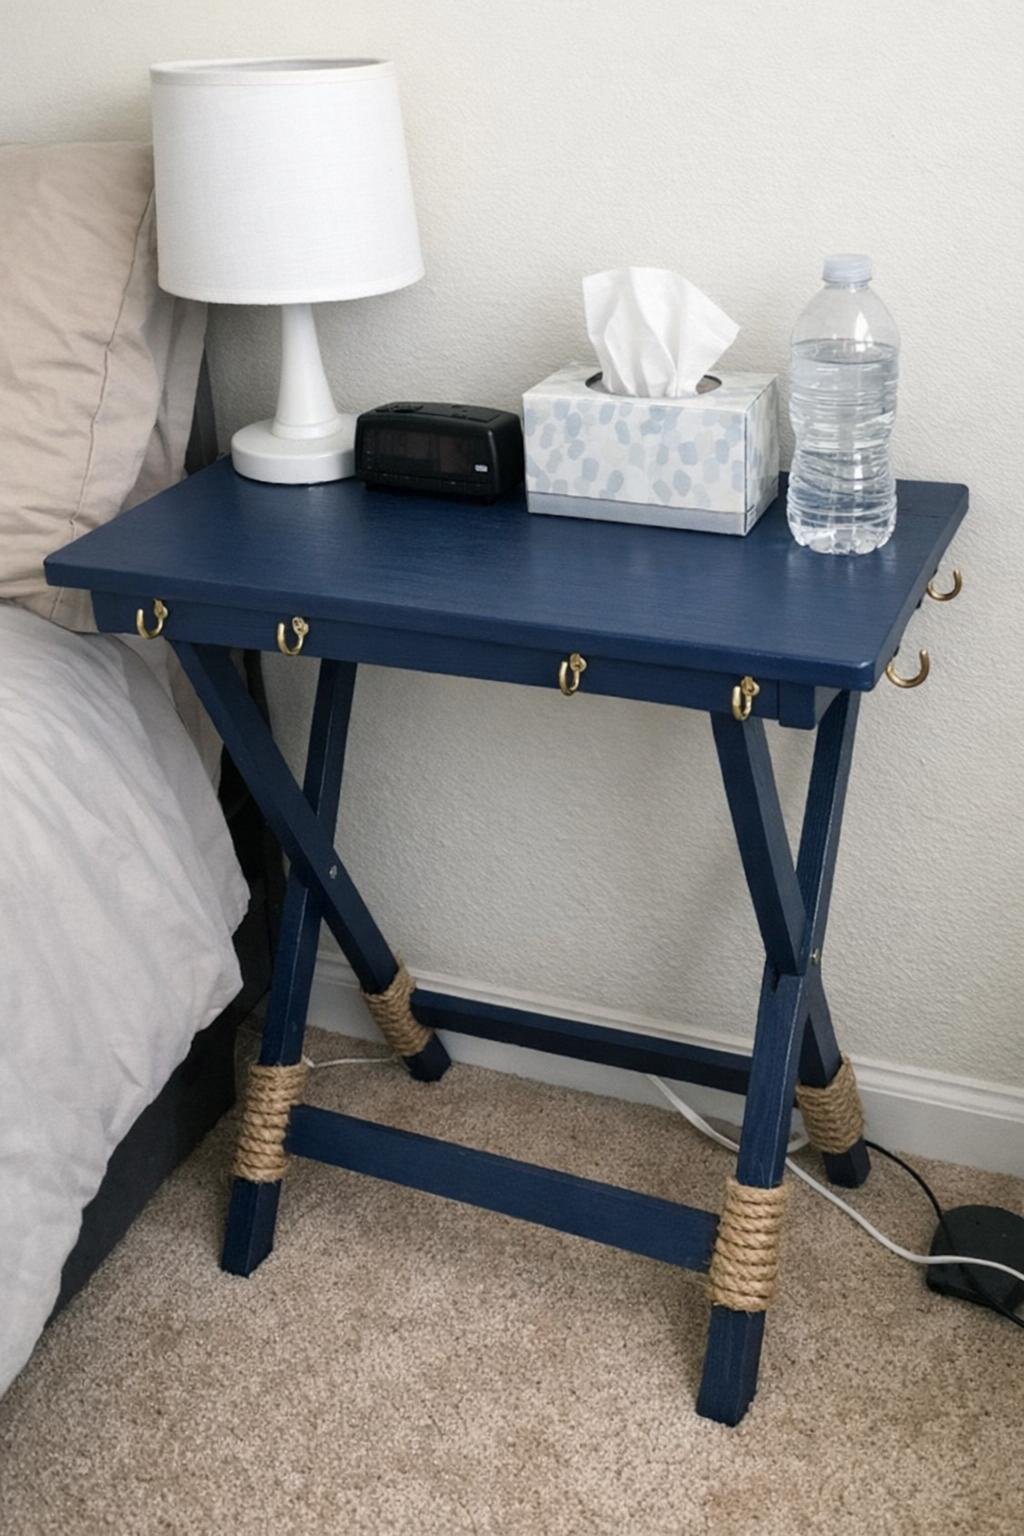
This one looks charming beside a guest bed or in a lake-house style room. Paint the whole tray navy with chalk paint, then screw two small brass cup hooks into the apron so you can hang a sleep mask, lightweight basket, or charging cord. Wrapping the lower part of the legs in sisal rope adds texture and helps hide scuffs.
I’d wrap about 8 to 10 inches of each leg, securing the rope with hot glue or clear construction adhesive every few inches. Add a lamp, a paperback, and a little white dish, and suddenly that old tray feels intentional. If you have a picky decorator in the house, this one is easy to soften with cream bedding and woven accents.
4. Wall-mounted fold-down desk
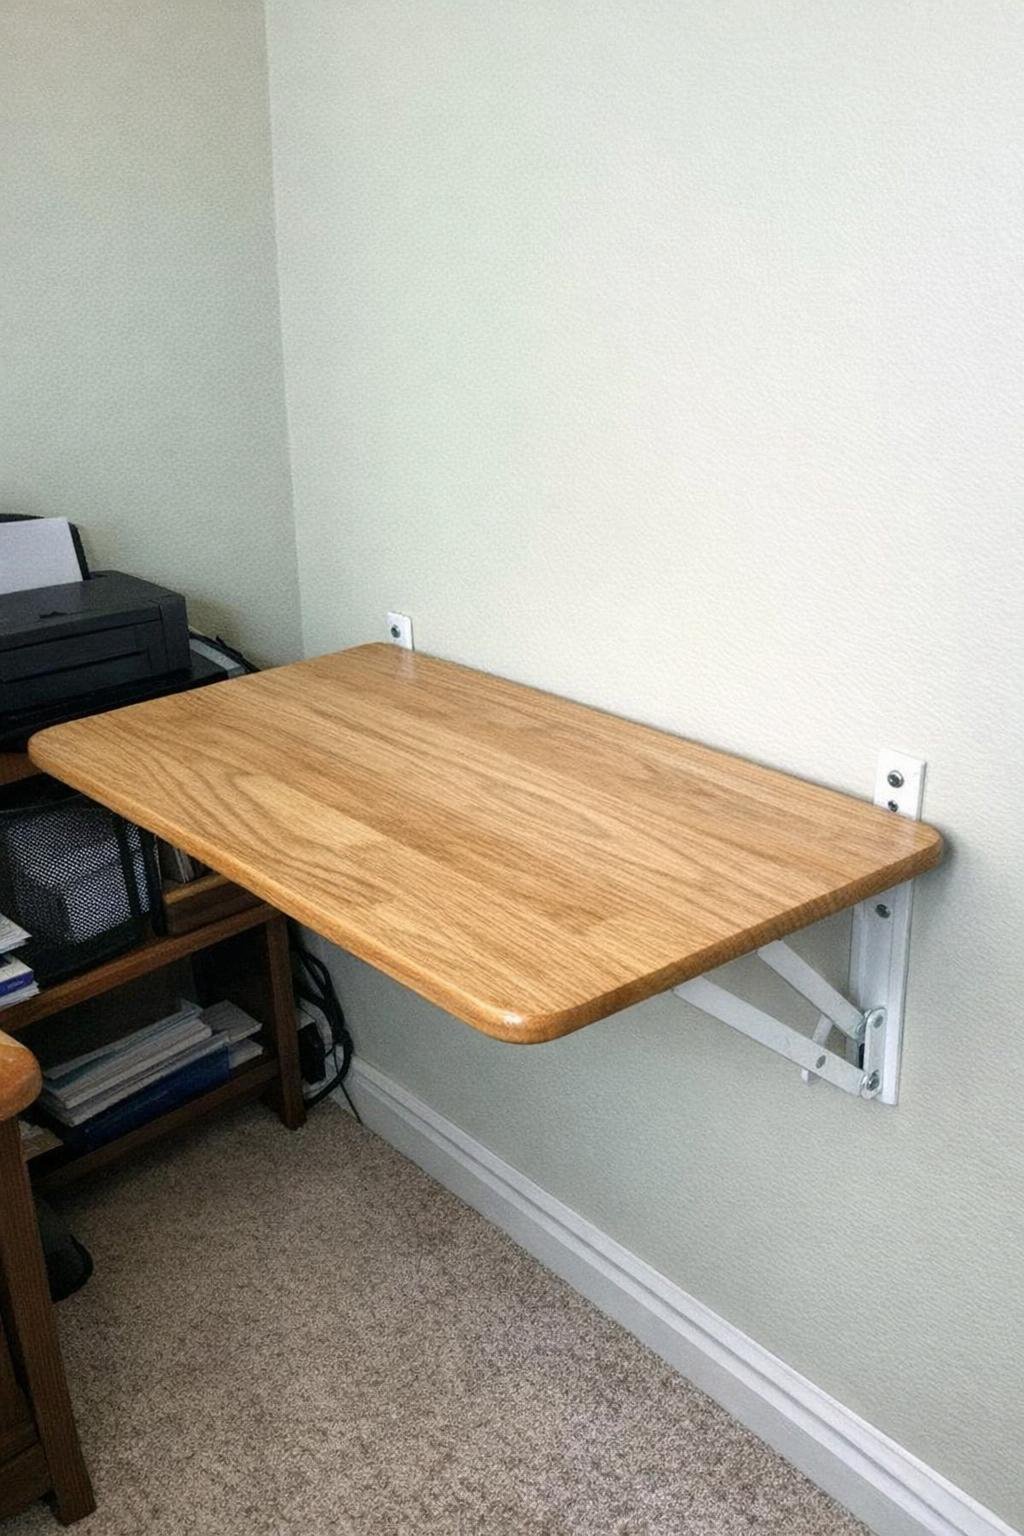
A tray top can become a wonderfully compact desk if you remove the legs and hinge the top to a wall cleat. Mount a 1-by-3 cleat into studs, then attach the tray top with sturdy hinges so it folds down to about standard desk height, roughly 29 to 30 inches from the floor. Add folding shelf brackets underneath so it locks in place when open.
It’s such a good solution for a hallway nook, mudroom, or teen bedroom where floor space is tight. The best part is that when you fold it flat, it sticks out only a few inches, so it doesn’t crowd the room. I’d use it for bill paying, laptop work, or a quick homework station.
5. Distressed farmhouse tray
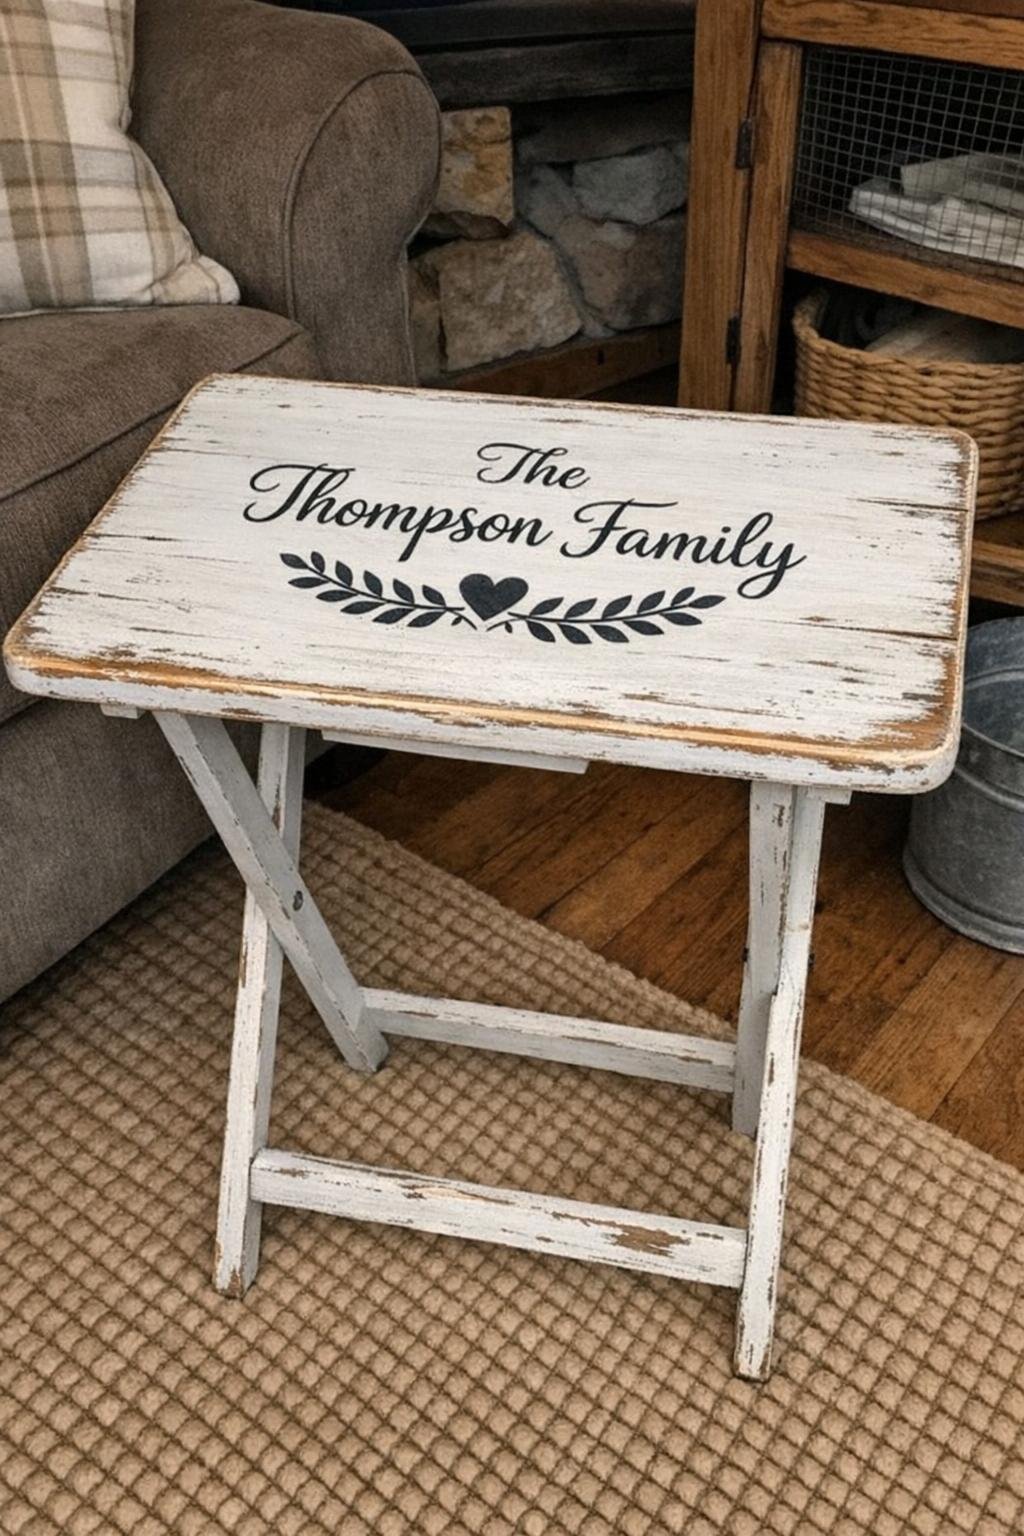
For a farmhouse look, paint the tray with white milk paint and then sand the edges and corners once it dries so the wood peeks through naturally. The trick is to keep the distressing mostly on the rim, the outer legs, and any raised details. Too much sanding makes it look forced, but a few worn areas make it feel like an old family piece.
A hand-lettered family-name stencil across the center turns it into decor as much as furniture. Use a light gray or faded black paint and a small stencil brush for a soft finish, then seal it with matte polycrylic. This is the kind of tray I’d use next to a rocking chair with a quilt folded nearby.
6. Three-height plant stand cluster
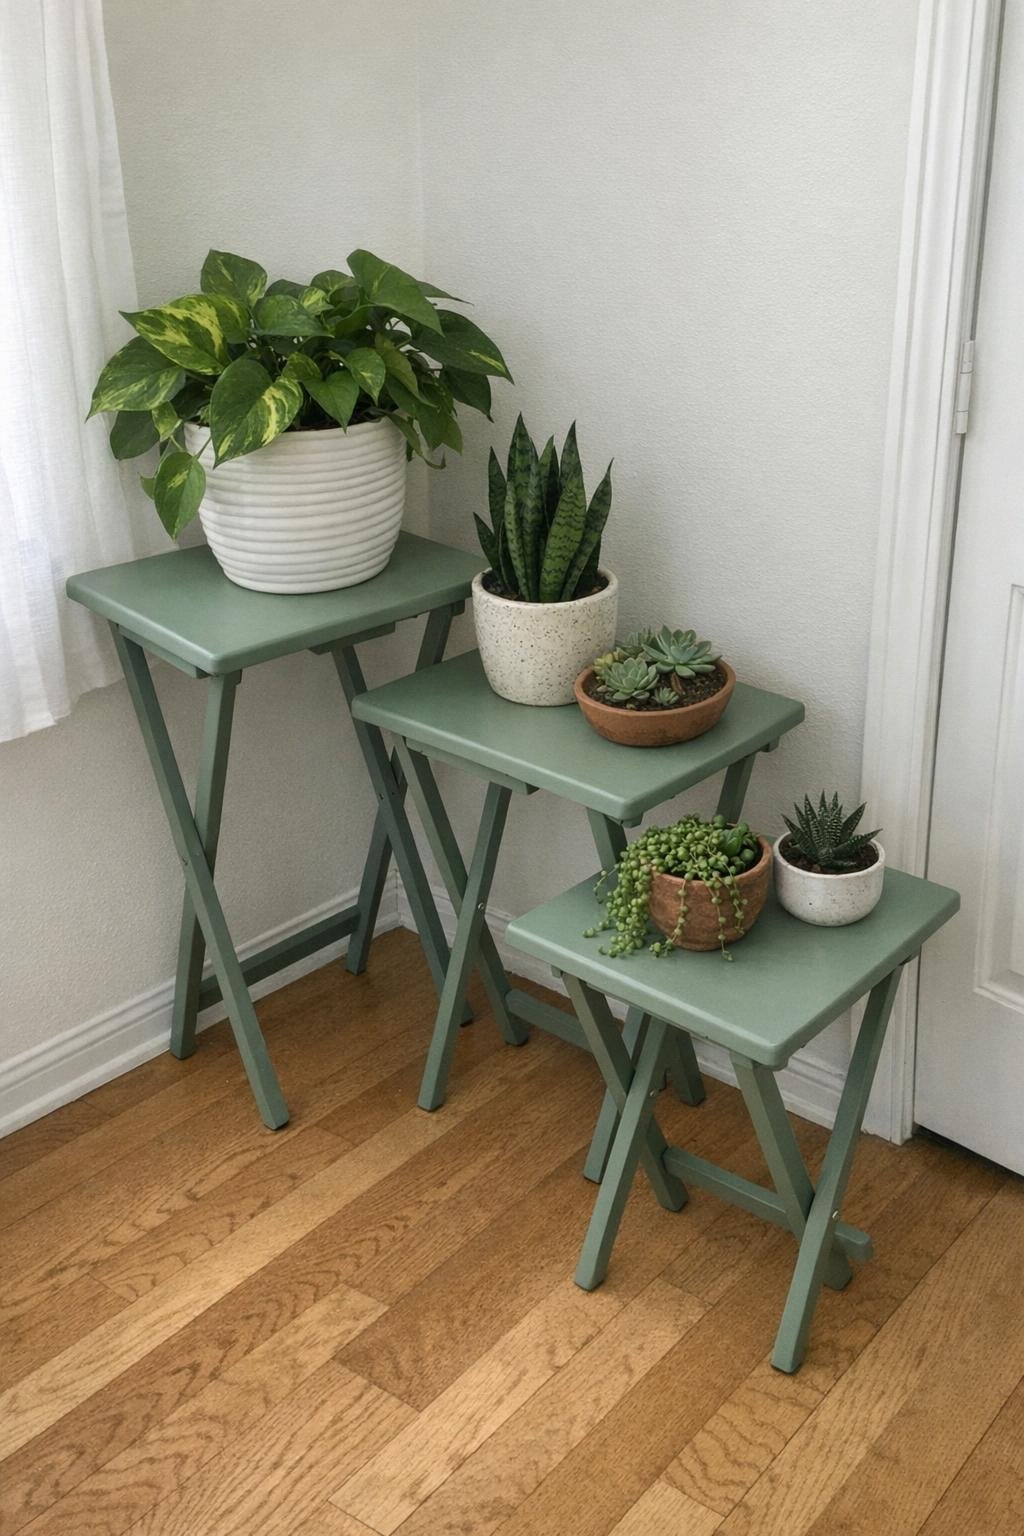
If you find three matching trays, turn them into a staggered plant display. Paint all three the same matte sage color so they read as a set, then cut the legs to three different heights, like 16 inches, 22 inches, and 28 inches. Sand the cut ends smooth and add felt pads or rubber feet so they don’t scratch the floor.
Grouped together in a sunny corner, the different levels let you layer trailing ivy, a medium fern, and a taller snake plant without everything looking flat. I love projects that make a room feel finished without a lot of cost, and this one gives you that nice collected look for less than the price of one new plant stand.
7. Chalkboard kids' drawing desk
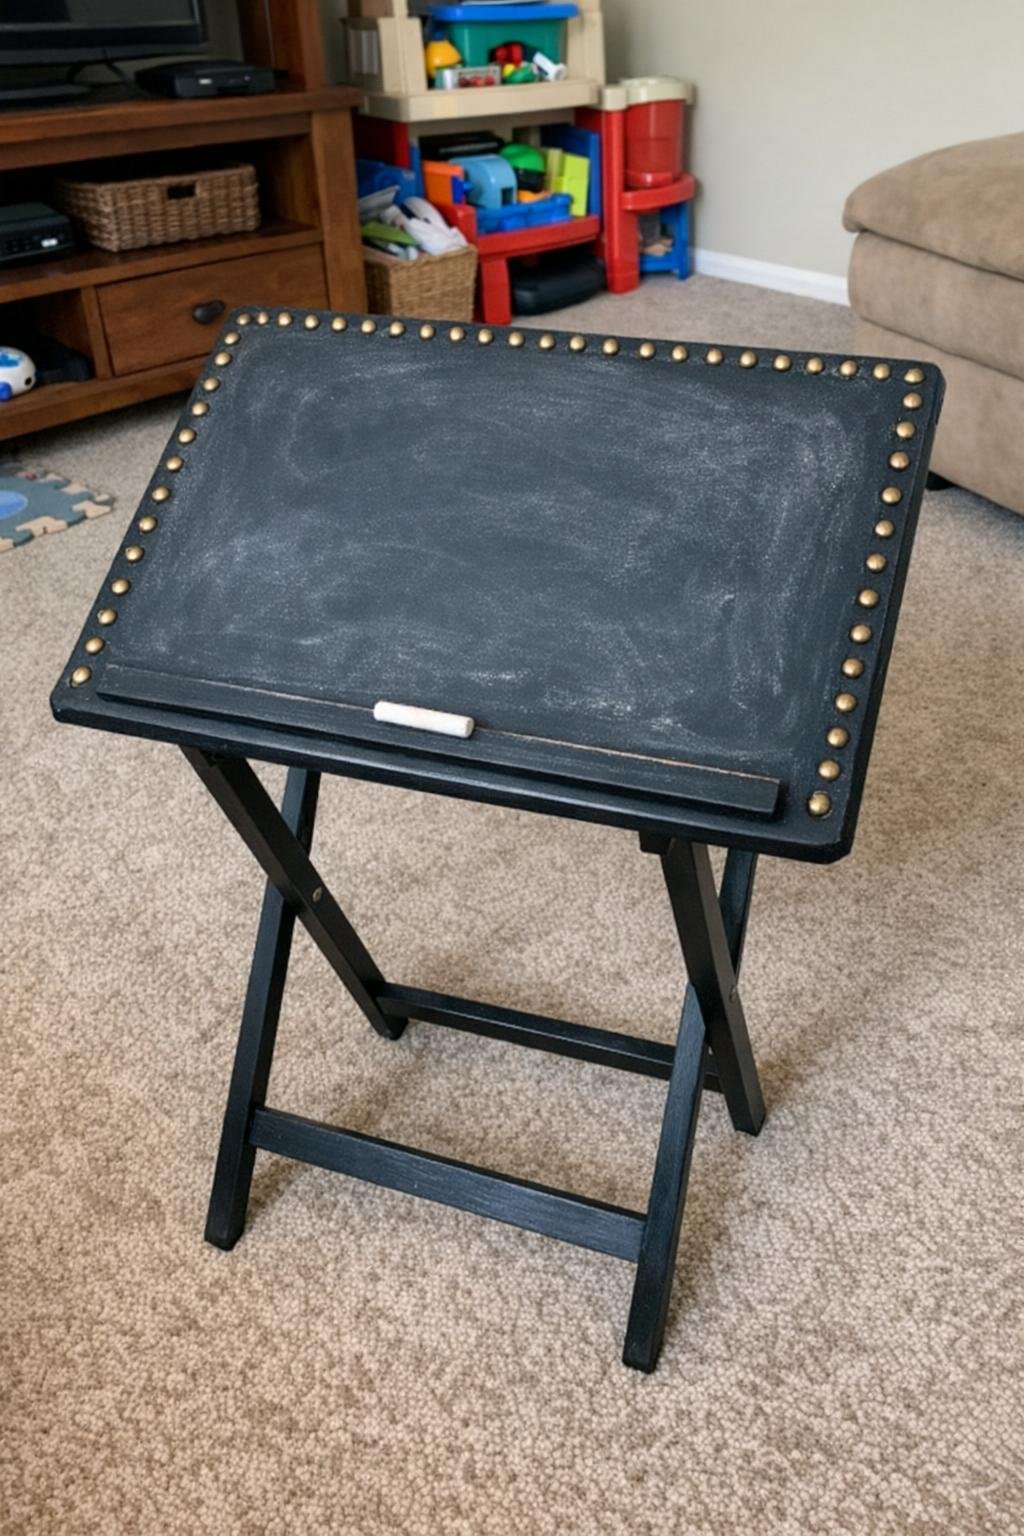
This one is such a hit with kids, especially on rainy afternoons. Paint the top with two or three coats of chalkboard paint, letting each coat dry fully, then outline the edge with upholstery tacks spaced about 1 inch apart for a finished look. A narrow chalk ledge screwed or glued along one side keeps chalk from rolling everywhere.
If you want it to last, season the chalkboard surface by rubbing the side of a piece of chalk over the whole top and wiping it off before first use. I’d keep a little tin of chalk and an eraser underneath, and for children who don’t love drawing, it can also double as a simple game or practice table.
8. Pet feeding station
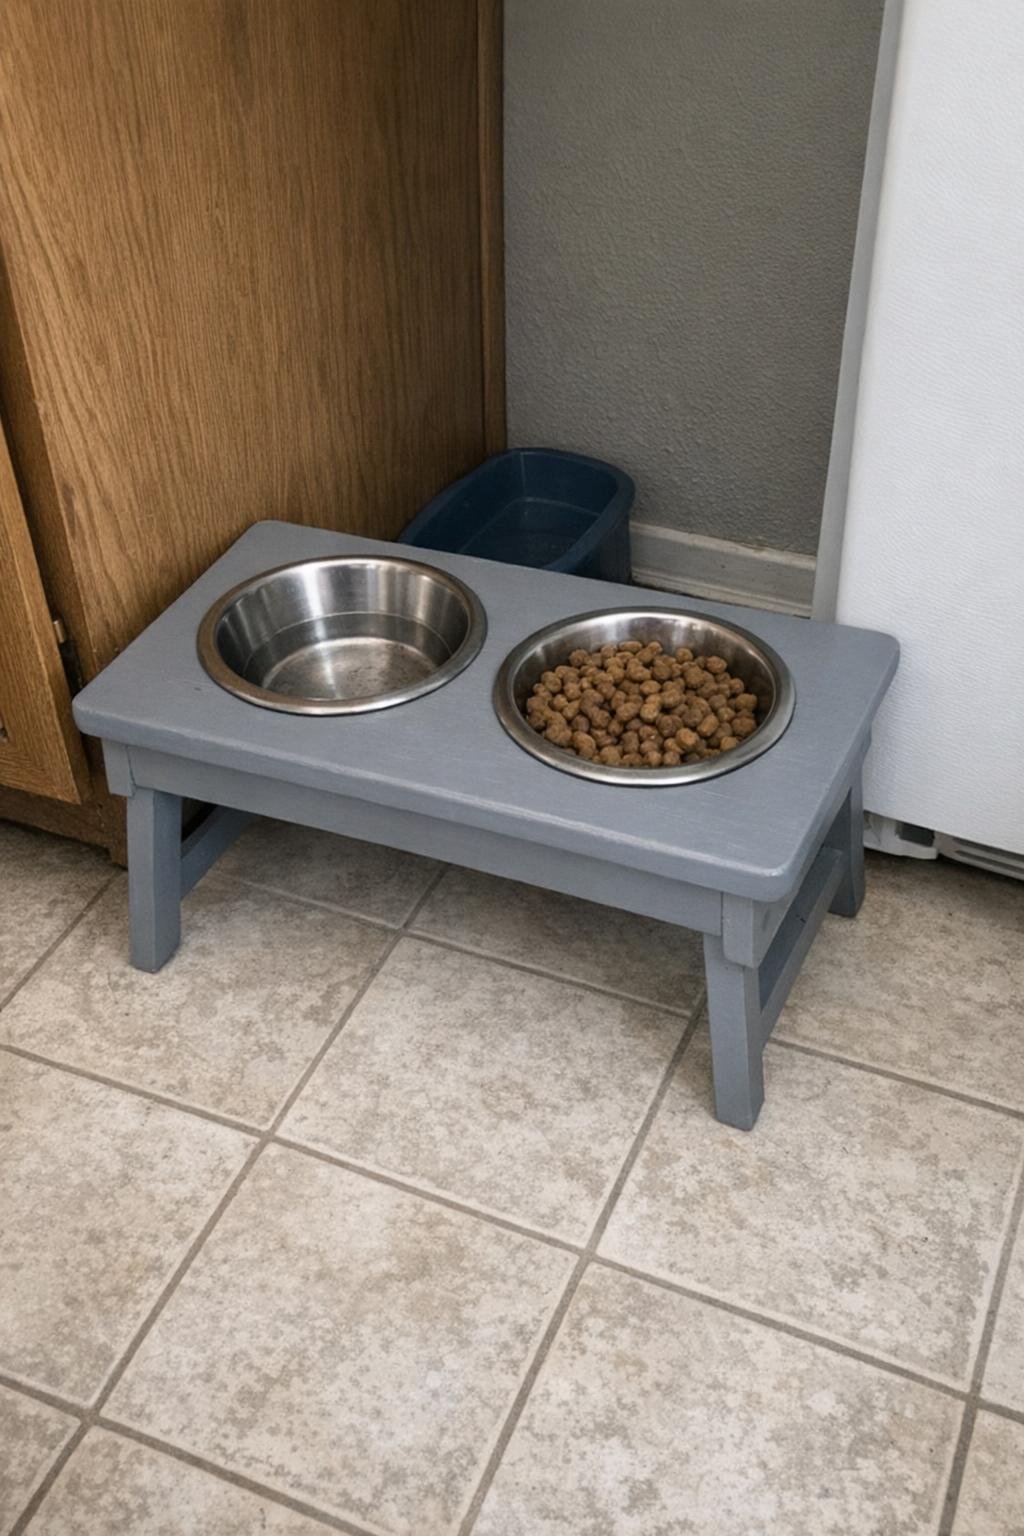
An old tray can make a tidy feeding spot for a dog or cat if you cut two bowl openings into the top with a jigsaw. Trace the rims of stainless bowls, drill a starter hole, then cut just inside the line so the bowls sit snugly without falling through. Shorten the legs by about 8 inches for medium dogs, or adjust to your pet’s shoulder height.
Paint the whole piece with a durable semi-gloss finish so you can wipe up drips easily. Beneath the bowls, a washable mat helps catch splashes. It looks much neater than bowls slid against the wall, and it keeps enthusiastic eaters from pushing dinner across the kitchen floor.
9. Padded fold-away ironing board
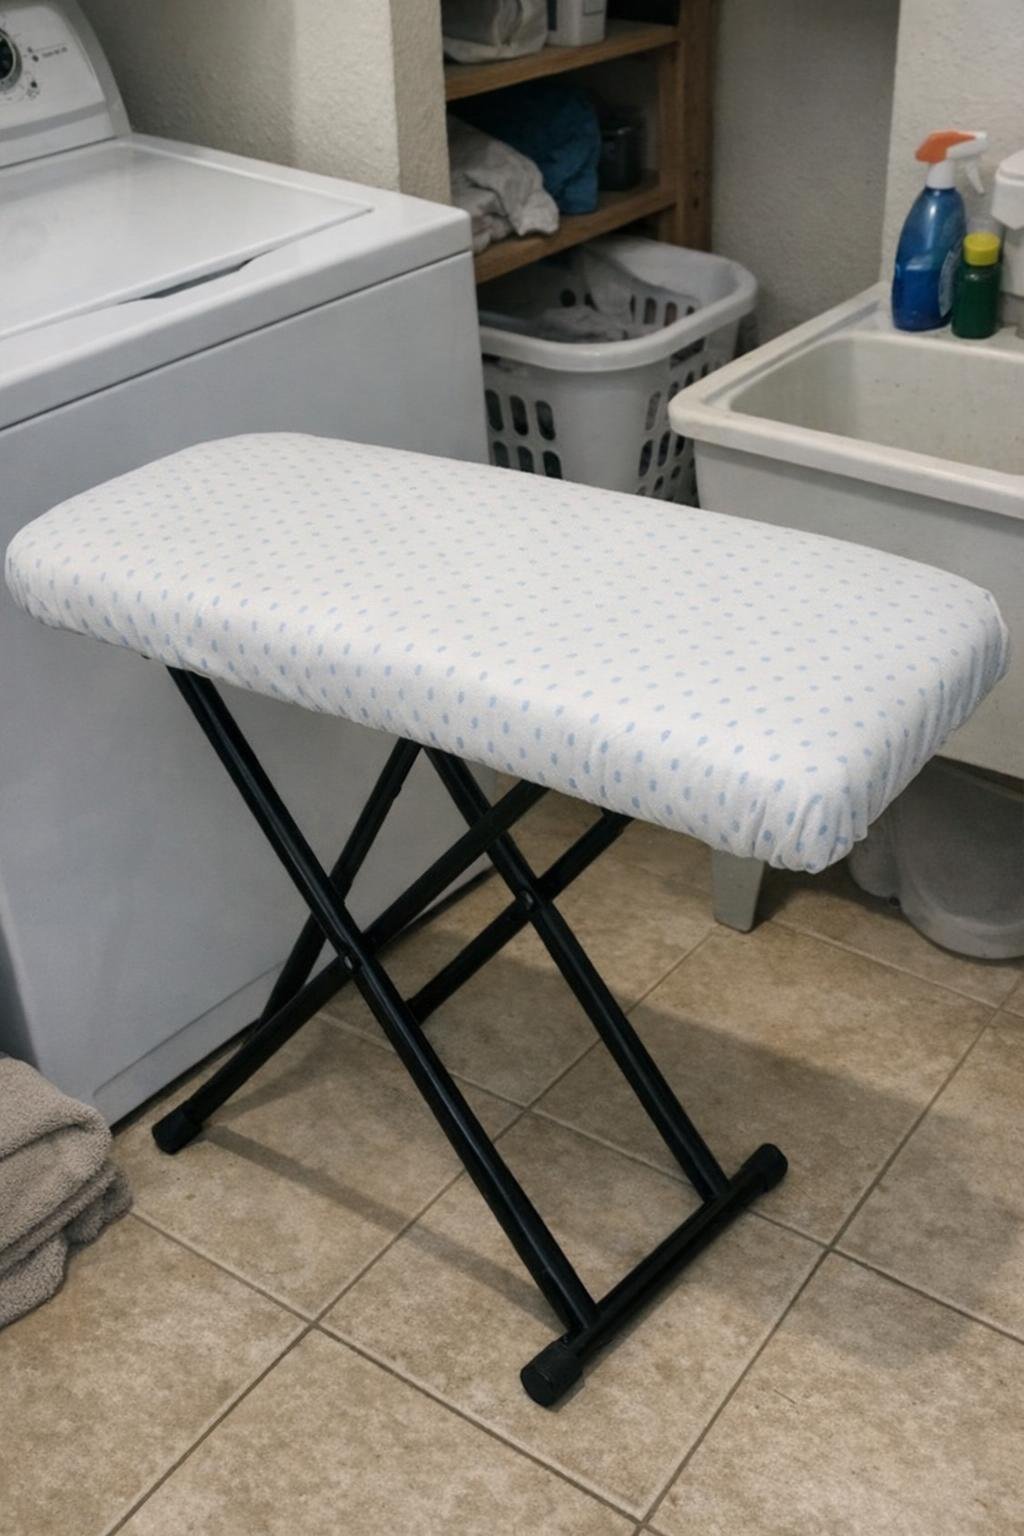
This is one of those practical little upgrades that makes perfect sense in a small house. Wrap the top with one layer of quilt batting and one layer of cotton fabric, pulling both tight and stapling them underneath. A heat-resistant cotton works best, and I’d leave at least 2 inches of extra fabric all around so you have enough to fold under neatly.
Because the tray still folds, you can slide it into a laundry closet or behind a door when you’re done. It’s ideal for quick touch-ups on school clothes, napkins, or pillowcases when you don’t want to drag out a full-size ironing board.
10. Faux marble glam table
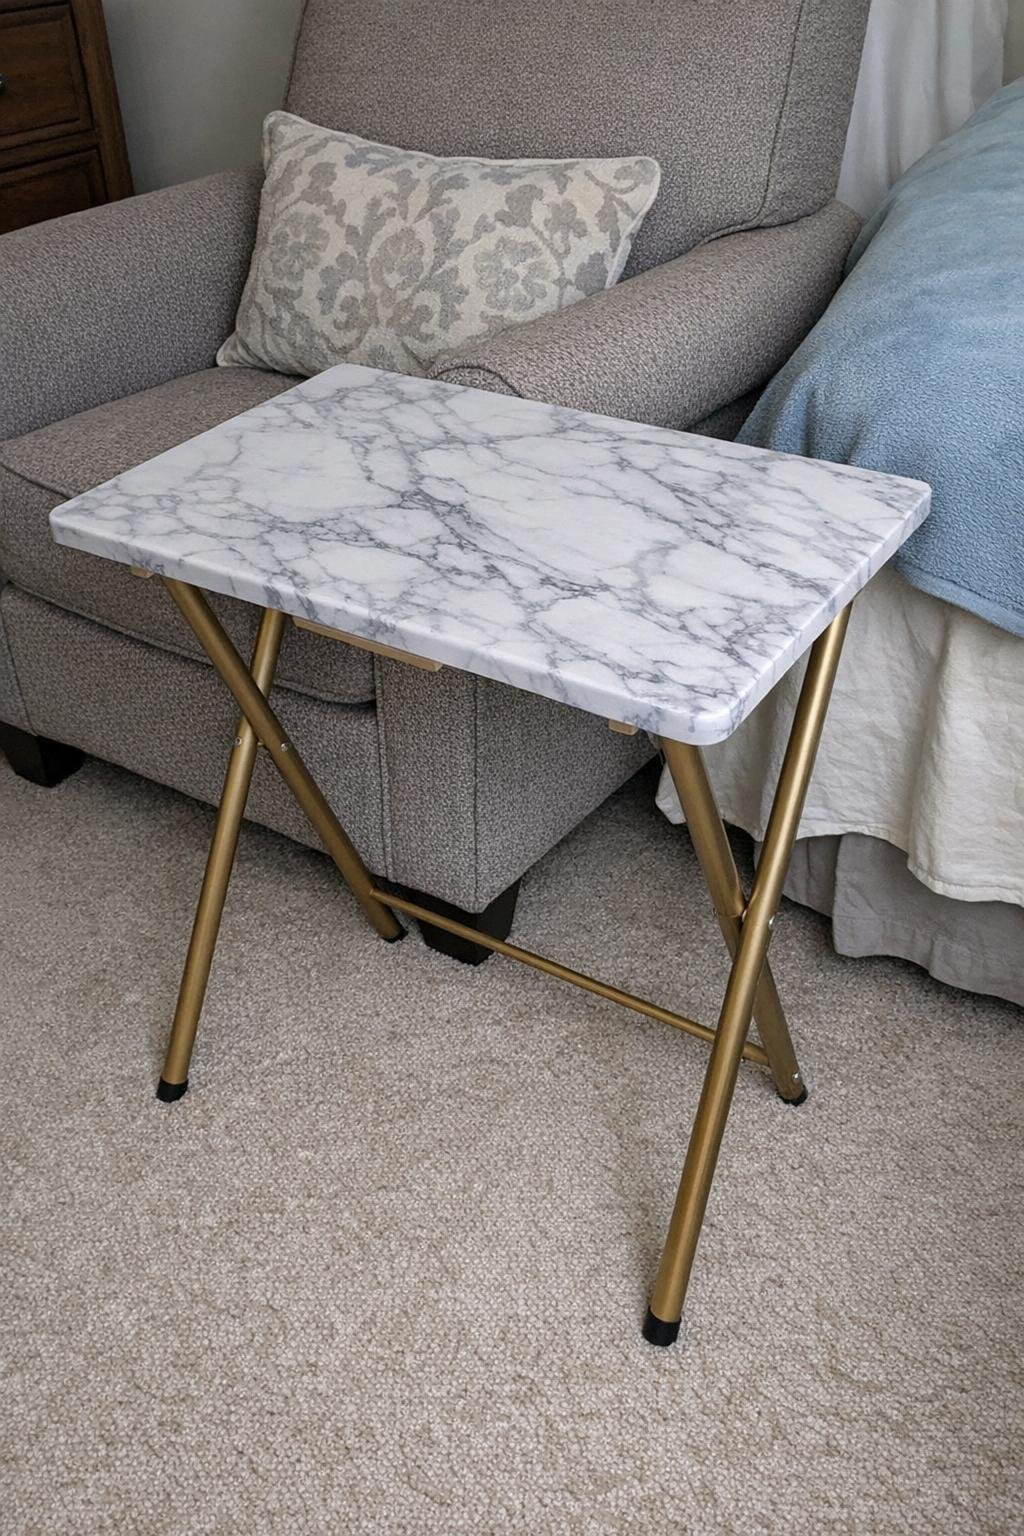
For a quick makeover with a high-contrast finish, cover the top with peel-and-stick marble vinyl and spray the legs gold. Clean the top well first, then smooth the vinyl from the center outward with a plastic scraper to prevent bubbles. Trim the edges with a craft knife and tuck them under as neatly as you can.
Spray the legs with two light coats of metallic gold after priming, letting them dry completely between coats. This one looks especially nice beside a reading chair or in a teen bedroom with a small lamp and candle on top. It’s one of the fastest flips on the list, but it looks surprisingly polished.
11. Dark-stained monogram table
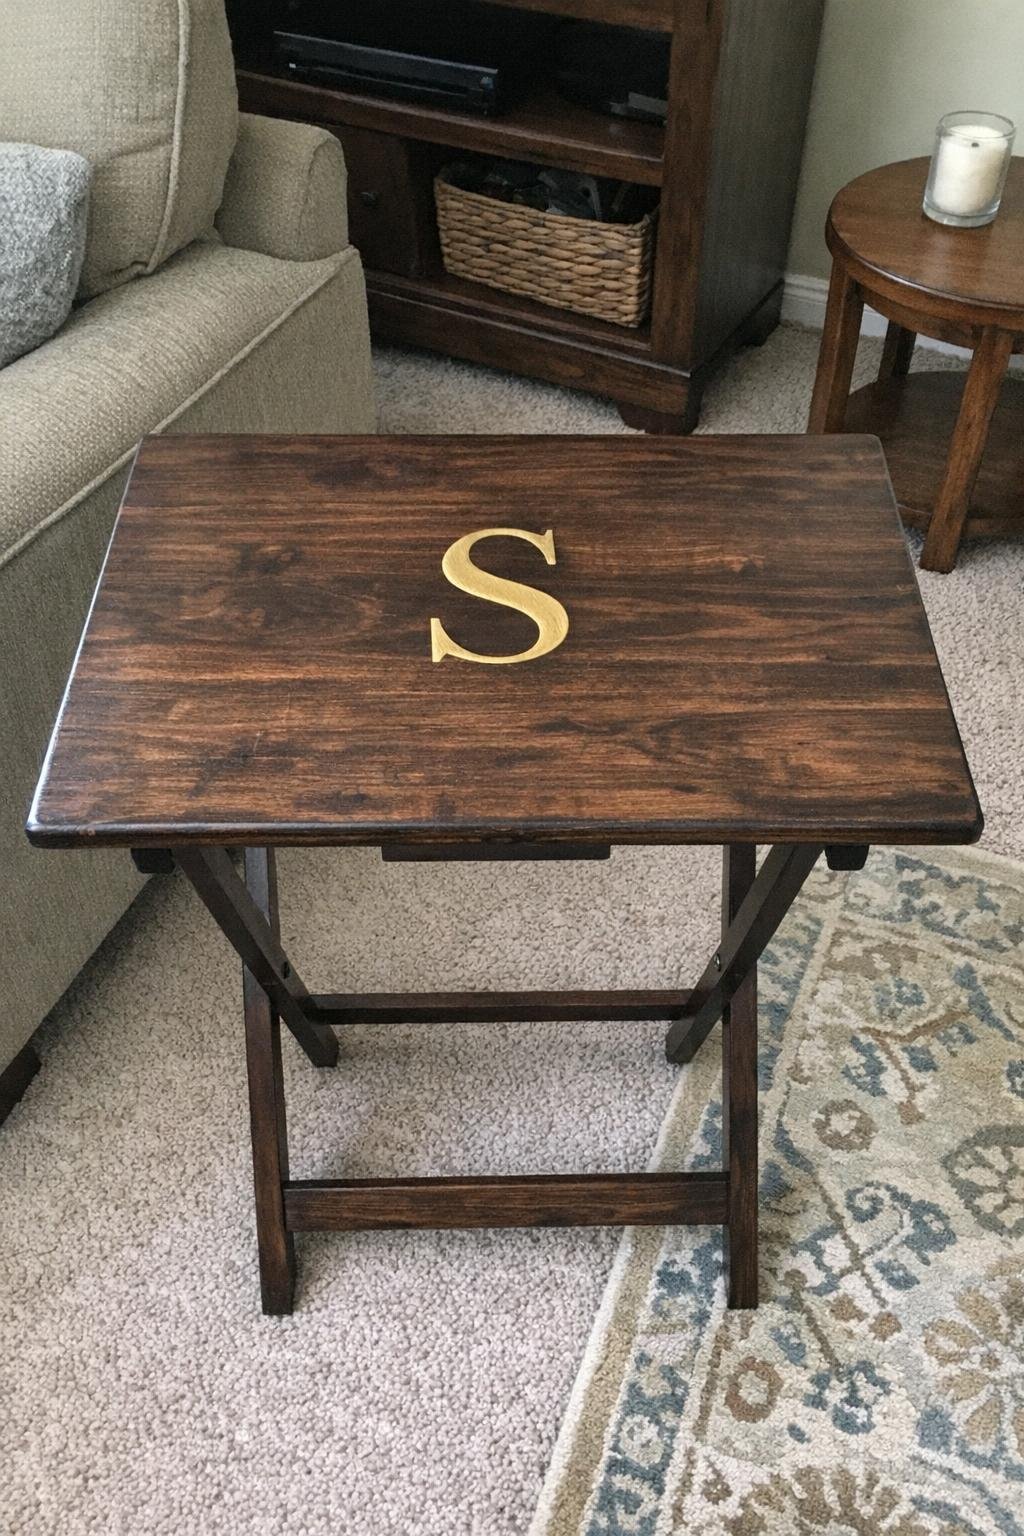
If the wood grain is decent, a rich walnut stain can completely transform a tired tray. Sand it to bare wood, wipe off the dust, and brush on one or two coats of walnut stain depending on how deep you want the color. Once it dries, center a single large monogram and apply gold leaf over adhesive sizing for a little bit of shine.
I’d keep the monogram around 6 to 8 inches tall so it feels elegant rather than oversized. A satin sealer on top protects the finish and keeps the gold from rubbing off. This is a lovely gift idea for a wedding, graduation, or new apartment.
12. Felt-top puzzle table
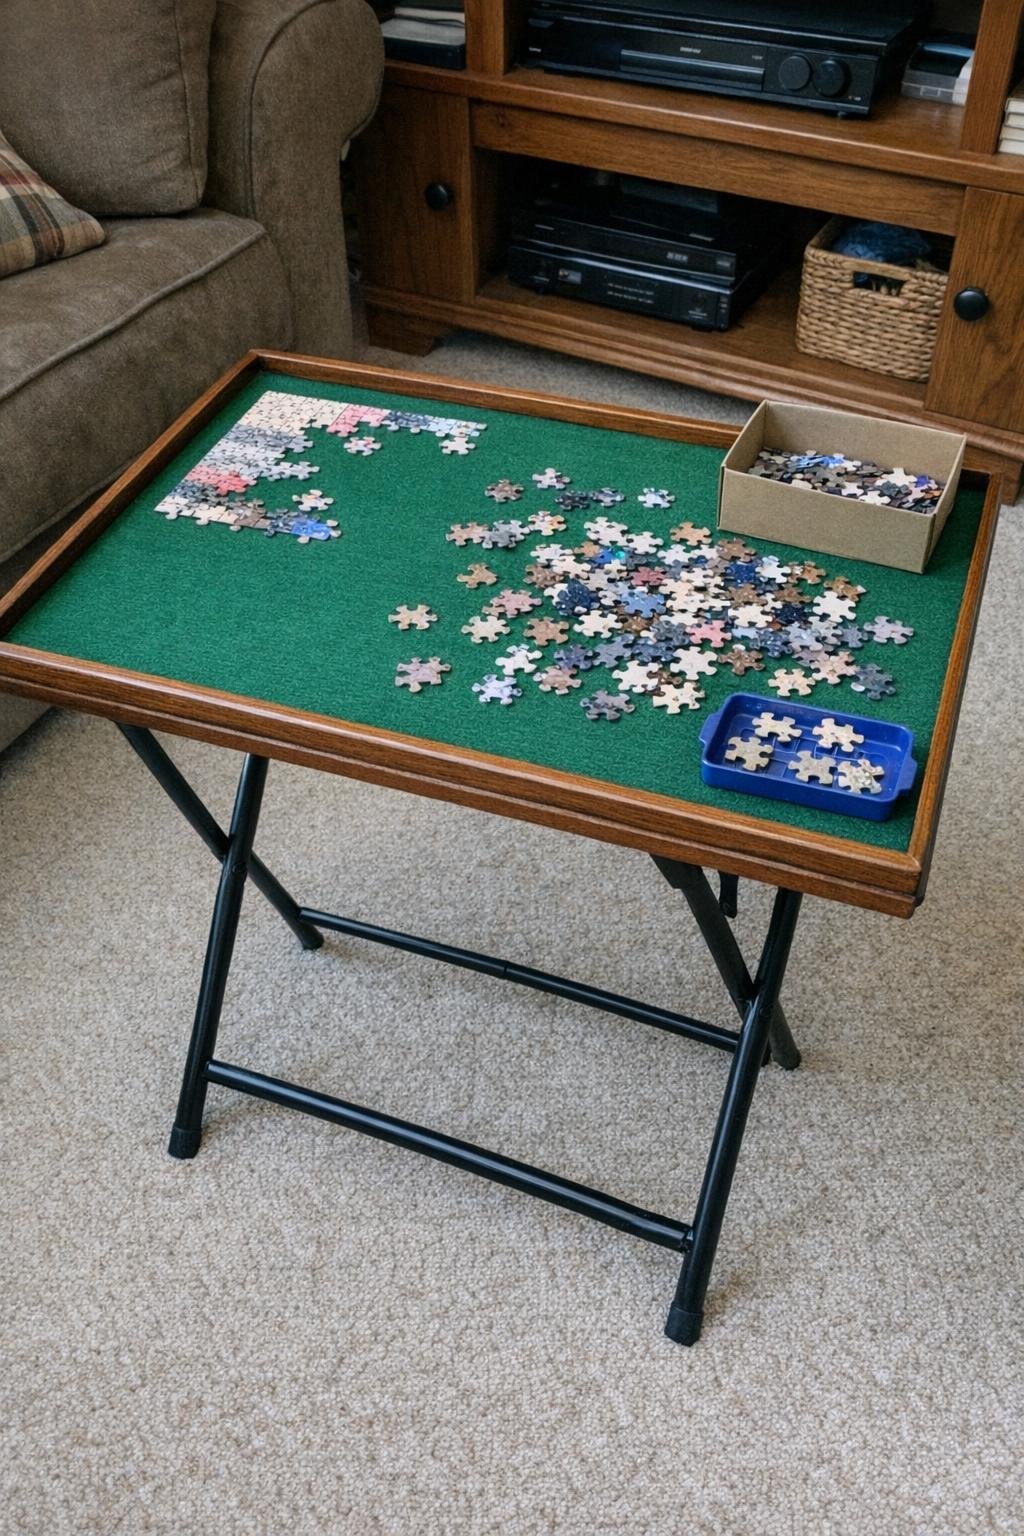
A puzzle table is such a cozy upgrade for winter evenings, but honestly we use ours year-round. Glue green felt to the top using spray adhesive or fabric glue, smoothing carefully so there are no wrinkles. Then attach 1-inch raised trim around the perimeter so edge pieces and loose sections don’t slide off if someone bumps the table.
A standard 500-piece puzzle fits comfortably on most tray tops, and you can tuck the whole thing into a corner when dinner is over. If your family likes board games more than puzzles, the same idea works for cards, dominoes, or little building sets too.
13. Lego build table
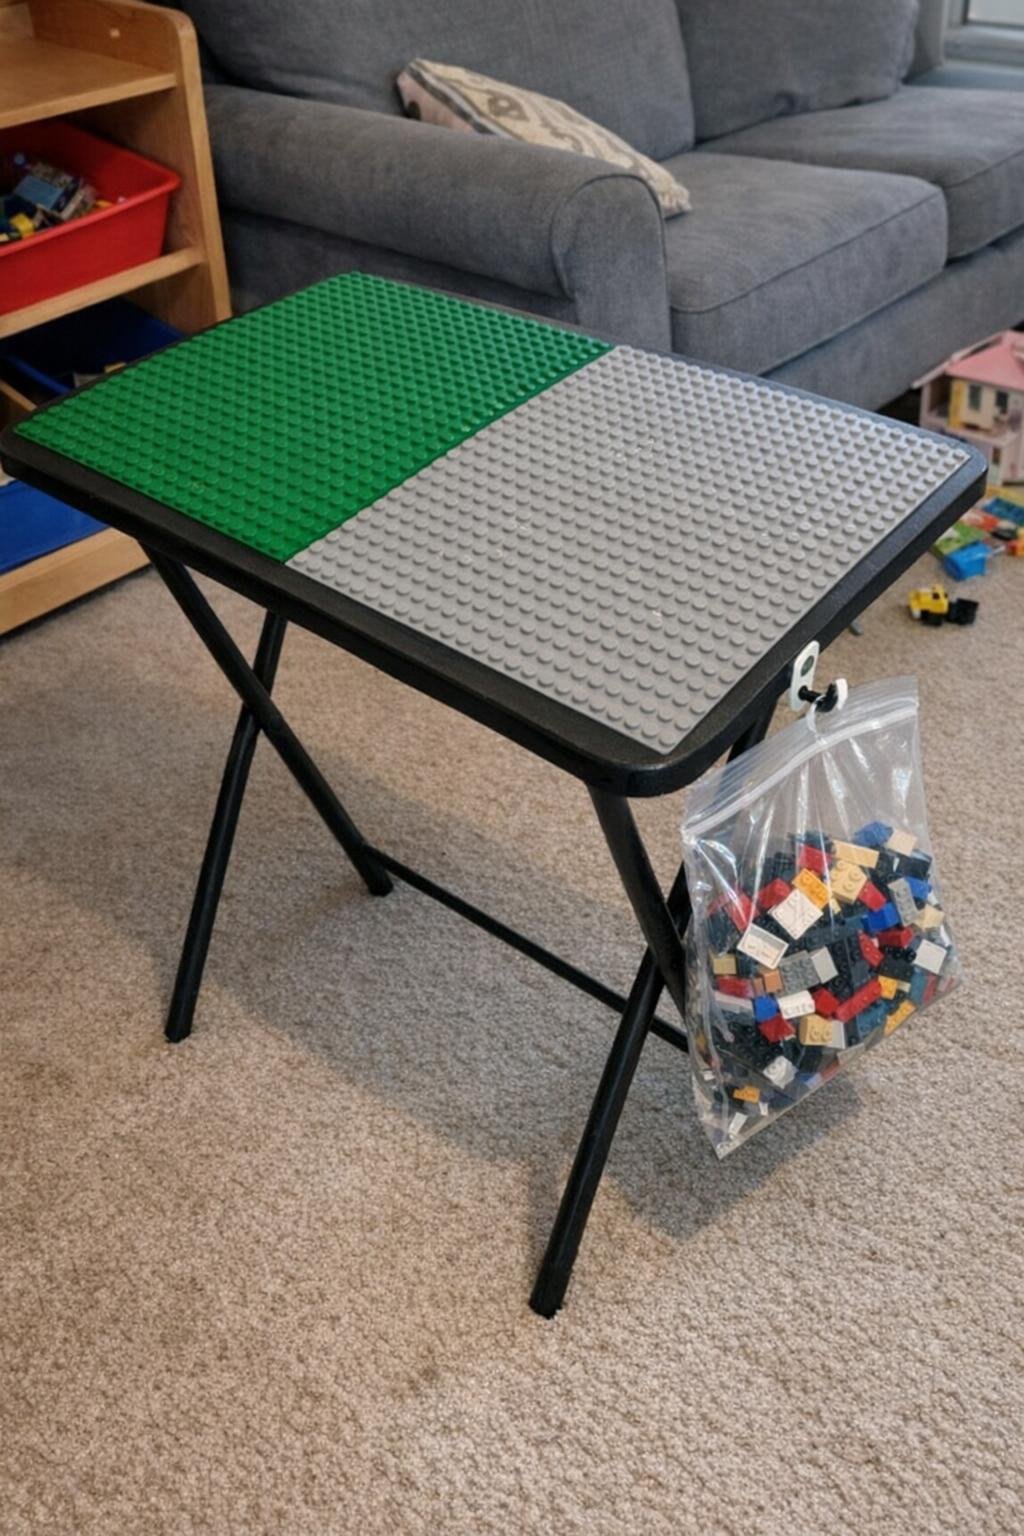
This is a wonderful use for a tray in a playroom or tucked into a den. Glue two 10-inch square base plates to the top, leaving a little border around the outside, and add a cup hook to one side for a mesh bag or small bucket of bricks. Use a strong adhesive and let it cure fully so the plates don’t lift at the corners.
It keeps building contained, and because the tray folds, you can put it away when company comes over. For younger kids who like structure, sort bricks by color into muffin tins or cups nearby. For older builders, it becomes a dedicated little workstation they can return to after school.
14. Laptop standing desk
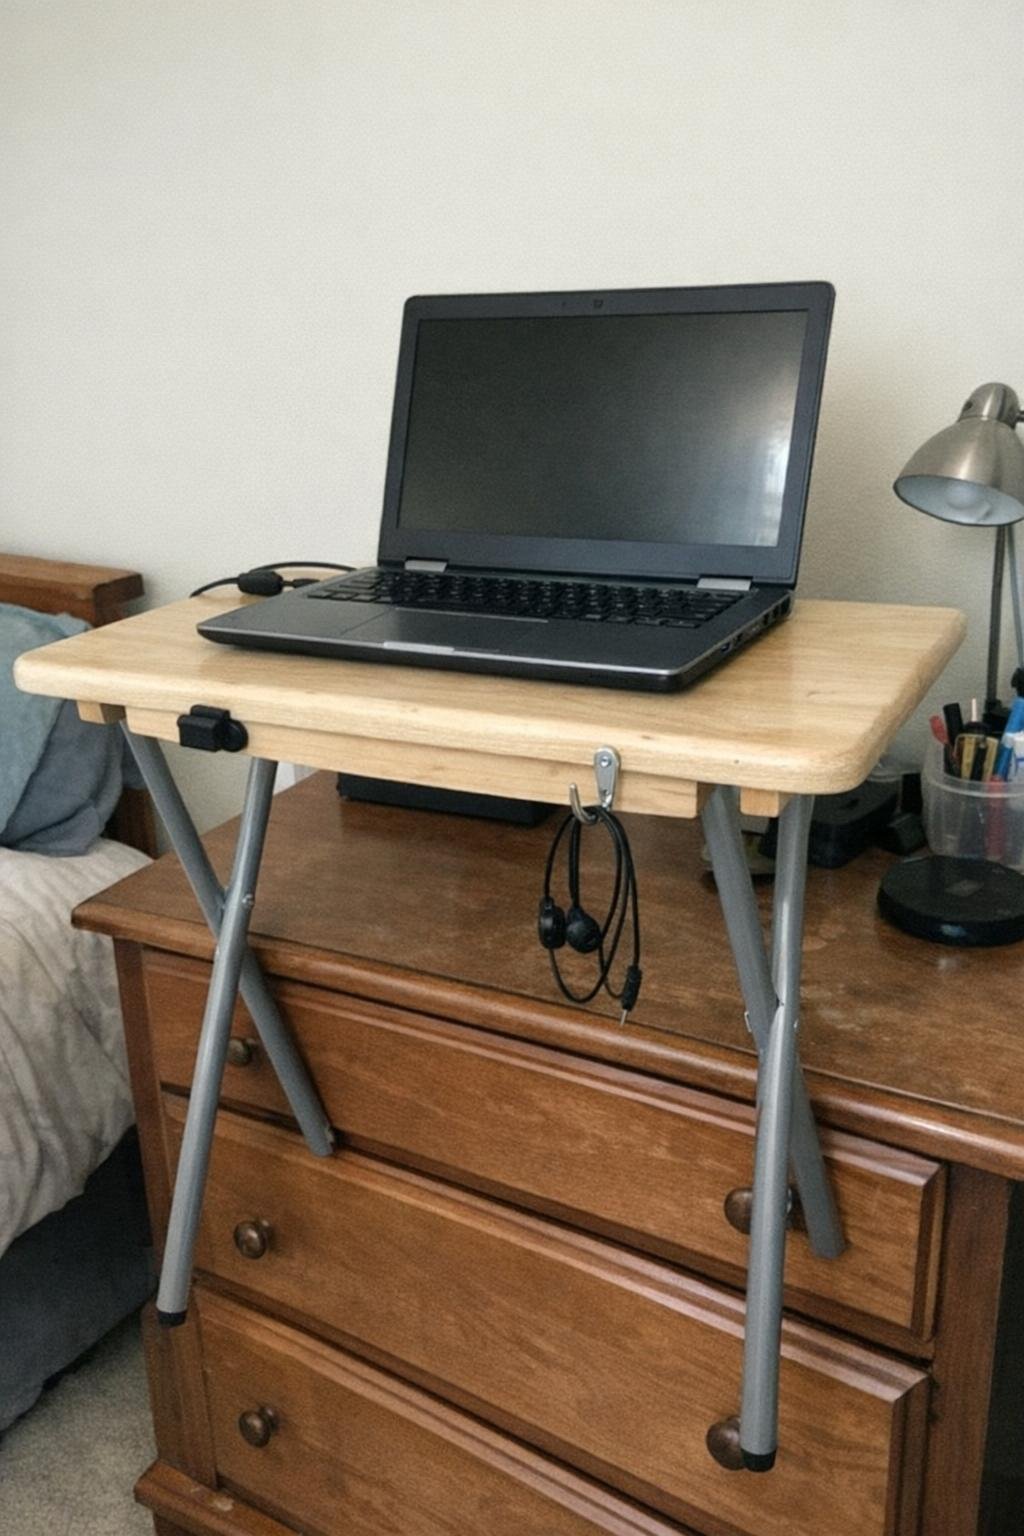
Sometimes the smartest projects are the simplest ones. If you already have a dresser or console at the right height, set the tray on top to create a raised laptop station, then screw a cord clip and a cup hook onto the apron so cables and headphones stay off the floor. The tray gives you a defined work surface without changing the furniture underneath.
For most adults, the right standing height lands with elbows bent around 90 degrees, so test it before attaching anything permanent. I like this setup for quick email sessions in the kitchen or bedroom when I don’t want paperwork spreading across the whole counter.
15. Butler's tray mini bar
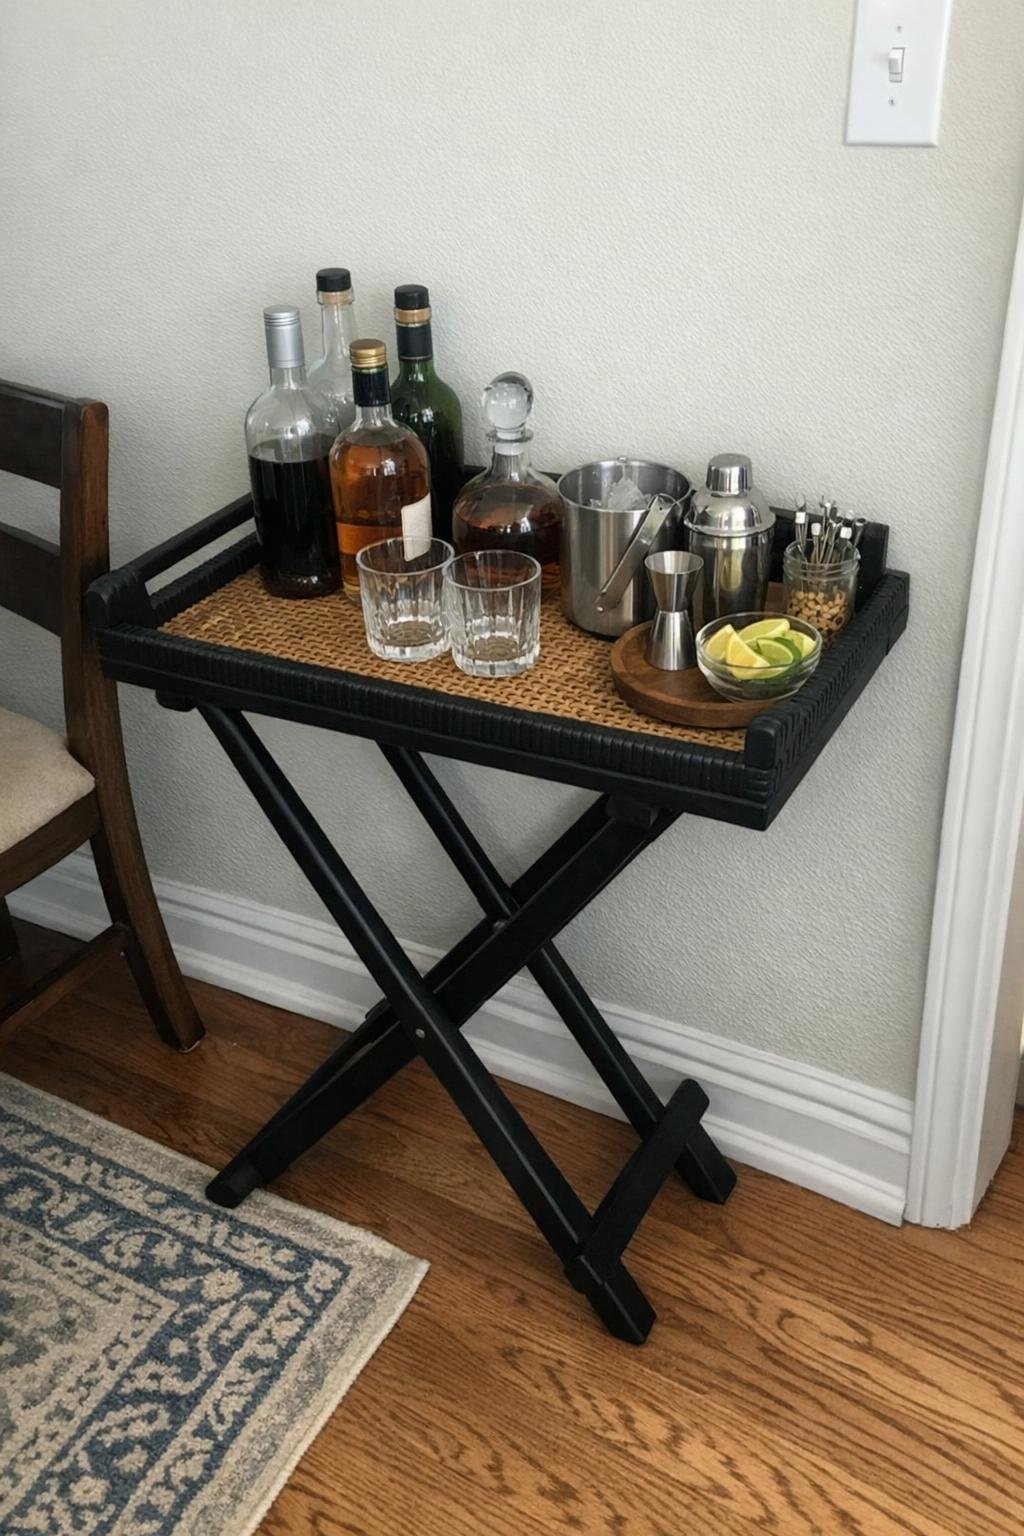
A mini bar version feels extra charming in a dining room corner or on a covered porch. Paint the tray black, then screw a shallow rattan tray securely onto the top so glasses and bottles have a contained surface. Add a slim bottle rail along the back edge to keep things from sliding if the tray gets nudged.
I’d keep the styling simple with a few glass bottles, a small ice bucket, and citrus in a bowl. Even if you don’t entertain much, it can also hold sparkling water, pretty glasses, or after-dinner coffee supplies. The mix of black paint and woven rattan gives it a classic look that doesn’t feel overdone.
16. Plaid hot-cocoa station
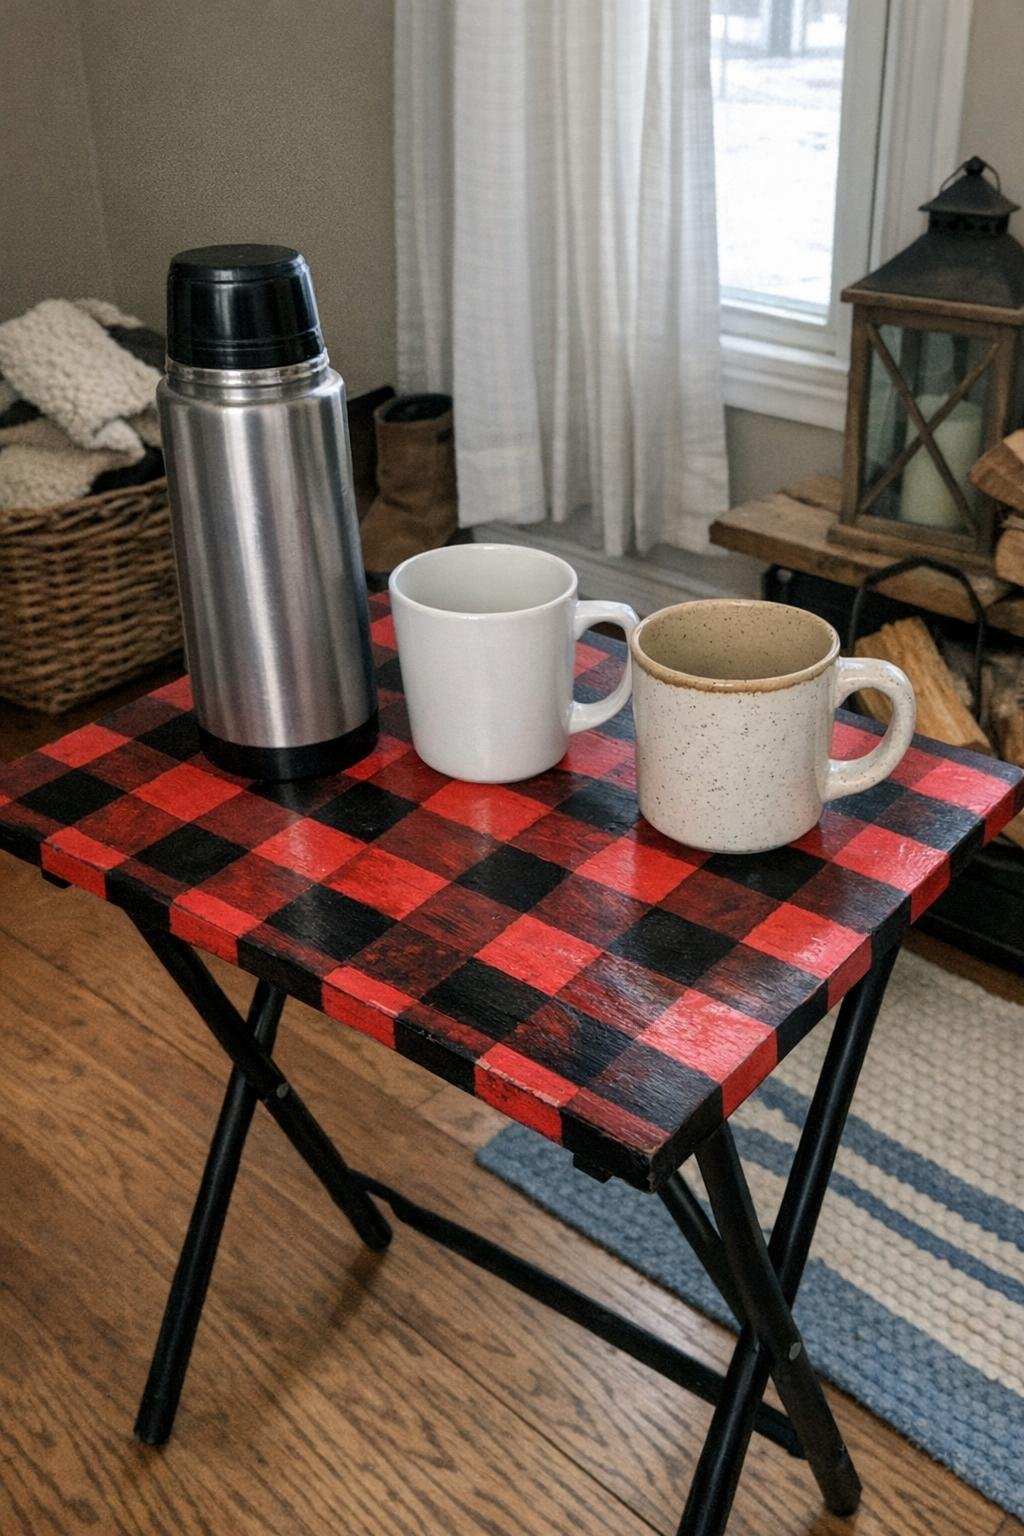
This one is pure cold-weather cheer. Paint the top in a red buffalo plaid pattern by first laying out broad squares in red, then crossing some sections with darker stripes once the base dries. It sounds fussy, but on a small tray top it goes quickly, especially if you lightly pencil a grid before painting.
Set it up with a thermos, a stack of mugs, a jar of marshmallows, and maybe a little bowl of cinnamon sticks. I’d use it on a porch enclosed from the wind or right inside the back door after sledding boots come off. It turns a simple drink setup into a festive little station for family movie nights.
17. Decoupage paper-strip top
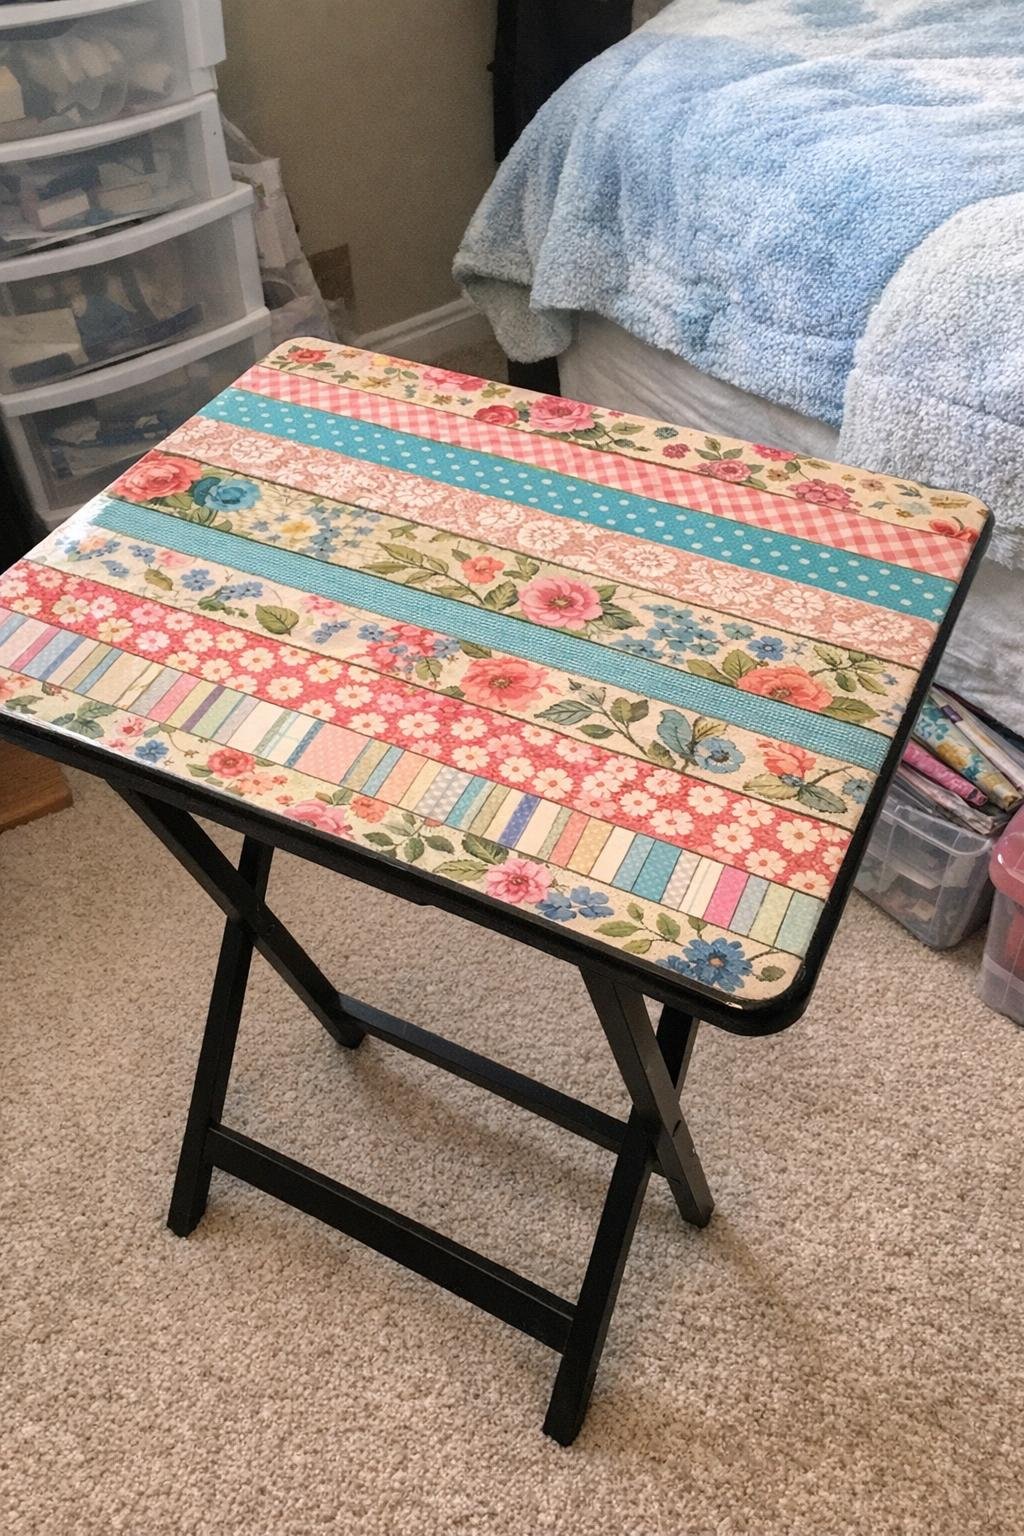
For a colorful, one-of-a-kind finish, cover the top with 2-inch strips of scrapbook paper. Cut enough strips to run the length of the tray, lay them in a planned pattern, and glue them down with Mod Podge, smoothing from the center outward. Once dry, brush on three total coats, letting each coat dry before adding the next.
The final finish has a sealed, almost laminated feel, and it works well if the original top has too many scratches to stain nicely. I’d choose papers in one family of colors so it looks intentional instead of chaotic. This is a fun project if you want something bright in a craft room or guest room.
18. Gift-wrap station
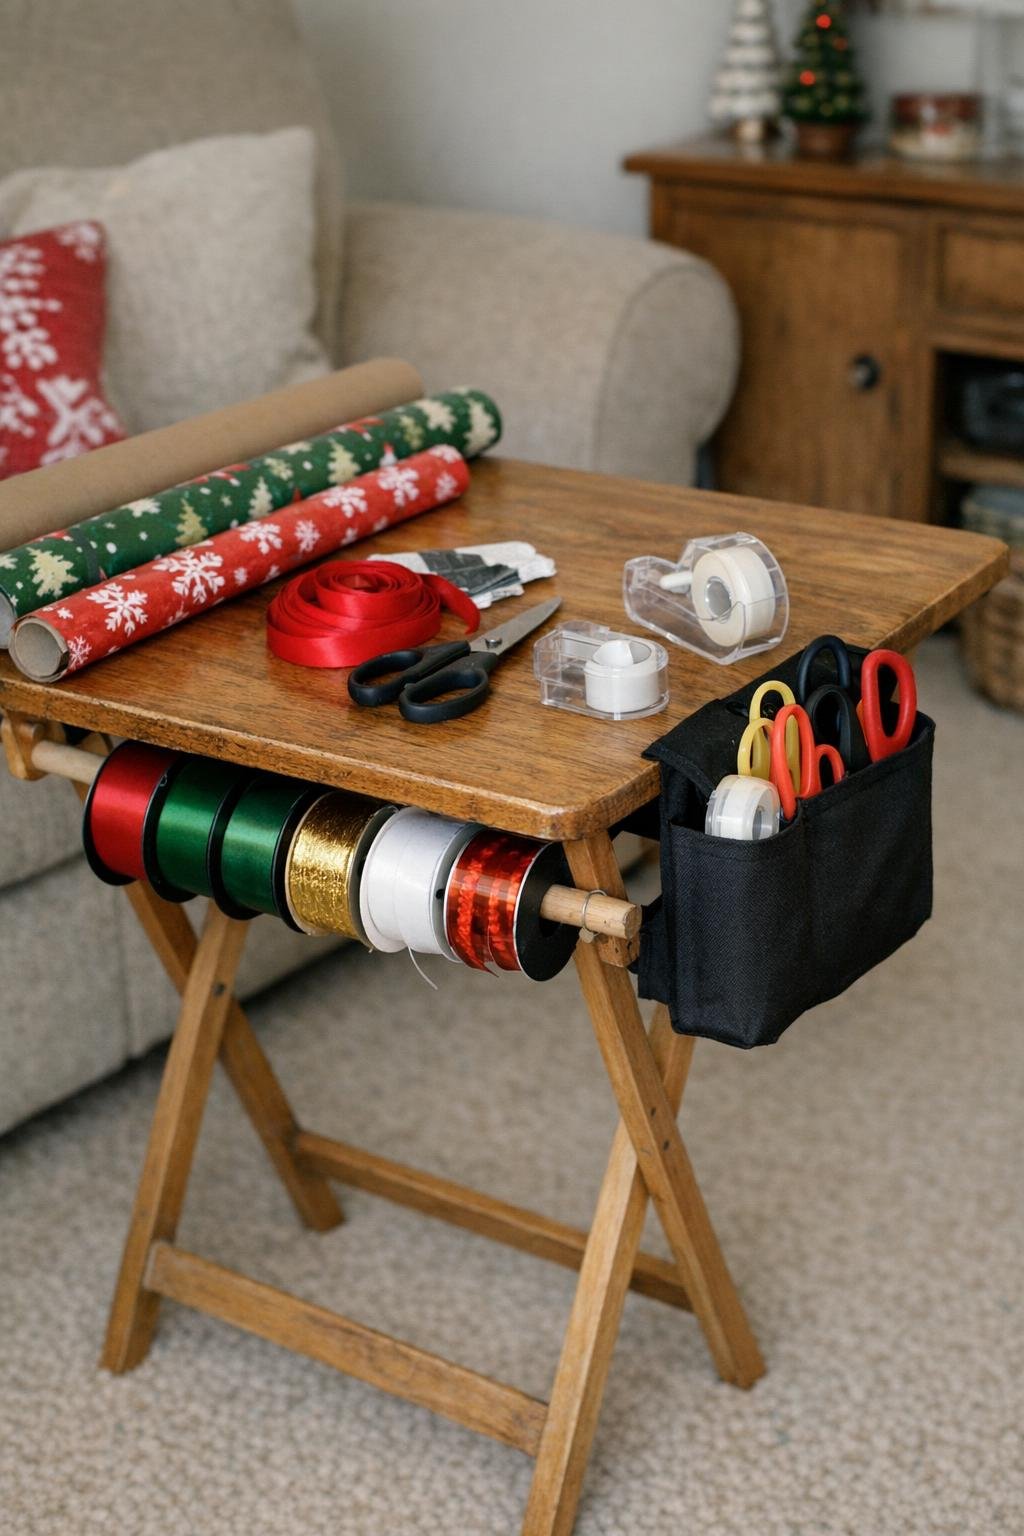
A folding tray makes a surprisingly efficient wrapping station during Christmas. Mount a wooden dowel underneath the top to hold ribbon spools, then attach a small side caddy or narrow basket for tape, scissors, gift tags, and pens. If you use screws and washers for the dowel brackets, it’ll stay much sturdier than a glued-only setup.
You can park it beside the sofa or in a spare bedroom and have all the little supplies in one place. I’d keep a roll or two of wrap standing in a nearby bin and use the tray top for bows and folded tissue paper. When the season is over, it folds flat and stores without taking over a closet.
19. Gold dipped-chevron legs
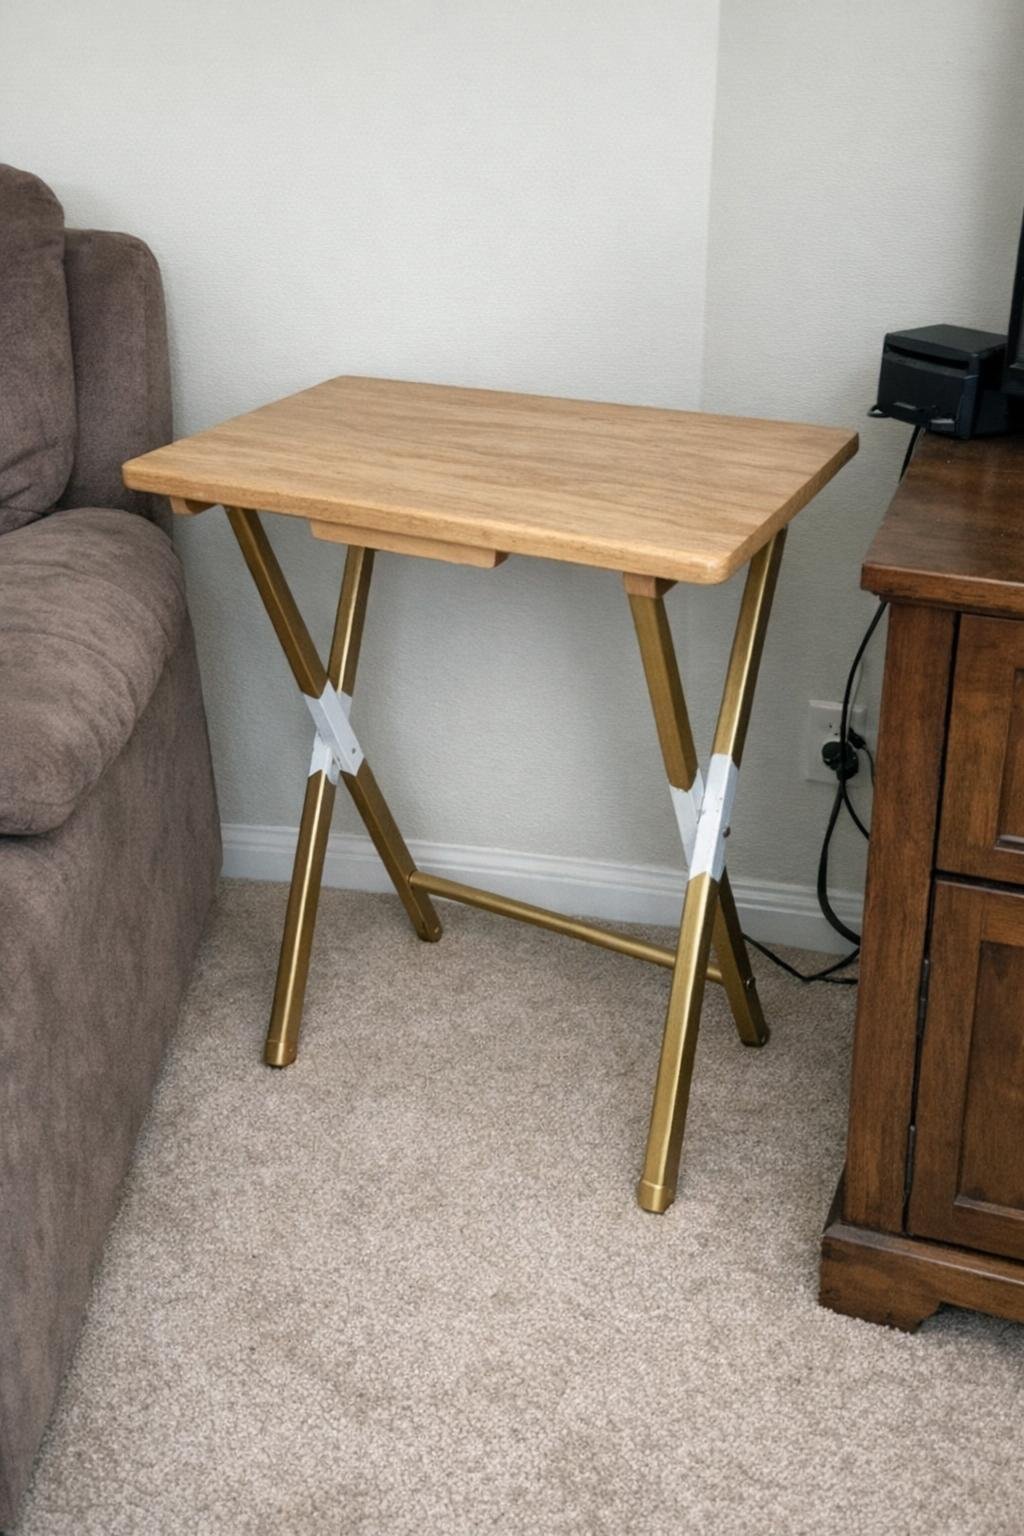
If the tray itself is in decent shape but the legs need personality, a gold dipped-chevron effect is a great update. Use painter’s tape to mark a clean chevron line around each leg at the same height, then spray everything below that line with metallic gold. Two light coats usually cover better than one heavy coat.
You can leave the top natural, stain it darker, or paint it a quiet neutral so the legs stand out. This kind of detail makes a basic tray feel much more current, and it pairs nicely with modern or eclectic decor. It’s also a good beginner project since you’re only painting one area.
20. Porch welcome easel
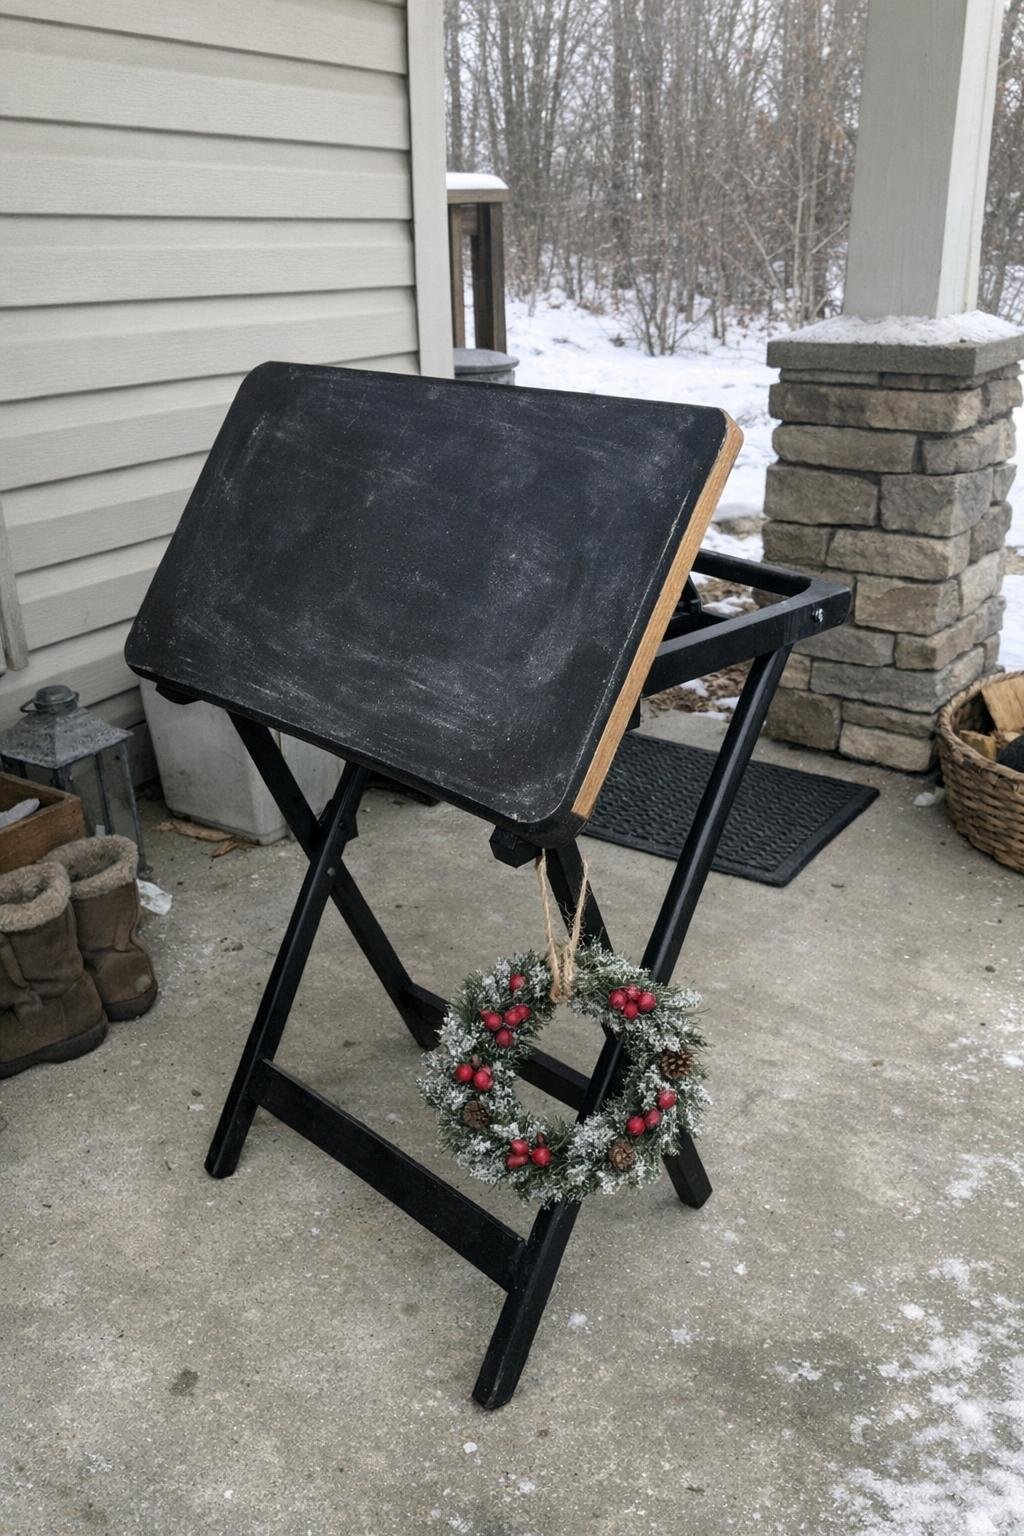
For a winter porch display, half-fold the tray so it stands like a simple easel, then paint the top with chalkboard paint. A small wreath hung from one leg adds enough decoration without making it feel cluttered. If you want the angle to stay put outdoors, secure the legs with a short chain or a length of jute tied underneath.
This works best on a covered porch where the finish won’t be battered by snow. Tuck a lantern or potted evergreen beside it, and you’ve got a display piece that costs very little but fills an awkward empty corner nicely. It’s a clever way to use the tray without even pretending it still needs to be a table.
Old TV trays are one of those thrift-store finds that reward a little imagination. With a few basic supplies and an afternoon or two, you can turn a forgotten folding table into something useful, pretty, and honestly worth showing off.