
I grew up in a kitchen where very little went to waste, and that habit has stayed with me all these years. Around here, bottle caps seem to collect in coffee cans and junk drawers faster than anybody expects, and every time I see that pile, I think of how many cheerful, useful little projects can come from something most folks toss without a second thought.
If you’ve got a jar full of plastic caps waiting for a purpose, I’ve gathered 20 of my favorite ideas that are practical, pretty, and downright satisfying to make. These are the kinds of projects I’d set out on the table with a towel, a glue gun, and a cup of tea nearby—simple enough for a weekend, but striking enough that people will ask where you got them.
1. Mini canvas magnets
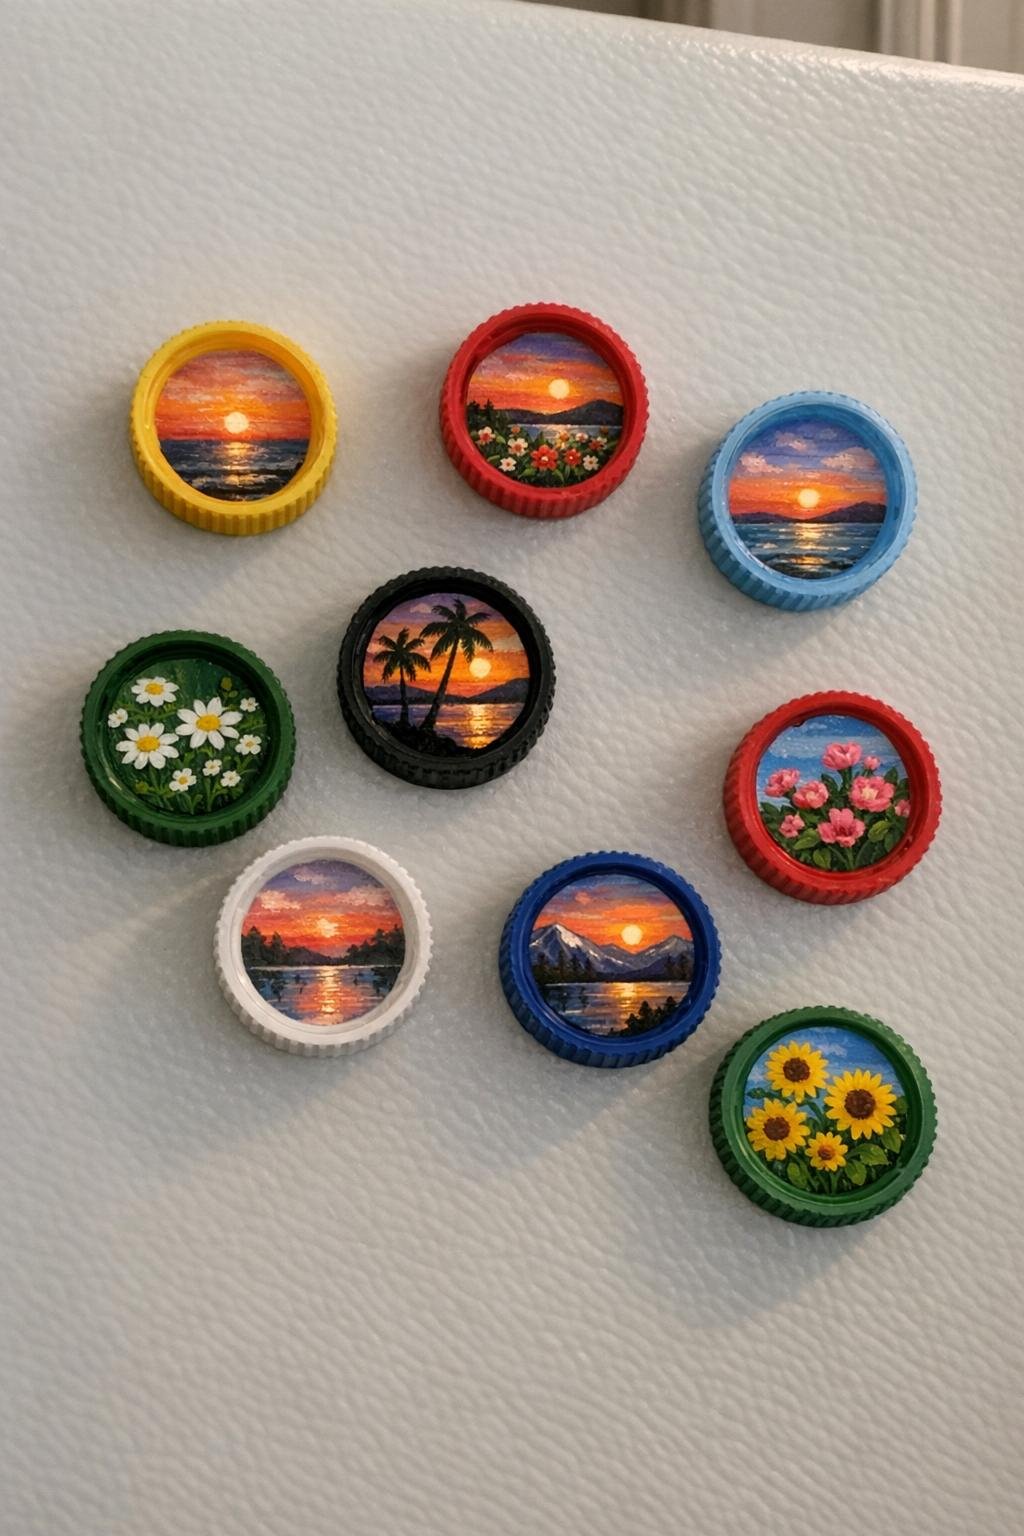
One of the sweetest little projects I’ve made with caps is a set of tiny refrigerator magnets. Paint the inside of clean caps with acrylic craft paint—sunsets, daisies, black-eyed Susans, even little bluebird skies—then let them dry for 30 minutes before sealing with a thin coat of Mod Podge. Once dry, glue a 3/4-inch round magnet inside the back of each cap with strong craft glue or E6000.
I like making these in sets of 6 or 8, and they use hardly any supplies beyond paint and magnets. The finished pieces look like miniature framed paintings, especially if you choose white caps or paint the rims in a neat solid color first.
2. Cap mosaic mirror frame
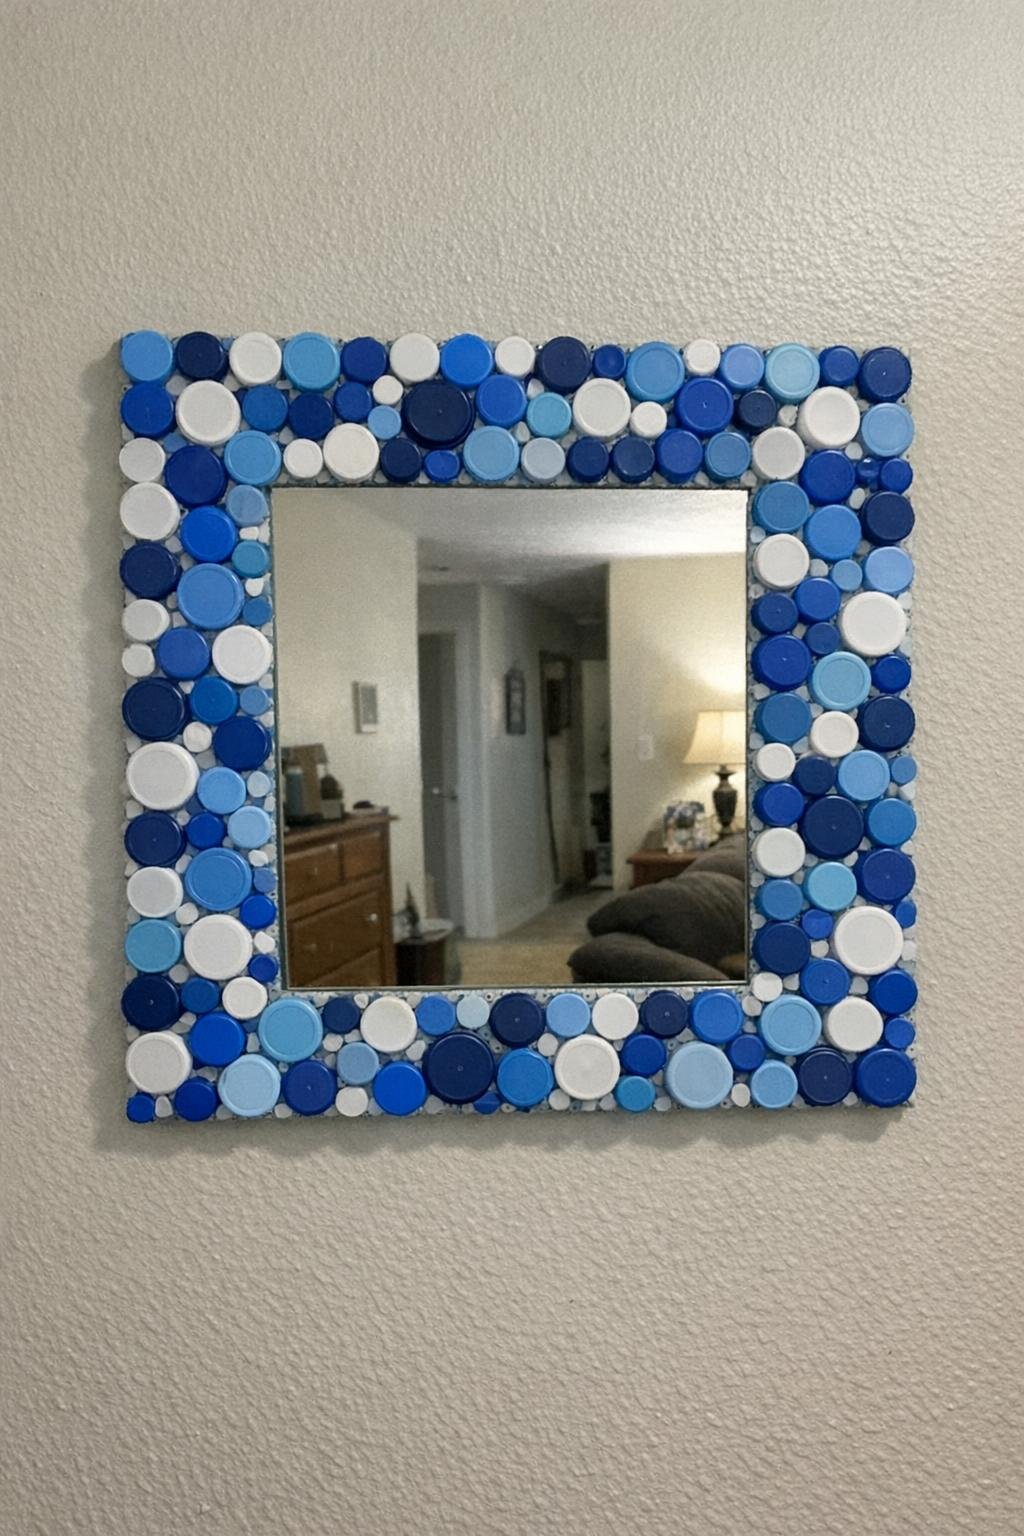
A plain square mirror from the dollar store turns into something special with about 150 blue and white caps glued around the frame. Start with a mirror about 10 by 10 inches, lay out the caps first so the colors alternate or drift from navy to sky blue, then glue them down with a heavy-duty adhesive in tight rows.
Leave a 1/4-inch gap between the mirror edge and the first row if you want a cleaner border, and let the whole thing cure flat overnight. Hung in a bathroom, mudroom, or lake cabin entryway, it has that bright mosaic look without the cost of tile.
3. Counting and alphabet caps
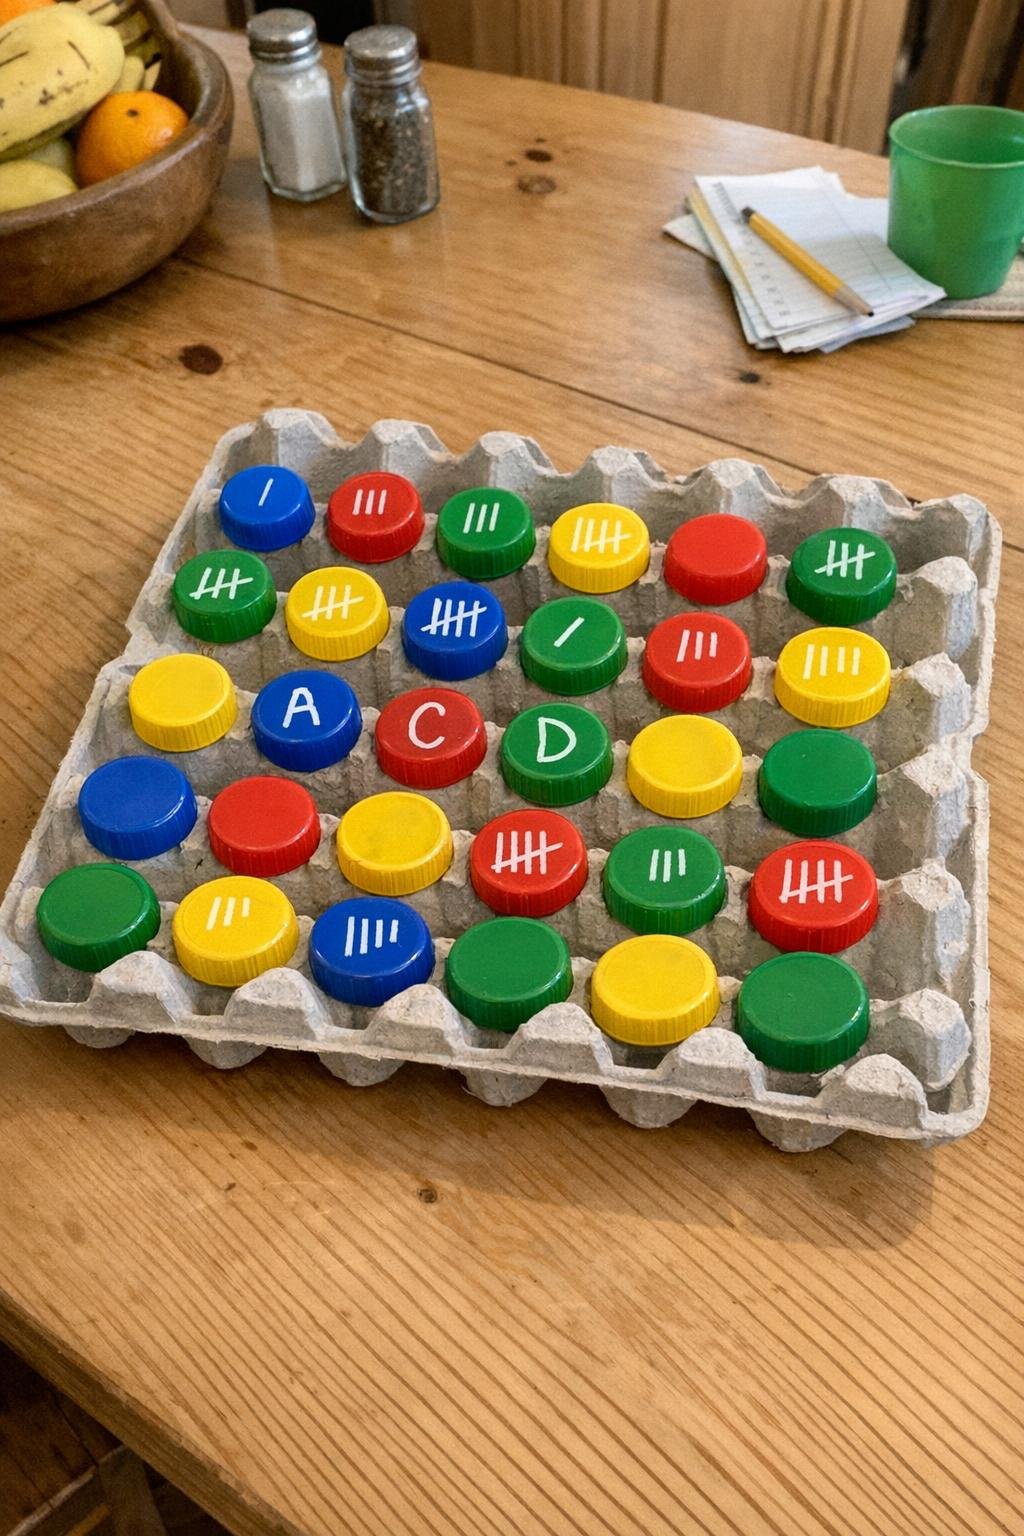
This is one I wish I’d had when my children were little. Use 52 caps total: 26 with alphabet stickers and 26 with number stickers or dots for counting practice. An empty paper egg carton makes a perfect sorter, and the caps are just the right size for small hands to move from one cup to the next.
If you want them to last longer, press the stickers down firmly and brush on a very light clear sealer. These are handy for matching uppercase to lowercase, sorting vowels, or making simple addition games at the kitchen table on a rainy afternoon.
4. Cap stepping stones
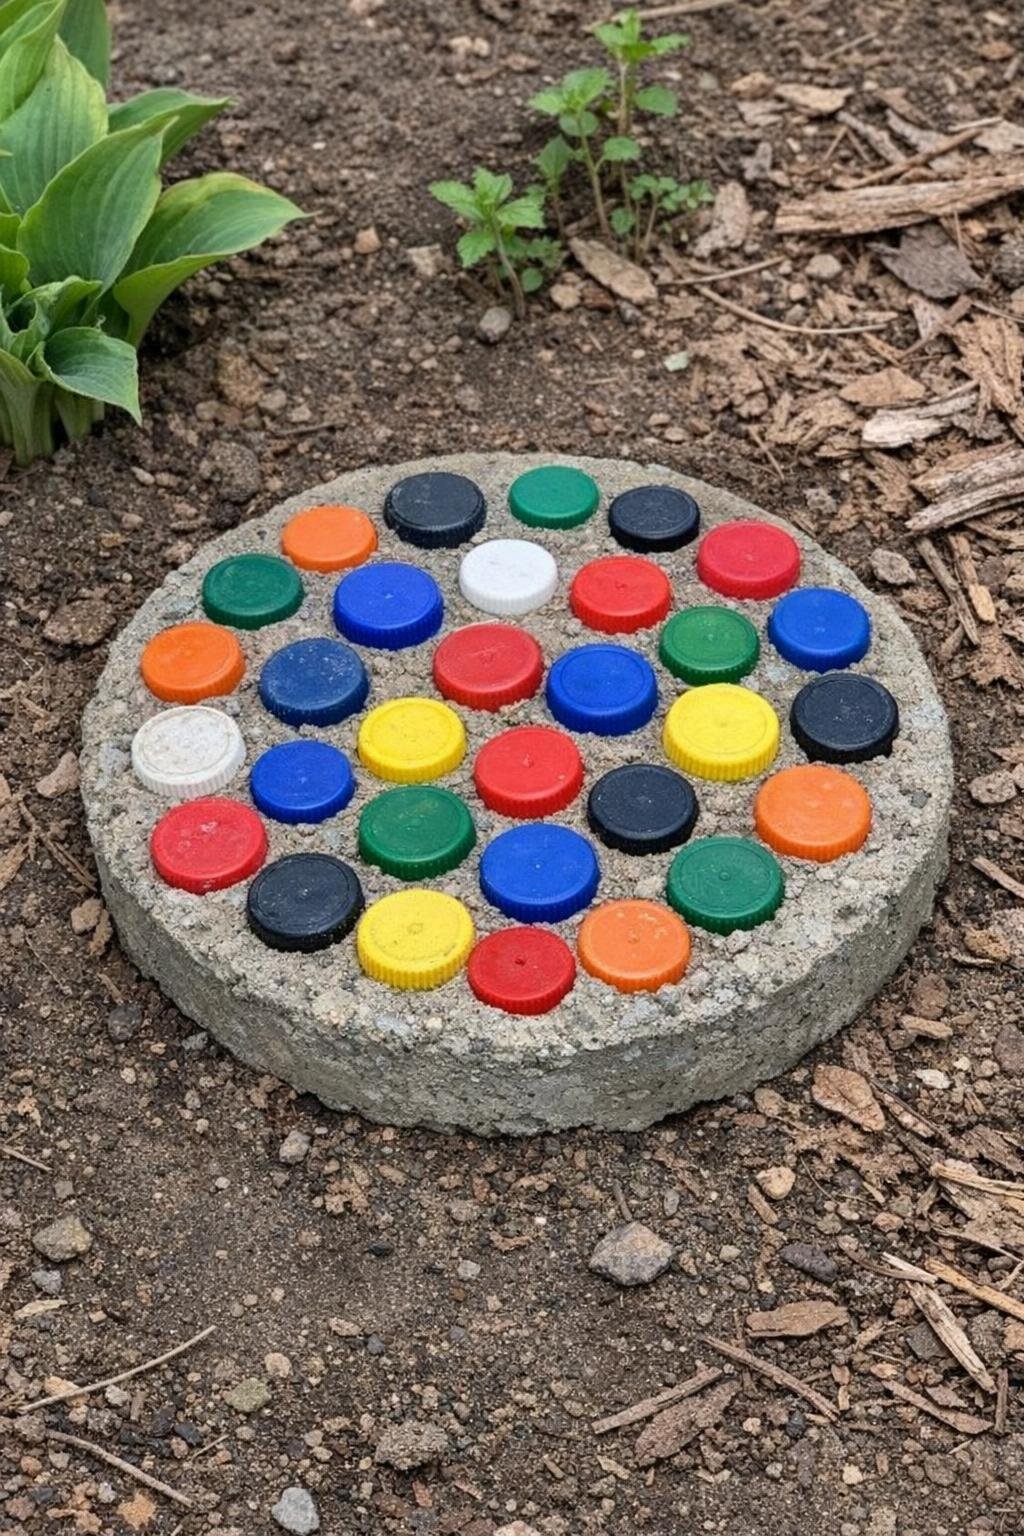
For a garden path or tucked beside a porch step, cap stepping stones are sturdy and cheerful. Mix quick-set concrete and pour it into a greased 12-inch round cake pan to a depth of about 2 inches, then press clean caps into the wet surface before it firms up. Space them about 1/2 inch apart or cluster them into spirals, flowers, or rings.
Let the stone cure at least 24 hours before unmolding, and a full 48 to 72 hours before setting it outside. Bright primary colors look playful in a vegetable patch, while all-white or blue caps make a more classic pattern near a flower bed.
5. Checkers set
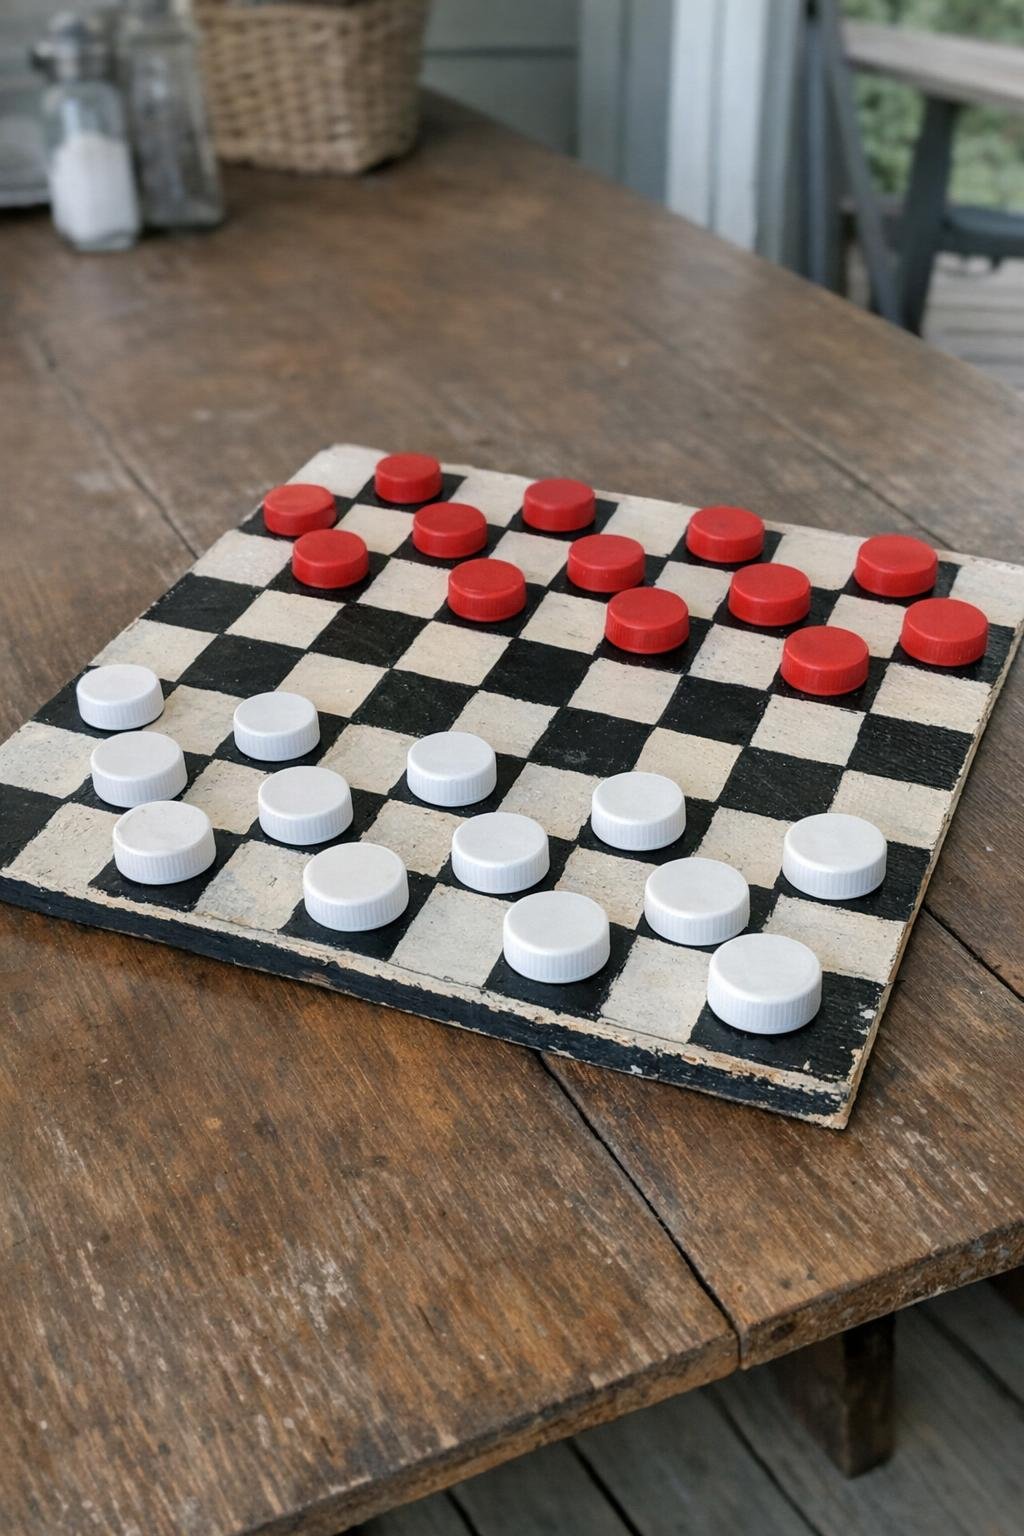
This is one of those projects that turns scraps into a family game night favorite. Paint 24 caps in two contrasting colors if they don’t already match—12 red and 12 black works nicely—then make a checkerboard on a 12-by-12-inch piece of plywood with 1 1/2-inch squares. A little acrylic paint and a clear sealer are all you need.
I like to keep the board flat in a drawer and the caps in a cloth bag beside it. If you’ve got grandchildren over, this is the sort of handmade set they remember, especially when the pieces are easy to grip and sturdy enough to survive being dropped on the floor.
6. Cap wind chime
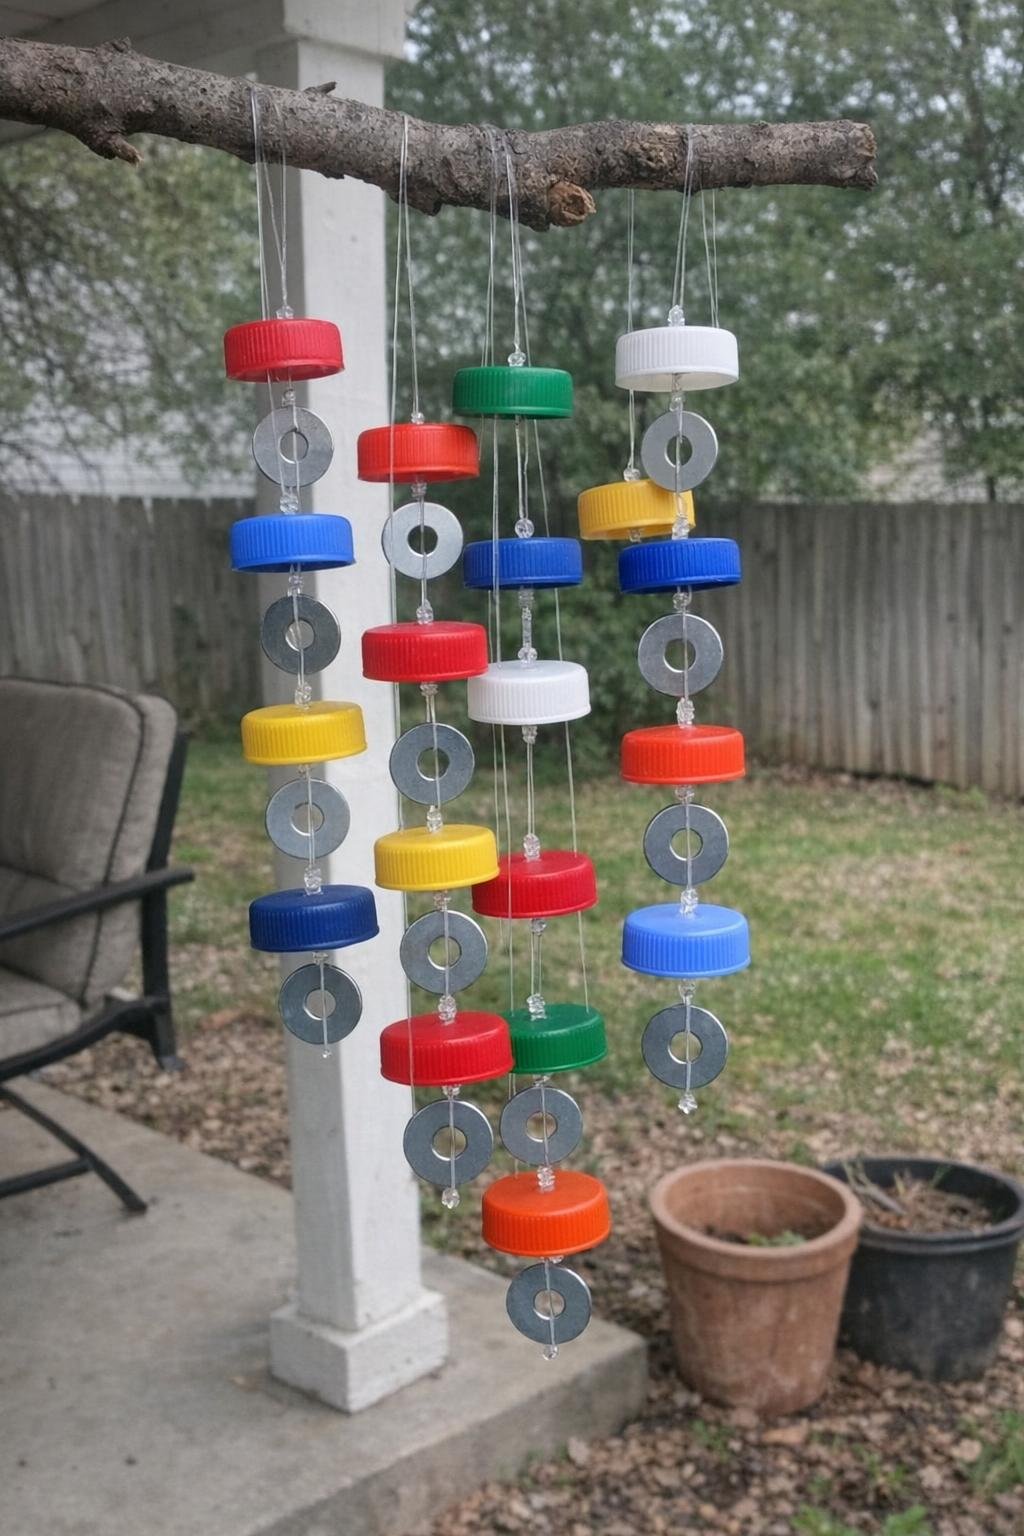
A bottle cap wind chime has a nice clattery sound that suits a porch, potting shed, or garden gate. Drill or punch a small hole through each cap, then string them on fishing line with a metal washer between every few caps for weight and a bit of shine. Tie the strands to a small fallen branch about 10 to 14 inches long.
Make 5 to 7 strands in staggered lengths, anywhere from 8 to 16 inches, so they move differently in the breeze. It’s a simple project, but hanging in a tree with the light coming through those colors, it looks far more artful than its humble beginnings.
7. Garden markers
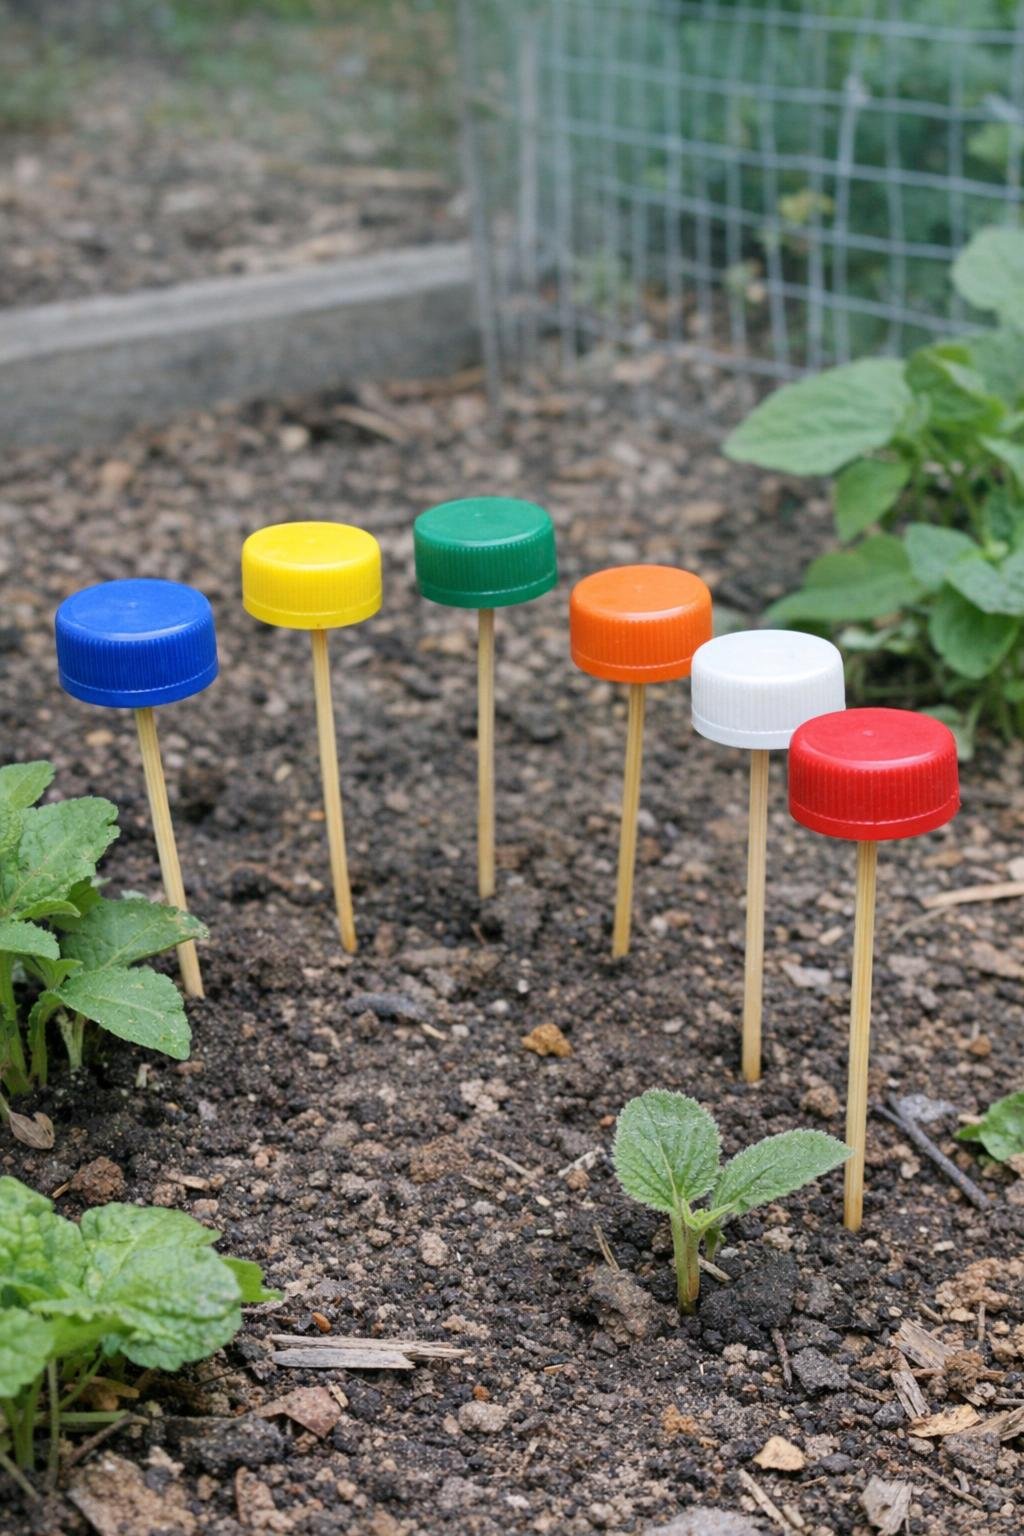
These are especially handy if you start seeds or grow more than a couple of herbs. Glue a cap to the top of a bamboo skewer or thin wooden dowel with hot glue, then use a paint pen to mark the plant name on top. A skewer 10 to 12 inches long gives enough height to spot it once the garden fills in.
If you want them to hold up through rain, add a dab of clear outdoor sealer over the writing. They’re much sturdier than flimsy plastic tags, and I find them easier to spot among rows of basil, beans, and zinnias.
8. Cap wreath
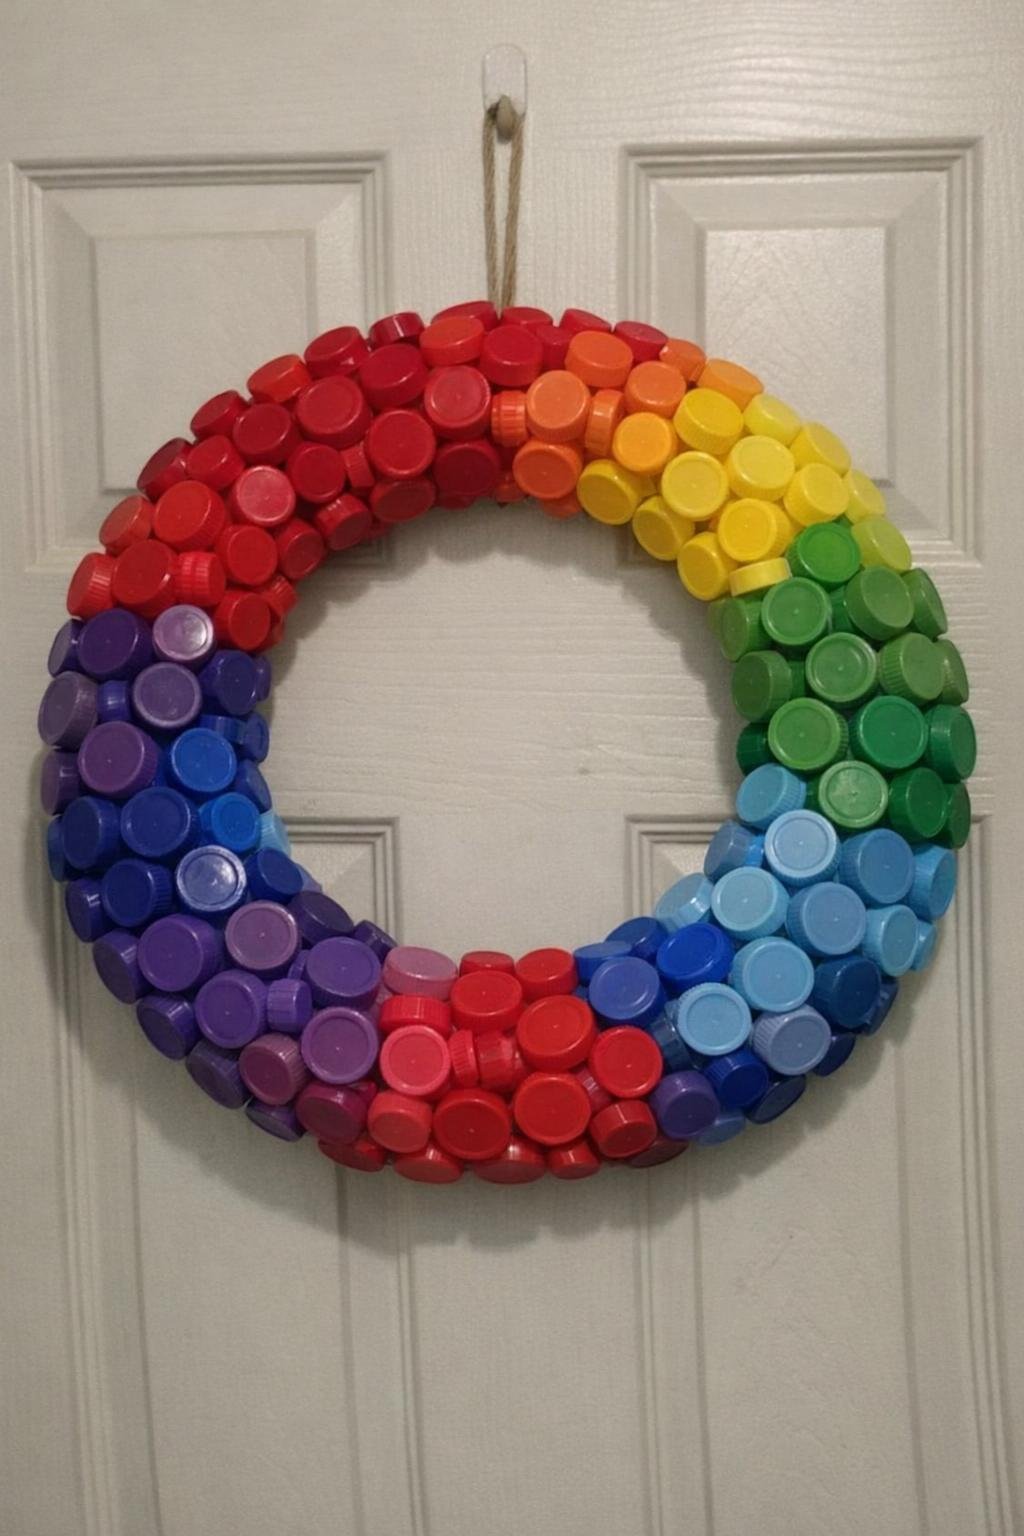
A foam wreath form and about 120 caps are all it takes to make a bright, modern-looking door decoration. Push or glue the caps onto a 12- to 14-inch foam ring in a rainbow gradient, starting with red, then orange, yellow, green, blue, and purple. Keeping the caps close together makes the color shift stand out beautifully.
I’ve seen expensive shop wreaths that don’t have half this much personality. Hang it with a ribbon indoors or on a sheltered porch, and if you use mostly matching cap sizes, the finished wreath looks surprisingly polished.
9. Bag sealers
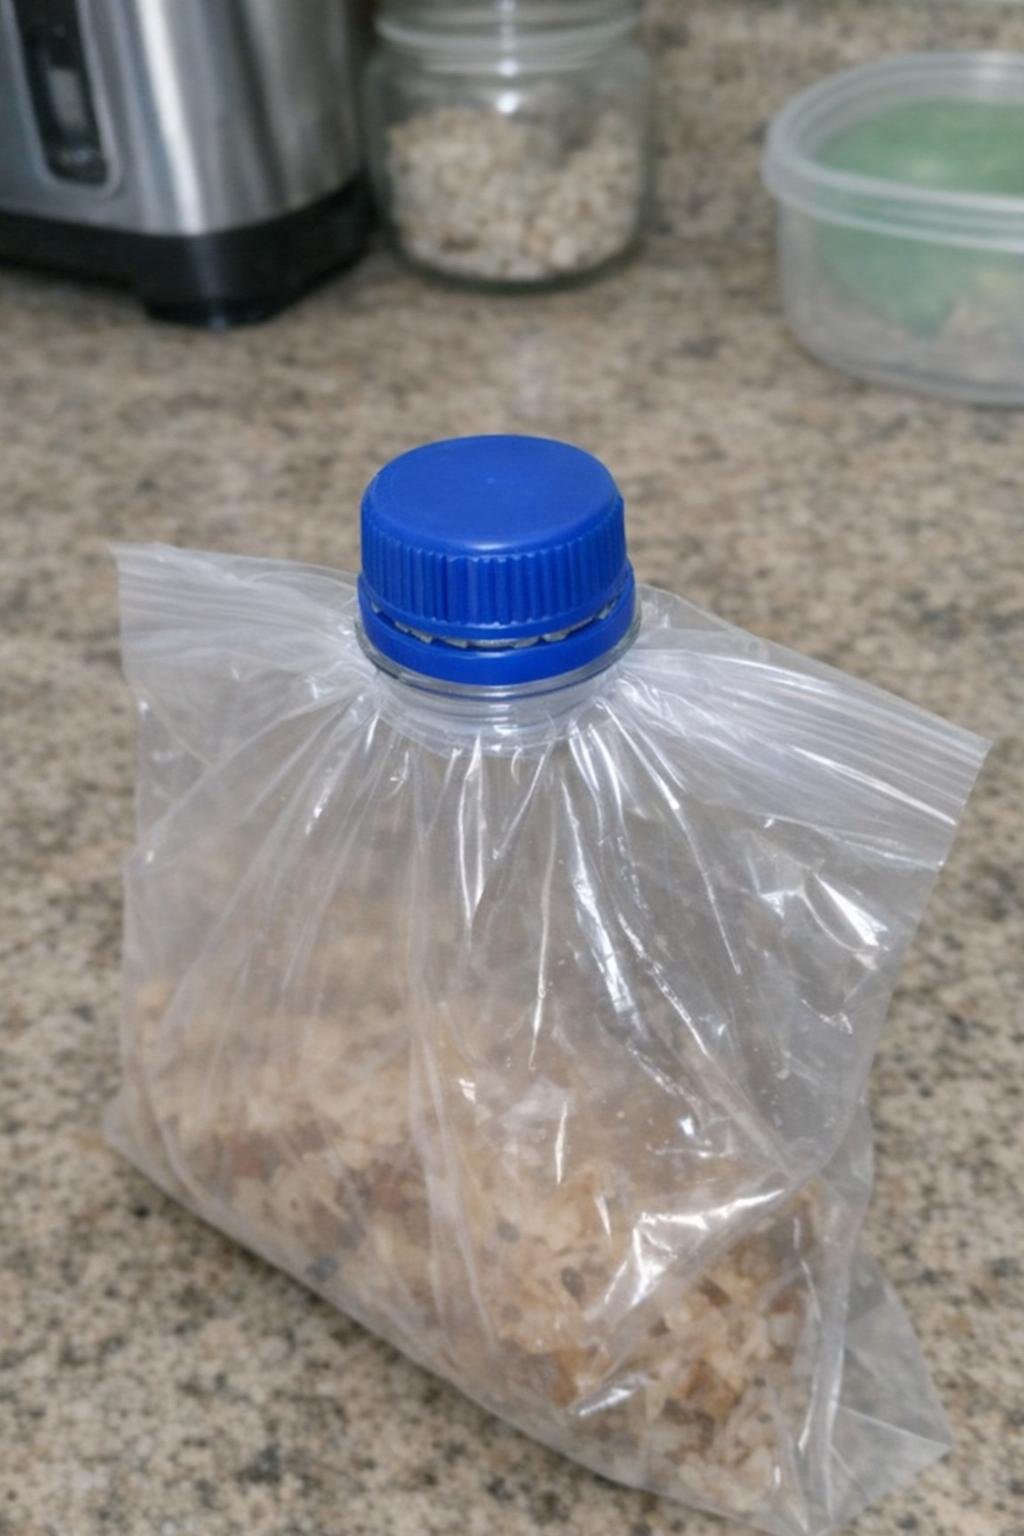
This one is more practical than decorative, and I love a clever kitchen fix. Cut the threaded neck from a plastic bottle, leaving about 1 inch of plastic below the threads. Pull the open end of a snack bag or bread bag through the ring, fold the plastic over the threads, and screw the cap back on tight.
It keeps dry goods neat and helps with half-used bags of rice, popcorn, or cereal that never seem to clip shut properly. Once you make two or three of these, you’ll start saving bottle tops just for pantry duty.
10. Cap flower stakes
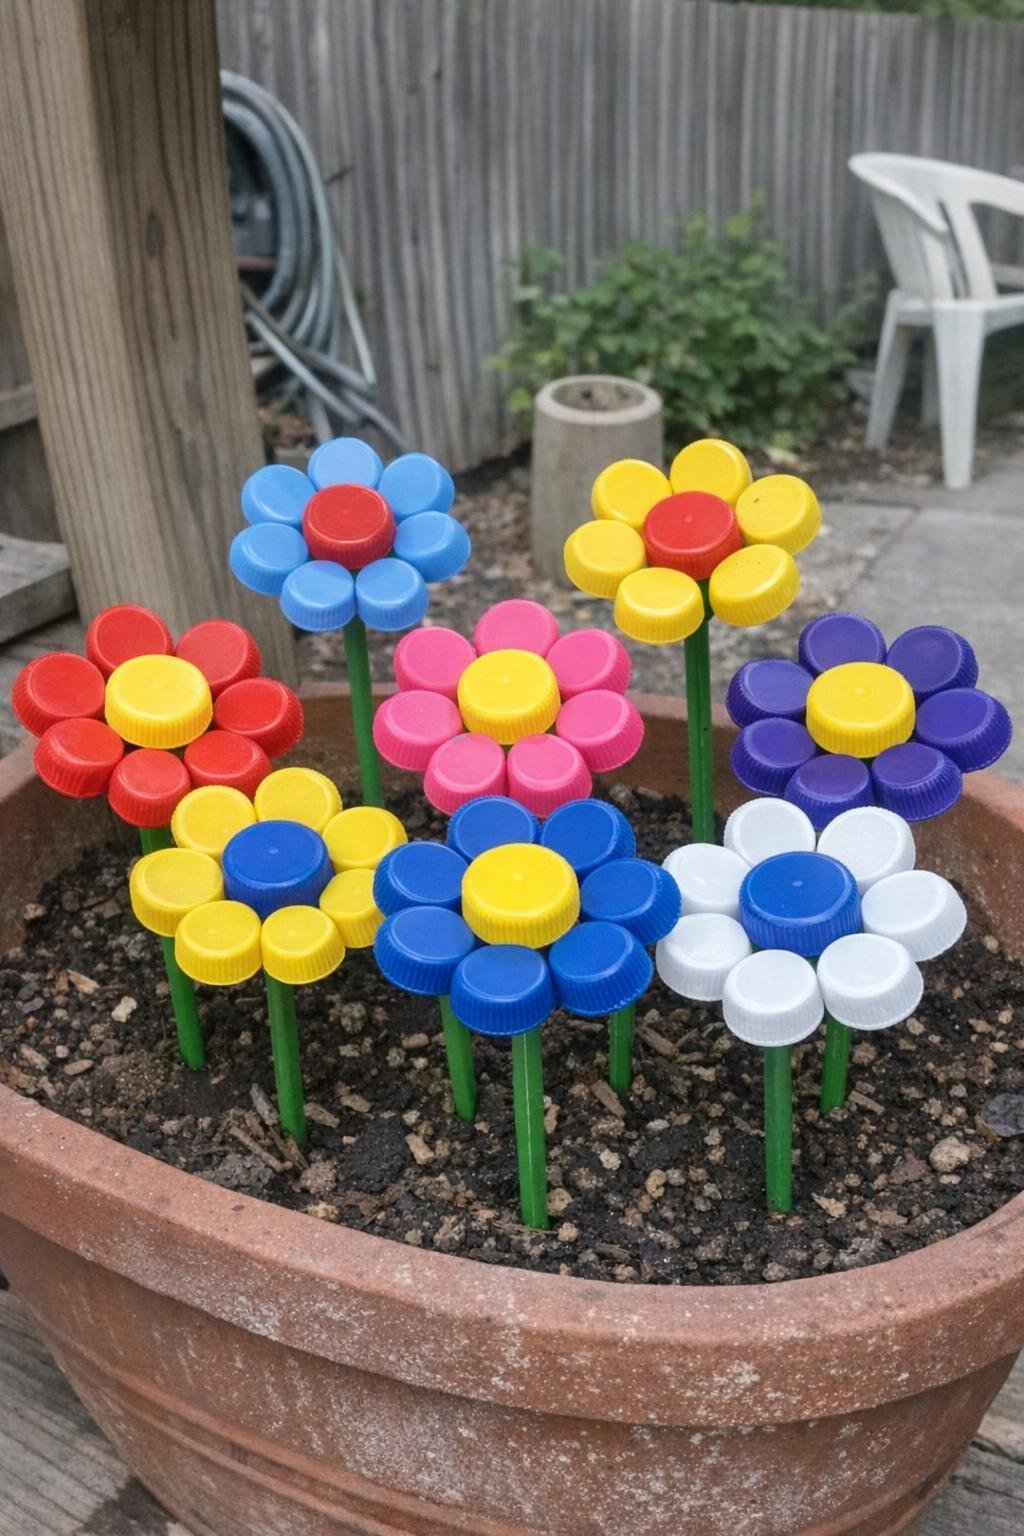
These cheerful flowers look sweet tucked into planters, window boxes, or the edge of a vegetable bed. Glue six caps in a ring around one center cap to make a blossom, then attach the flower to green garden wire or a painted wooden dowel. A wire stem around 12 to 18 inches long gives enough height for a pot or border.
Mix colors for a playful patch, or use all one shade for a tidier look. They don’t wilt in summer heat, and they’re especially charming in early spring before the real flowers have decided to wake up.
11. Mosaic tabletop
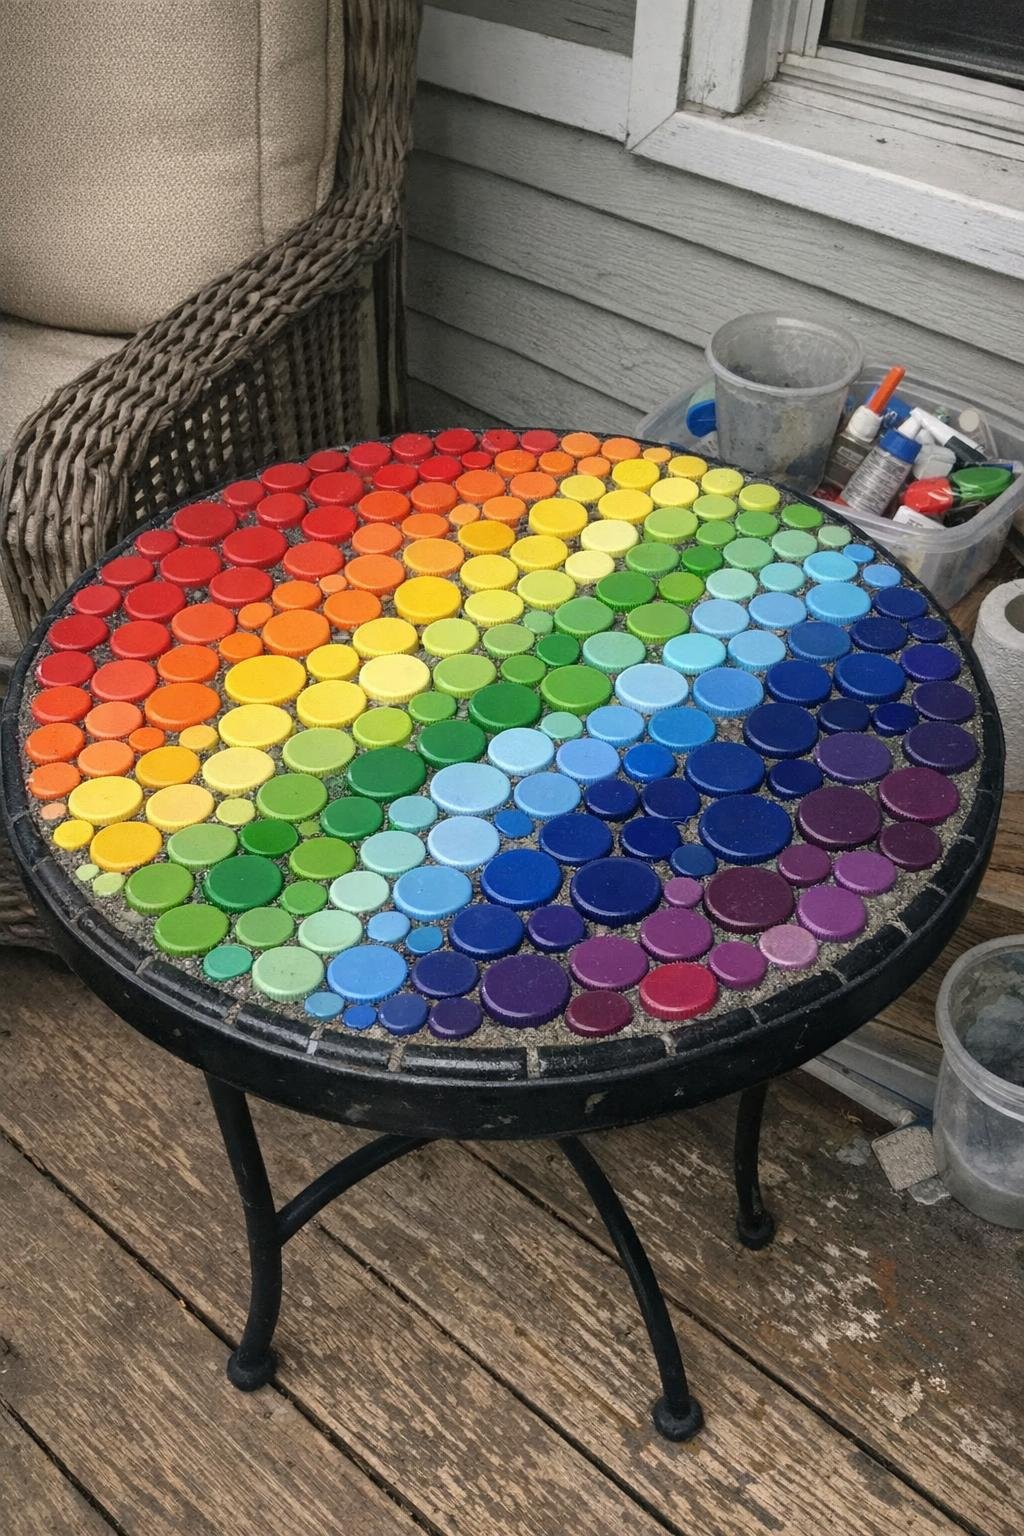
If you want a bottle cap project with real wow factor, this is the one. Cover a small round side table, about 18 to 20 inches across, with roughly 400 caps in a planned color gradient. Glue them down in tight formation, then pour grout over the gaps and wipe the tops clean with a damp sponge before the grout fully sets.
It takes a bit of patience, but the result is bold and durable. I’d use it on a porch, in a craft room, or beside a reading chair, where the pattern can be seen and enjoyed instead of hidden under stacks of mail.
12. Cap Christmas tree
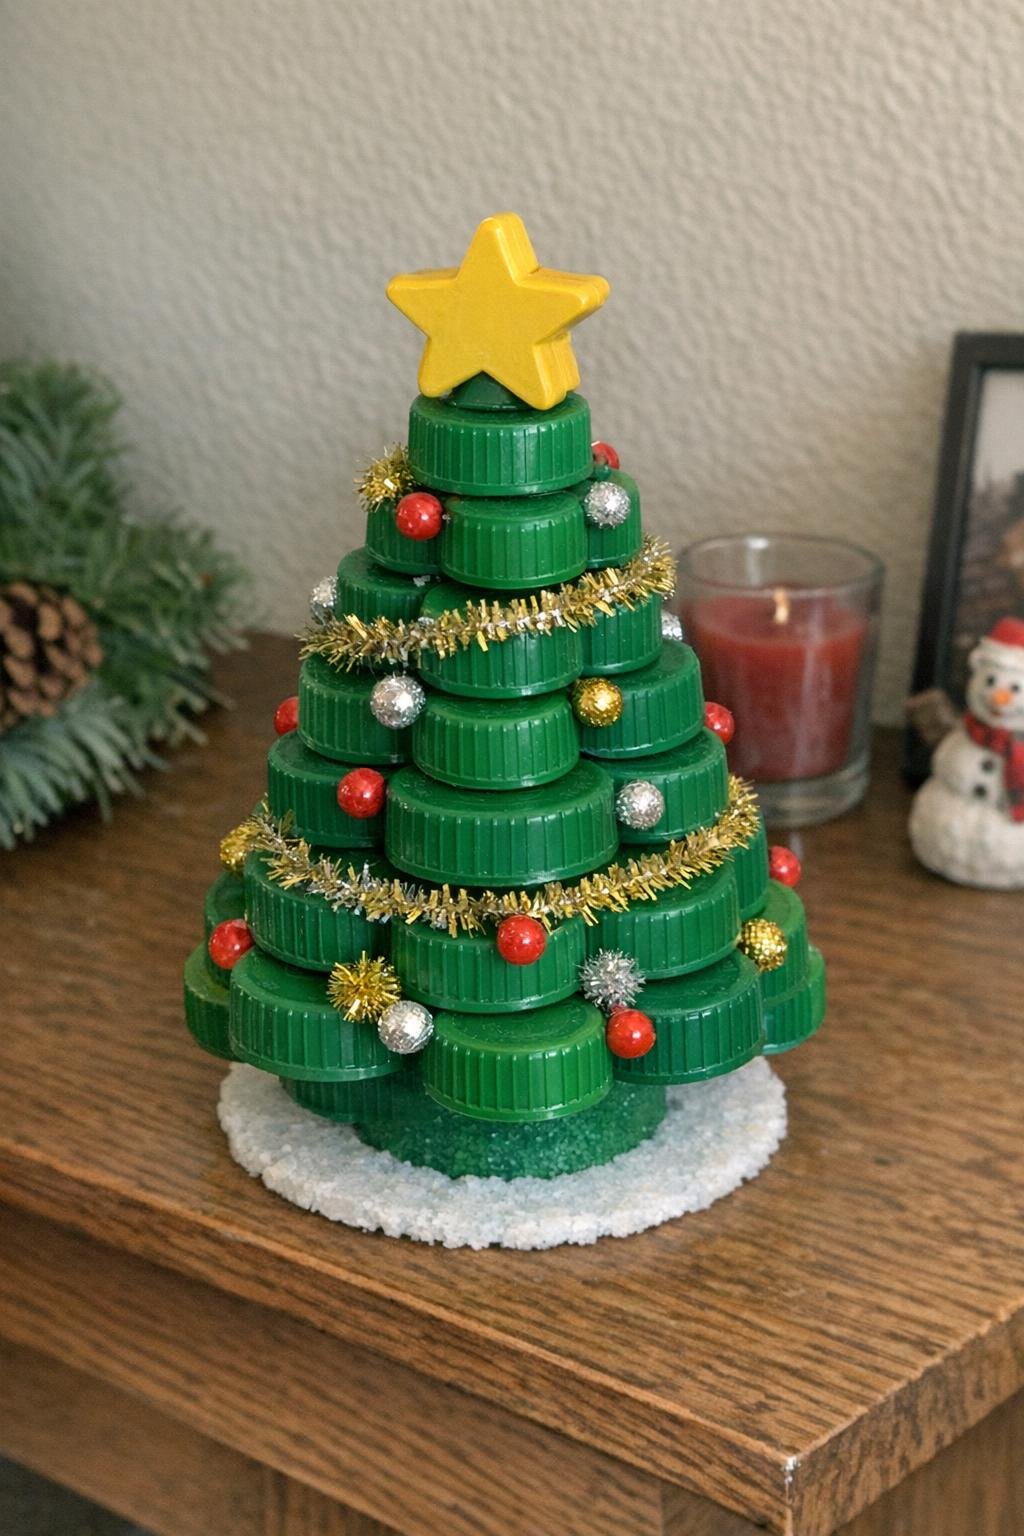
Come Christmastime, a little bottle cap tree on the mantel is just plain delightful. Use a 12-inch foam cone as the base and glue green caps in overlapping rings from bottom to top, working upward so each row hides part of the one beneath it. Finish with a contrasting cap painted gold or yellow as the star on top.
You can tuck tiny beads between a few caps if you want the look of ornaments, but it’s lovely even kept simple. Sitting on a windowsill or buffet, it has that homemade holiday cheer I’ve always preferred over anything too store-bought.
13. Cap pendant necklaces
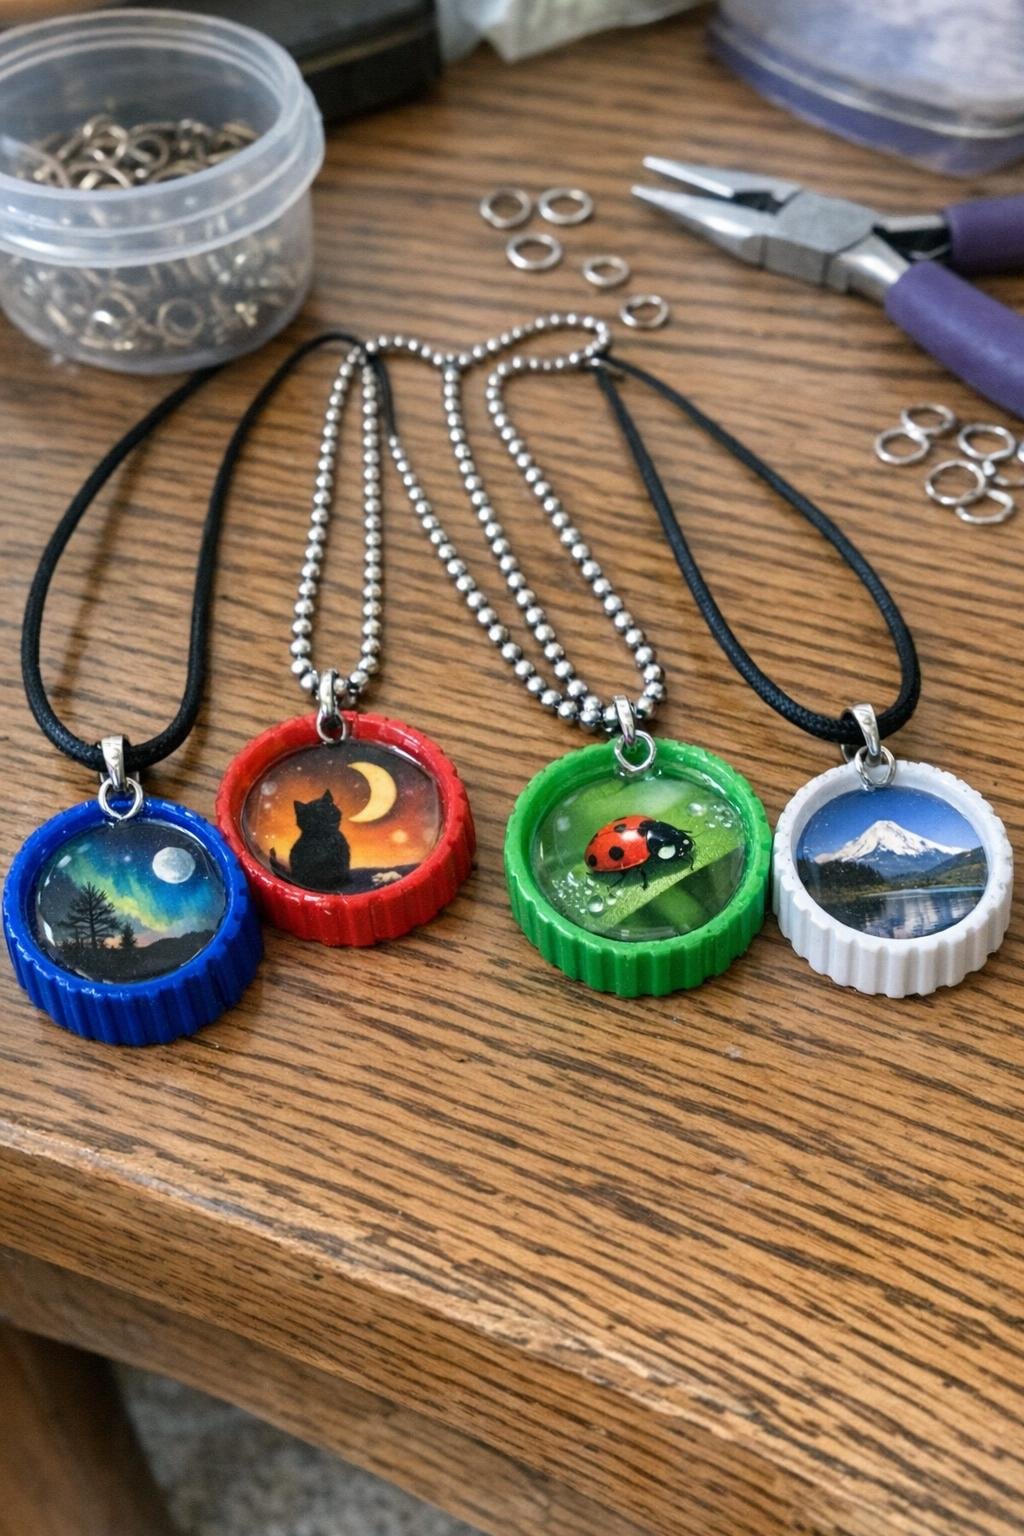
These make lovely keepsakes and gifts, especially if you tuck a tiny photo or painted scene inside. Set a trimmed photo, pressed flower, or miniature painted landscape into a cap, then cover it with a shallow pour of clear resin. Once cured, attach a small screw eye or glue-on bail and string it on a chain or cord 18 to 24 inches long.
I’ve made similar little memory pieces with old garden pictures and tiny birds painted in soft blues. They’re inexpensive, personal, and much sturdier than they look once the resin has set for a full day.
14. Cap snowman ornaments
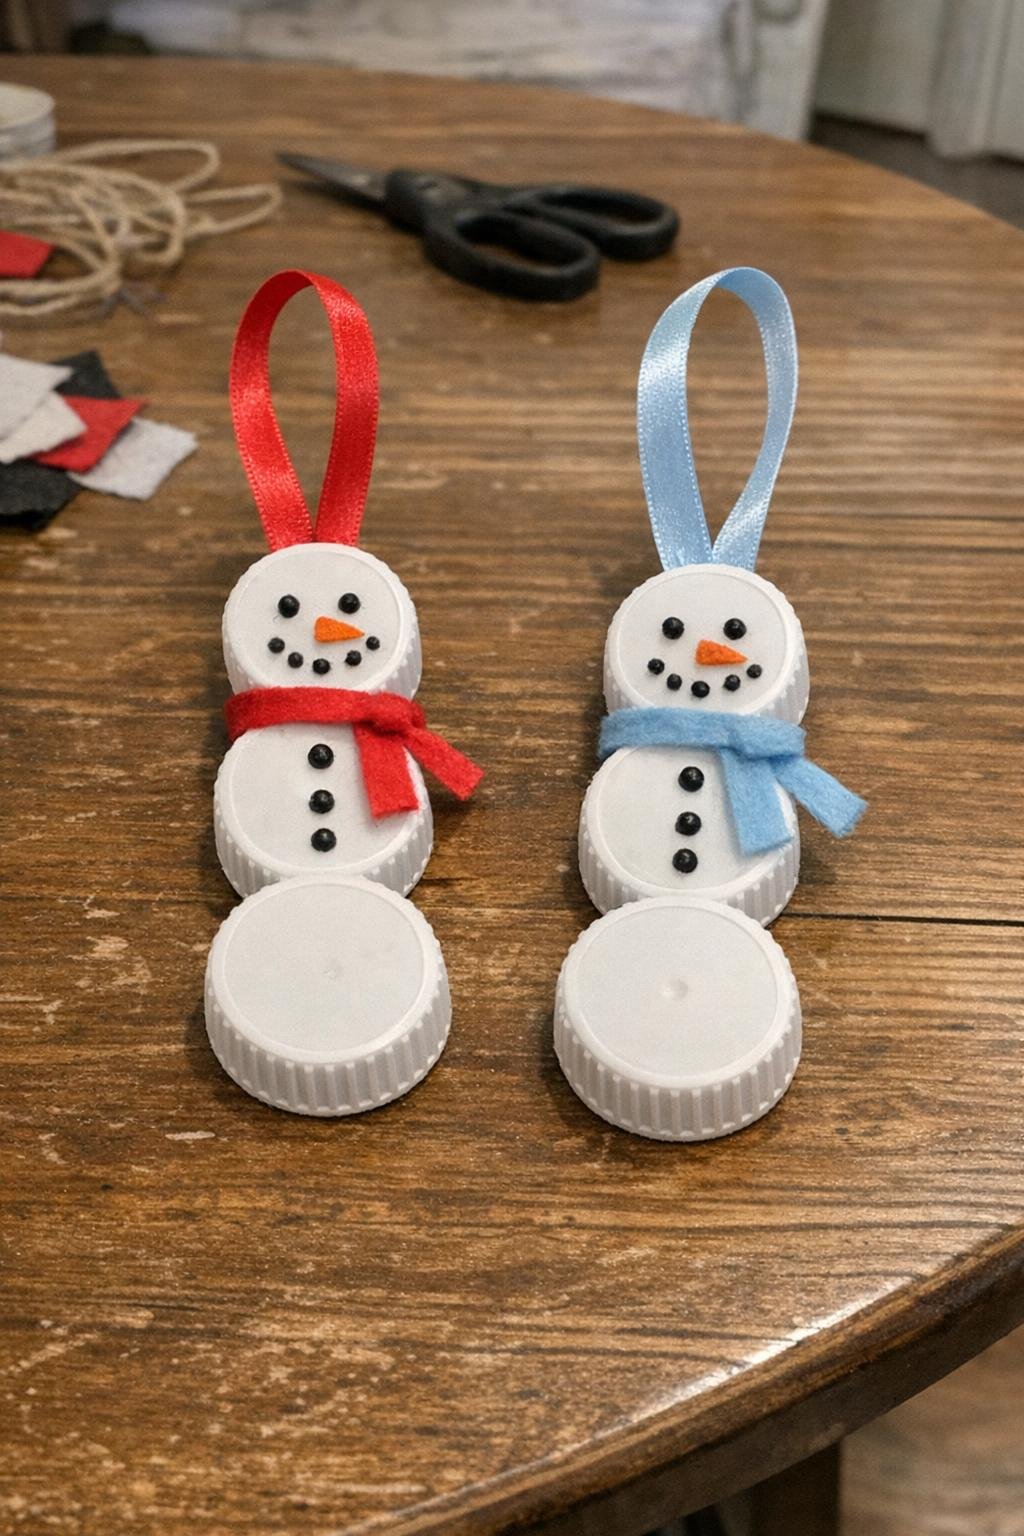
For winter decorating, three white caps in a row make an adorable little snowman ornament. Glue the caps edge to edge on a strip of ribbon, add small painted facial details and buttons with a fine-tip marker or paint pen, and finish with a loop at the top for hanging.
They’re light enough for a Christmas tree branch but also sweet tied onto a gift bag or winter wreath. Make half a dozen in an evening, and you’ve got a whole batch of homemade charm ready before supper dishes are even dry.
15. Cap Christmas garland
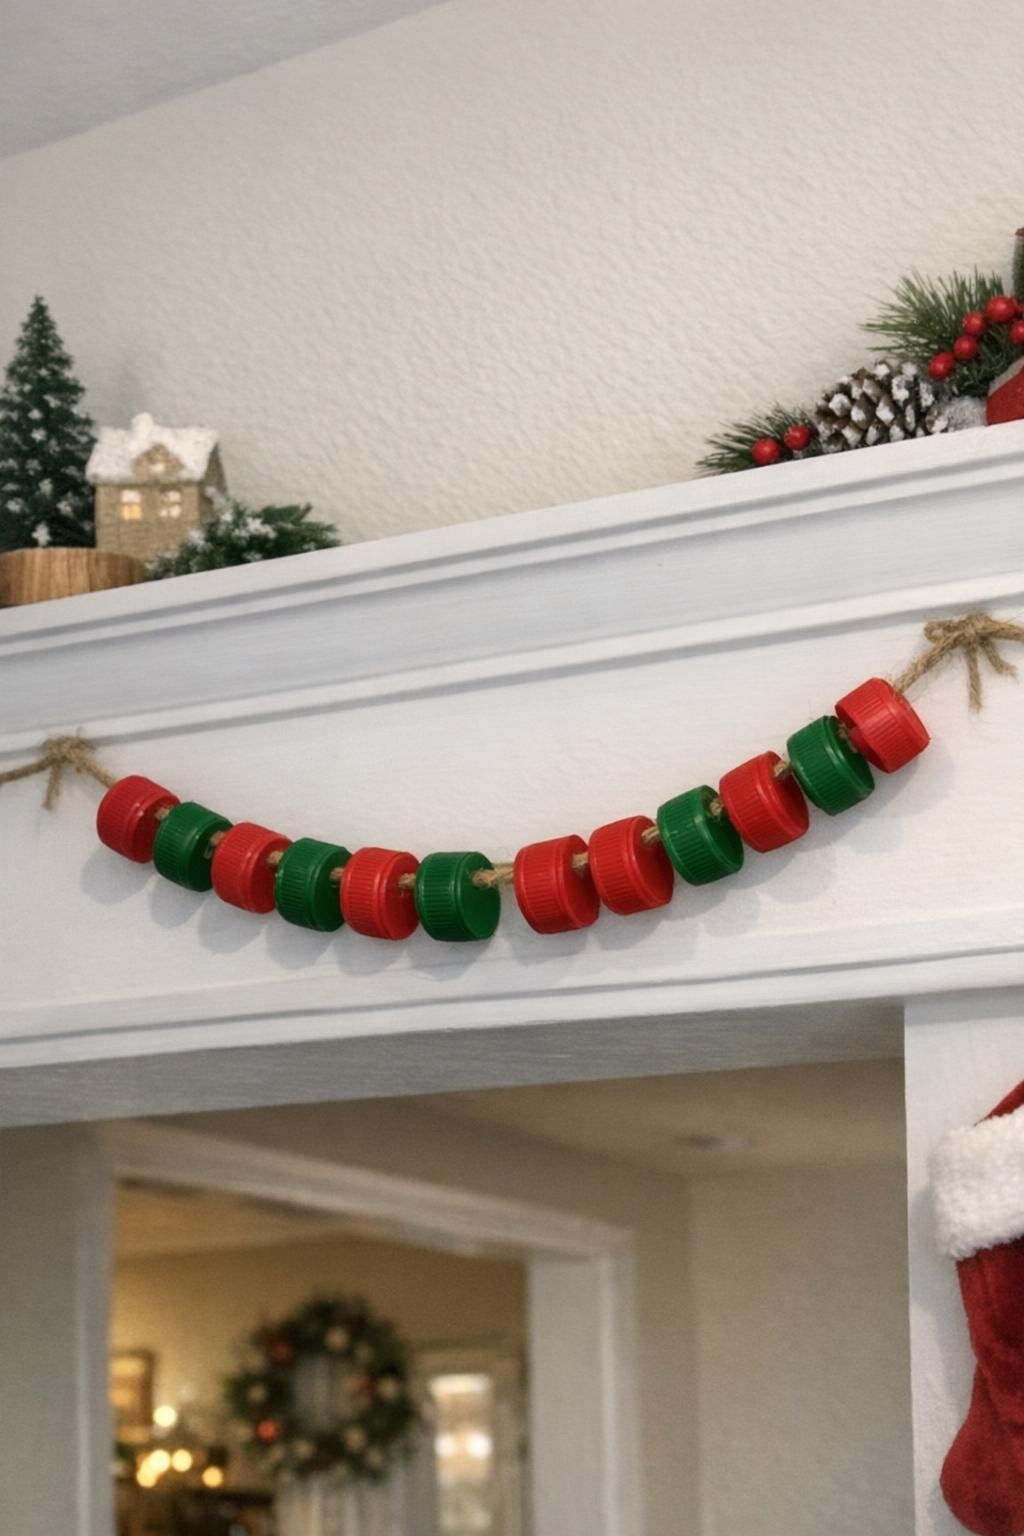
A long string of red and green caps makes a playful garland for a mantel, stair rail, or child’s bedroom at Christmas. Drill two small holes near the edge of each cap and thread them onto jute twine so they sit flat and close together. A 6-foot garland usually takes 70 to 90 caps, depending on their size and spacing.
The jute keeps it from looking too shiny or plastic, and that mix of rustic twine with bright caps works surprisingly well. I’d drape it over evergreen branches or around a doorway where the colors can do their festive work.
16. Pixel-art sunflower
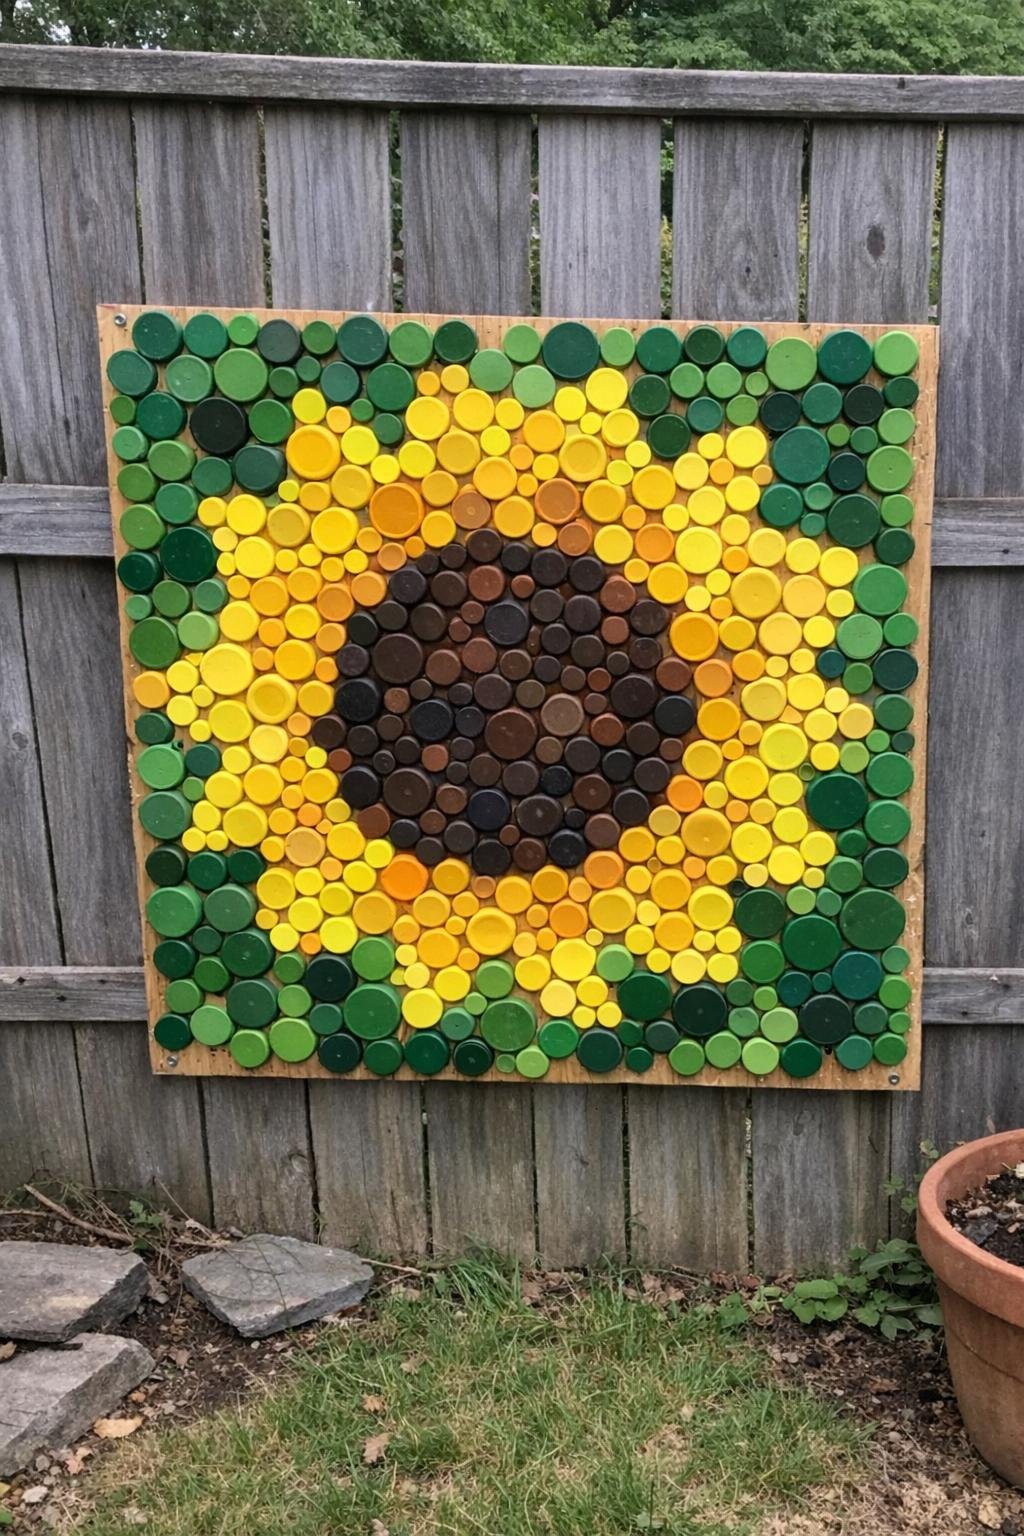
This is a real showpiece for a fence or shed wall. Use about 500 caps in yellow, brown, and green on a painted plywood square, around 24 by 24 inches, arranging them like pixel art to form a large sunflower. Pre-drawing the design in chalk helps keep the rows even before you start screwing or gluing the caps down.
Seen from a distance, the cap pattern blends into a bright, bold flower that looks almost quilt-like. It’s a wonderful way to use lots of caps at once, and it brings a plain stretch of fence to life.
17. Mini paint palettes
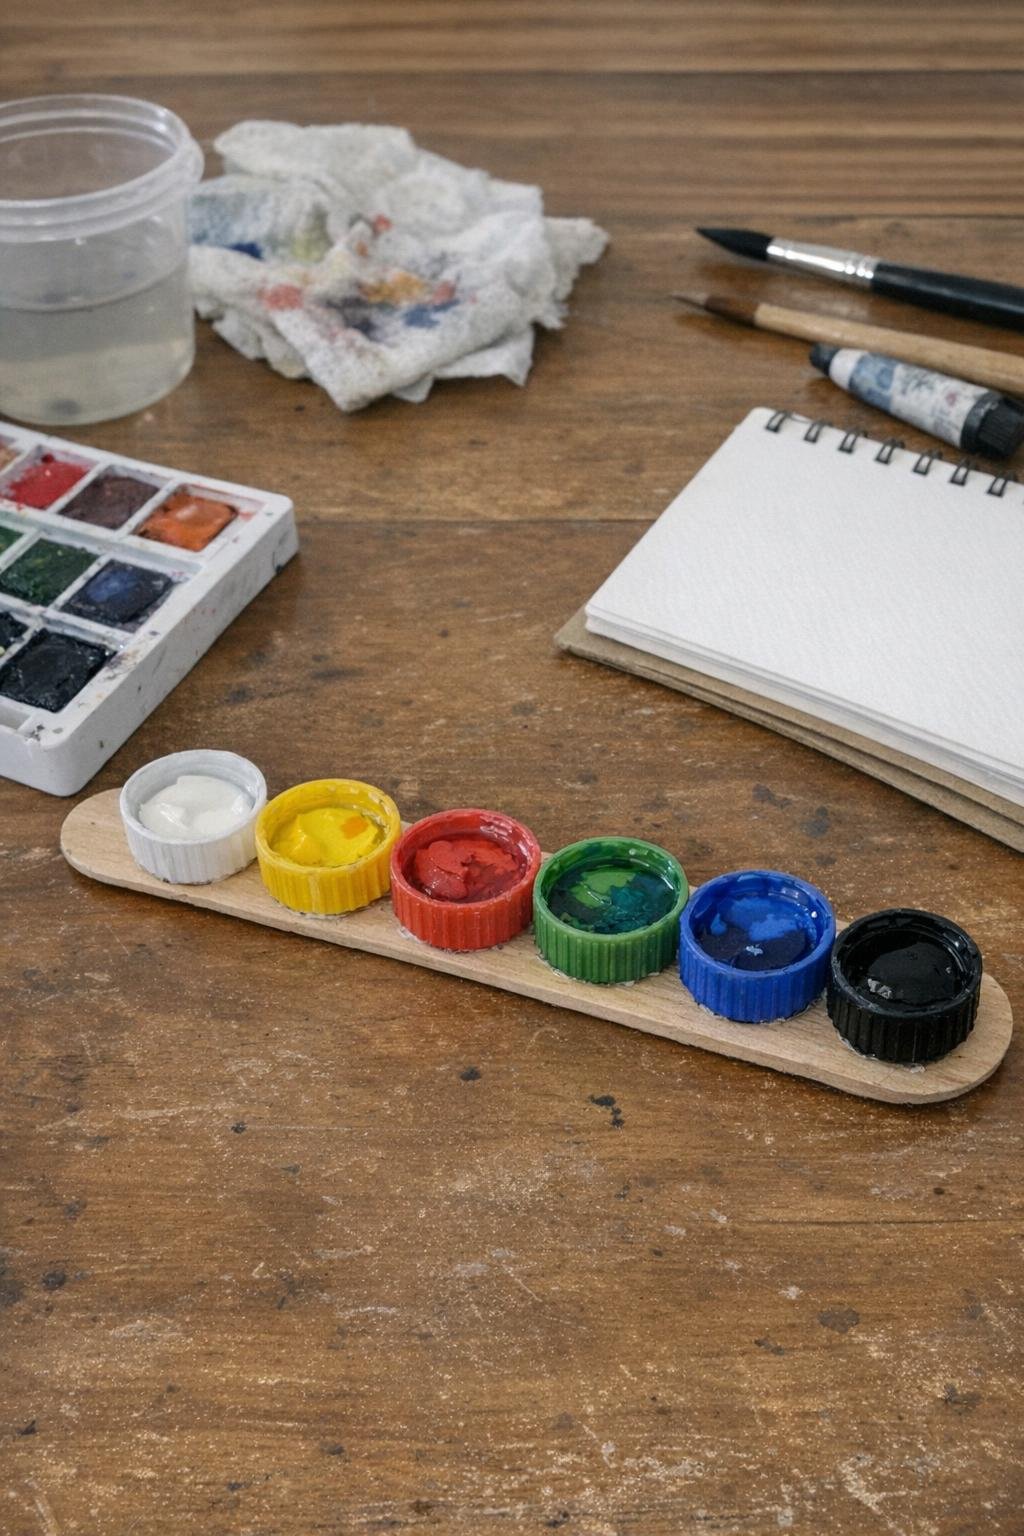
If you watercolor or keep a little art basket for children, this is a handy trick. Glue six caps in a straight row onto a popsicle stick or thin wood strip, spacing them just close enough to touch. Each cap holds a small puddle of paint, and the stick gives you a neat handle for carrying the whole palette from sink to table.
I like these for small projects because they rinse clean quickly and stack neatly in a drawer once dry. They cost next to nothing, and they save you from dirtying a whole plate for six dabs of color.
18. Birdhouse roof shingles
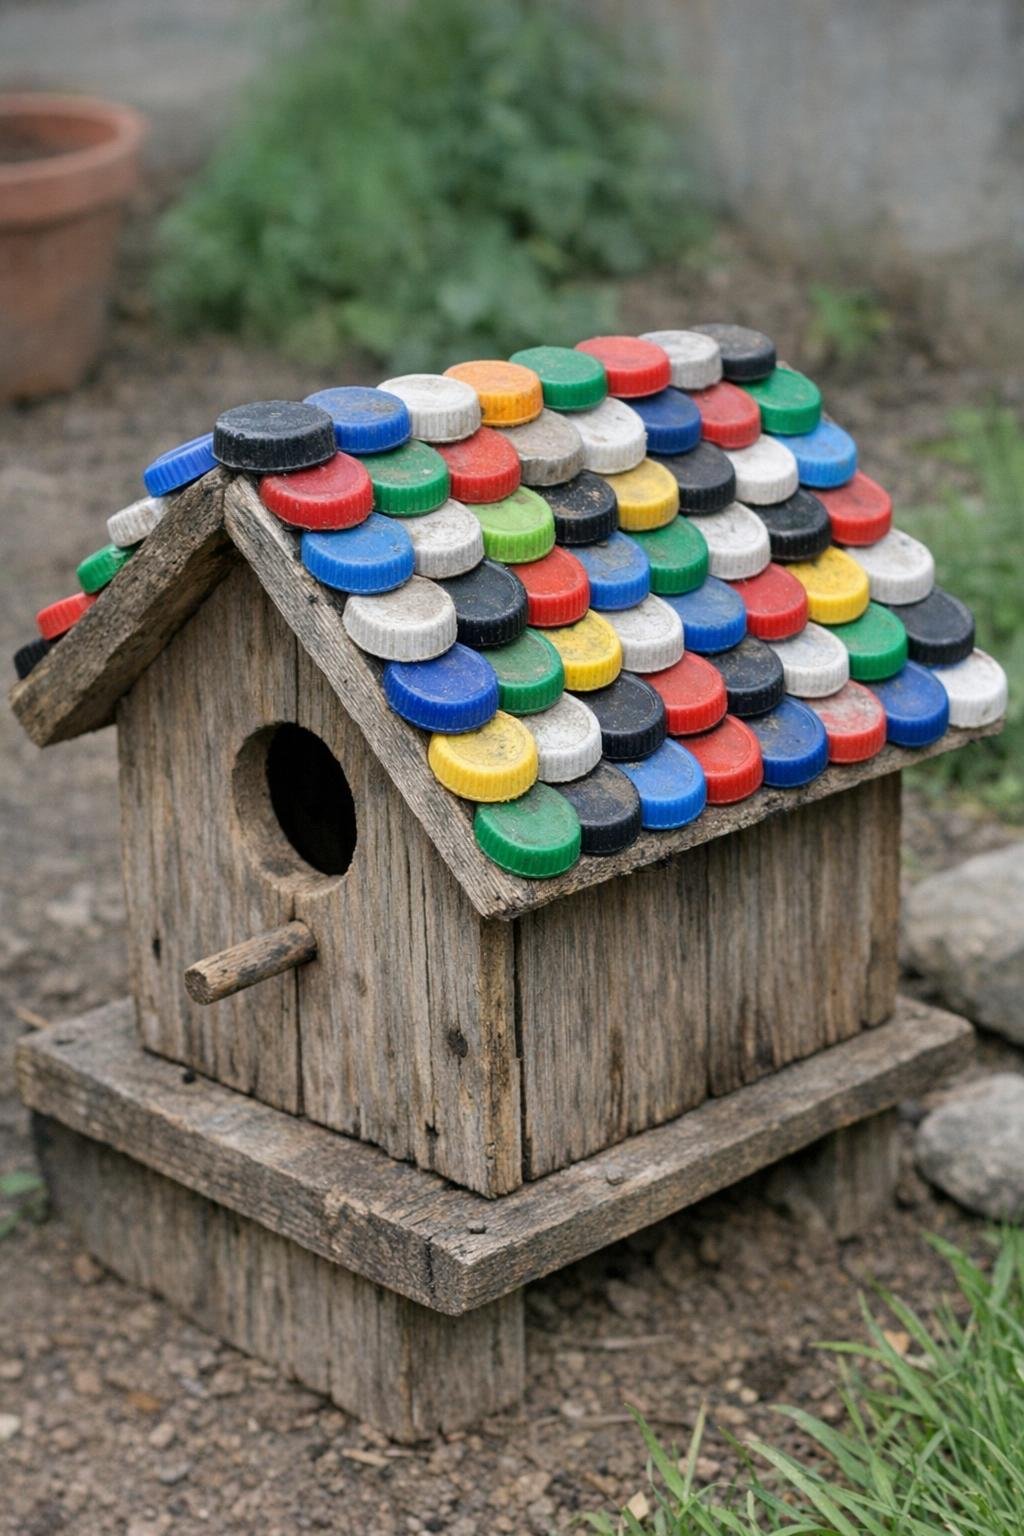
A thrifted wooden birdhouse gets a second life when you cover the roof with overlapping caps like shingles. Start at the bottom edge and work upward in rows, nailing or screwing the caps in place so each row overlaps the one below it by about 1/3. Smaller caps tend to look tidier here, especially on a roof under 8 inches wide.
It’s whimsical without being fussy, and those curved caps shed rain better than you might think. Set the finished birdhouse in a flower bed or on a post, and it becomes as much garden ornament as shelter.
19. Cap wall clock
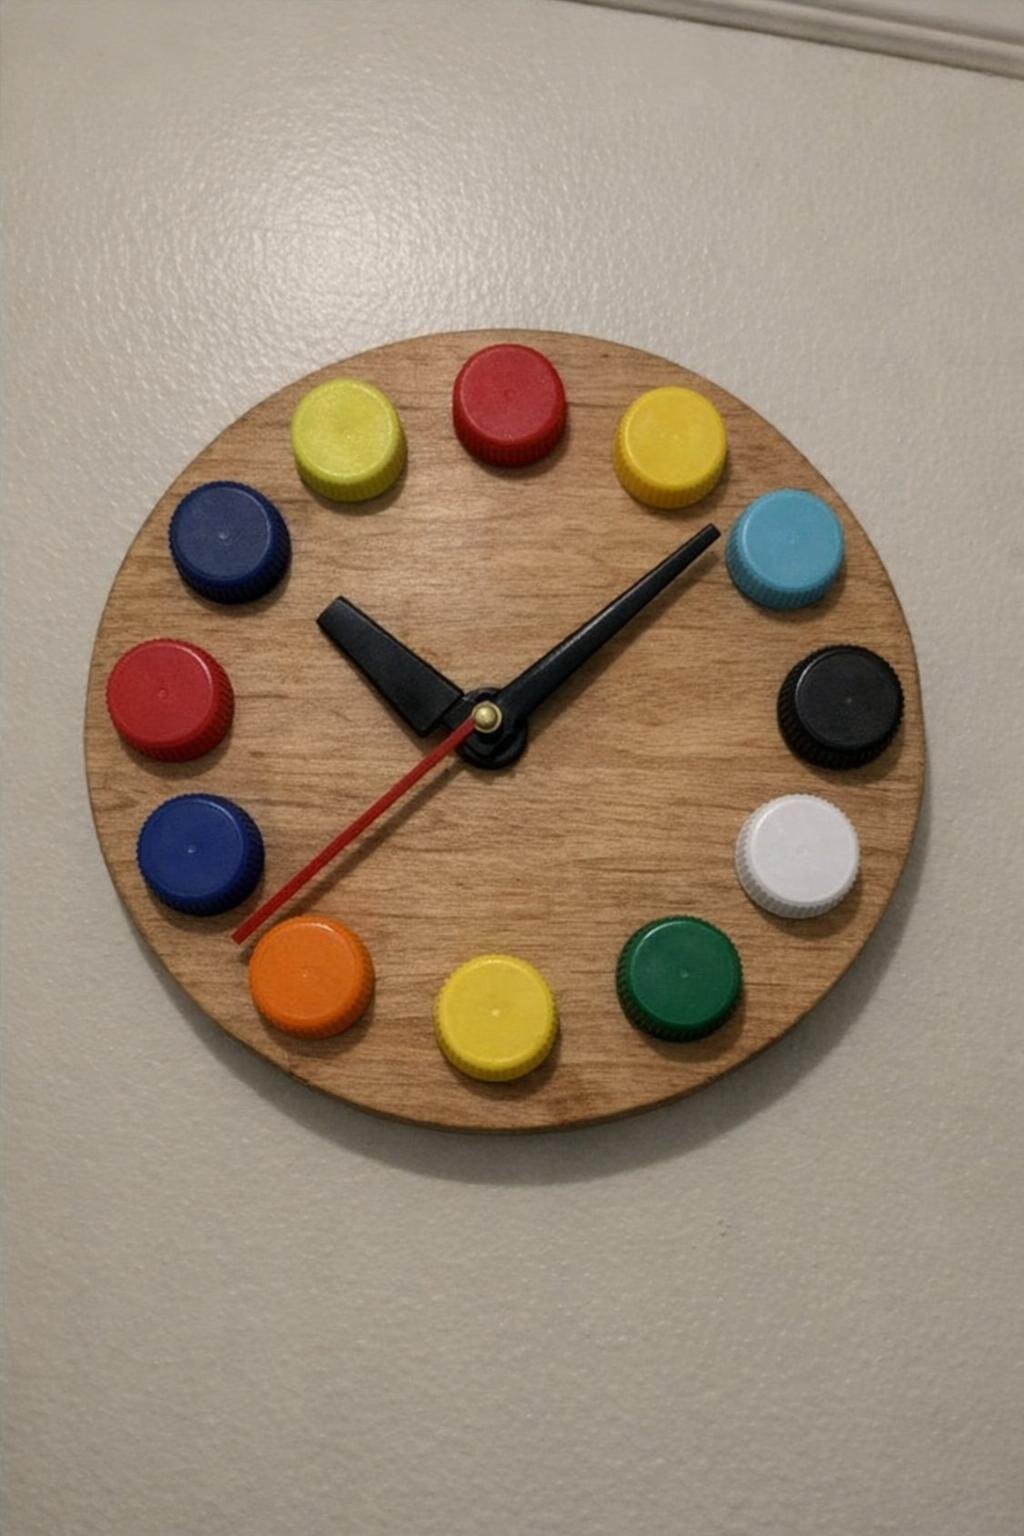
For a kitchen, craft room, or rec room, a bottle cap clock is useful and a conversation starter besides. Mount a simple clock kit onto a wooden round about 12 inches across, then glue 12 caps evenly around the face as hour markers. You can keep the board plain stained wood or paint it a solid color first for more contrast.
Take a few extra minutes to mark the positions with a ruler before gluing anything down, because even spacing makes all the difference. Once the hands are attached, it looks clean, graphic, and a good deal more expensive than it is.
20. Cap pumpkin wreath
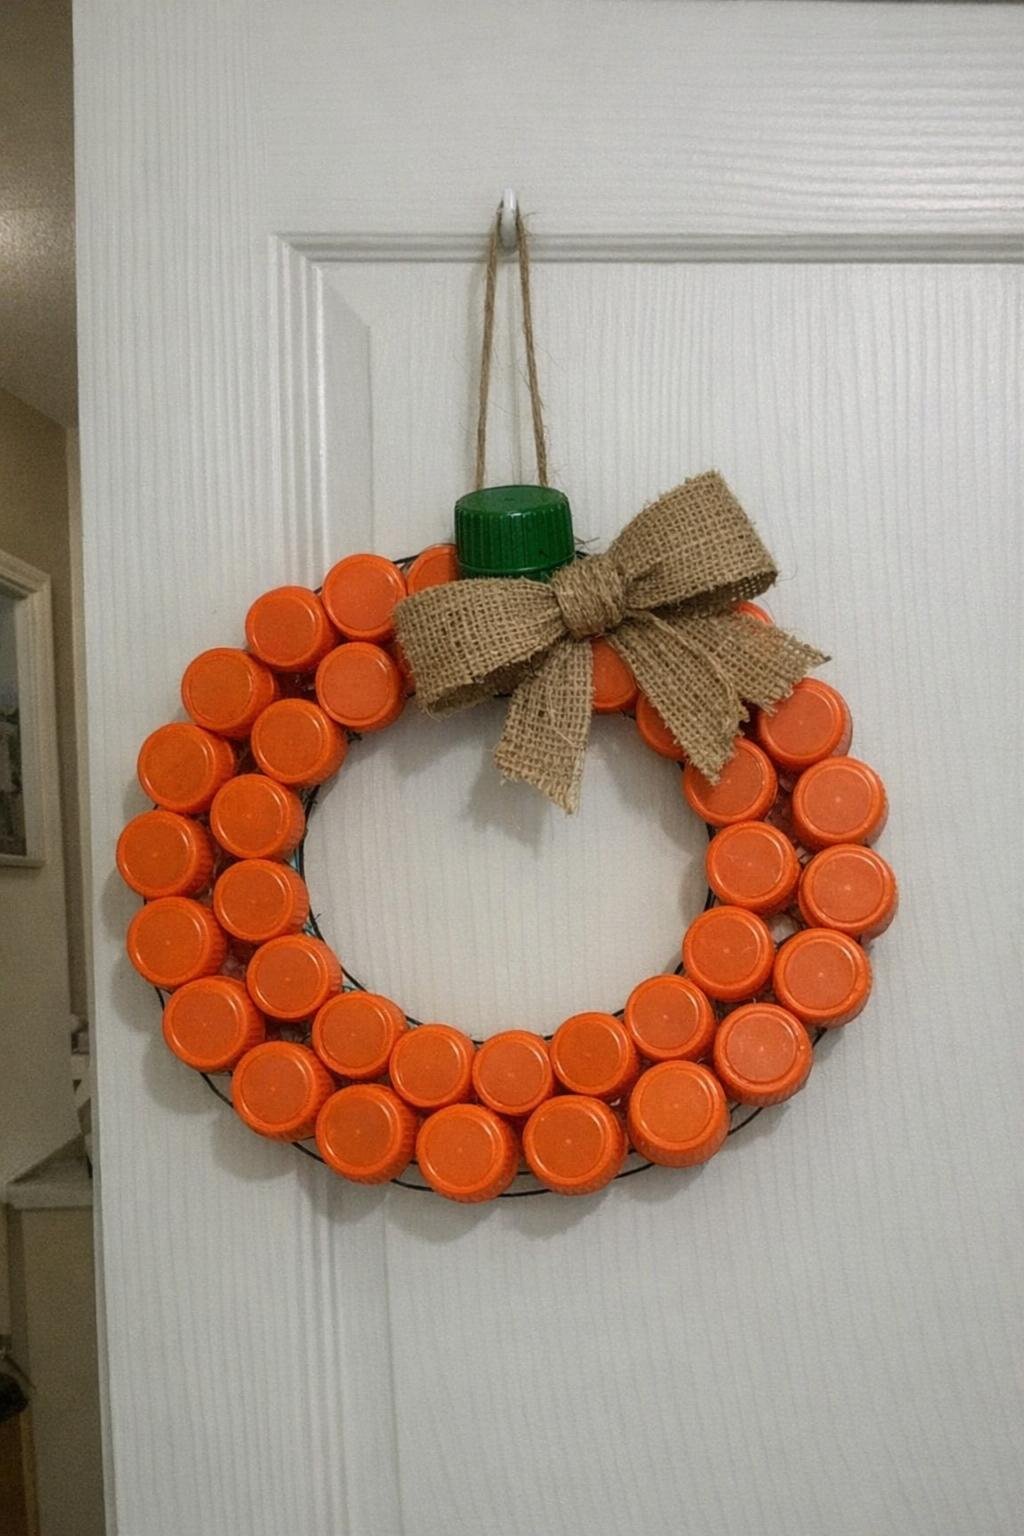
When fall rolls in, orange bottle caps make a darling pumpkin wreath for the front door. Cover a round ring form with orange caps packed tightly into a pumpkin shape, then add a small cluster of green caps at the top as the stem and leaf area. A burlap bow off to one side finishes it nicely without overdoing it.
I’d use a 12-inch form for a standard door, though a smaller one works well for an apartment or pantry door indoors. With its bright color and nubby texture, it feels festive from September right through Thanksgiving.
It still tickles me how a humble bottle cap can become something useful, playful, or downright beautiful. Before you send that next handful to the recycling bin, set a few aside—you may be surprised how quickly they turn into a project worth keeping.