
When the first cold snaps start showing up on the forecast, I get a little protective about my herb bed. My basil and parsley always seem to be doing their best work right when the nights turn rude, so this super simple root-zone insulator has become one of those practical little yard projects I repeat every year. It uses cut plastic milk jugs plus one common garden basic to create a tidy insulating collar around each plant, helping hold in daytime warmth and buffer the soil from early frost.
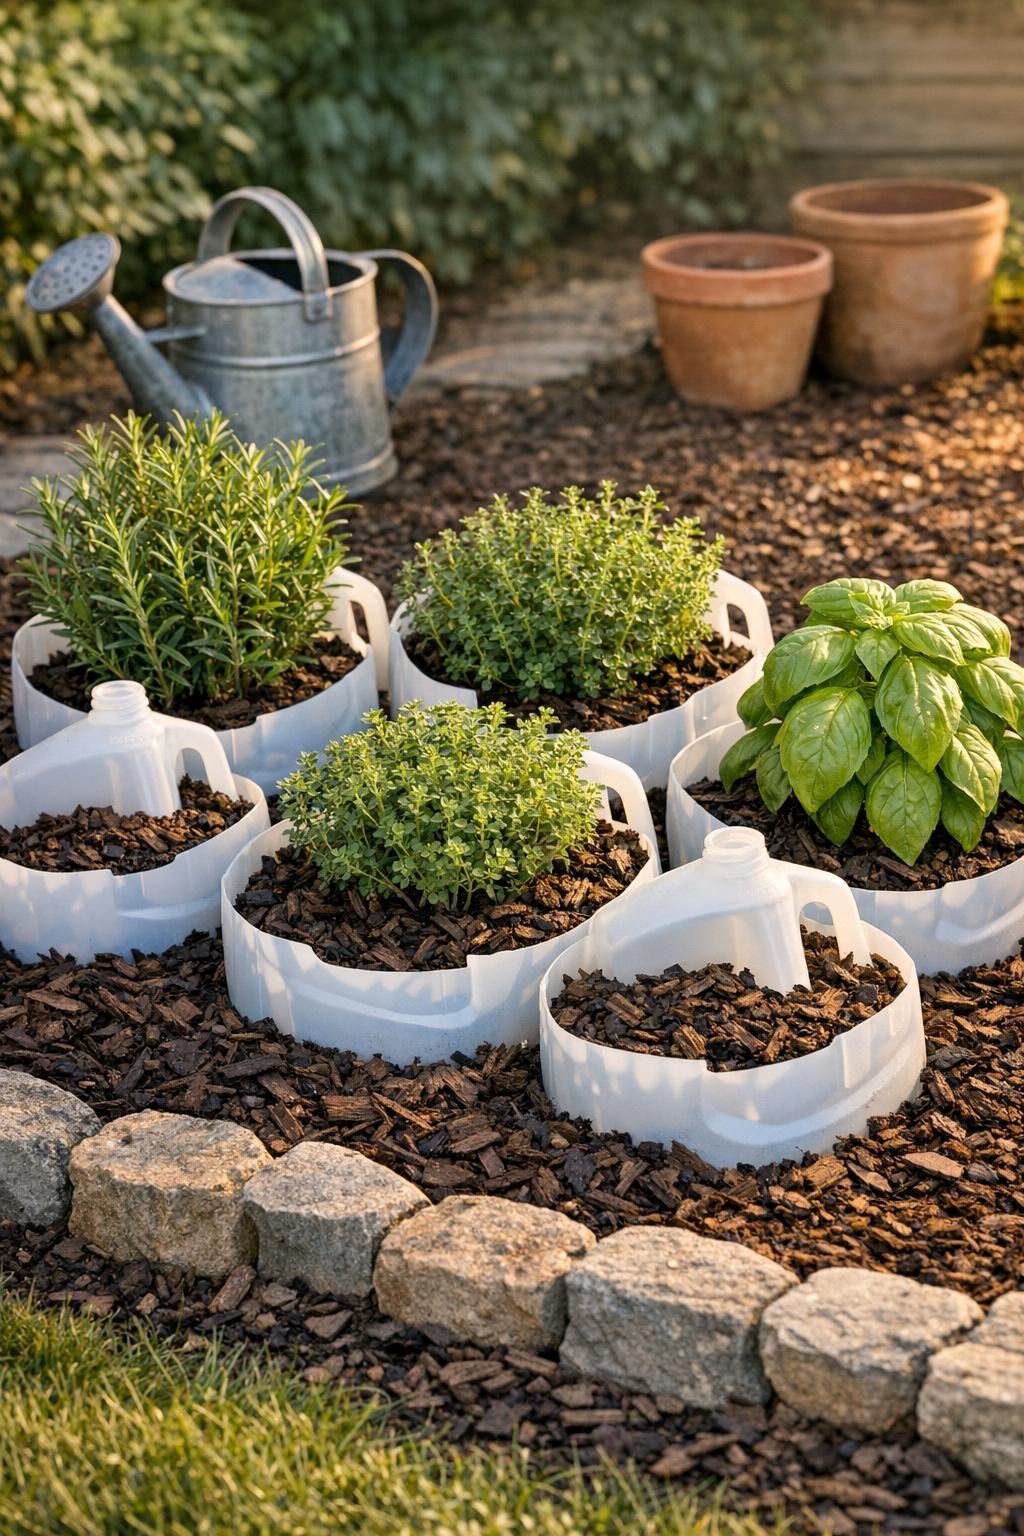
What I love most is that it looks surprisingly intentional once it’s in place. Instead of random plastic stuck in the garden, you get neat white rings mulched in cleanly, and from a few steps back it reads like something you picked up at a garden center. If you’re busy like I am and want a fast, low-cost way to stretch your herb season without building frames or dragging out frost cloth every night, this is absolutely worth doing.
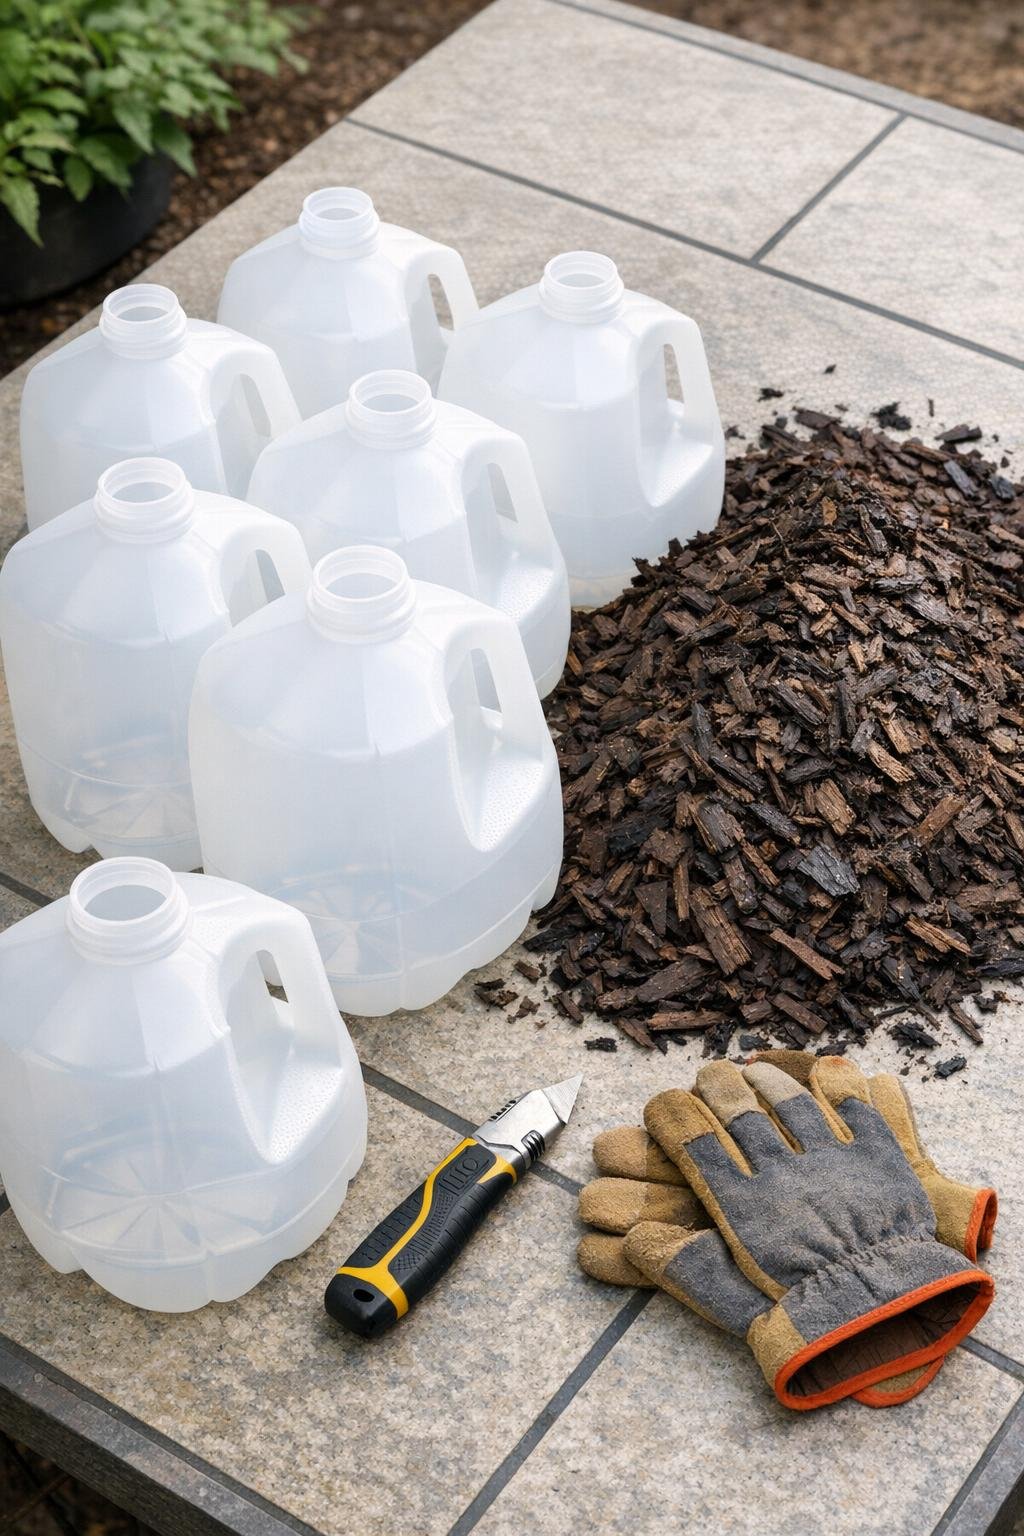
Materials
Instructions
1. Rinse and dry the milk jugs, then remove the caps and peel off any labels so the finished collars look clean and uniform in the bed.
2. Put on gloves and use the utility knife to cut around each jug 1 to 1 1/2 inches up from the bottom, removing the base completely so you’re left with an open-ended plastic sleeve.
3. Trim any jagged plastic from the cut edge so each collar sits flat and won’t catch on gloves, mulch, or plant stems when you install it.
4. Press one jug collar into the soil around each herb plant, cut edge down, sinking it about 1 inch deep and keeping the stem centered with at least 2 inches of breathing room all the way around.
5. Fill the space around the outside of each jug with mulch, banking it up 3 to 4 inches high so the plastic wall and mulch work together to insulate the root zone.
6. Add a light 1-inch layer of mulch inside the jug collar on the soil surface, stopping short of the plant stem so moisture doesn’t sit directly against the crown.
7. Water the bed lightly to settle the mulch and soil, then rotate each jug so the handle opening faces away from the main viewing angle for a cleaner, more polished look.
8. Leave the collars in place through the pre-frost period, checking after wind or heavy rain to make sure the mulch stays banked evenly around each plant.
Variations & Tips
For basil: Use the tallest, straightest jugs for basil since it’s usually the first drama queen in my herb bed when temperatures dip. The extra wall height helps trap a little more warmth around the soil.
For low herbs: If you’re protecting thyme, chives, or compact parsley, cut the jug a little shorter so it doesn’t visually overwhelm the plant. I usually leave 4 to 5 inches of jug height above the soil for smaller herbs.
Mulch choice: Shredded mulch insulates better than chunky nuggets because it packs more evenly around the jug collar. Pine bark works well too if that’s what you already have on hand.
Clean finish: Taking two extra minutes to remove labels really does make these look more intentional. In my yard, that’s the difference between “clever garden hack” and “what on earth happened here?”
Extra cold nights: If a surprise hard frost is coming, loosely set the original milk jug cap back on overnight to reduce cold air dropping into the collar, then remove it again in the morning so the plant can breathe.
End-of-season storage: Once the frost window passes or the herbs are done, pull the collars, rinse them, and stack them in the garage. I keep mine nested in a big tote so I can reuse them every fall without starting from scratch.