
There is something especially dear about making Christmas from what you already have, and this little folded-card project is one of those old-fashioned miracles that still feels fresh today. You start with a stack of saved Christmas cards, the kind many of us have tucked into a box somewhere, and with a ruler, a pencil, and a few careful folds, they turn into a glowing village worthy of a mantel at Christmastime.
My mother’s generation made things like this from magazine pages and greeting cards, and I remember seeing versions of it in old homemaking magazines from the 1950s. If you can draw a line, score a fold with the back of a butter knife, and cut a neat window, you can make this. It is simple, but the finished display has such charm and warmth that nobody would ever mistake it for a child’s craft.
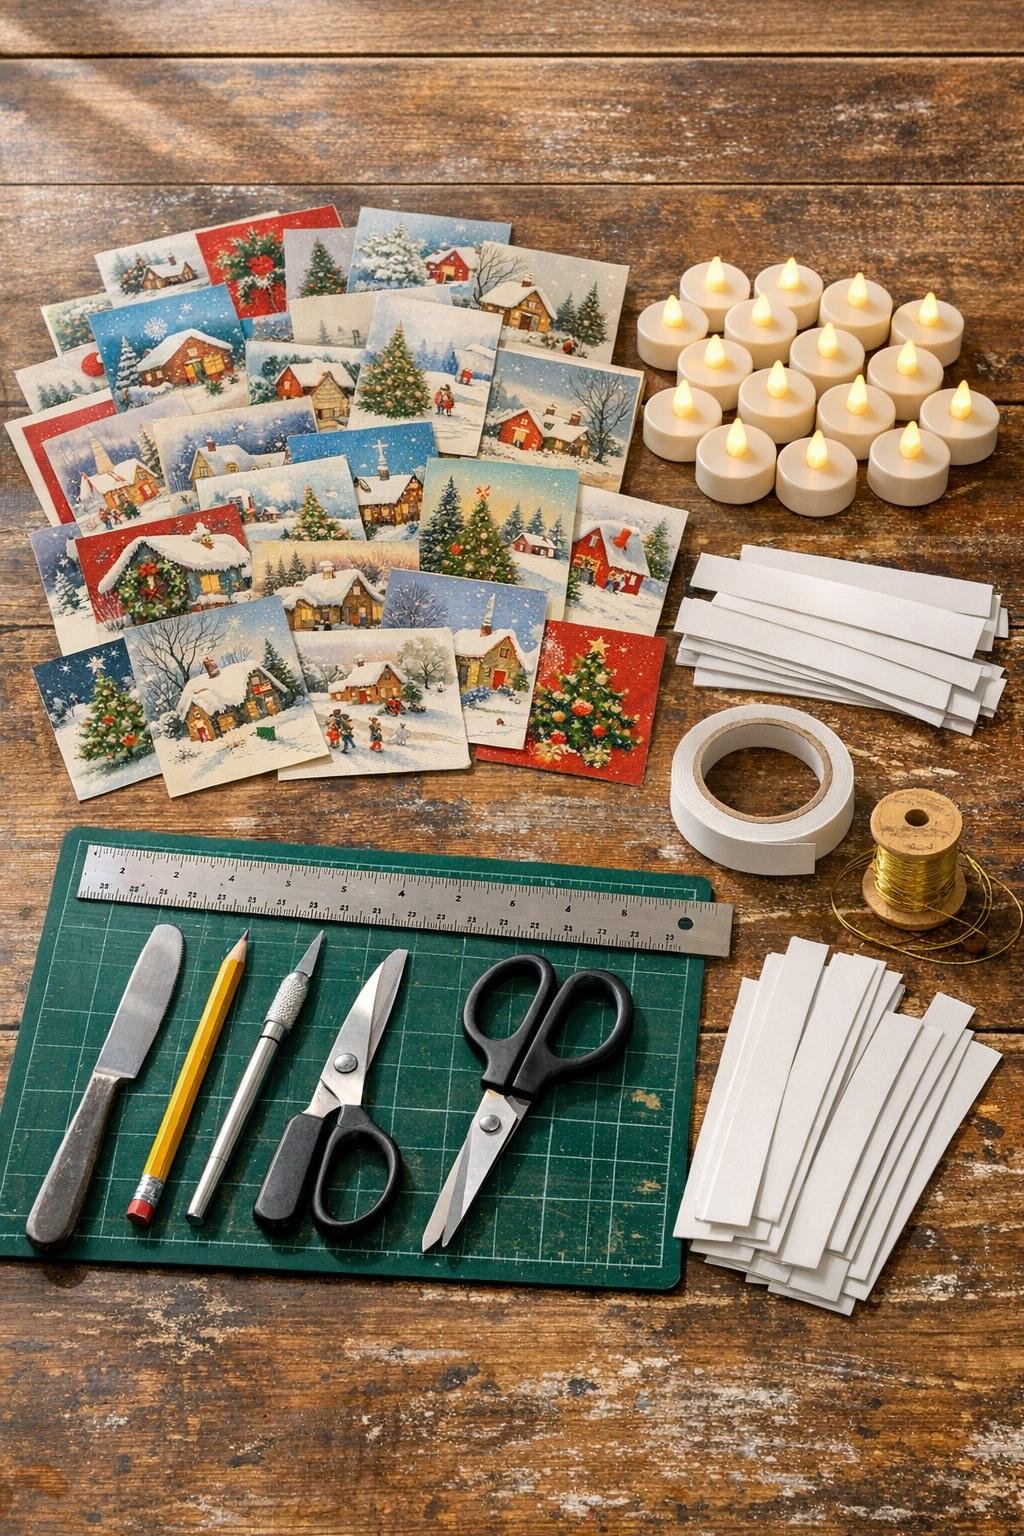
Materials
25 old Christmas cards, standard single-fold size, about 5 x 7 inches each
Instructions
1. Sort your 25 cards into the prettiest fronts, choosing scenes with cottages, Santas, trees, churches, candles, stars, or bold holiday color so the finished village looks full and varied.
2. Open one card flat and place it face down on your table, then decide which part of the picture you want centered on the front wall of the little house.
3. While the card is still flat, draw three light vertical guide lines: one at the center fold, one 1 3/4 inches to the left of center, and one 1 3/4 inches to the right of center.
4. Lay the ruler on each drawn line and score firmly with the back of the butter knife, making 3 scored vertical fold lines so the card folds cleanly without cracking.
5. Turn the card so the long edge runs left to right, then mark the midpoint of the top edge and the midpoint of the bottom edge with a tiny pencil dot.
6. Draw a line from the top midpoint down to the top of the left outer scored line, and another from the top midpoint down to the top of the right outer scored line to form the roof peak.
7. Score those 2 slanted roof lines with the ruler and butter knife, pressing firmly enough to guide the fold but not tear the card.
8. With the card still flat, draw a window or door shape on what will become the front panel; make most windows about 3/4 inch square and doors about 3/4 inch wide by 1 1/4 inches tall.
9. Cut out the windows and doors with the craft knife on the mat, keeping them at least 1/2 inch from every fold so the house stays sturdy.
10. Add more cut windows to side panels if you like, but keep the shapes simple and balanced; on 25 houses, I like a mix of one-window cottages and larger chapel-style fronts.
11. Fold the card inward on the 3 vertical score lines and 2 roof score lines, bringing the two outer sections toward the back so the card stands as a peaked little house.
12. Cut a cardstock support tab 1 inch by 5 inches, score it lengthwise down the center, and crease it into a narrow V shape.
13. Tape one side of the support tab inside the back left panel and the other side inside the back right panel so the house holds its triangular shape when standing.
14. If the card wants to spring open, add a small piece of clear tape along the inside top seam near the roof peak, keeping it hidden from the front.
15. Repeat the same measuring, scoring, window-cutting, and folding process for all 25 cards so the village looks consistent even though every house has different artwork.
16. Vary the heights and personalities a little by turning some cards horizontally before marking, which gives you lower, wider cottages among the taller peaked ones.
17. Cut 25 cardstock base strips, each 1 1/2 inches by 4 inches, and tape one beneath the open bottom edges of each house if you want extra stability on a mantel.
18. Slide one battery tea light under each finished house, centering the flame-shaped bulb beneath the main front window or doorway opening.
19. Dim the room slightly and check each house for glow, trimming any window openings a touch larger if the light is blocked by dark printed areas.
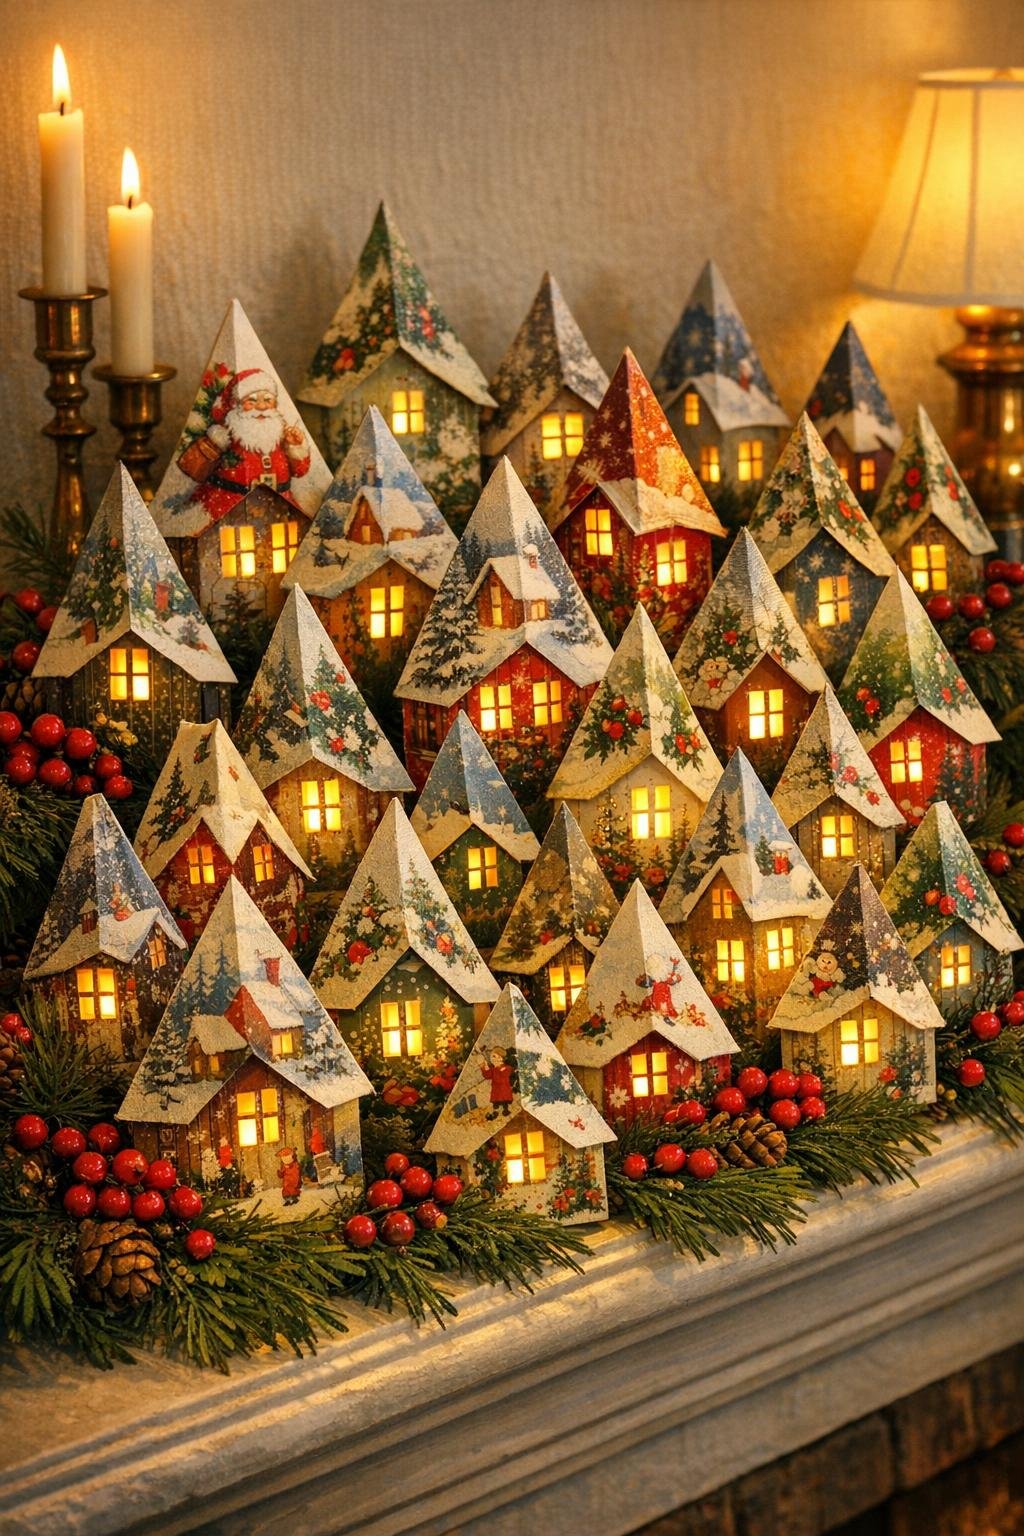
20. Arrange the 25 houses in a generous cluster across a mantel, bookshelf, or sideboard, mixing colors and scenes so the village feels layered and lively instead of lined up stiffly.
21. For a tree display, punch a tiny hole near the roof peak of 5 or 6 lighter houses, tie on loops of gold thread, and hang them among white lights while the rest of the village stays on the mantel.
22. Tuck the houses close enough together to read as one glowing village, but leave just enough space that each peaked roof and cut window can be seen.
Variations & Tips
Best cards to use: Cards with bold pictures and little bits of sky, snow, or buildings make the prettiest houses. Very dark cards can still work, but you may need slightly larger windows so the candlelight shows.
Keep folds crisp: The scoring is the secret here. I would not skip the butter-knife step, because old glossy cards can crack at the fold if you simply bend them by hand.
Cut windows first: Always cut your windows while the card is lying flat. It is easier on the hands, easier to keep neat, and much safer than trying to cut once the house is folded.
For a more polished mantel display: Set the houses in 2 or 3 staggered rows, with taller ones in back and smaller ones in front. A little evergreen garland tucked behind them makes the glow look even richer without covering your work.
Choose safe lighting: Use only battery-operated LED tea lights, never real candles. These little houses are paper, and the warm LED glow gives all the charm without any worry.
Make it feel collected over time: Mix card styles on purpose: some very vintage-looking, some bright mid-century, some classic religious scenes, some snowy village pictures. That variety is what gives an old-fashioned Christmas display its soul.
Storage tip: After the season, nest the houses gently in a shallow box with tissue between layers, and store the tea lights separately. If you have scored neatly, many of the houses will fold down enough to save space without losing their shape.