
This is one of those porch projects that looks like you spent all afternoon hunting antique markets, when in reality the magic comes from pairing two simple finds: old wooden window frames and those dollar store burlap pumpkin signs. I love a project like this because it gives you big seasonal impact without asking for fancy woodworking skills, and the mix of weathered wood and textured burlap has that warm harvest look that always feels welcoming.
If you like decorating for fall but prefer pieces that feel a little more tailored than plastic yard décor, this is a great one to make. I designed this version to be full and polished enough for a front porch display, but still easy enough that you can finish it in a single afternoon with basic tools and a few inexpensive finishing touches.
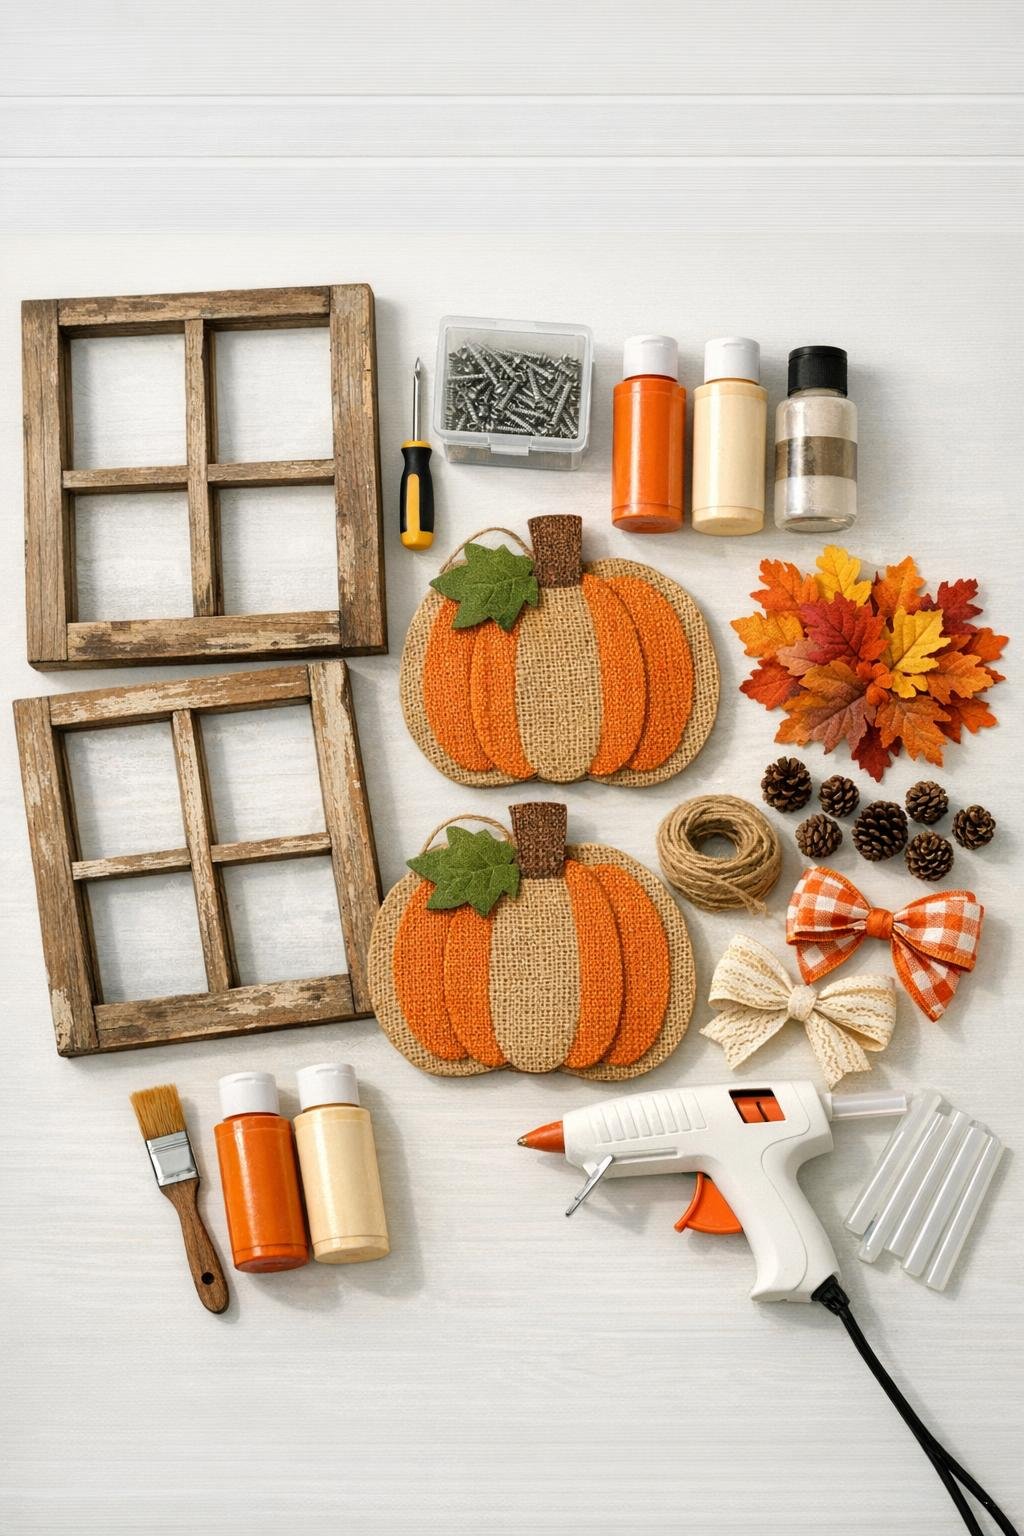
Materials
Instructions
1. Wipe the wooden window frames with a damp cloth and a little soap solution to remove dust, then let them dry completely. A clean surface helps the pumpkin signs sit flat and keeps your finish from looking muddy.
2. Check the window frames for loose backing, staples, or splinters, and remove or flatten anything that sticks out. If the frames have old glass, remove it first so the finished piece is lighter and safer for porch decorating.
3. Touch up the frames only where needed with dark brown, black, or burnt orange craft paint, then dry-brush a little cream paint over edges for a softly aged look. I like keeping the wood weathered, because that contrast is what makes the burlap pumpkins stand out.
4. Brush a thin coat of matte sealer over the frames and let it dry. This quick step helps old wood hold up better on a covered porch and gives the finished project a more intentional look.
5. Lay each burlap pumpkin sign centered over one window frame and test the placement before attaching it. Keep the pumpkin in the middle pane area so the frame still reads clearly as a vintage window.
6. Mark four screw points on each pumpkin sign—top, bottom, left, and right—placing them where the screws will disappear into darker printed areas, seams, or existing decorative details. This keeps the attachment secure without drawing attention to the hardware.
7. Carefully screw each burlap pumpkin sign onto its frame with four short screws, tightening just until snug. Do not overtighten, or you can crush the sign or strip the old wood.
8. Wrap a short length of jute twine around the pumpkin stem area or top edge of each sign and tie it off neatly at the back for added texture. This tiny layer makes the signs feel more custom and less like straight-from-the-store décor.
9. Hot-glue a ribbon bow near the stem area of each pumpkin, slightly off-center for a fuller look. Press it in place for several seconds so it grips the burlap surface well.
10. Tuck and glue faux fall leaves around the top half of each pumpkin and around two corners of each window frame, using 12 to 15 leaves per piece for a lush harvest effect. Add three mini pinecones per frame to fill small gaps and give the arrangement more depth.
11. Turn the frames over and attach a sawtooth hanger to each one, or tie heavy jute twine securely across the back for hanging. If you plan to lean them on the porch instead of hanging them, skip this step and add felt pads to the bottom corners instead.
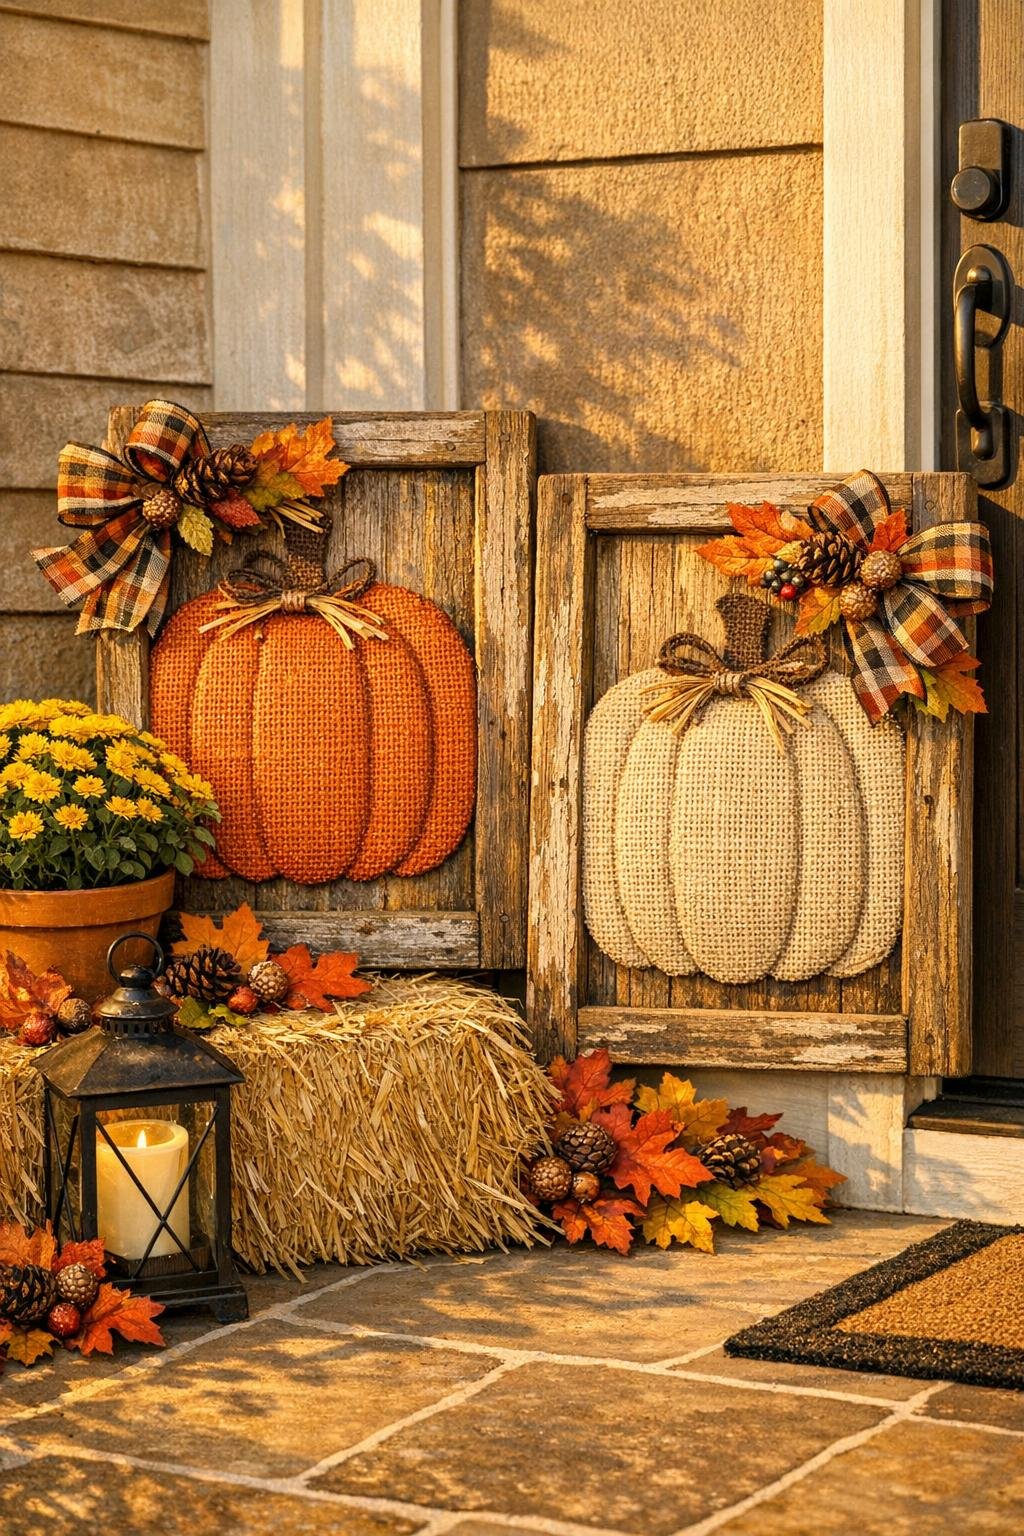
12. Give the whole piece a final check, fluff the leaves and bows, and touch up any visible glue strings or paint scuffs. When both frames are styled side by side, they create a generous porch display that looks collected and custom.
Variations & Tips
Use mismatched frames: If your two old window frames are different sizes, keep the pumpkin signs centered and let the mismatch work in your favor. I often find that slightly uneven pairs look even more charming on a porch.
Choose a softer color palette: Cream, sage, muted orange, and faded black make this easy to blend with farmhouse or neutral fall décor. If your pumpkin signs are very bright, dry-brush a little tan paint over them to tone them down.
Make it porch-safe: These hold up best on a covered porch rather than in direct rain. A matte sealer helps, but burlap always lasts longer when it is somewhat protected.
Skip extra drilling stress: If the pumpkin signs feel delicate, pre-poke tiny pilot holes through the sign material first. That small step makes screwing them on much easier and reduces pulling.
Add fuller embellishment: For a more dramatic look, extend the leaf clusters farther into the frame corners and layer in wheat picks or small berry sprigs. I always tell people that seasonal décor needs a little abundance to really read from the curb.
Lean instead of hang: If your porch already has layered décor, these look especially pretty leaned behind mums or next to a bench. That arrangement gives you the same impact with less measuring and no wall hardware.