
I love a project that turns the recycling bin into something people stop and ask about, and this one absolutely does that. If you’ve got a stash of empty soda bottles and a front porch that could use a little glow, this is one of those surprisingly simple makes that looks far fancier than the supply list suggests.
What I especially like is that it’s budget-friendly, forgiving, and easy to build in an afternoon, even if you’re not a “serious crafter.” The bottle bottoms catch the light in the prettiest way, and because we’re building on a tomato cage, the whole thing comes together fast while still giving you a nice full shape.
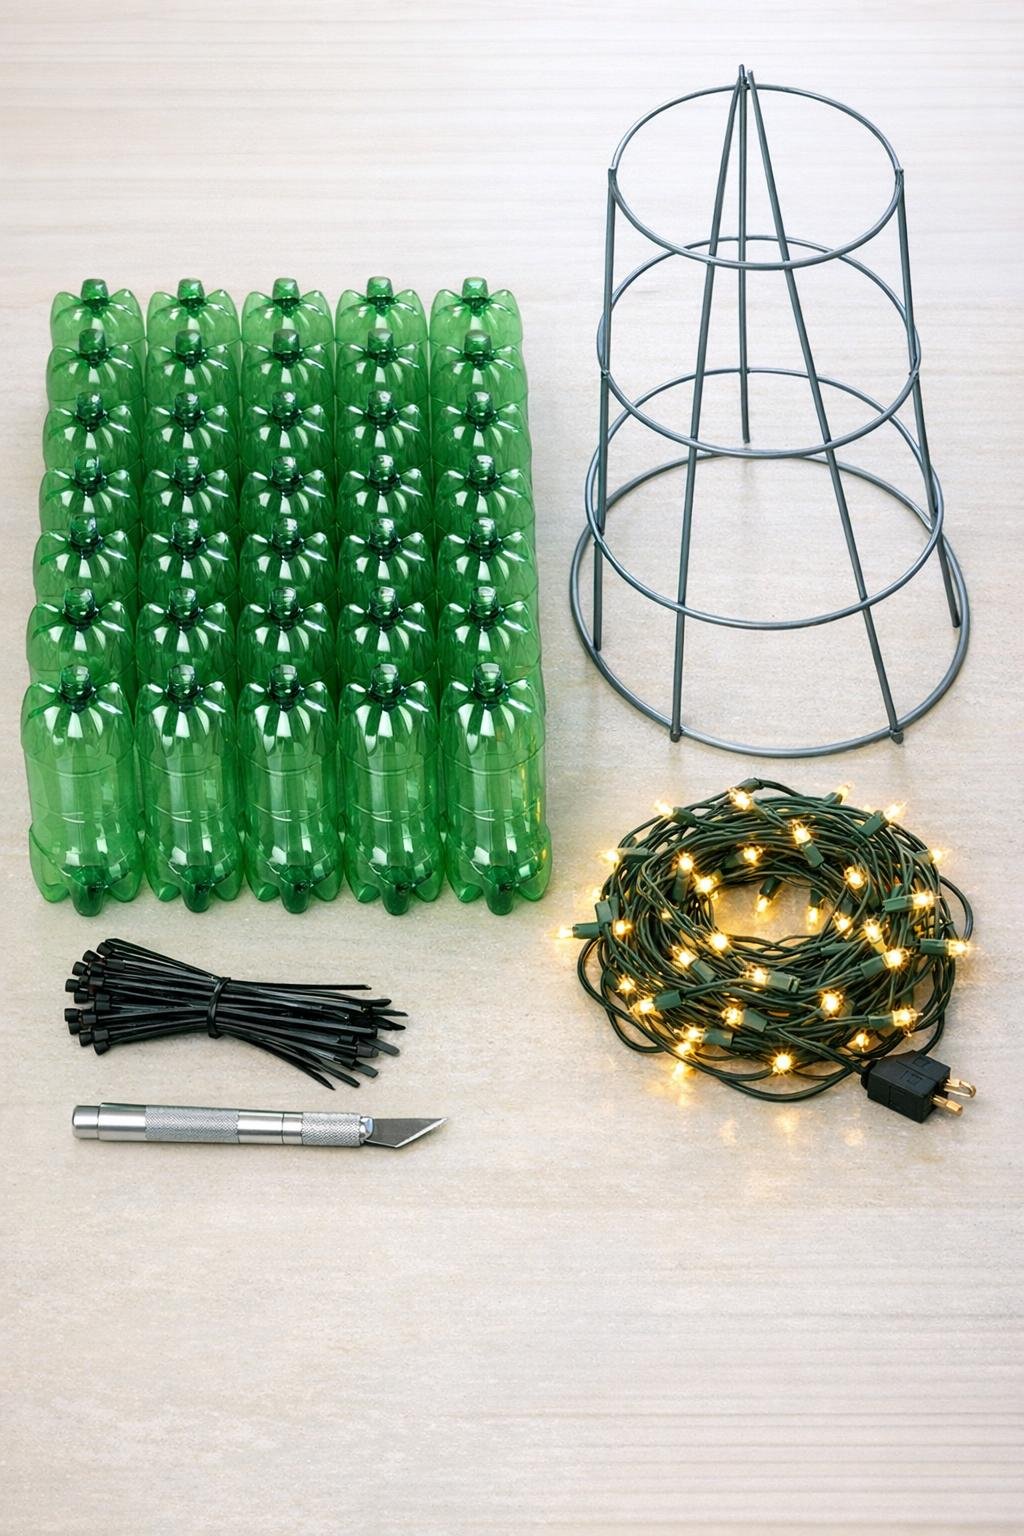
Materials
30 empty 2-liter green soda bottles, washed and fully dried
Instructions
1. Wash all 30 bottles, remove the caps, and let them dry completely so the plastic stays clear and the lights won’t highlight water spots.
2. Using the craft knife, carefully pierce each bottle about 3 to 4 inches up from the bottom, then cut all the way around to remove the bottom section; trim the edge neatly with scissors so every piece sits evenly.
3. Turn the tomato cage upside down so the wide ring becomes the bottom, then gather and secure the three wire legs together at the top with 2 zip ties to form a strong cone shape.
4. If you want extra stability, place decorative pebbles or two patio bricks inside the bottom ring now, keeping the weight centered so the frame won’t tip on a breezy porch.
5. Start at the lowest ring of the cage and attach the first row of bottle bottoms by poking a tiny slit near the cut edge of each piece and threading a zip tie through the slit and around the cage wire.
6. Overlap the bottle bottoms slightly as you go, placing them close enough that the row looks full and the cage wire begins to disappear.
7. Continue adding bottle bottoms row by row, working upward and staggering the pieces between seams so the tree gets dense coverage instead of visible gaps.
8. Fill the middle section with the largest, best-shaped bottle bottoms, then use the slightly smaller or less perfect pieces near the top where they blend in easily.
9. As you reach the upper cone, angle the bottle bottoms upward a bit so they follow the tree shape and create a fuller, more polished silhouette.
10. Attach 3 to 4 bottle bottoms clustered tightly around the tip of the cage to form a finished topper and hide the zip ties at the peak.
11. Weave the LED string lights from top to bottom, wrapping them evenly around the cone and tucking the wire behind the plastic layers so the glow shines through the bottle bottoms instead of the cord showing.
12. Use small bits of clear tape or a few extra zip ties wherever needed to hold the light strand snug against the frame without crushing the plastic pieces.
13. Plug in or switch on the lights, then adjust any bottle bottoms that are sitting too flat or too far apart until the glow looks balanced all the way around.
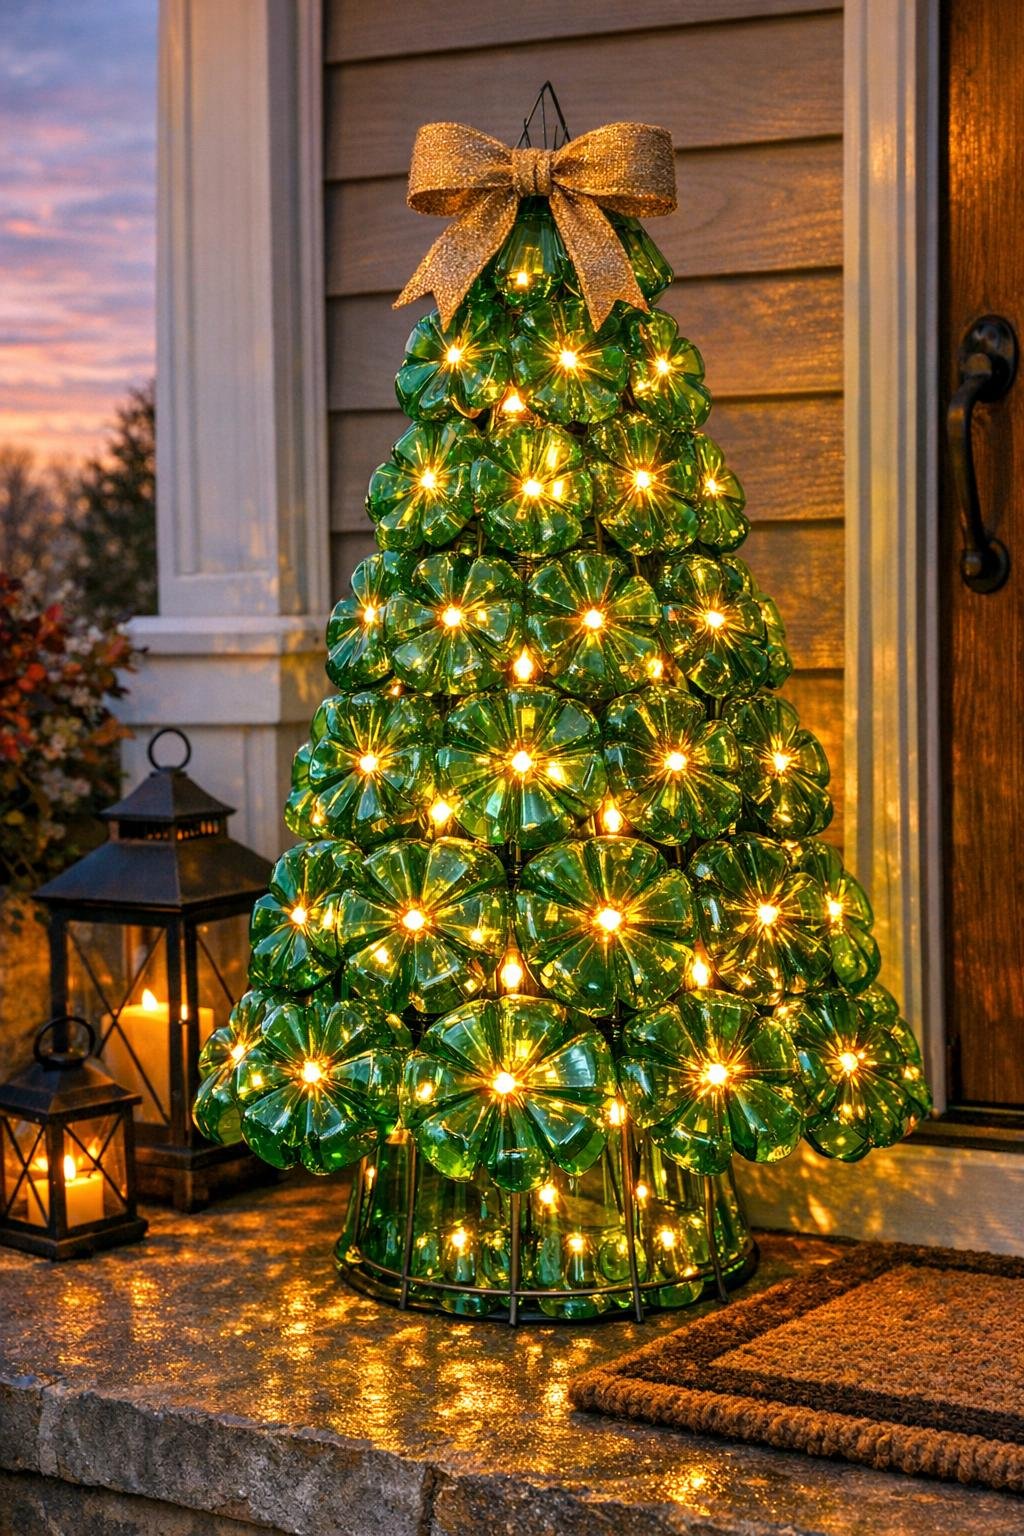
14. Wipe the whole project with a damp microfiber cloth to remove fingerprints, then add a weatherproof ribbon bow near the top if you want a dressier porch look.
15. Set the finished piece by your front door, on porch steps, or beside a planter where it can glow safely under cover and be seen from the sidewalk.
Variations & Tips
Clear bottle version: If you only have clear soda bottles, use them exactly the same way for an icier, crystal-like look. Warm white lights make them feel soft and pretty instead of stark.
Color-mixed tree: Mix green, clear, and a few brown bottle bottoms for extra depth. I’d keep one color dominant so it still reads as intentional and not too busy.
For windy porches: Add extra zip ties at every other bottle bottom and weight the base with bricks inside the bottom ring. A stable base makes a big difference once the weather turns.
Kid-helpful jobs: If little hands want to join in, let them wash bottles, sort the best bottoms, or hand you zip ties. I save the knife work for adults only.
Nighttime glow tip: Space the lights a little closer together near the bottom third, since that area visually carries the whole project from the street. It’s a small trick, but it makes the tree look fuller and brighter.
Seasonal switch-up: Change the bow and nearby porch accents to match the season. Red for winter, burlap for fall, pastel ribbon for spring, or no bow at all if you like a cleaner look.
For picky decorators: In my house, someone always wants things “less shiny” and someone else wants “more sparkle,” so this project is nice because you can keep it simple with just lights or dress it up with a bow and lanterns depending on your crowd.