
There’s something deeply satisfying about taking a handful of fallen branches and turning them into décor that looks warm, intentional, and far more expensive than it has any right to. I’m always drawn to projects like this because they use simple materials, go together quickly, and still have that “Where did you get that?” effect once they’re on the wall.
This is a great project if you like natural textures, want a seasonal focal point without dragging out bulky storage bins, or just enjoy making something beautiful out of what’s already in your yard. The build is straightforward, the supplies are minimal, and the finished piece has plenty of impact without requiring advanced tools or perfect branches.
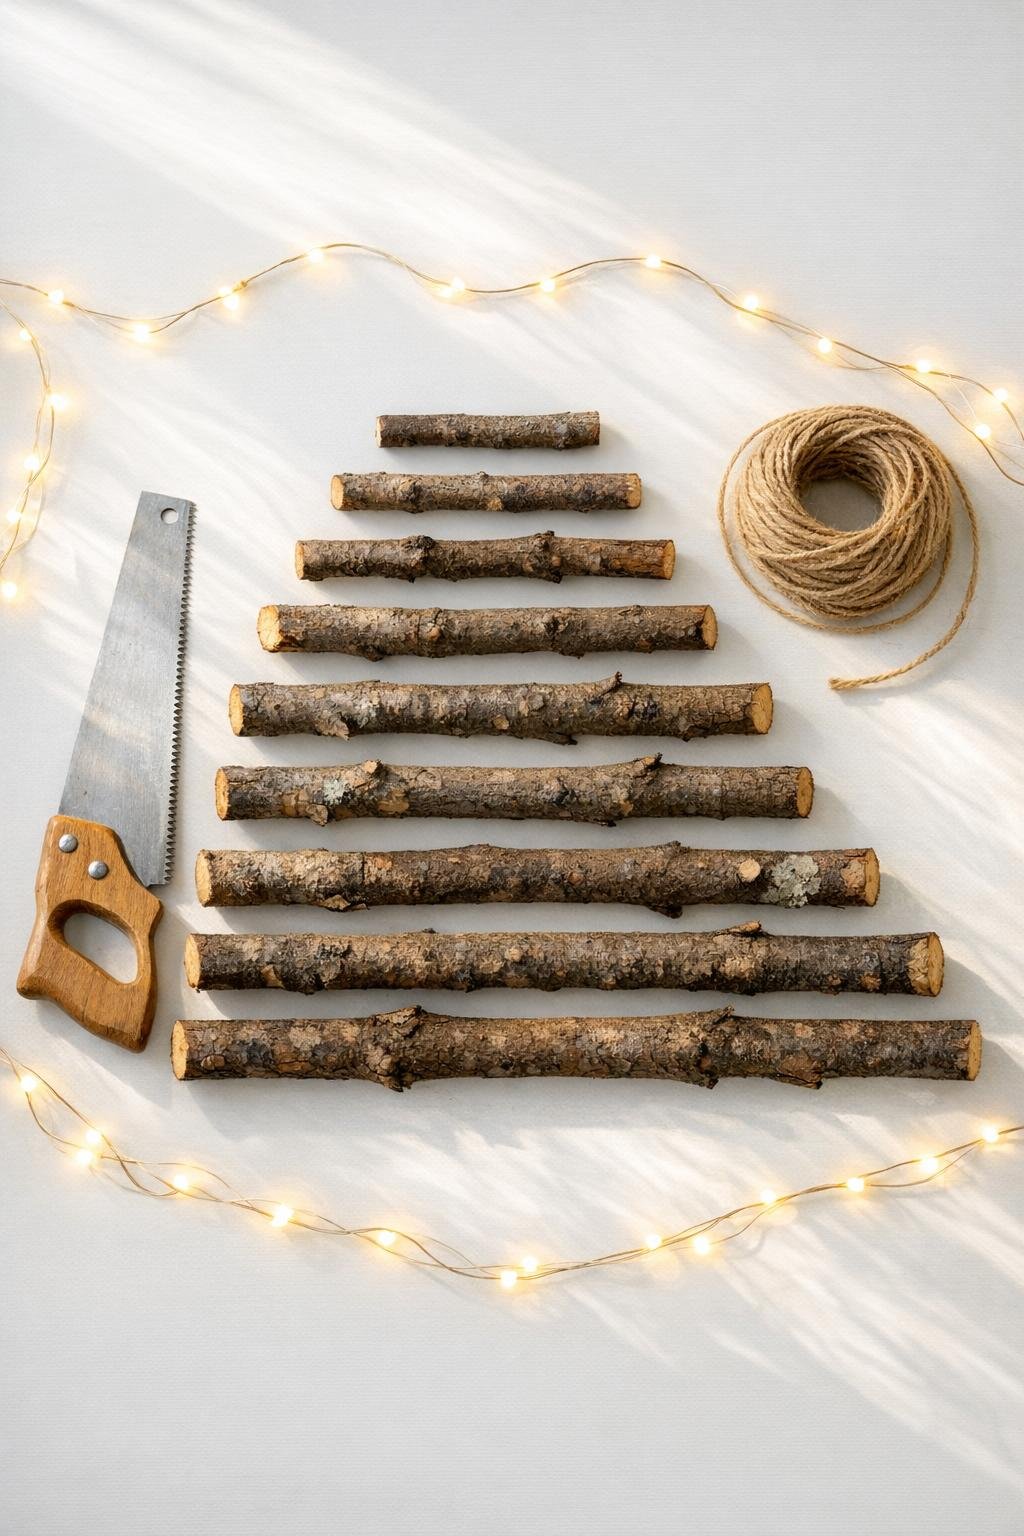
Materials
Instructions
1. Gather ten sturdy fallen branches and choose pieces with gentle natural variation but a fairly straight overall shape, then cut them to graduated lengths from 36 inches down to 5 inches. Keep the longest branch for the bottom and the shortest for the top so the silhouette builds cleanly.
2. Trim away twig nubs, loose bark, and rough spots with pruning shears, then lightly sand the cut ends and any splintered areas with medium-grit followed by fine-grit sandpaper. Leave the bark and natural character intact so the finished piece still looks like it came from real branches.
3. Brush off all dust and, if you want a cleaner finished look, apply a thin coat of clear matte sealer to the branches; let them dry completely. This small step makes the wood look richer and helps reduce flaking on the wall.
4. Lay the branches on the floor in length order with about 4 to 5 inches between each one, centering them so the shape tapers evenly from bottom to top. Step back and adjust the spacing until the outline looks balanced and full.
5. Cut two long lengths of twine, about 6 feet each, and place one along each side of the arranged branches. Leave 10 to 12 inches of extra twine above the top branch for hanging and a little excess below the bottom branch for tying off neatly.
6. Tie the shortest top branch to both twine lengths using tight double knots set about 1 inch in from each end, then repeat with each branch below it, keeping the spacing consistent as you work downward. Check after every few knots that both sides stay level so the shape hangs straight.
7. Once all ten branches are secured, knot the twine firmly beneath the bottom branch and trim the ends. Tie the two top twine ends together into a centered hanging loop, or knot each side separately if you prefer a more rustic V-shaped hanger.
8. Hang the piece on a wall hook and make any small spacing adjustments by sliding knots or retightening them until the branches sit evenly. If one branch droops, shorten the twine slightly on that side and retie.
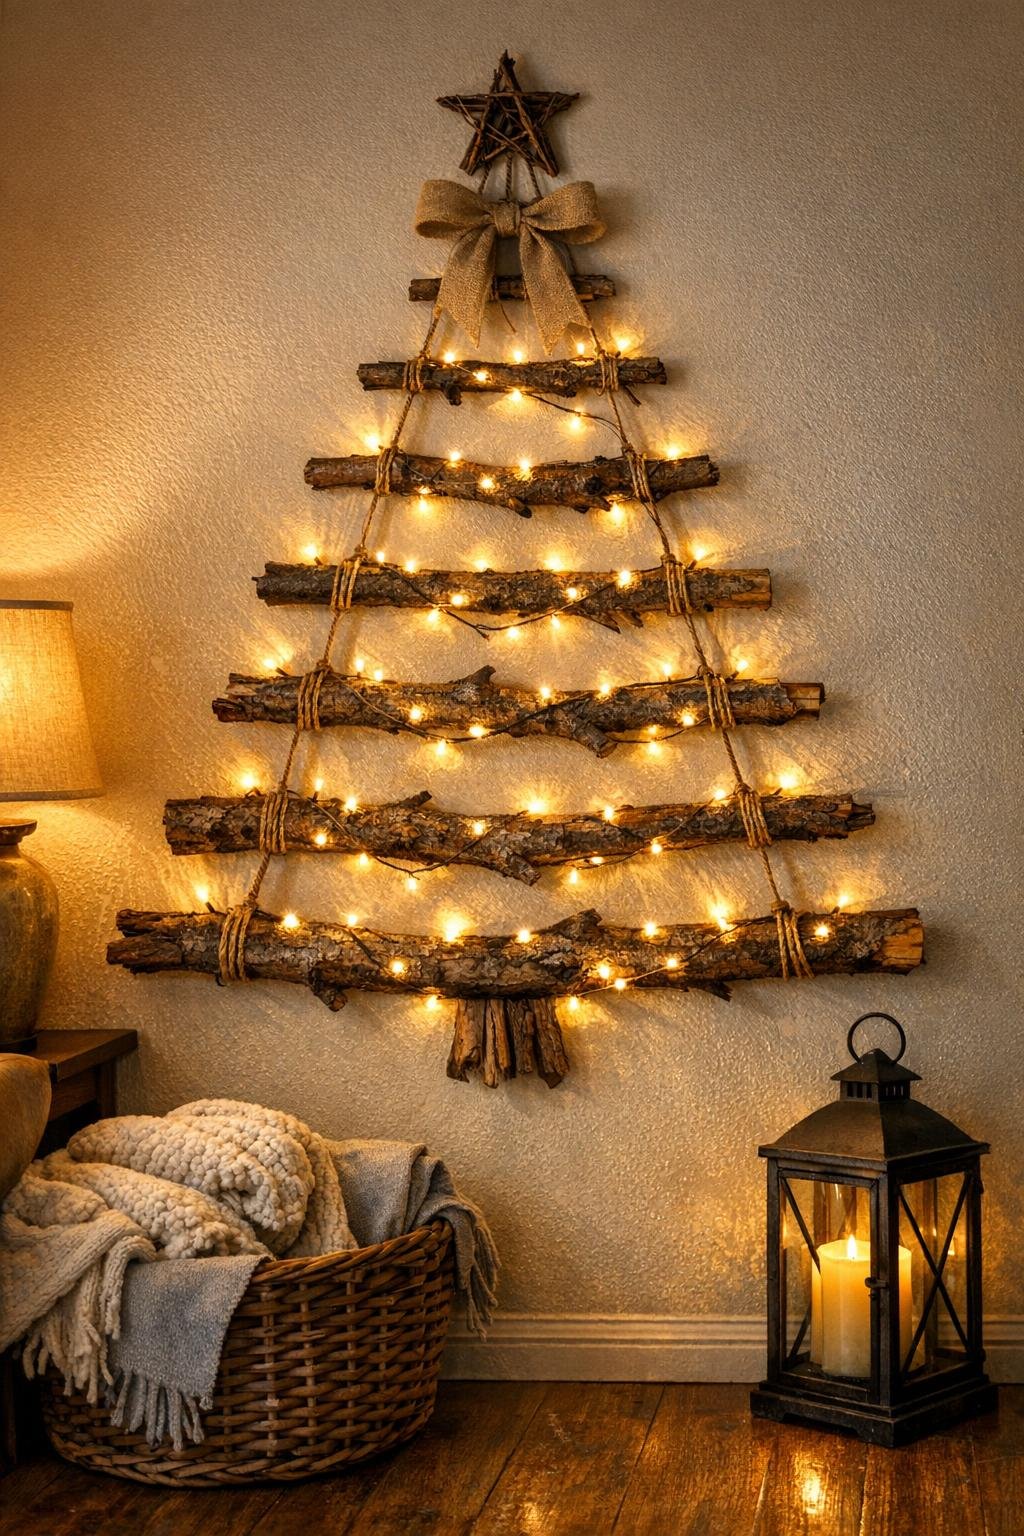
9. Weave the warm white string lights around the branches, starting near the top and working downward in a loose zigzag, tucking the wire behind the wood where possible. Distribute the lights evenly so every level gets some glow instead of crowding the bottom.
10. Add any lightweight finishing touches such as a ribbon at the top, tiny ornaments, clipped-on cards, dried orange slices, or little pine sprigs, keeping the decorations spread out for a full but still airy look. Turn on the lights, fluff the arrangement visually, and make one last check that the outline stays crisp and symmetrical.
Variations & Tips
For a fuller look: Use branches with a bit of natural curve and side texture rather than perfectly smooth sticks. I’ve found that slightly knobby, character-rich pieces make the whole project look more substantial once it’s hung.
For cleaner lines: Strip a little loose bark and seal the branches before assembly. That gives you a tidier finish, especially if you’re hanging it in a dining room, hallway, or apartment with lighter walls.
For a softer glow: Choose micro LED lights on a thin copper wire. They wrap more easily than bulky holiday strands and let the branch texture stay visible, which is really the charm of the whole piece.
For seasonal changes: Swap the accents instead of rebuilding the base. Dried citrus and pine work beautifully in winter, faux blossoms are lovely in spring, and little paper leaves or berries can carry it into fall.
For wall protection: Add small felt pads to the back of the lowest branch or at any point where the wood touches the wall. It’s a tiny kitchen-drawer kind of fix, but it keeps the piece from scuffing paint when you adjust it.
For better balance: Before tying everything permanently, lay the branches out and take a quick phone photo. I do this with food plating all the time, and it works here too; a photo makes uneven spacing jump out immediately.
If your branches are thinner: Reduce the spacing between each row to about 3 inches so the shape still feels generous. That keeps the design from looking skimpy and helps the lights fill the silhouette more evenly.