
There’s something especially sweet about a craft that looks simple in your hands and then turns into a keepsake you want to set out every Christmas. These little wrapped spool figures come straight out of the vintage handmade holiday tradition so many of our moms or grandmothers knew by heart, and I love that they use humble scraps to make something that feels genuinely heirloom-worthy.
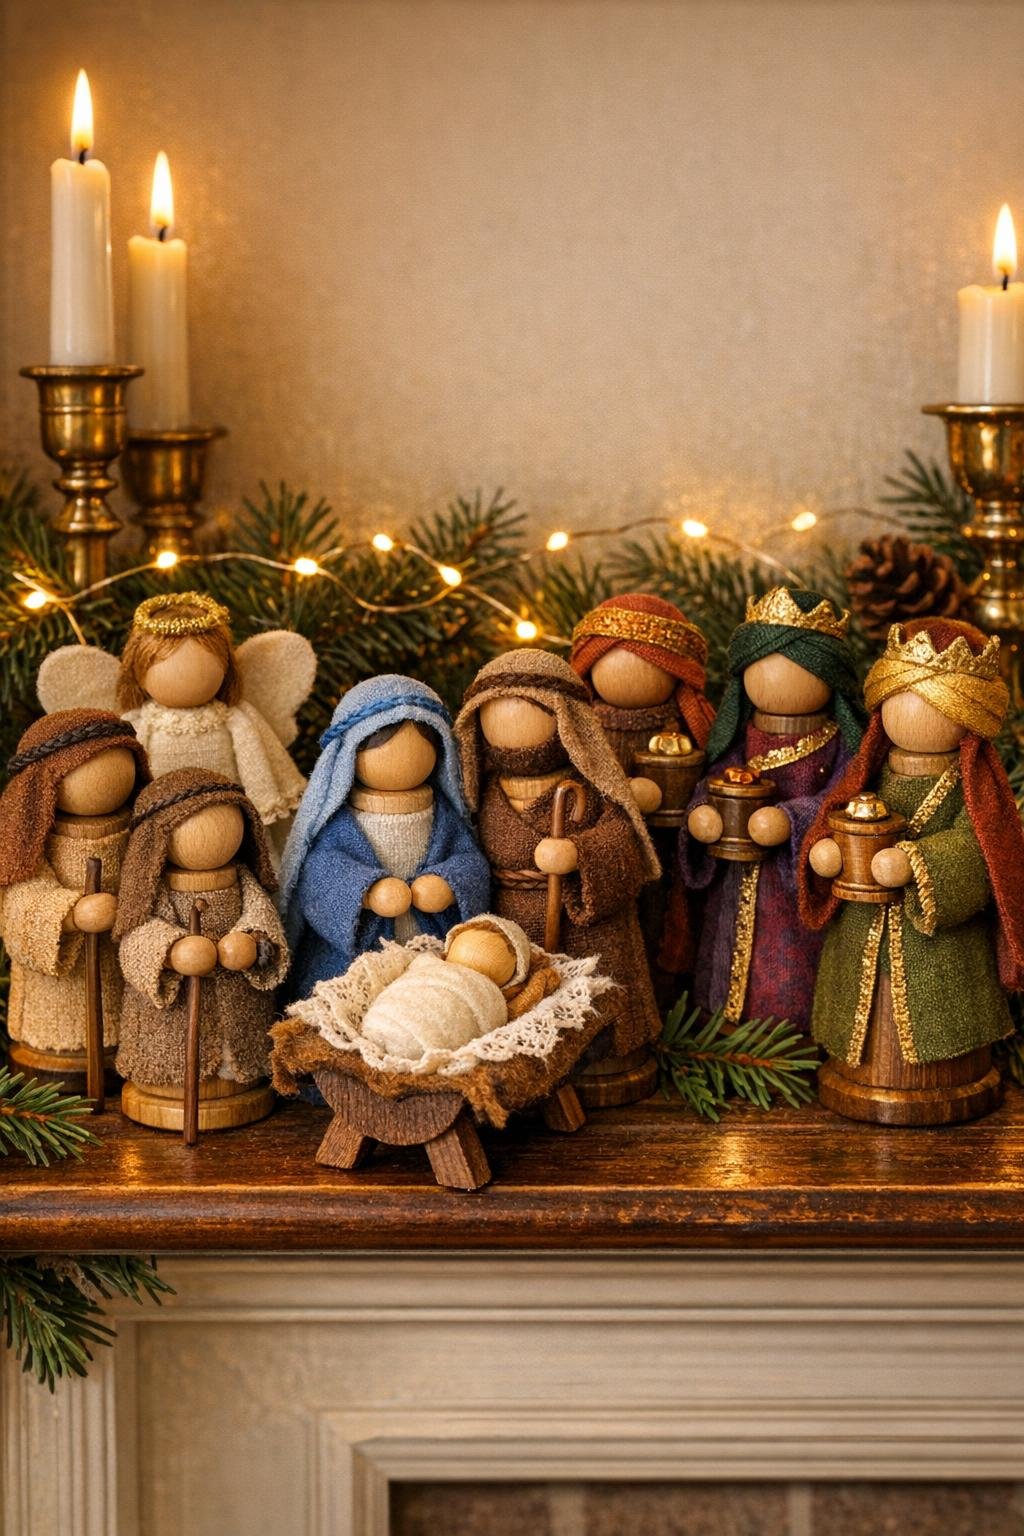
If you’ve got a jar of old wooden thread spools, a handful of fabric bits, and an afternoon at the table, this is a lovely project to make. I designed these as a full 12-figure nativity with a matching manger so the finished set looks polished on a mantel or sturdy enough to hang as a tree display, not at all like a kiddie craft.
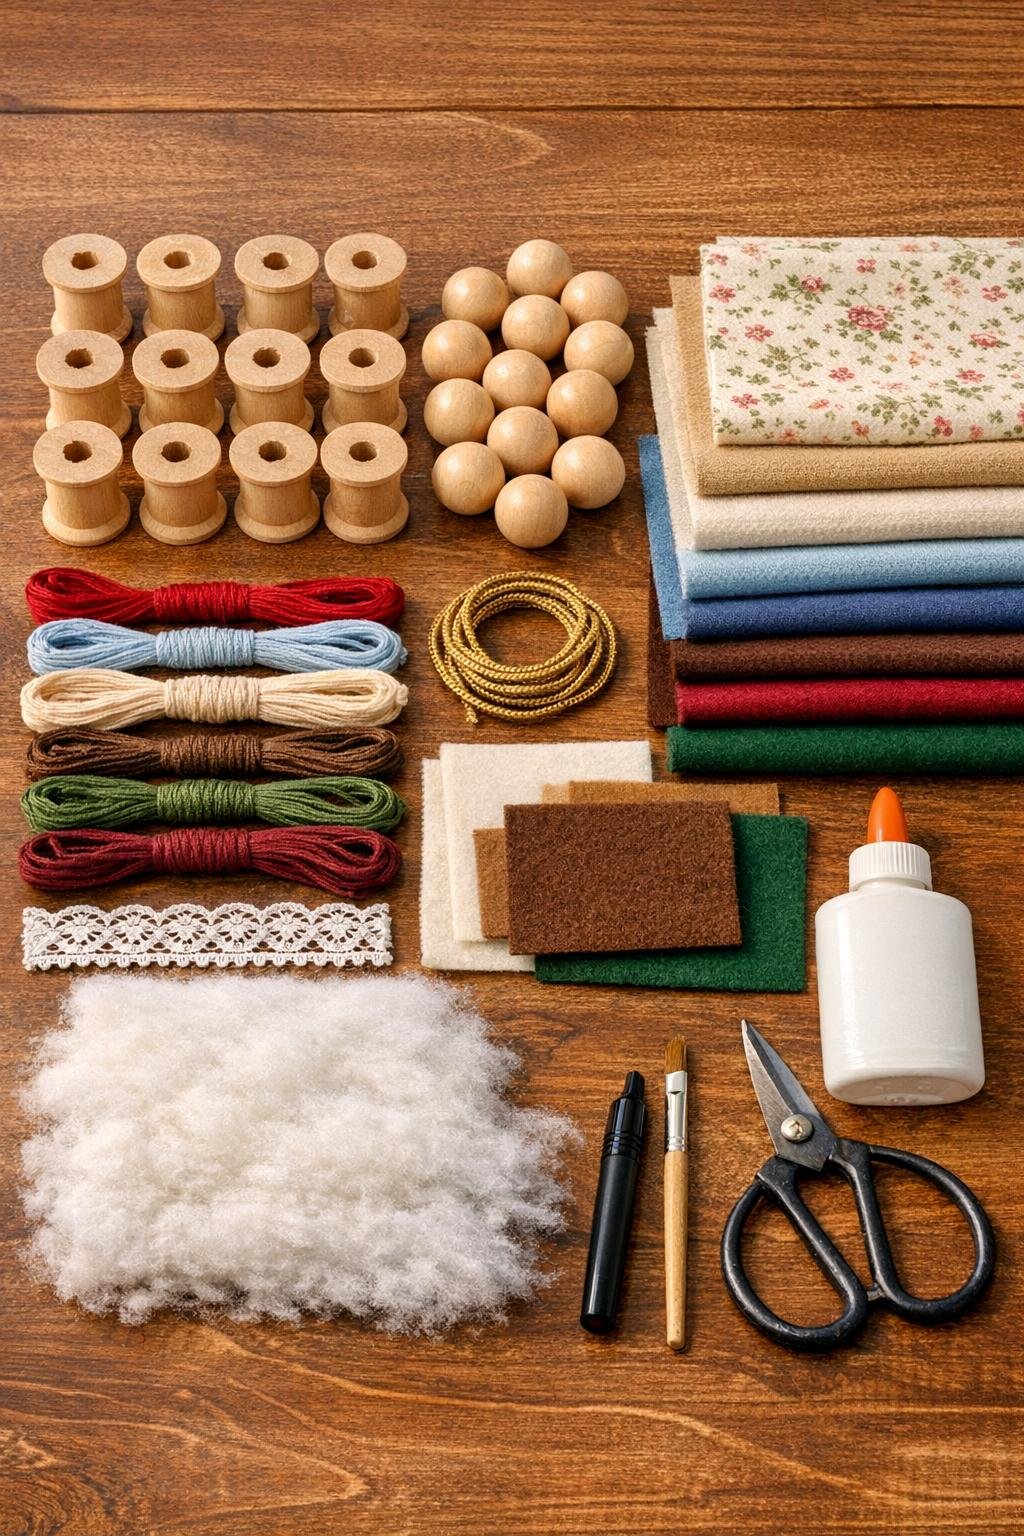
Materials
Instructions
1. Sort your 12 spools into the figures: 1 Mary, 1 Joseph, 1 baby Jesus, 3 wise men, 2 shepherds, 1 angel, and 3 extra villagers or attendants so the whole set feels full and balanced.
2. Cut 11 robe rectangles for the standing figures, making each one exactly the same height as your spool, about 1 1/8 inches tall, and 2 1/4 inches wide so it wraps fully with a slight overlap.
3. Test-wrap one rectangle around a spool before cutting the rest; the fabric should meet neatly at the back without bunching, because this clean fit is what makes the figures look finished instead of bulky.
4. Brush a thin line of tacky glue along one short edge of a robe piece, wrap it around the spool, and press the seam closed at the back with the fabric straight along the top and bottom.
5. Repeat with the other 10 standing figures, mixing prints and solid fabrics so the group looks coordinated but not too matched; keep Mary in soft blue and Joseph in tan or brown so they read clearly at a glance.
6. For Joseph and the three wise men, glue an extra narrow strip of contrasting fabric around the shoulders like a shawl or outer robe, keeping the seam at the back again.
7. Make the angel’s robe from cream or white fabric, then add a tiny band of gold cord at the waist and a narrow trim or floss band near the hem for a more special finish.
8. For the shepherds, use quieter prints or earth tones, and tie a short piece of embroidery floss around the waist of each robe to define the shape without adding bulk.
9. Draw simple, small faces on 11 wooden beads with the fine-tip marker: two dots for eyes and a tiny curved line for a mouth, keeping the features centered and similar in height on every bead.
10. Let the faces dry fully, then glue one bead on top of each standing spool, making sure the face looks forward and the robe seam stays at the back.
11. Dress the heads last by adding head coverings after the faces are attached; this is the easiest way to keep every face lined up evenly across the whole group.
12. For Mary, drape a 2 x 3-inch piece of soft blue or white fabric over the bead like a veil and glue it lightly at the sides and back, leaving the front open around the face.
13. For Joseph and the shepherds, wrap a narrow band of embroidery floss or a slim strip of fabric around the top of the bead like a headdress tie, then trim the ends neatly at the back.
14. For the wise men, use richer scraps as turbans or wrapped headcloths, adding a tiny touch of gold cord around the base of each one for a polished, vintage look.
15. For the angel, glue a small floss halo behind the head by forming a loop of gold floss and anchoring it at the back where it won’t show from the front.
16. Make the baby by wrapping the 12th spool in the same way, then glue the smallest-looking bead at one end so it reads as a swaddled infant lying down rather than a standing figure.
17. Wrap the baby spool in the cream or white blanket scrap, folding the edges close and smooth like swaddling, and leave the bead head visible above the blanket.
18. Cut a manger base from felt, about 2 inches long and 1 1/4 inches wide, then fold or layer a second small felt strip beneath it to raise the center slightly like a cradle.
19. Glue a pinch of batting on top of the felt manger and cover it with a small piece of lace or soft fabric so the bedding looks cushioned and neat, not puffy.
20. Set the swaddled baby into the manger with a dot of glue under the spool only if you want it fixed in place; otherwise leave it loose so you can arrange the scene year after year.
21. Check all 11 standing figures from the front and trim any loose threads, crooked hems, or bulky head coverings so the whole set looks even when grouped together.
22. If you like, brush a tiny coat of matte sealer over the faces only, then let everything dry completely before arranging the nativity on a mantel, shelf, or under the Christmas tree.
Variations & Tips
Use true spool height: If your spools are a little taller or shorter than mine, always cut each robe to exactly the height of the spool first. That one detail makes the whole set look tidy and intentional.
Keep the seams hidden: I always turn every seam to the back before the glue sets. It sounds small, but once the figures are grouped together, hidden seams are what give that vintage magazine finish.
Choose calm fabric prints: Tiny calicos, narrow stripes, and soft solids work best. Loud prints can overwhelm the figures at this scale, while quieter fabrics make the set look more elegant on a mantel.
Make the faces last longer: If your set will be handled every year, a dab of matte sealer over the marker faces helps prevent smudging. I keep it off the fabric so the robes stay soft-looking.
Add a hanging loop: If you want to use the set on a large tree branch or as a grouped ornament display, glue a loop of ribbon behind the manger base or create a shallow tray base that all the figures can sit on together.
Try no-sew trim accents: A tiny line of lace at a hem, a gold cord belt, or a floss band around a head covering adds a lot without making the project harder. Those little finishing touches are what make scrap fabric look surprisingly refined.
Store it safely: Nestle the figures in tissue in a shallow box so the bead heads and halos don’t catch. This is the kind of Christmas craft that deserves to come back out every year.