
I love a thrift-store project that looks high-end when it’s done, and this fall woven wall hanging absolutely delivers. With just 4 old wool scarves, you can loop, braid, and weave your way into a chunky, textured piece that brings in all that warm autumn coziness without requiring a loom or any fancy fiber-art skills.
This is the kind of project I reach for when I want something impressive but low-stress after a long workday. If you can tie a knot and thread fabric over and under, you can make this. The finished hanging looks full and boutique-worthy, and because wool scarves already have beautiful texture and weight, the whole thing comes together much faster than starting from yarn.
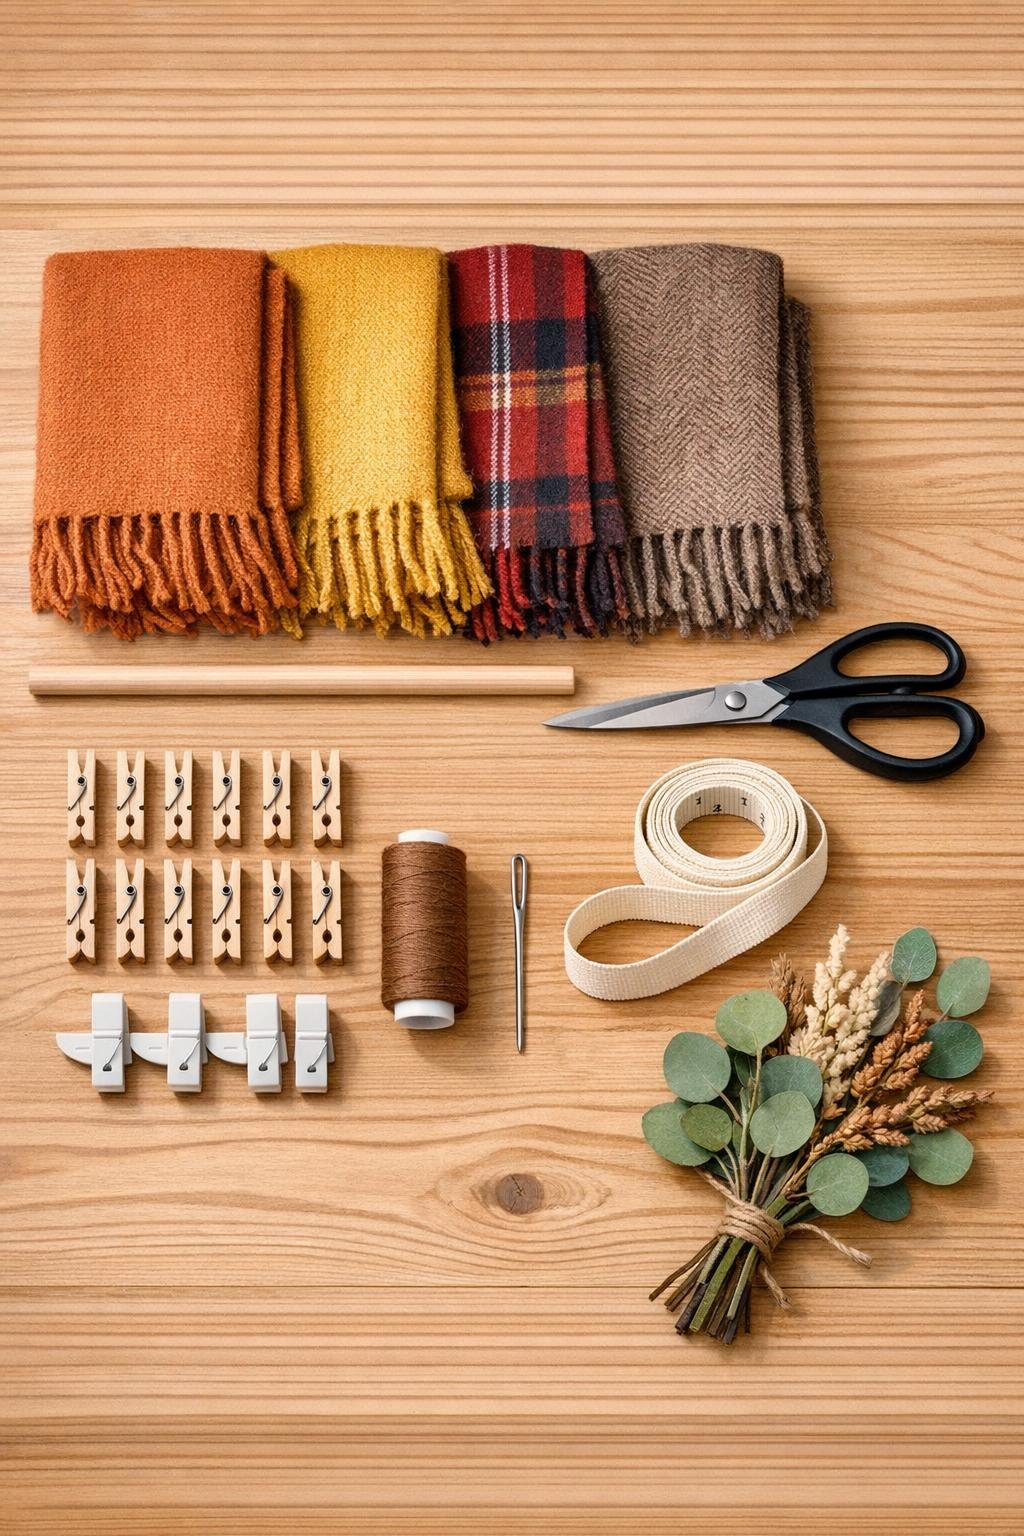
Materials
Instructions
1. Wash or steam the scarves if needed, then lay all 4 flat and choose your color order so the warmest tones are spread evenly across the design.
2. Cut one scarf into six strips that are each about 3 inches wide and 60 inches long; these will become the vertical base strands for weaving.
3. Fold the six strips in half over the wooden dowel and secure each with a lark’s head knot, spacing them evenly across the 24-inch dowel for a full wall hanging.
4. Tie the cotton cording to both ends of the dowel now, so you can hang the piece while working and keep the weave balanced as it grows.
5. Cut the second scarf into four long strips about 4 inches wide, then gently stretch and roll each strip with your hands so the edges soften and look rope-like.
6. Weave the first strip over and under the vertical strands, pushing it snugly toward the top; on the next row, reverse the pattern and keep weaving until you create a 6- to 7-inch-tall band.
7. Cut the third scarf into eight strips, each about 2 inches wide, and braid pairs of strips together to make four thick braided lengths for extra texture.
8. Lay the braided lengths across the hanging one at a time, weaving them in and out loosely so they sit raised on the surface instead of flattening into the rows.
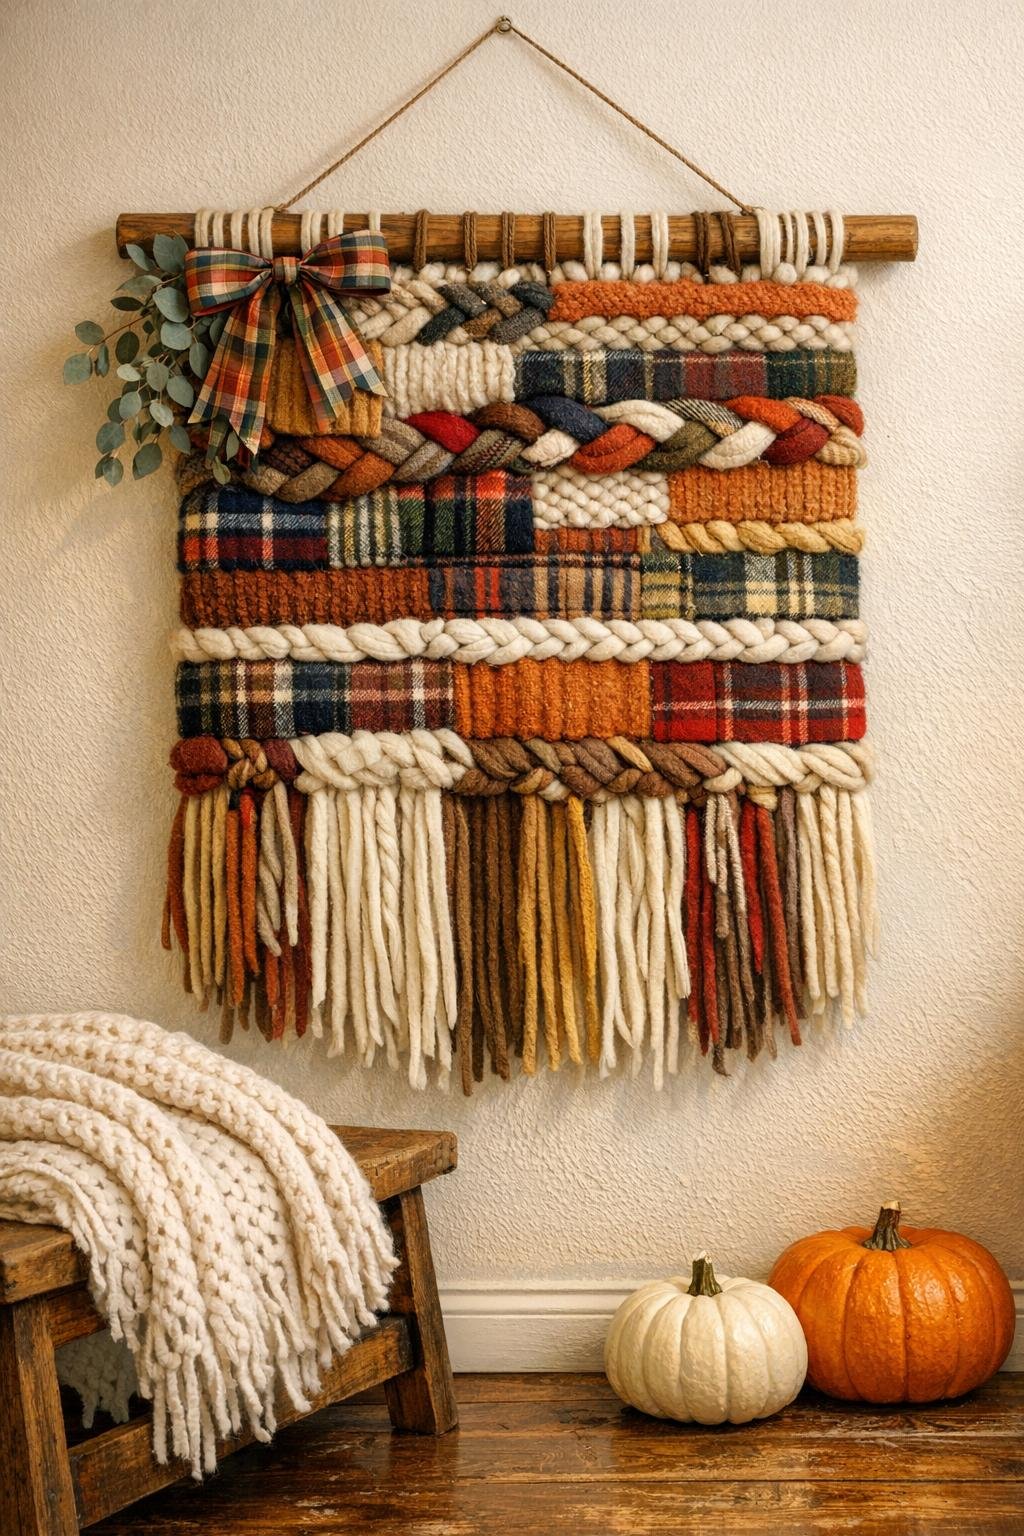
9. Use strips from the remaining scarf to fill in between the braided sections, alternating colors and patterns to build a dense, layered center section about 12 to 14 inches tall.
10. Every few rows, use your fingers to fluff the wool and gently tug the outer edges wider so the hanging keeps a generous, slightly tapered shape instead of narrowing in the middle.
11. When the body reaches about 18 inches long, stop weaving and trim the bottom vertical strands into a soft V-shape or shallow curve, whichever fits your scarves best.
12. Knot a few leftover narrow strips around select bottom strands to create extra tassel clusters, then comb the fringe lightly with your fingers to make it look full and intentional.
13. Stitch any loose braid ends or bulky joins to the back with the heavy thread so the front stays polished and secure without visible fasteners.
14. Tie a simple ribbon bow around one side of the dowel and tuck in 2 or 3 small eucalyptus or dried-look stems for an easy finished touch that makes it feel styled for fall.
15. Hang the piece on the wall, step back, and trim any uneven loops or fringe ends so the overall shape looks balanced and full.
Variations & Tips
Best scarf mix: I like using at least one plaid scarf and one solid scarf because the contrast makes the weaving look much richer without any extra effort.
If your scarves are short: Overlap strip ends by 2 inches and stitch them together on the back side before weaving, or hide the join inside a bulky row where it disappears.
For a fuller look: Add more narrow filler strips in the center and near the bottom fringe; the project looks most polished when the coverage feels generous instead of see-through.
Color planning: Keep the darkest tones toward the top or center to ground the piece, then use lighter cream or camel tones near the bottom fringe for contrast.
No dowel on hand: A smooth fallen branch, a wooden curtain rod, or even a stained paint stir stick bundle can work, as long as it’s sturdy enough to hold the scarf weight.
Make it cleaner-lined: Trim the bottom into a straight edge instead of a V if your style leans more modern than boho.
Use real dried stems carefully: If you’re hanging this in a busy hallway like I would in my house, faux stems hold up better and don’t shed every time someone brushes past.
Storage tip: Pack the hanging flat or gently rolled in tissue paper after fall, and avoid tight folding so the woven wool keeps its loft for next year.