
When I’m trying to get tomatoes established before the weather fully settles in, I lean hard on anything that cuts down on watering stress and keeps roots reaching deep instead of sitting shallow. This simple deep-watering reservoir does exactly that: you drill drainage and seep holes in a small galvanized trash can, pair it with one common yard item, and create a sturdy in-bed water source that slowly feeds moisture where tomato roots actually need it.
I like this project because it feels wonderfully low-fuss but gives a very “why didn’t I do this sooner?” payoff. If you’re growing tomatoes in a raised bed or small garden plot and you’re tired of surface watering drying out fast in spring wind, this is an easy afternoon project that looks tidy, lasts more than one season, and makes watering a lot more efficient during those busy workweeks when you can’t baby the garden every evening.
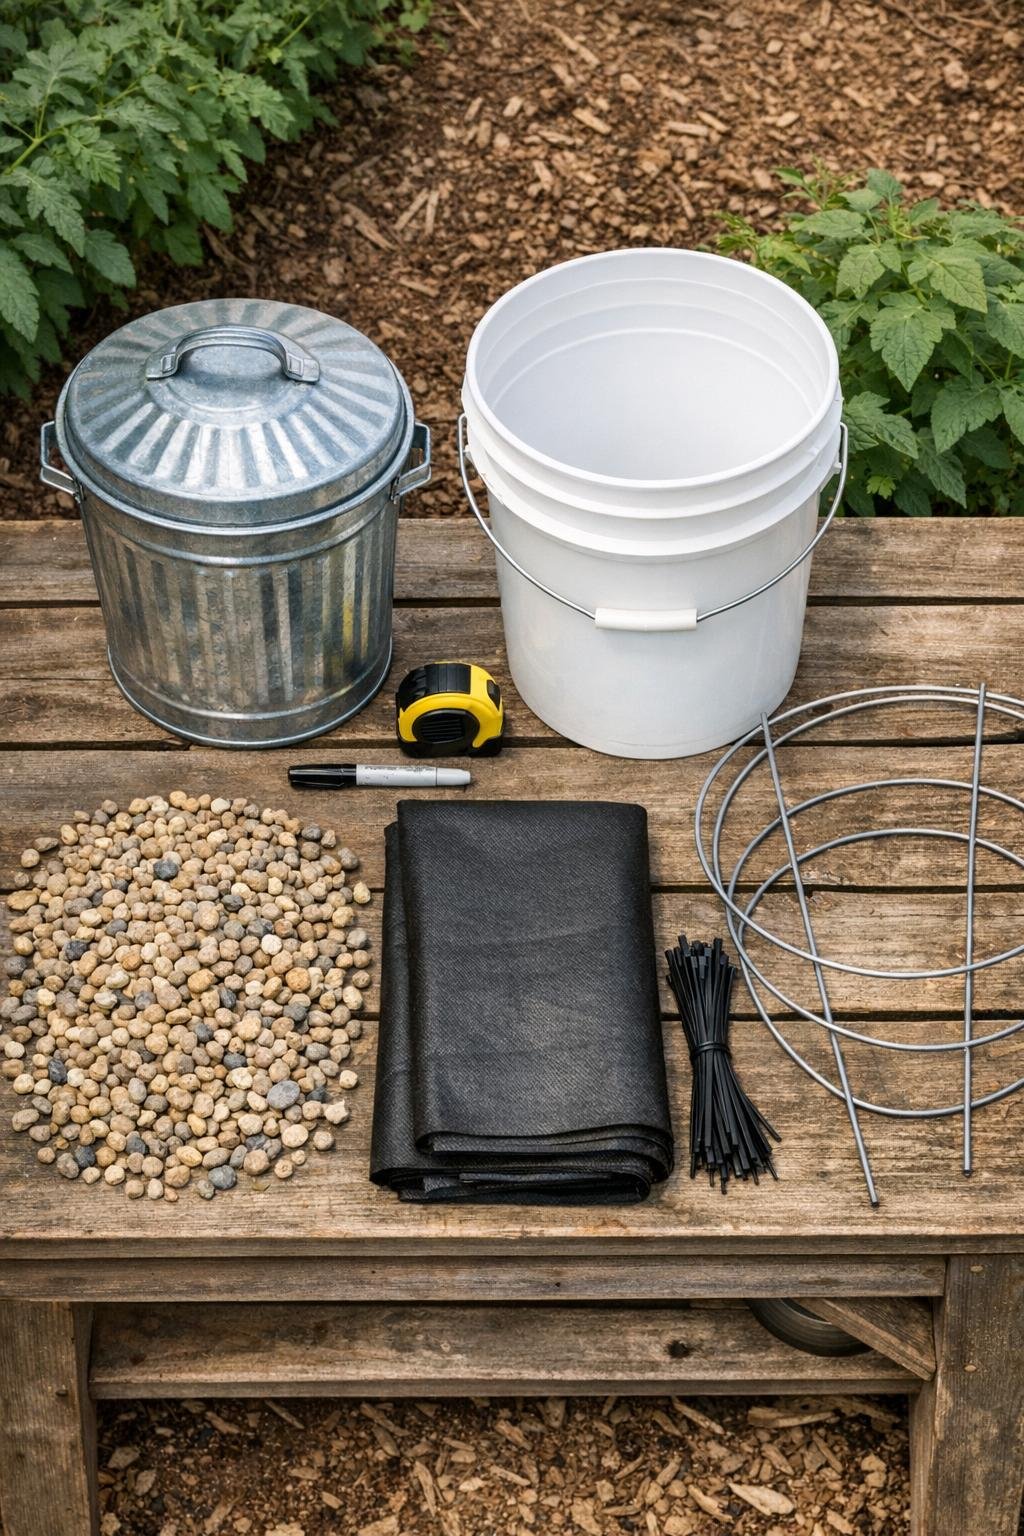
Materials
Instructions
1. Mark a band around the lower sides of the galvanized trash can starting 2 inches up from the bottom and ending about 6 inches up. Space marks every 1 1/2 to 2 inches around the can for water-release holes.
2. Drill 1/4-inch holes on each mark around the lower sides of the trash can, then drill 6 to 8 matching 1/4-inch holes in the bottom. These bottom holes keep the reservoir from turning stagnant while still allowing a slow soak into the bed.
3. Turn to the 5-gallon bucket and drill twelve 1/2-inch holes in the bottom and eight 1/2-inch holes around the lower 4 inches of the sides. This bucket becomes the gravel sleeve that keeps soil from packing tightly against the reservoir.
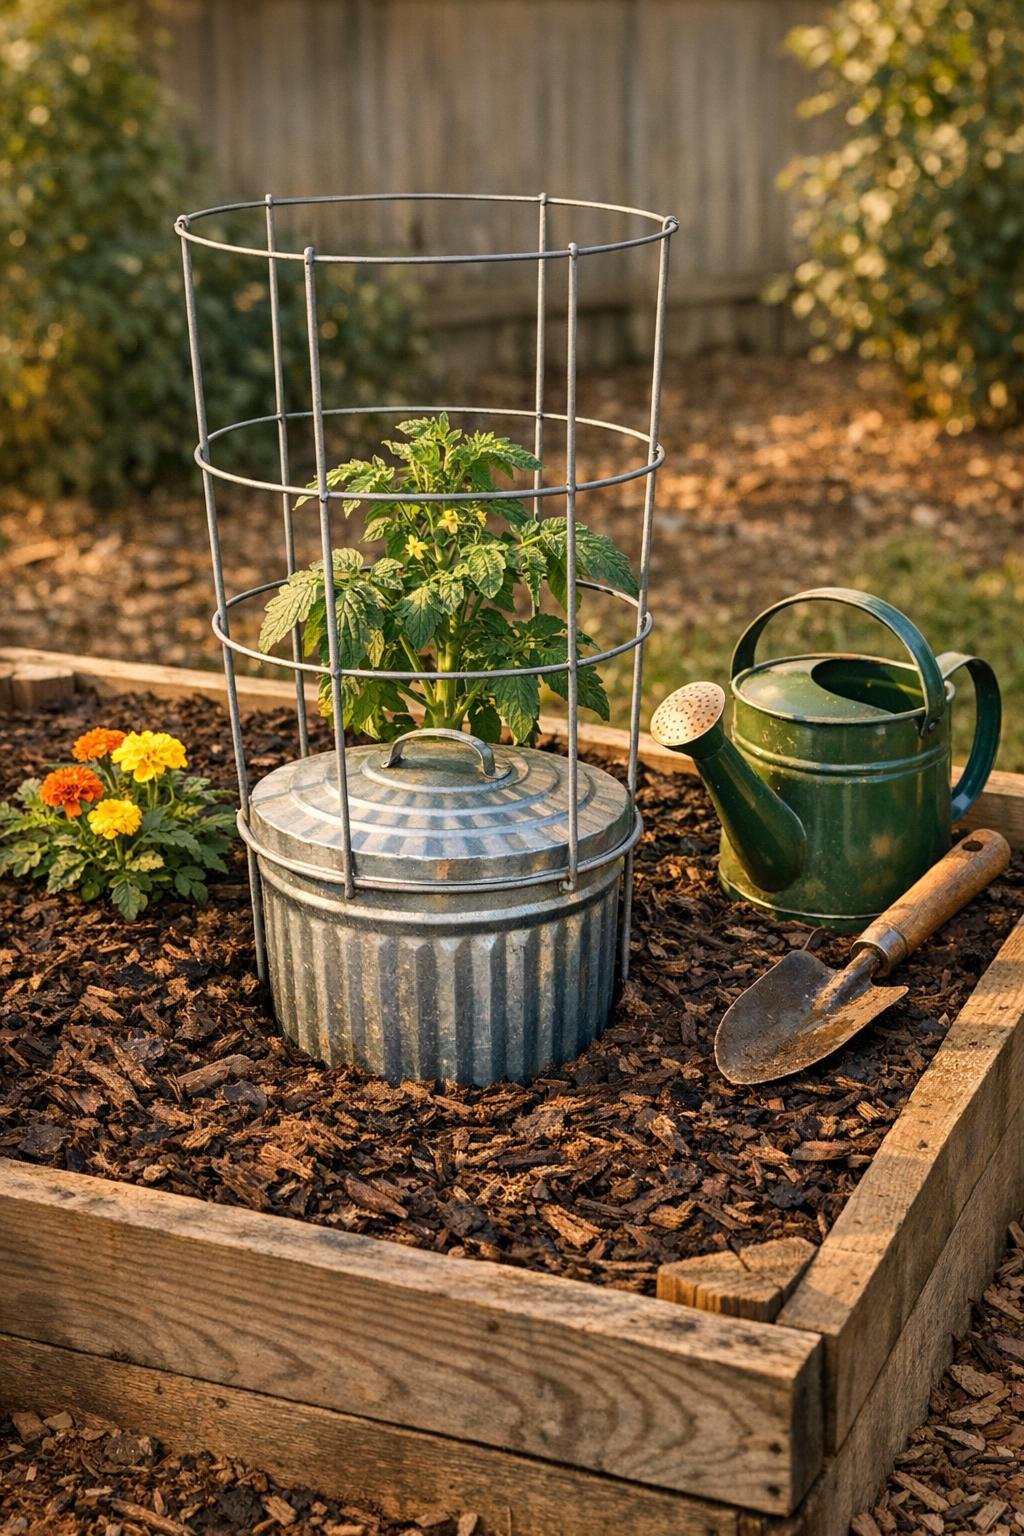
4. Cut the bottom out of the tomato cage if needed so the legs can push into the bed, then zip-tie the cage securely to the sides of the galvanized trash can near the top. This gives your tomato a built-in support centered right over the watering core.
5. Choose the center of your tomato planting spot and dig a hole wide enough for the bucket and deep enough so the bucket rim will sit 1 inch above soil level. Keeping it slightly proud of the bed makes filling easier and helps keep mulch from washing in.
6. Set the drilled 5-gallon bucket into the hole, backfill around the outside firmly, and add the 2 cups of pea gravel in the bottom. The gravel creates a little sump so the can drains evenly instead of sitting flat in mud.
7. Wrap the lower half of the galvanized trash can loosely with the landscape fabric and secure it with 2 zip ties. This fabric layer blocks soil from plugging the small holes while still letting water seep out slowly.
8. Lower the wrapped trash can into the bucket so the drilled lower section sits inside the bucket sleeve and the upper half remains above soil. Press the bucket fill around it if needed so the can stands level and sturdy.
9. Plant one tomato seedling beside the reservoir, 6 to 8 inches from the can, and angle the stem slightly toward the cage as you backfill. I usually bury my tomato deep here, because once the roots find that moisture column, they take off beautifully.
10. Fill the trash can with water and place the lid on top loosely to keep debris and mosquitoes out while still letting you lift it easily for refills. Add 2 to 3 inches of mulch around the plant and water the surrounding soil once to help the roots settle in.
Variations & Tips
For colder spring nights: Set the trash can lid on during the day to hold a bit of warmth in the water, then remove it briefly when filling. Water stored in the reservoir is usually less shocking to roots than a blast of cold hose water straight on the soil.
For larger indeterminate tomatoes: Use the taller end of the tomato cage range and add two extra zip ties at opposite sides. Once the plant loads up with fruit, that extra support makes a big difference on windy Midwestern summer days.
If you do not have landscape fabric: A piece of burlap or synthetic shade cloth works too. I would skip cotton fabric, because it tends to stay soggy and break down too quickly underground.
Watering routine: In mild spring weather, fill the can every 3 to 5 days; in summer heat, check it daily at first until you learn your bed’s rhythm. I love systems like this because they make weeknight garden care feel much more manageable after work.
Best placement: Put the reservoir on the side of the plant that gives you the easiest access path for watering. It sounds minor, but if refilling is convenient, you’ll actually keep up with it.
End-of-season cleanup: Pull the can and bucket, rinse out any soil, and store them dry. Because the galvanized can stays recognizable and intact instead of being cut apart, you can reuse the whole setup year after year.