
If you have a narrow hallway or mudroom corner that seems to collect damp boots no matter how organized you try to be, this is one of those simple projects that earns its keep immediately. I love a DIY that solves a real-life problem without adding visual clutter, and this boot tray liner does exactly that by turning a shallow plastic storage bin, smooth river rocks, and a metal cooling rack into a tidy landing spot for wet shoes.
As someone who is constantly trying to keep our entryway from looking like a miniature weather event hit it, I appreciate that this version is easy, inexpensive, and surprisingly polished once it’s assembled. The rocks catch drips, the rack keeps boots elevated above the moisture, and the whole thing is slim enough for a small hallway without looking bulky.
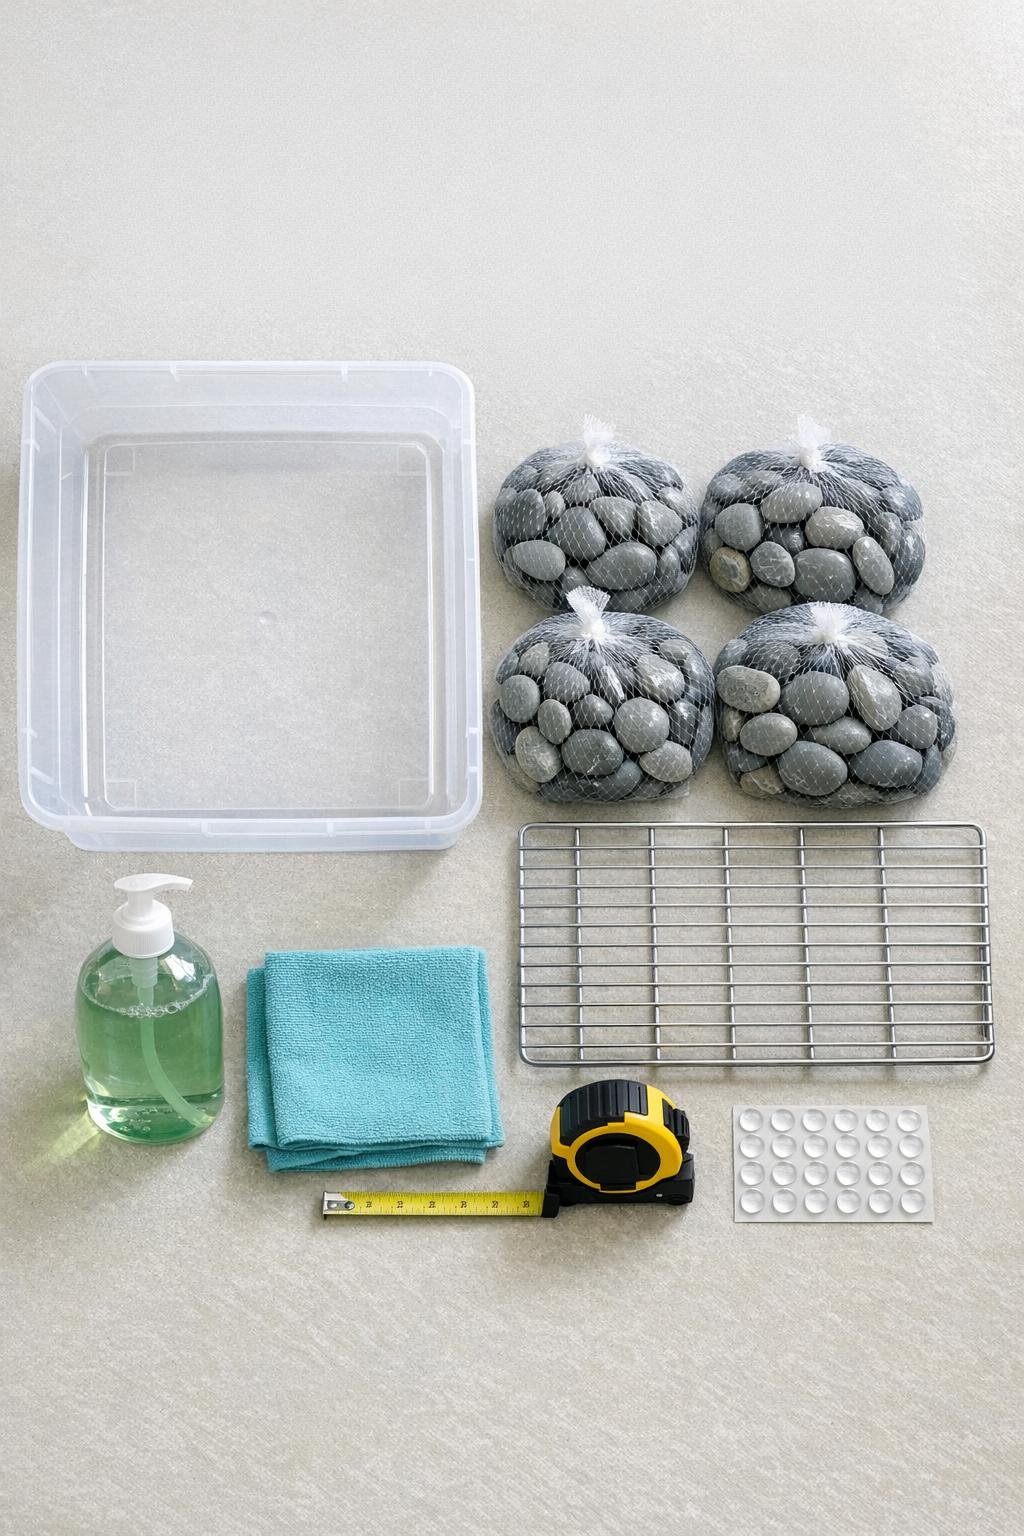
Materials
Instructions
1. Measure your hallway spot first and make sure the storage bin fits with a little walking clearance around it. I like to leave at least 2 inches on either side so it feels intentional instead of crammed in.
2. Wash the bin with warm water and a drop of dish soap, then dry it completely with the towel and microfiber cloth. Starting clean keeps grit from scratching the plastic and makes the finished tray look much neater.
3. Rinse the river rocks thoroughly and spread them on a towel to dry. This extra step is worth it because dusty rocks can make the bin look cloudy and messy fast.
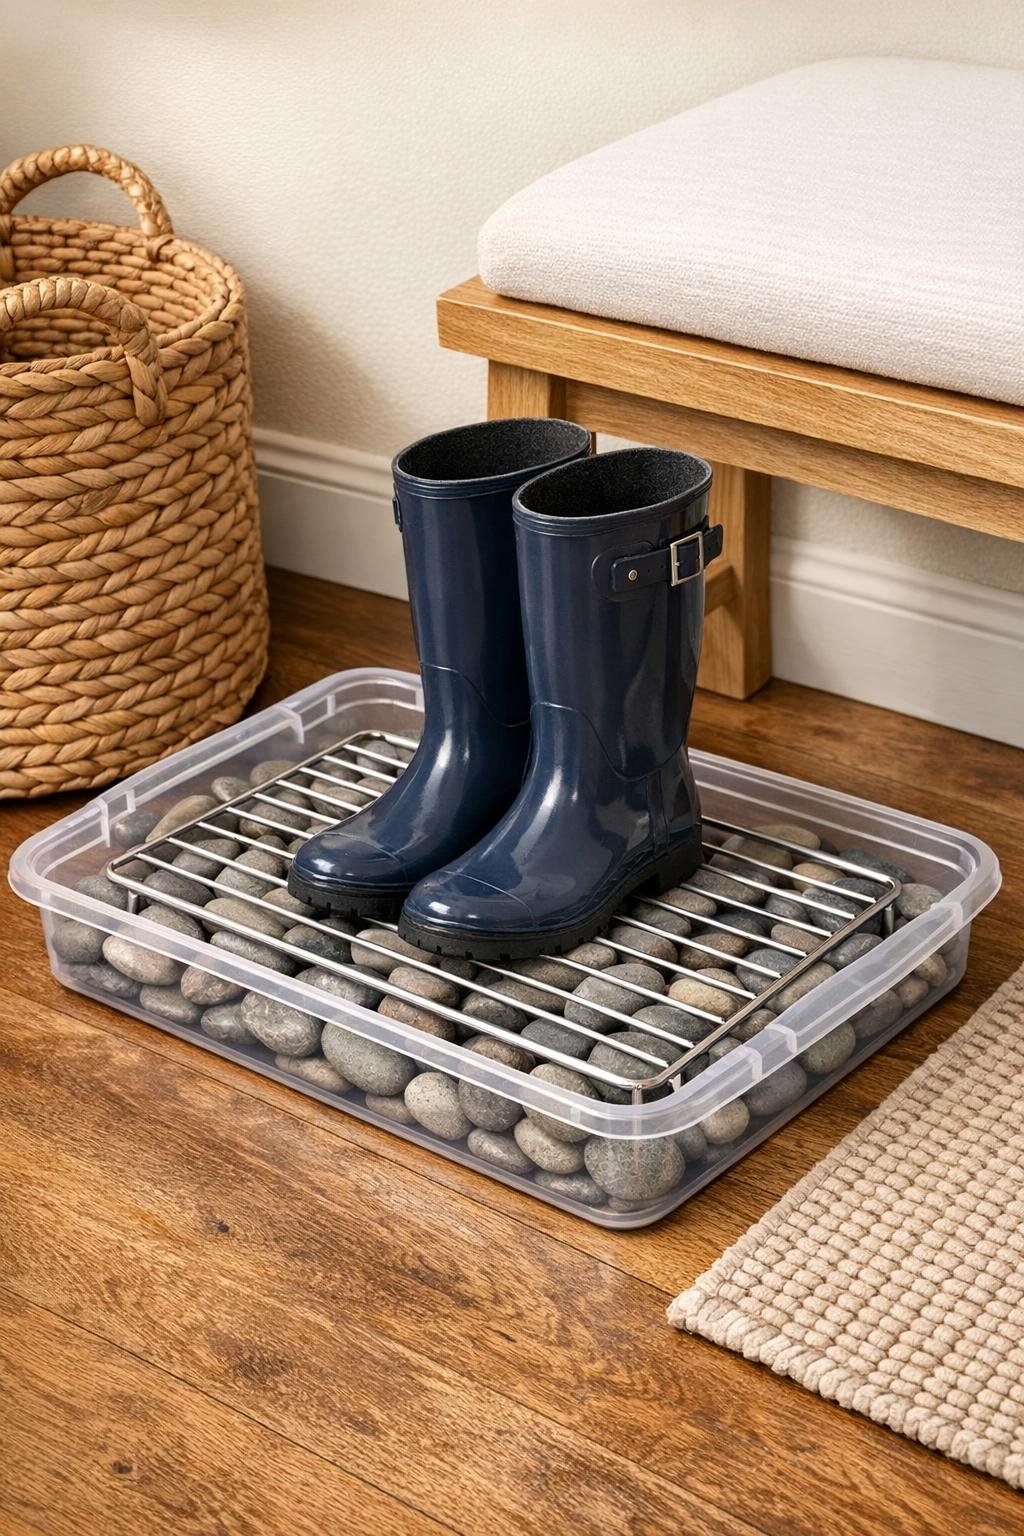
4. Pour the dry river rocks into the bin and spread them into an even layer about 1 1/2 to 2 inches deep. Keep the surface fairly level so the cooling rack sits securely without wobbling.
5. Set the silver metal cooling rack on top of the rocks and press gently until it feels stable. The rack should sit above the lowest moisture point while still being supported across most of its underside.
6. Add clear rubber bumper pads under the rack corners or along the bin edge if the rack shifts or rattles. This little tweak makes the tray feel custom and keeps the metal from scraping the plastic.
7. Test the tray with a pair of wet boots and check that water can drip below the rack without touching the soles right away. If needed, remove or add a few rocks to fine-tune the height and keep the rack level.
8. Slide the finished tray into place in the hallway and center it neatly against the wall or under a bench. Wipe the rim of the bin one last time so the clear plastic looks crisp and finished.
Variations & Tips
Longer Hallway Version: If you have more wall space, use a longer under-bed style bin and two matching cooling racks side by side so the tray can hold multiple pairs of shoes without looking skimpy.
Rock Color Choice: Gray river rocks give this a clean, modern look, but tan, white, or mixed natural stones also work if they better match your hallway flooring and decor.
Extra Stability: If your cooling rack has short feet, nestle those feet slightly between the rocks instead of flattening the entire rock layer; that usually keeps the rack from sliding around.
Easy Cleaning: Every week or two, lift off the rack, dump out any collected grit or water, rinse the rocks if needed, and wipe the bin dry before reassembling. It takes maybe ten minutes and keeps the tray from developing that winter-entryway look.
Rust Prevention: Use a stainless or well-coated metal cooling rack if possible, especially if the tray will catch snow and road salt often. It holds up better and keeps the project looking sharp longer.
Small-Space Styling: I like placing this under a slim bench or next to a wall hook area so it feels built into the drop zone. Even a practical project looks more intentional when it has a defined home.