
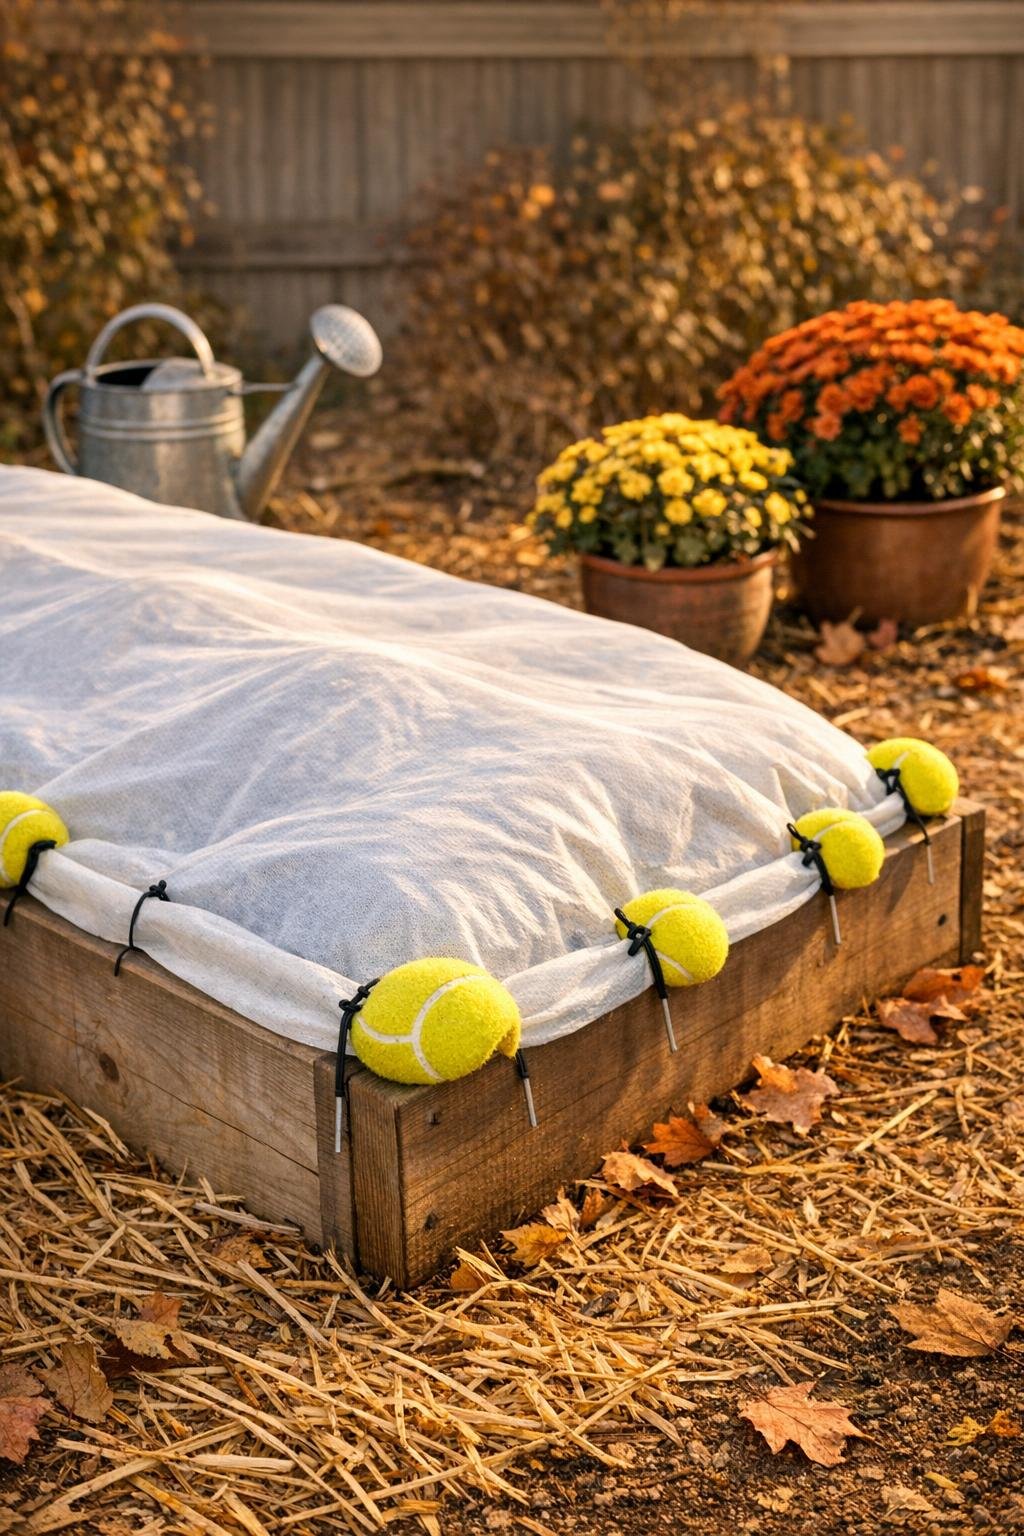
Every fall, I end up babying my raised beds a little more than I care to admit. Between gusty Midwest wind, row cover fabric that wants to lift at the corners, and the sharp edges of clips or stakes that can tear lightweight material, I’m always looking for a better way to hold covers down without making a nuisance of myself every time I need to peek at the lettuce. This little garden hack uses sliced yellow tennis balls plus two basic shed staples to make soft, grippy anchors that protect your bed cover instead of damaging it.
What I like most about this project is the payoff-to-effort ratio. You get a set of reusable cover anchors that are highly visible, easy to grab with gloves on, and gentle on frost cloth, bird netting, and plastic sheeting. If you already have old tennis balls, a few landscape staples, and some zip ties or sturdy garden twine in the shed, you can make enough anchors for a full raised bed in well under an hour.
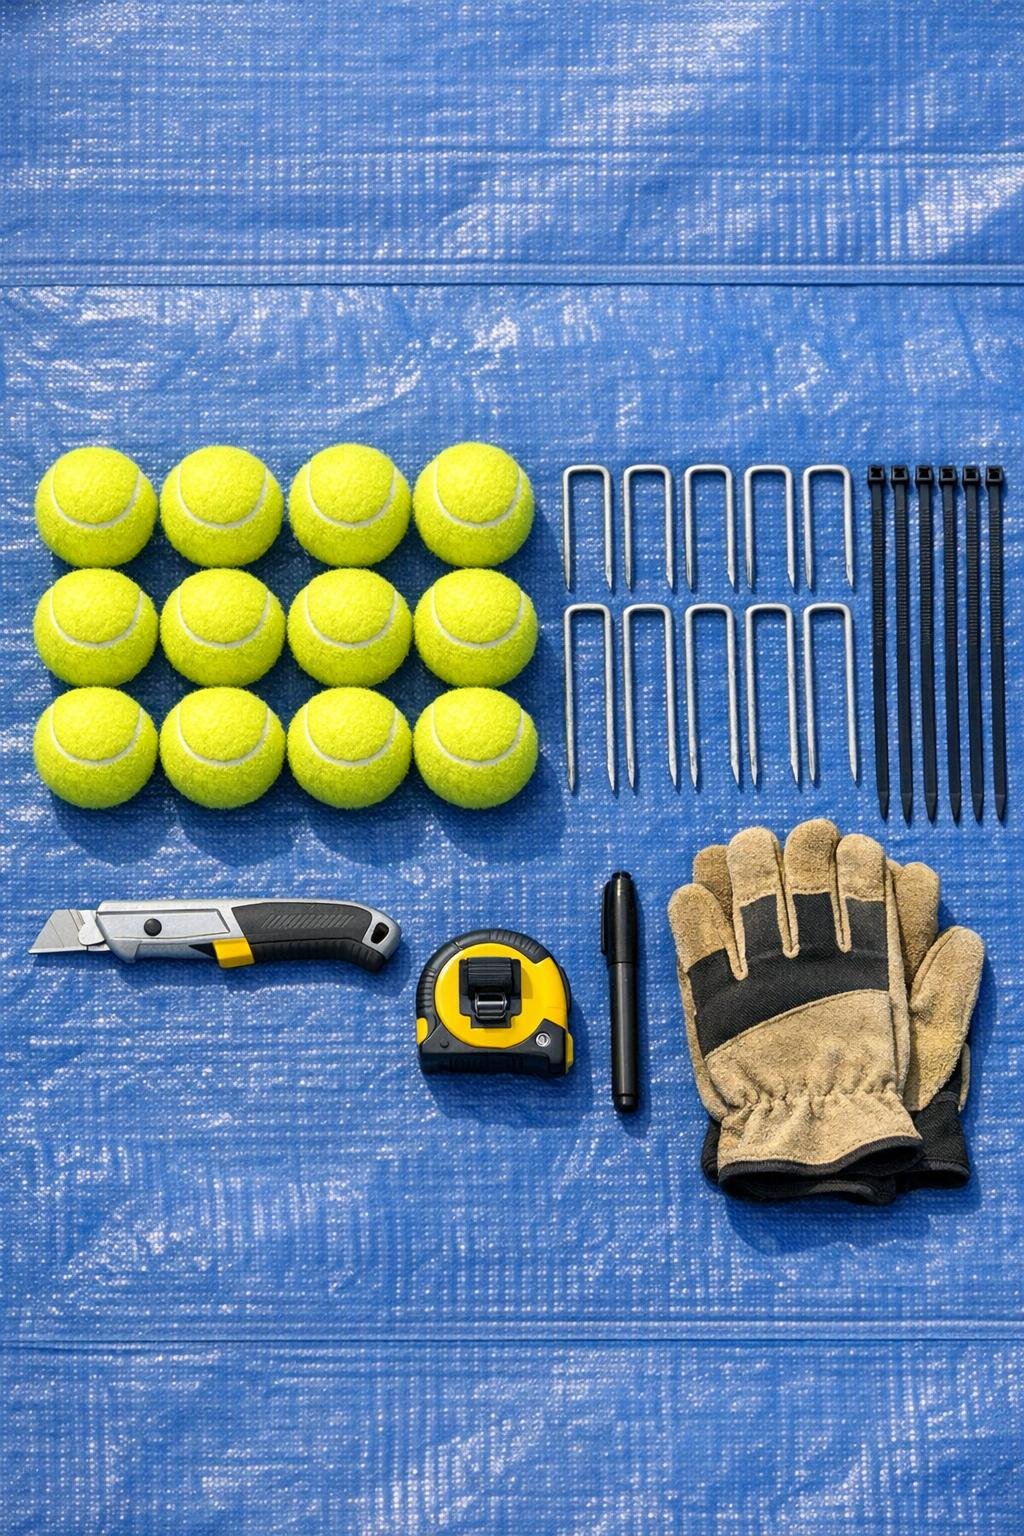
Materials
Instructions
1. Count out one anchor for each spot where your cover usually lifts, which is typically the four corners plus the middle of each long side on a 4-by-8-foot raised bed.
2. Put on gloves, then use the marker to draw a straight 1 1/2-inch slit across each tennis ball, centered on the curved side rather than over the printed seam.
3. Cut along each line with the utility knife, slicing about halfway through the ball so the opening is deep enough to grip fabric but the ball still stays intact and springy.
4. Push one landscape staple through the slit of a tennis ball to test the fit; the ball should hug the metal snugly without splitting wider, and you can shorten the slit slightly only if needed.
5. Thread a heavy-duty zip tie around the curved top of the landscape staple, just above the tennis ball, and cinch it so the ball cannot slide off when you pull the anchor out of the soil.
6. Repeat with the remaining balls, staples, and zip ties until you have a full matching set of padded anchors.
7. Drape your frost cloth, insect netting, or plastic cover over the raised bed, leaving enough slack for hoops or plant height and at least 4 to 6 inches of extra material around the edges.
8. Place a tennis ball anchor over the cover edge at each corner, then push the staple legs through the fabric and into the soil at a slight outward angle so the cover is pinned firmly without being stretched tight.
9. Add the remaining anchors along the long sides and any windy spots, spacing them about 18 to 24 inches apart wherever the fabric tends to flap.
10. Tug each anchor lightly to make sure it holds, then trim the tails off the zip ties for a tidy finish that won’t catch on sleeves, gloves, or garden fabric.
11. To open the bed for harvesting or watering, pull up the tennis ball handles instead of tugging on the fabric; when you’re done, press the anchors back into the same holes.
Variations & Tips
For extra-windy beds: Use 10 to 12 anchors instead of 8, especially if your bed sits in an open yard or along a fence line that funnels wind.
For plastic sheeting: Keep the cover slightly looser than you would with fabric so the plastic can expand and contract without tearing around the staple points.
Color-coding tip: If you cover multiple beds, use different zip tie colors or a small dab of outdoor paint on the tennis balls to mark which anchors belong to cold crops, brassicas, or seed beds.
If you do not have zip ties: Sturdy synthetic garden twine works too; tie it tightly around the staple arch and through a small puncture near the slit so the ball stays attached when you pull the anchor up.
Best ball condition: Slightly worn tennis balls are ideal because they are easier to cut than brand-new extra-pressurized ones, but they should still feel firm enough to cushion the cover.
Safety note: Always cut the slit with the ball braced on a tarp or scrap wood, never in your hand; after years in the kitchen, I’ve learned that a sharp blade behaves best when I give it a stable surface and a clear path.
Off-season storage: Stack the anchors in a bucket or hang them from the staple curves on a peg in the shed so the slits stay clean and ready for spring insect netting.