
There’s something awfully satisfying about taking the simplest little household item and turning it into something that looks straight out of a winter window display. This project starts with plain cotton swabs and a sheet of foam board, and with a bit of repetition—honestly the pleasant, quiet kind—you end up with a snowy wall piece that catches the light in the prettiest way.
I’m especially fond of crafts like this during the cold months, when the garden is sleeping and my hands still want something to do. If you enjoy easy, meditative projects and you want a big holiday decoration that looks full and special without costing much, this one is a fine afternoon’s work with a very handsome payoff.
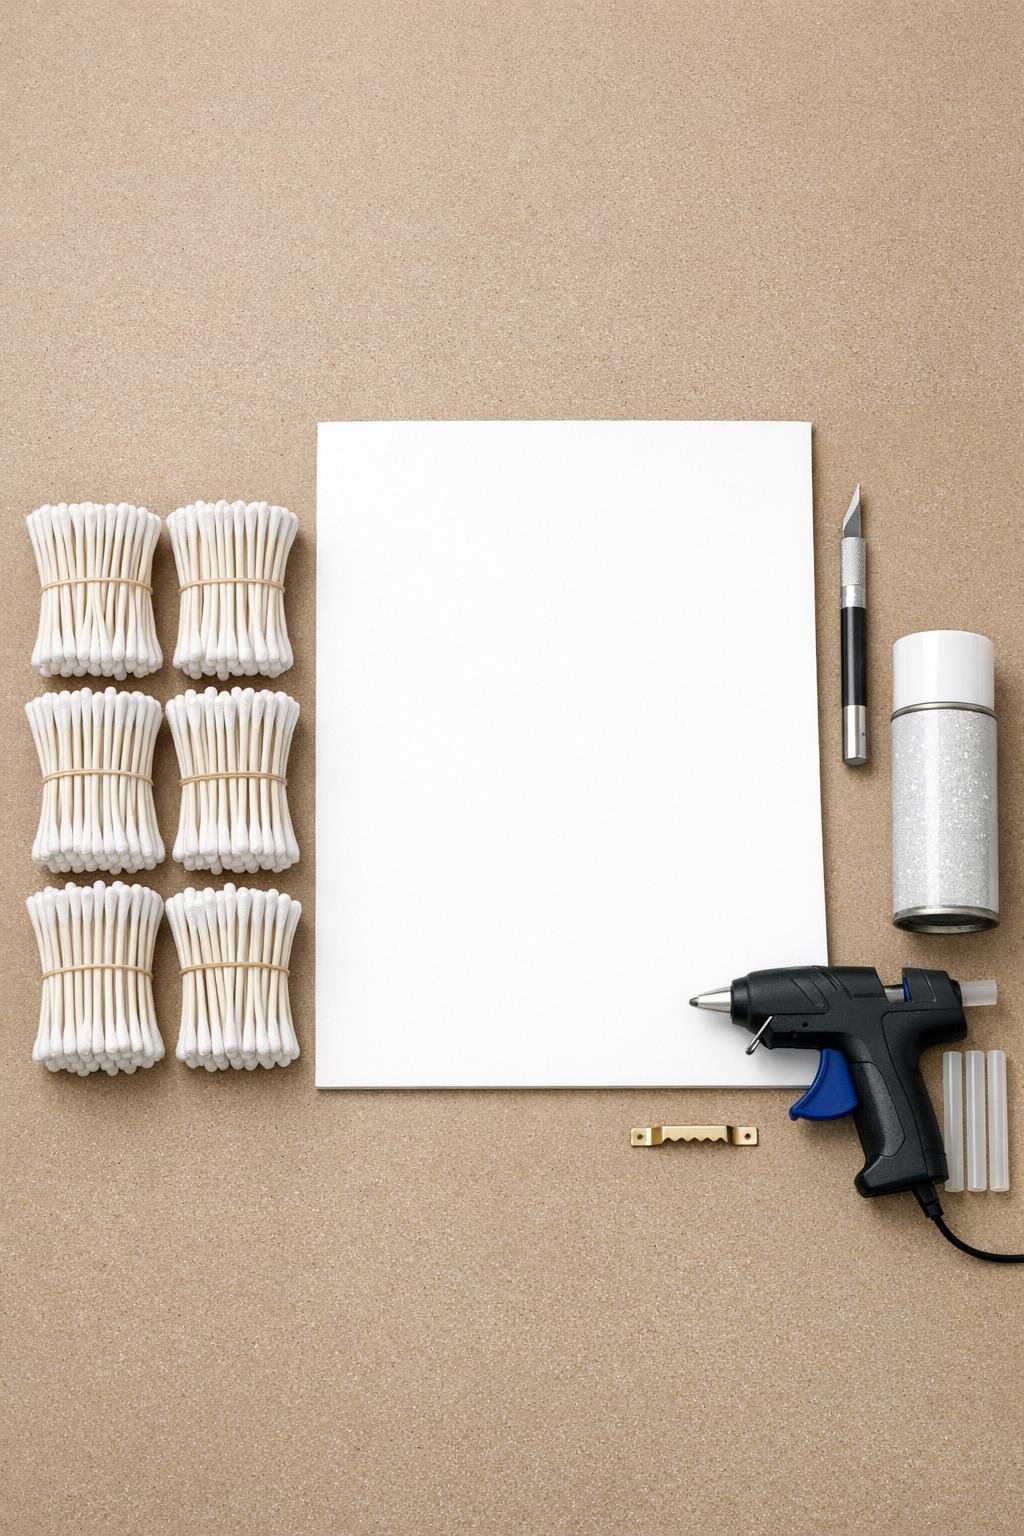
Materials
Instructions
1. Lay the 20 x 30-inch foam board flat with the 30-inch side running vertically, then lightly mark a centered Christmas tree shape with the craft knife tip or a pencil if you have one handy: make the tree about 18 inches wide at the bottom and 24 inches tall, leaving a 2-inch margin around it.
2. Cut the foam board into the tree shape with the craft knife, using long steady passes so the edges stay clean and crisp.
3. Starting at the bottom edge of the tree, push the first row of cotton swabs straight into the foam board so they stand upright, placing them about 1/2 inch apart in an even line.
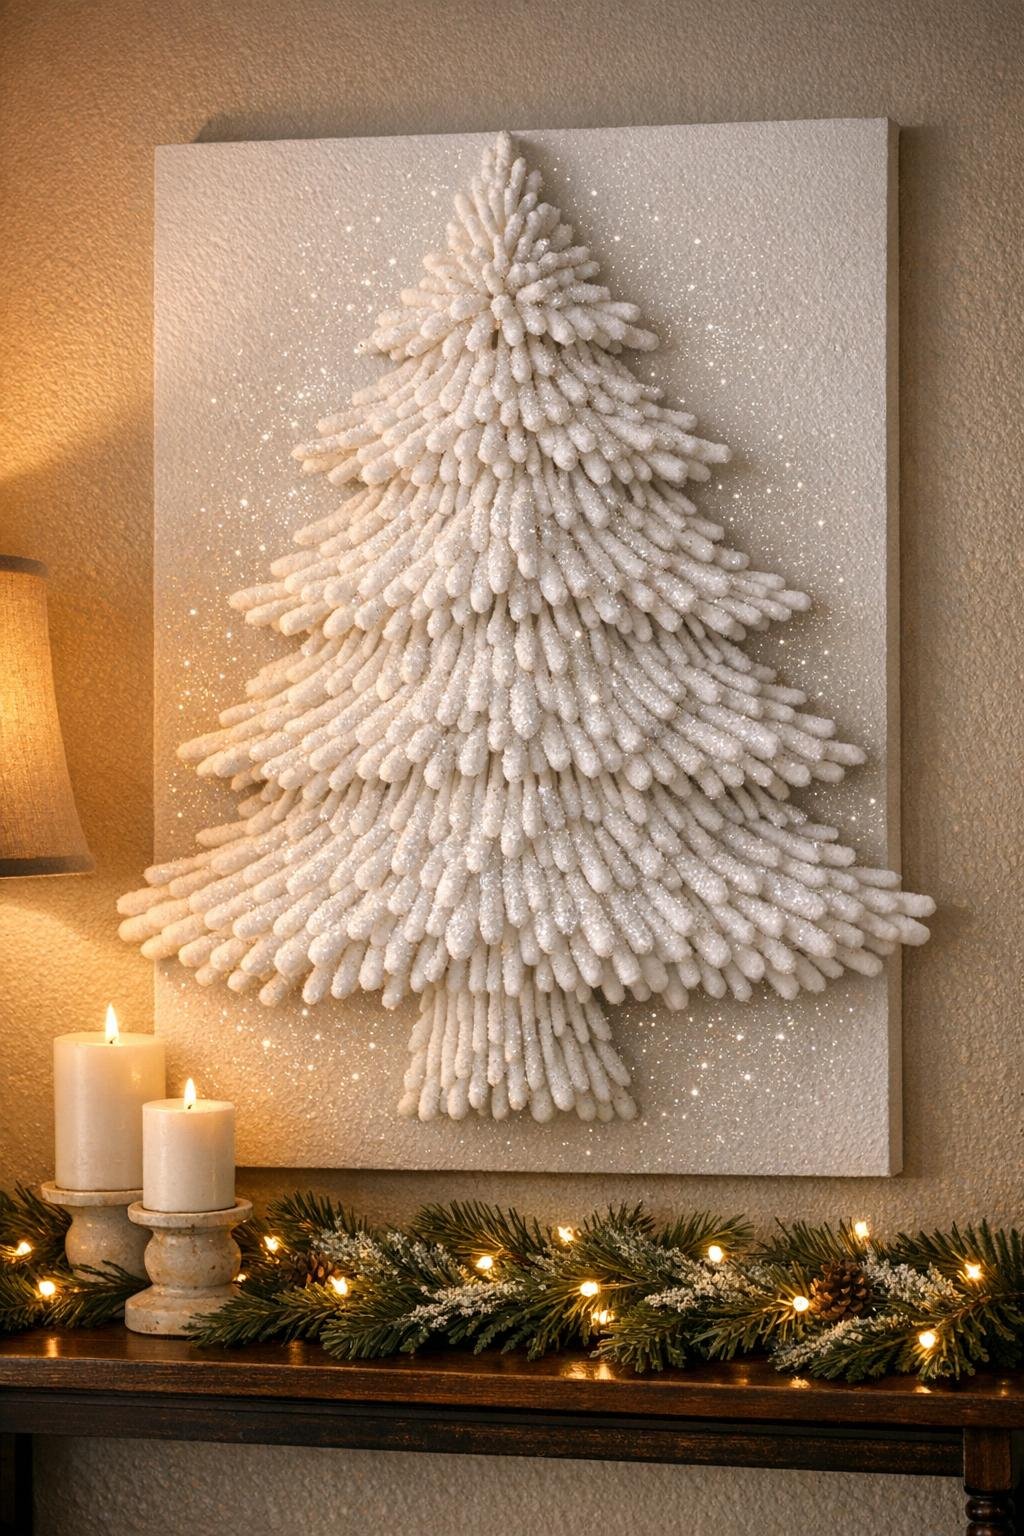
4. Continue filling the tree one horizontal row at a time, staggering the swabs slightly from row to row so the cotton tips overlap visually and create a dense, fluffy snowy surface.
5. Narrow the rows naturally as you work upward, following the tree outline and keeping the spacing consistent until the entire shape is covered with all 500 swabs.
6. Check for thin spots and tuck extra swabs into any gaps so the surface looks full all the way to the edges, especially along the outer outline and tip of the tree.
7. Lightly mist the cotton swab tips with white glitter spray from 10 to 12 inches away, using two light coats instead of one heavy coat so the texture stays soft and snowy.
8. Turn the tree over carefully and run a short bead of hot glue across the upper back, then press the sawtooth picture hanger into the glue and hold it in place until set.
9. Add two small dots of hot glue near the lower back corners if any swabs feel loose, then let everything cool completely before hanging.
10. Hang the finished piece on the wall and give it a final fluff with your fingertips, straightening any swabs that shifted so the shape looks full, crisp, and even.
Variations & Tips
For extra sparkle: If you want more shimmer, add a very light second pass of glitter spray only on the outer tips after the first coat dries. Too much spray can flatten the cotton, so less truly is more here.
For a fuller look: Push some swabs in at slightly different depths instead of making every row perfectly level. That little bit of variation gives the surface a fluffier, more snow-covered look.
For easier spacing: Work from the bottom up in rows about 1 inch deep. I find that breaking repetitive crafts into small sections keeps everything neat and makes the whole project feel faster.
For a sturdier hanger: If your foam board feels soft, glue a 3-inch scrap of foam board to the back top center first, then attach the sawtooth hanger onto that doubled layer.
For a softer silhouette: Round the corners of the tree very slightly when cutting the foam board. It helps the finished piece look more snowy and less sharp-edged.
For storage: Wrap the project loosely in tissue paper and store it flat or upright in a large box. That keeps the swabs from bending and saves you from having to fuss with it next season.