
There’s something awfully satisfying about taking the plainest little household things and turning them into something that feels special enough for the porch. Brown lunch bags are about as humble as they come, but with a bit of crumpling, shaping, and patient fluffing, they become a wonderfully textured decoration that catches light in the prettiest way. It reminds me of the kind of project we would have made on a kitchen table years ago, using whatever was inexpensive and close at hand, then standing back in disbelief at how lovely it looked by evening.
This is a good project for anyone who wants a big seasonal statement without fussing with fancy supplies or tricky techniques. If you can crumple paper, work a glue gun carefully, and wrap lights, you can make this. The finished piece has plenty of fullness and glow, but the steps are simple and repetitive in that nice, calming way that makes an afternoon craft feel almost restful.
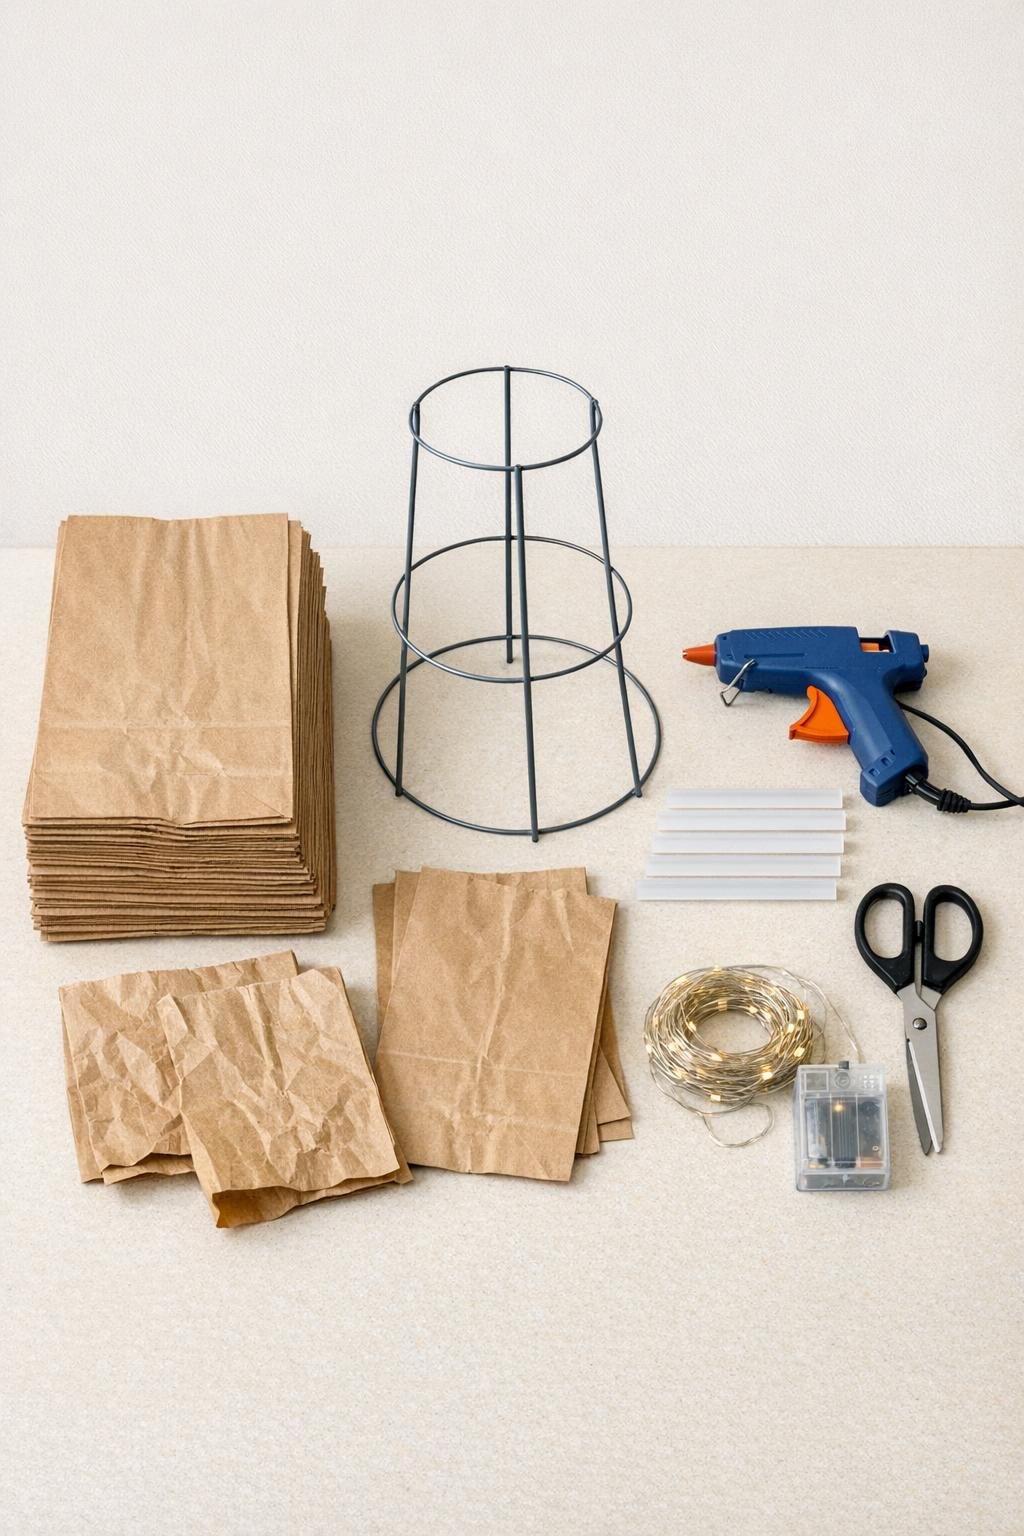
Materials
40 brown paper lunch bags, standard 5 x 3 x 10 inch size
Instructions
1. Set the tomato cage upright with the wide end on the floor and bring the three top prongs together to form a tall cone; tie them tightly with jute string or floral wire if they don’t already stay in place.
2. Plug in or test your string lights before you start, then wrap them evenly around the tomato cage from top to bottom, keeping most of the lights toward the outer edge of the wire frame.
3. Take one brown paper lunch bag, crumple it tightly into a ball, then gently open it back up just enough to create lots of wrinkles and body; repeat with all 40 bags.
4. Flatten the bottom seam of each bag with your fingers so it sits a little wider, and snip a 1-inch slit in the bag opening on two opposite corners to help each one flare out like a ruffle.
5. Start at the bottom ring of the tomato cage and add a line of hot glue to one bag near its base, then press it onto the wire so the bag opening faces outward and the crumpled paper puffs away from the frame.
6. Continue gluing bags all the way around the bottom row, overlapping them slightly so you don’t leave open gaps and the cage starts to look full right from the base.
7. Build the second row above the first, gluing each bag so it overlaps the seams below and angles slightly upward, which gives the surface a layered, branch-like look.
8. Keep adding rows upward, turning the cage as you work and tucking bags into any thin spots; use about 12 to 14 bags on the bottom half of the cage and the remaining bags more densely on the upper half so the cone stays generous and full.
9. Near the top, glue the last few bags closer together and pinch them inward a bit so the tree shape narrows neatly instead of looking blunt.
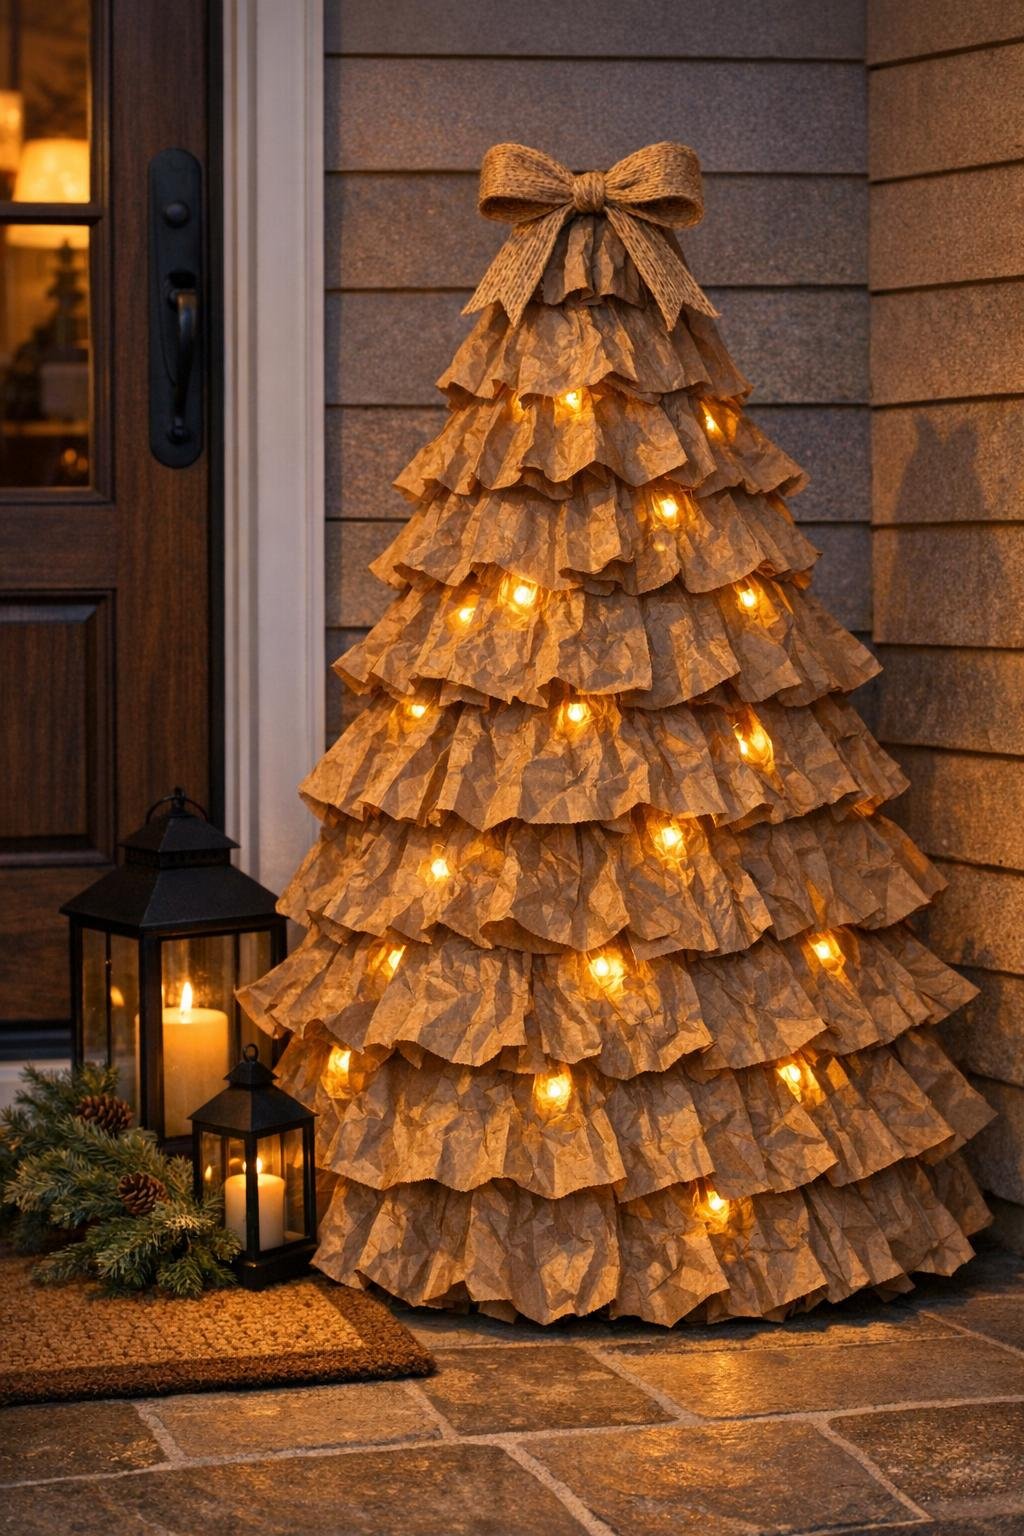
10. Step back, switch on the lights, and fill any dark or bare spots with extra glue and gentle fluffing, pulling the bag openings outward so the whole piece looks abundant from every angle.
Variations & Tips
For a taller tree: Use a larger tomato cage and 55 to 60 bags instead of 40, keeping the same method of dense overlapping rows so the shape still looks lush.
For a softer glow: Choose warm white micro lights on thin wire; they disappear into the paper better than bulky bulb strands and make the whole piece look cozier at night.
For outdoor use: Keep it on a covered porch and away from rain or snow, since paper bags can soften in damp weather. I treat this as porch décor, not yard décor.
For extra polish: Add a narrow ribbon bow at the top or tuck a few tiny sprigs of faux greenery into the lower rows, but keep the accents light so the beautiful paper texture stays the star.
To hide gaps: The easiest fix is not more lights but more fluffing; open the bag mouths wider, pinch some edges, and twist others slightly so the layers catch light and fill space naturally.
To store it: Lift it from the wire frame, not the paper, and keep it in a large trash bag or cardboard box through the off-season so the crumpled texture doesn’t get crushed flat.