
There’s something so satisfying about turning the simplest supplies into something that looks straight out of a winter centerpiece display. With just a few dollar store bundt pans, water, and a handful of fresh extras, you can make a stunning frozen decoration that feels special without being fussy or expensive.
I love projects like this because they’re easy enough to pull together on a regular afternoon, but the payoff is big and beautiful. If you enjoy seasonal decorating, want a fun cold-weather project for the family, or just like making your porch or table feel a little more welcoming, this one is absolutely worth trying.
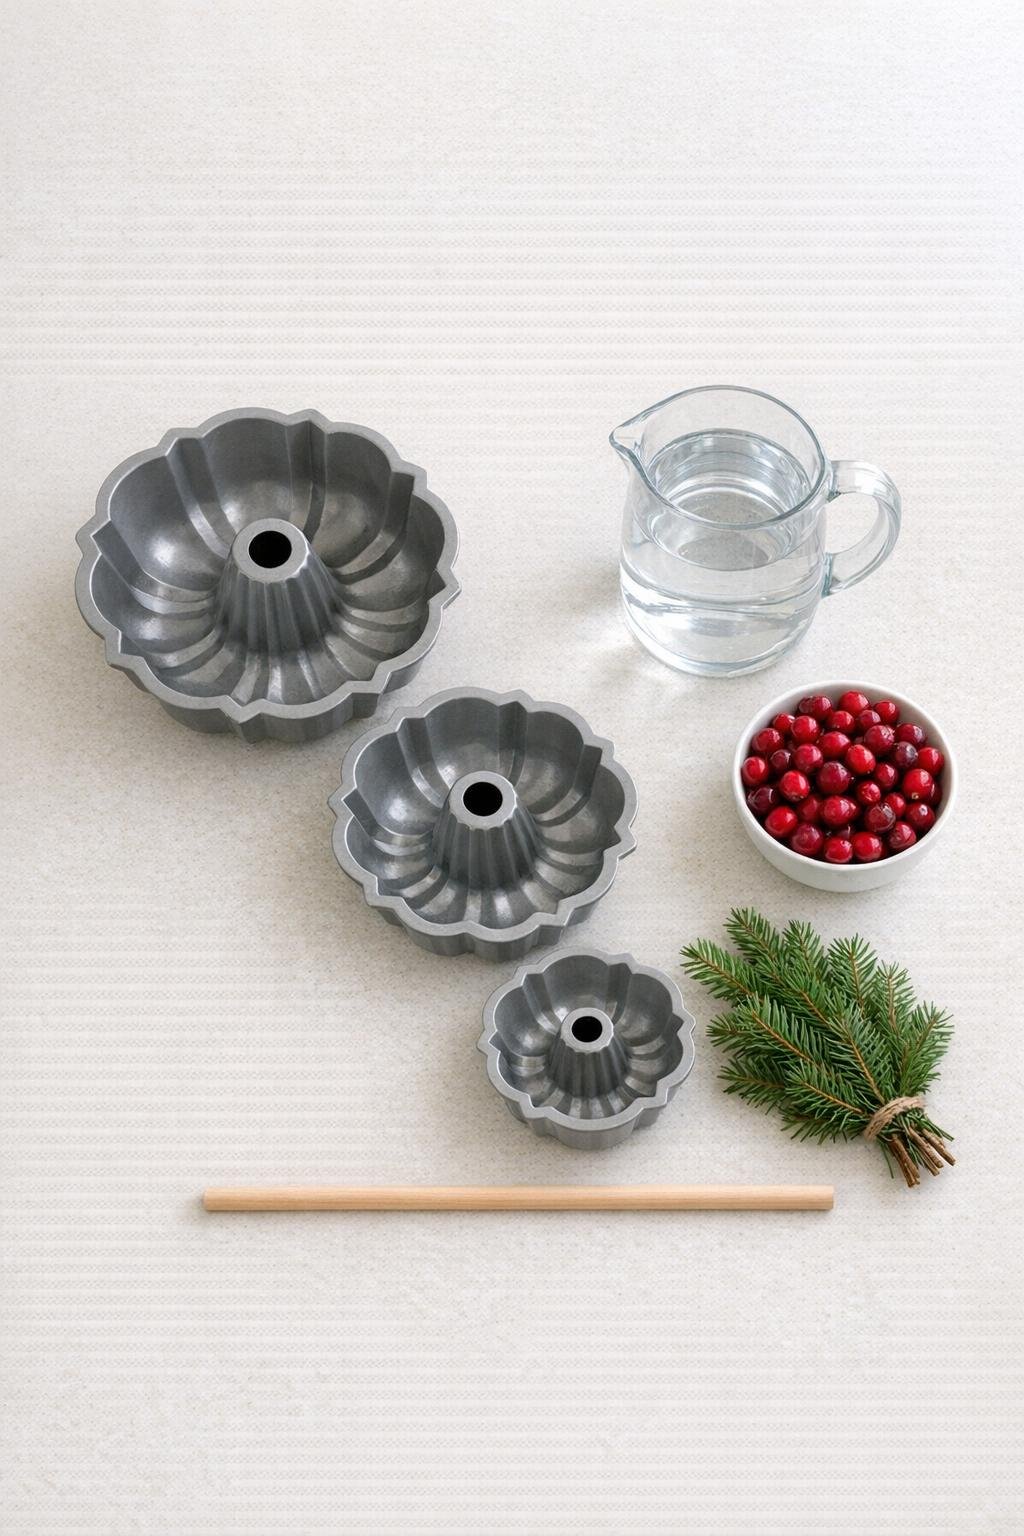
Materials
Instructions
1. Wash the bundt pans and make sure they sit level, then clear a flat spot in your freezer or another reliably freezing space so the water sets evenly.
2. Divide the cranberries and evergreen sprigs among the three pans, placing a little more in the larger pans so each ring will look full once frozen.
3. Pour water into each pan until it is nearly full, leaving about 1/4 inch of space at the top so the ice has room to expand.
4. Gently tuck any floating sprigs and berries into a balanced arrangement, spacing them around each pan instead of letting everything drift to one side.
5. Freeze the pans until solid, usually overnight or at least 8 hours, keeping them flat the entire time.
6. Remove the pans from the freezer and dip the bottom of one pan at a time into warm water for a few seconds, just until the ice ring loosens without melting much.
7. Turn each pan over onto a towel and unmold all three ice rings carefully, handling them from the bottom so the decorative pieces stay embedded and visible.
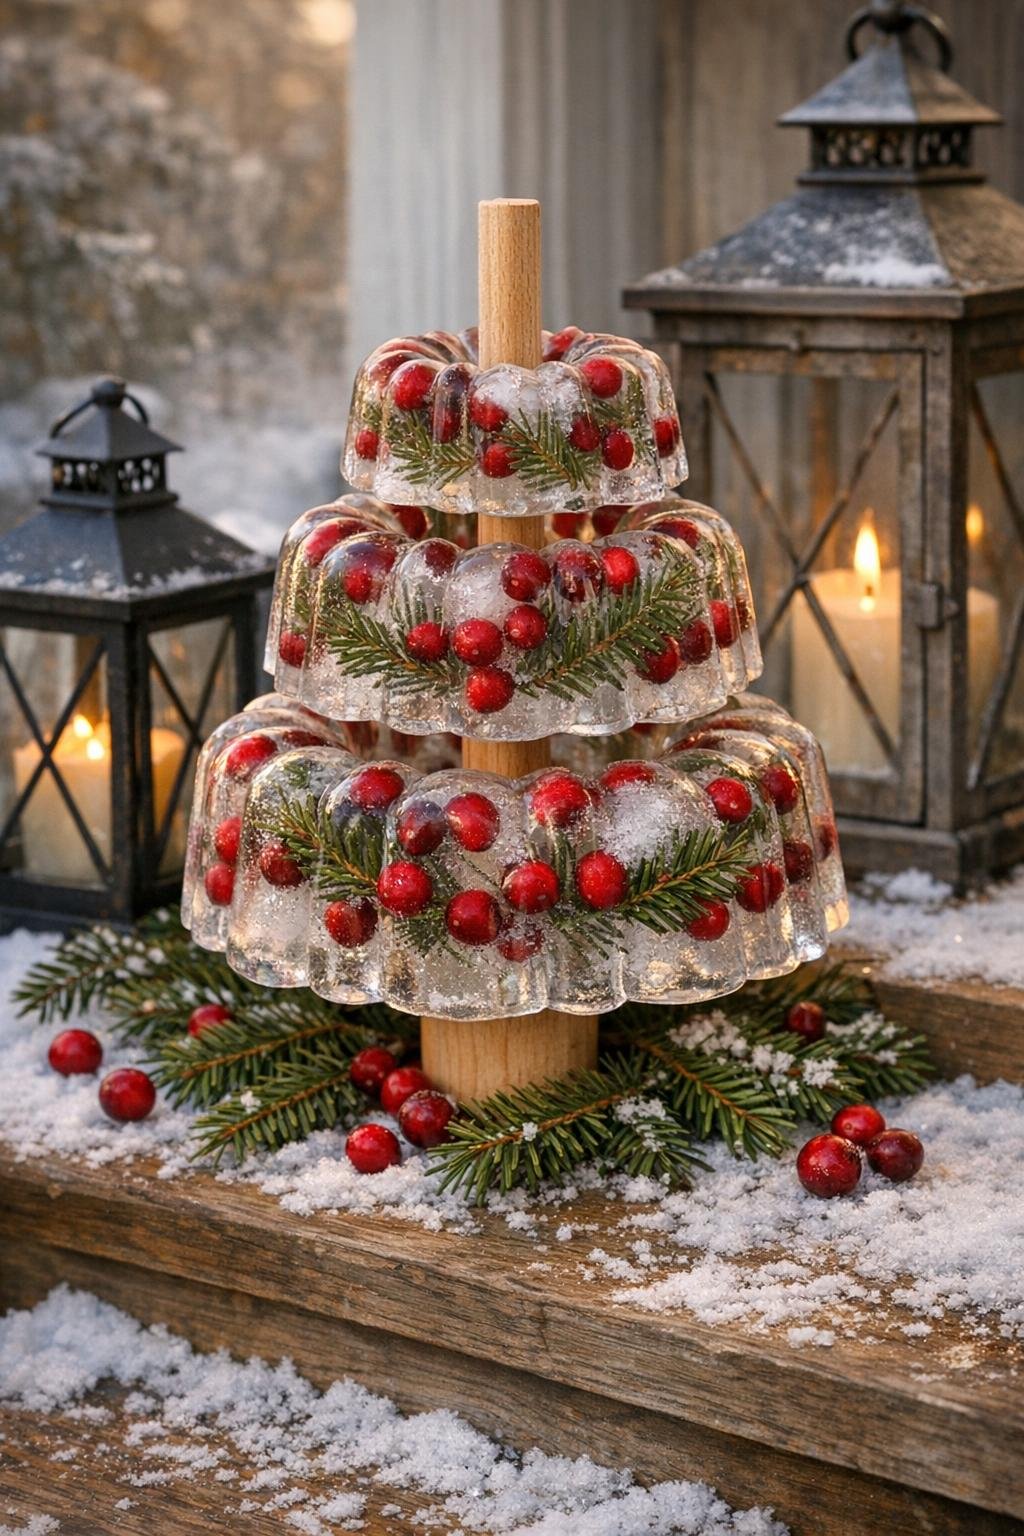
8. Stand the largest ring on your serving spot first, then center the medium ring on top, and finish with the smallest ring to create a tiered shape.
9. Slide the wooden dowel down through the center holes to stabilize the stack, pushing it gently until the whole piece feels secure.
10. Tuck a few extra evergreen tips or a small scatter of cranberries around the base if you’d like, then place it outside right away so it stays crisp and frozen.
Variations & Tips
For a fuller look: Use more evergreen sprigs in the largest ring and cluster the cranberries in loose circles so each layer reads clearly from a distance.
For cleaner ice: Let the water sit for a bit before pouring, or use filtered water if you want the rings to freeze a little clearer.
For picky decorators: If bright red cranberries feel too bold for your style, use all-evergreen rings for a softer, classic winter look.
For easier stacking: If the rings slide while you assemble them, freeze them again for 15 to 20 minutes after unmolding so the surfaces firm back up.
Placement tip: This project does best outdoors in freezing weather, on a porch, patio table, or near the front walk where everyone can enjoy it before it melts.
Make-ahead tip: Freeze the rings a day ahead and stack them just before displaying so the finished piece looks sharp and polished.