
I have a soft spot for projects that turn the “why am I keeping this?” bin into something people genuinely stop and stare at. If you’ve inherited a tangle of vintage-looking brooches, single earrings, rhinestone pins, and sparkly odds and ends, this is one of those satisfying little builds that makes the whole collection feel intentional instead of cluttered.
What I love most is that it looks special without being especially complicated. If you can wrap fabric smoothly, work in tidy rows, and spend an hour or two arranging pieces the way you’d top a casserole with the good crunchy bits, you can absolutely make this. It’s perfect for holiday decorating, gifting, or displaying sentimental jewelry you want to enjoy instead of hiding in a drawer.
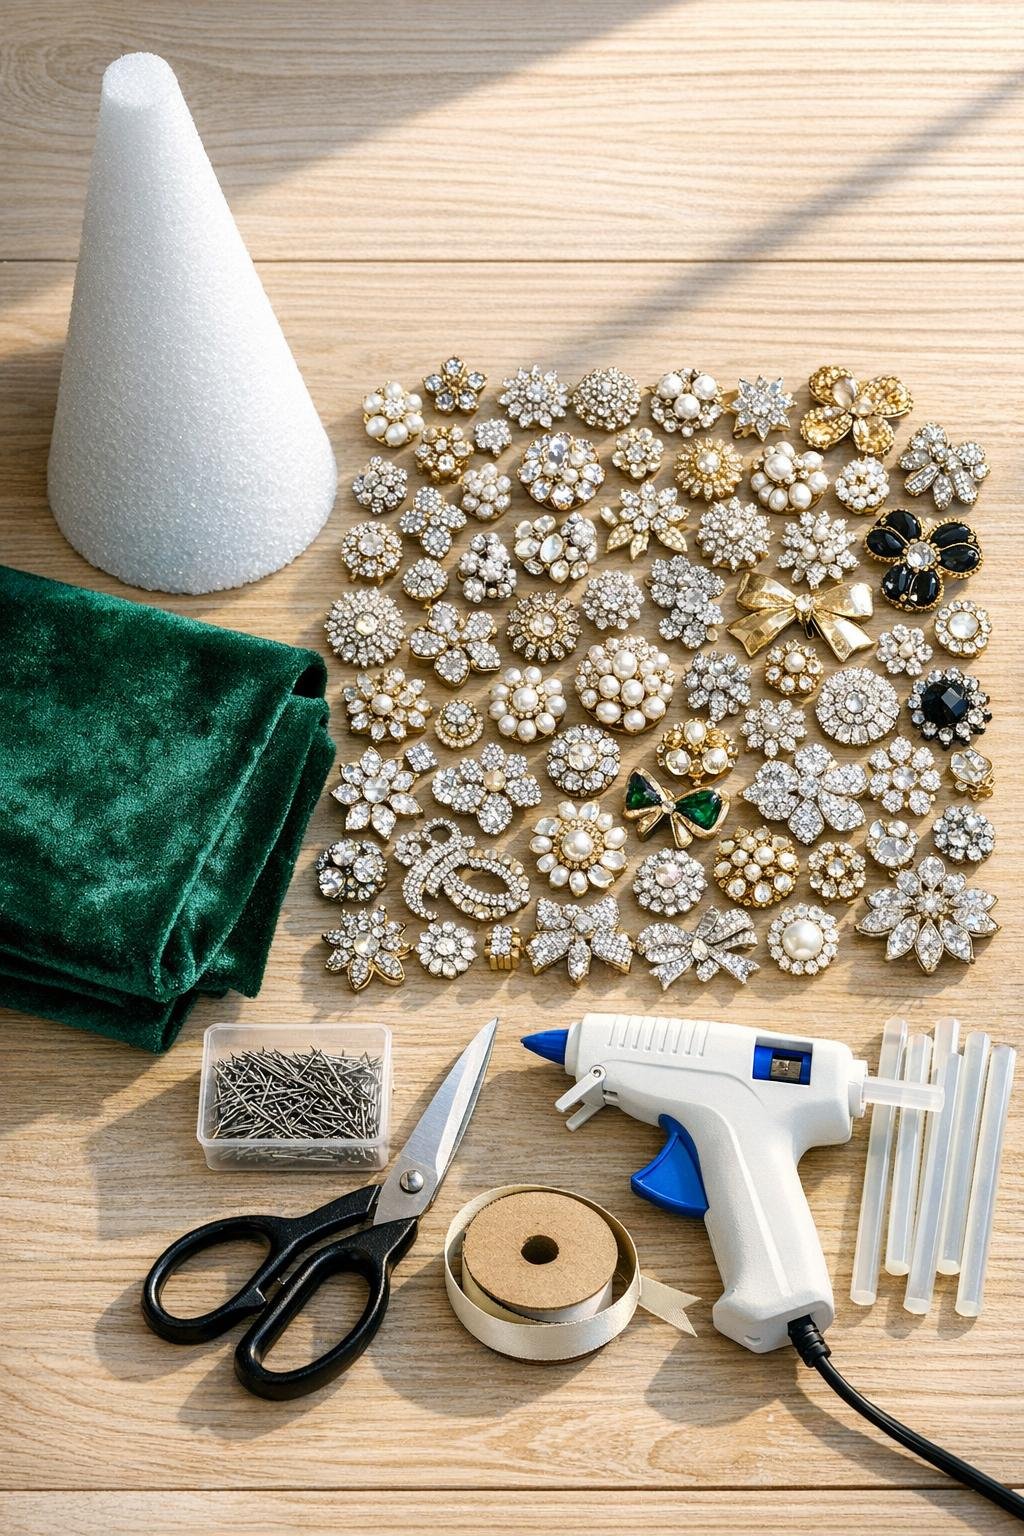
1. Sort the jewelry into large, medium, and small pieces, and remove any loose dust or lint with a dry cloth so everything shines once it’s on display.
2. Test your layout on the table first by grouping colors and finishes together loosely; I like to spread pearls, rhinestones, and gold-tone pieces throughout so one area doesn’t look too heavy.
3. Lay the velvet face down, place the foam cone on it, and wrap the fabric around the cone to check coverage before cutting away excess.
4. Trim the velvet so it wraps with a 1-inch overlap along the side seam and 1 inch of extra fabric at the bottom edge.
5. Run a thin line of hot glue vertically on the foam cone, press one side of the velvet into it, then wrap the fabric snugly around the cone and glue down the overlap to make a smooth seam.
6. Clip the extra velvet at the bottom edge every 1 inch, fold the tabs inward, and hot glue them to the underside so the cone stands neatly.
7. If you want a cleaner underside, hot glue the small felt square over the bottom to cover the folded velvet tabs.
8. Start at the bottom row and pin on your largest brooches first, spacing them so they nearly touch and angle slightly upward to follow the cone shape.
9. Continue building the next rows above, offsetting each piece from the row below like bricks so the cone looks full and layered instead of lined up in stiff columns.
10. Use straight pins through the pin backs, hinge openings, or open spaces in the jewelry whenever possible so the metal heads disappear into the design.
11. Add medium-size brooches through the center section, keeping the rows close and covering as much velvet as you can without crushing delicate pieces.
12. Fill noticeable gaps with clip earrings, smaller pins, or compact brooches, tucking them between larger pieces so the surface reads as richly covered from every angle.
13. If a piece has no workable opening for a pin or feels too heavy, add a pea-size dot of hot glue to the back and press it in place for a few seconds.
14. As you reach the top third, switch to smaller jewelry so the cone tapers gracefully and the scale looks balanced.
15. Finish the tip with one standout piece, such as a starburst brooch, floral pin, or cluster of rhinestones, pinned or glued securely at the top.
16. Turn the tree slowly and check for bare spots, then add the last few small pieces until the coverage looks even all the way around.
17. If you’d like, hot glue a narrow ribbon around the base or tie a small bow and add it near the bottom for a finished touch.
18. Let any glued pieces cool completely, then set the tree on a mantel, entry table, or holiday sideboard where the sparkle can catch the light.
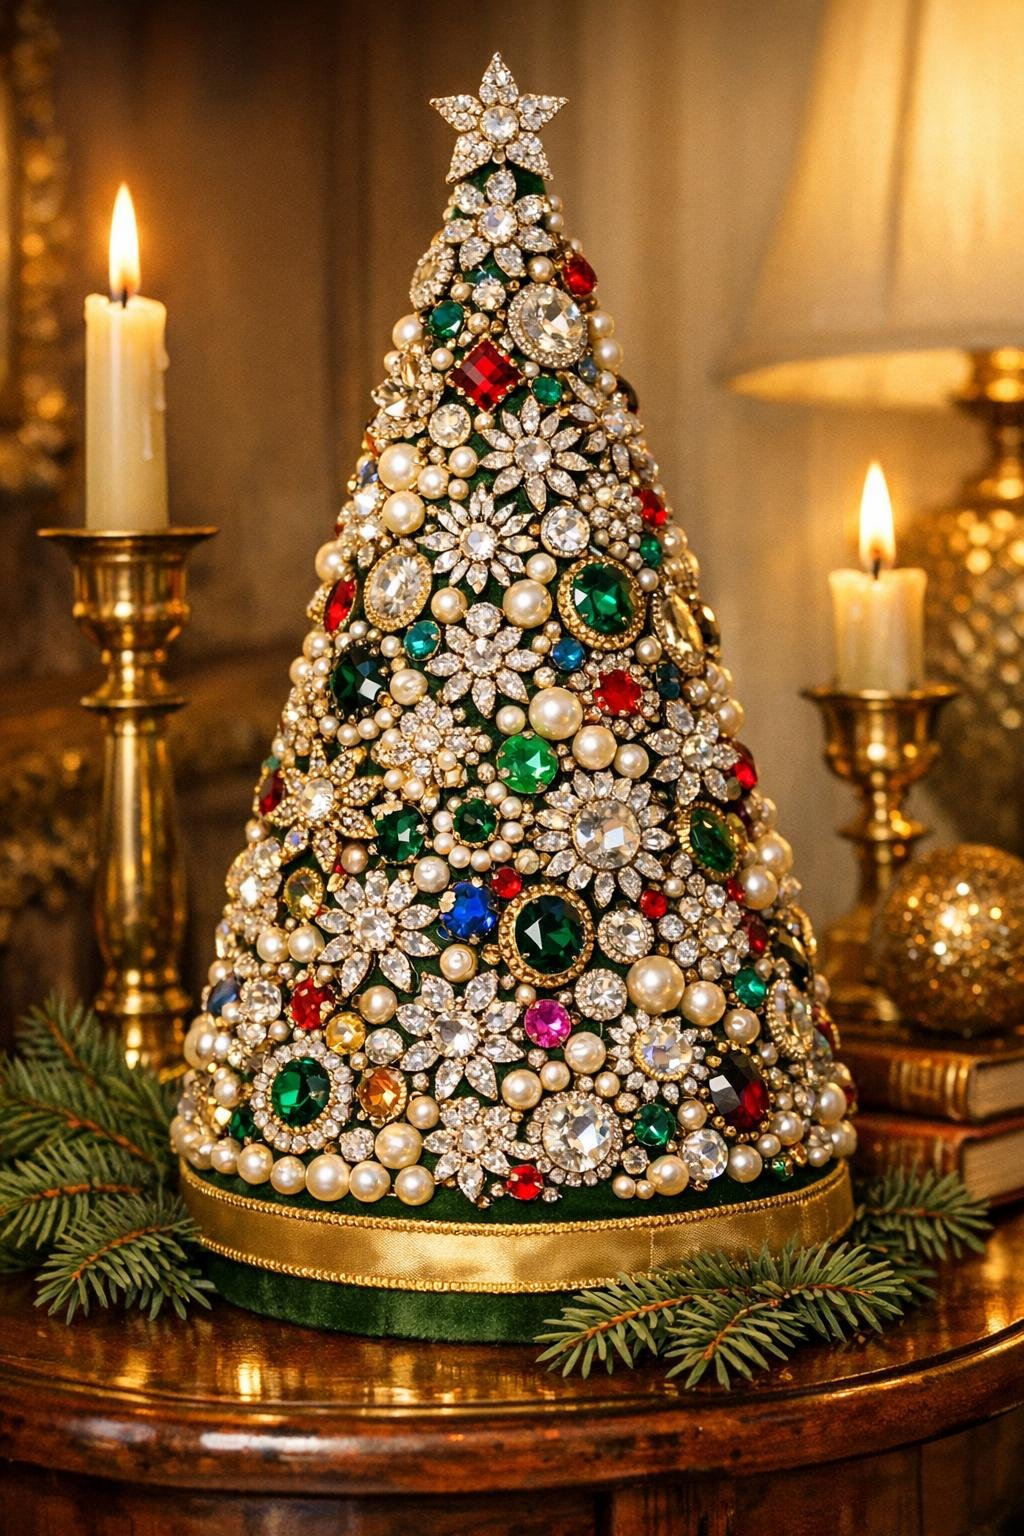
Keep it sentimental: Mix in a few pieces from relatives and fill the rest with thrifted brooches so the project feels personal without requiring every single piece to be an heirloom.
Choose a color story: All silver and crystal looks icy and formal, while gold, pearls, and jewel tones feel warmer and more vintage. I usually pick one direction before pinning so it looks curated instead of random.
Work from big to small: This is the easiest way to get full coverage. The large pieces create structure, and the little ones do the magic of hiding gaps.
Use glue sparingly: Straight pins make it much easier to rearrange as you go, which is helpful if you’re decorating after work in short bursts like I often do. Save hot glue for heavy or awkward pieces only.
Make it sturdier for storage: If you plan to pack it away every year, add one discreet dot of hot glue to the back of especially wiggly brooches after your layout is finished.
Try a softer look: Velvet gives the richest background, but felt also works if you want a simpler wrap with less slipping while you pin.
Scale it up or down: A 9-inch cone makes a lovely gift, while a 15- to 18-inch cone creates a dramatic centerpiece. Just increase the jewelry count so the coverage stays dense and generous.
Display tip: This sparkles best near a lamp or twinkle lights. I like placing it where evening light hits the rhinestones, because that’s when people inevitably ask where I bought it.