
There are some projects that look wonderfully special without asking for a ton of complicated skills, and this is one of my favorite kinds. If you can roll dough, press a cookie cutter, and stack pieces carefully, you can make something that looks charmingly handmade but still polished enough to display all season long. I love projects like this for busy weeks, because I can work on them in short pockets of time after dinner and still end up with something that feels gift-worthy.
This one is especially nice if you enjoy simple holiday crafting, air-dry style clay projects, or easy handmade decor that doesn’t require fancy tools. The magic is in repeating the same easy step enough times to create a full, dimensional result, and that little bit of layering makes all the difference.
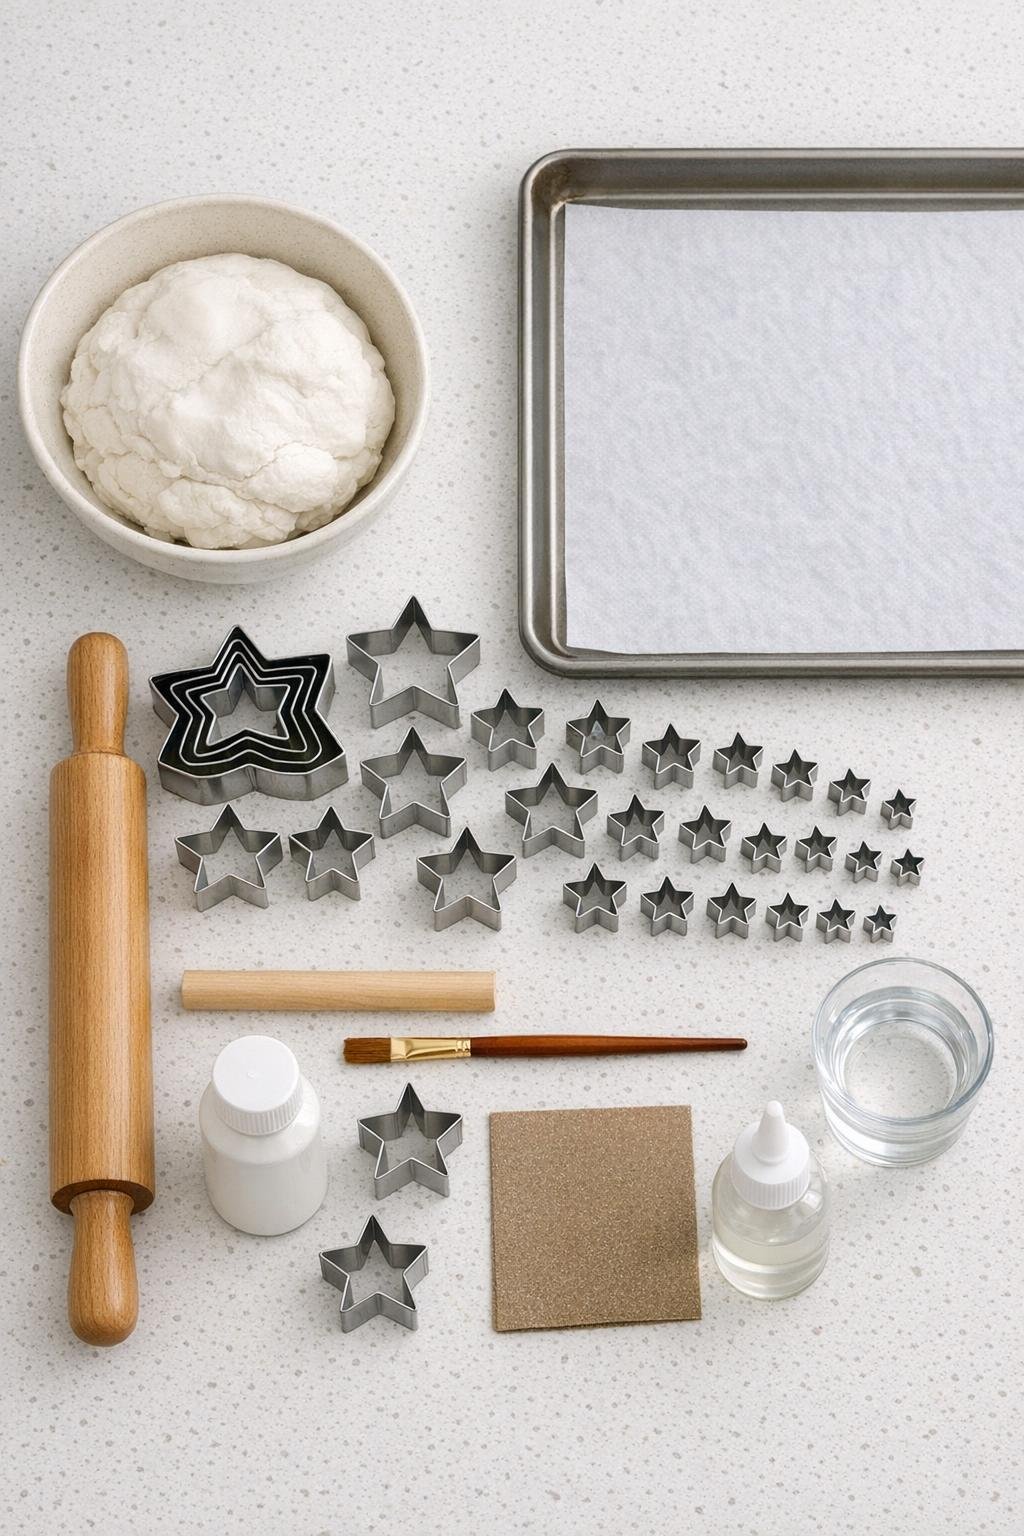
Materials
Instructions
1. Line your baking sheet with parchment paper and set out your clay, cutters, rolling pin, and dowel so everything is within reach.
2. Roll the baking soda clay on the parchment to an even 1/4-inch thickness, smoothing any cracks at the edges with a fingertip dipped in water.
3. Cut 18 stars total, using 6 graduated sizes and making 3 stars in each size so you have enough layers for a full, balanced stacked piece.
4. Transfer the stars to the baking sheet in neat rows, then gently smooth rough points and edges with a damp fingertip so they dry with a cleaner porcelain-like finish.
5. In the center of each star, make a hole with the wooden dowel, twisting gently so the opening is slightly larger than the dowel and will still fit after drying.
6. Let the stars dry completely according to your clay method, turning them once halfway through if needed so they dry flat and evenly.
7. Sand any bumps or rough edges lightly with fine-grit sandpaper once the stars are fully dry, especially around the points and center holes.
8. Paint both sides and the edges of all 18 stars with white craft paint for a smooth, uniform porcelain look, then let them dry fully.
9. Paint the wooden dowel white as well, covering it completely so it blends into the finished piece, and let it dry.
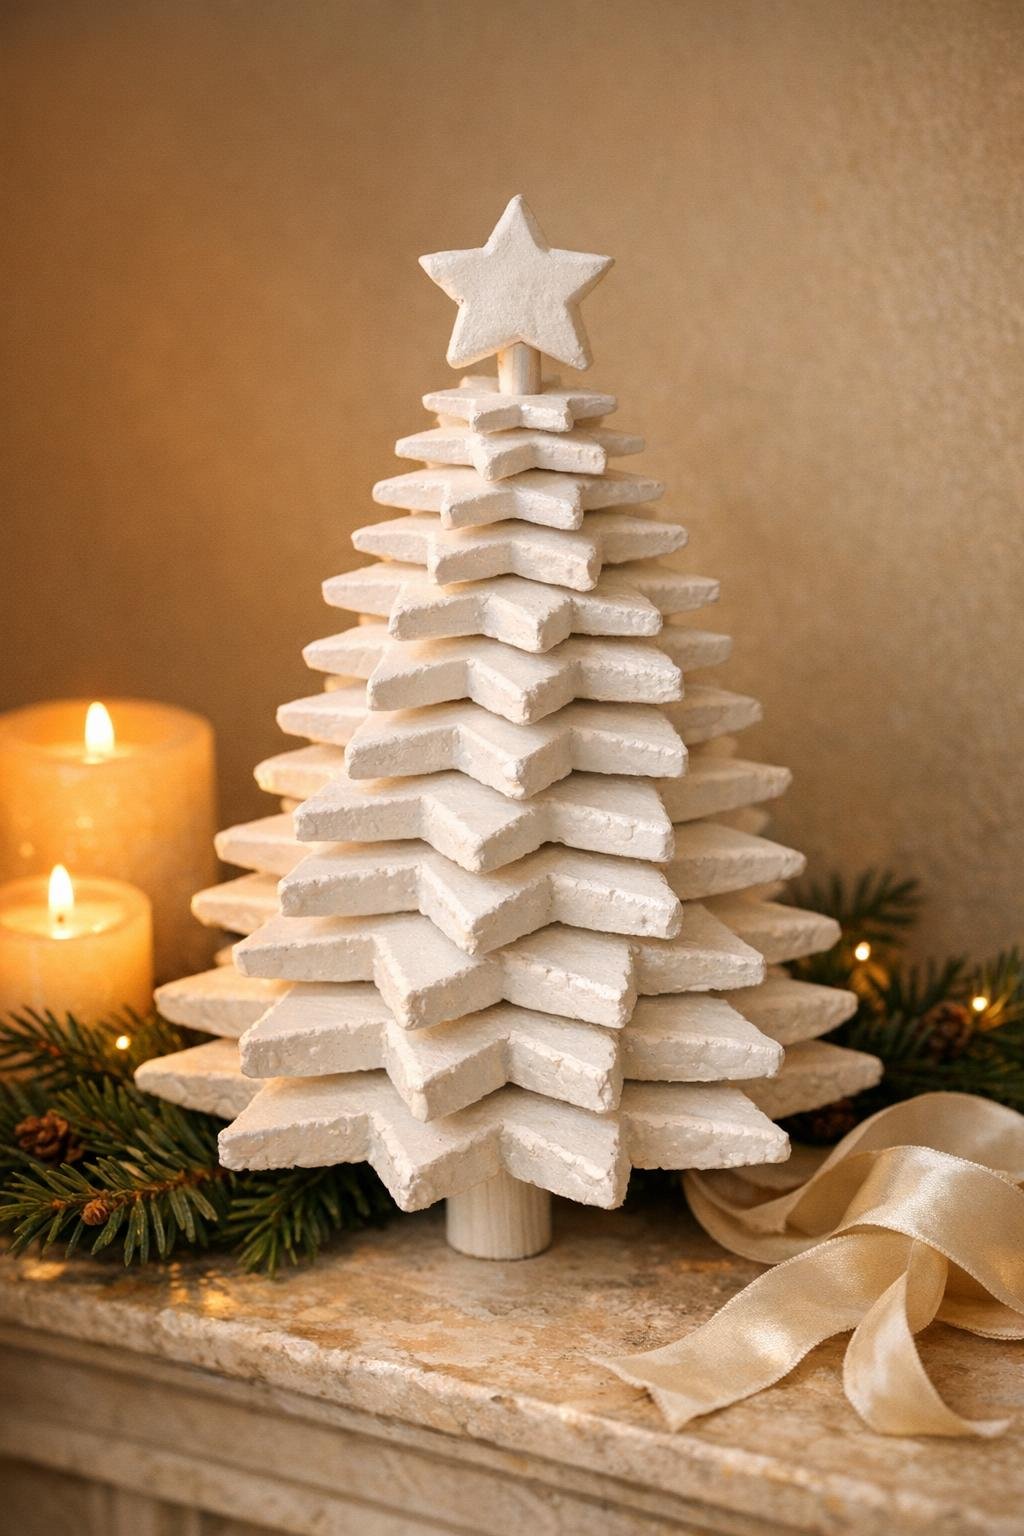
10. Glue the dowel upright onto the center of the largest star, then stack the next two largest stars over it, rotating each one slightly so the points alternate and create fullness.
11. Continue stacking the remaining stars from largest to smallest in groups of three per size, adding a small dab of glue between layers and rotating each star a little to build a full, tree-like shape.
12. Finish with the smallest star neatly centered on top, straighten the layers while the glue is still workable, and let the whole piece dry undisturbed until firm.
Variations & Tips
Soft sparkle finish: If you want a little extra holiday glow, dry-brush the edges with pearl paint or add a very light dusting of fine iridescent glitter over wet topcoat.
Keep the layers even: I like to lay the stars out in stacking order before gluing, because once I’m in assembly mode after a long workday, it saves me from accidentally repeating a size or rotating too little.
Make it sturdier: If your center holes feel snug after drying and painting, widen them gently with the dowel before gluing so you don’t risk cracking a star during assembly.
Try a warmer look: Instead of bright white paint, use ivory or a very pale cream for a vintage porcelain effect that looks especially pretty with brass or wood decor.
Display idea: This looks sweetest grouped with bottle brush trees, a small candle, or on a kitchen shelf near holiday baking pieces, which is honestly where mine usually ends up because it ties in so well with winter baking season.
Gift tip: Make two at once while the clay is already out, then tie one up with a simple ribbon and a handwritten note for a hostess or teacher gift.