
I love a yard project that looks clever and expensive but starts with things most of us already have tucked behind the shed. This pre-frost strawberry tower is exactly that kind of make: stacked black plastic nursery pots paired with one simple center support to create a vertical planter that gives you a lot of planting space without taking over the patio or garden bed.
If you want a strawberry planter that feels generous and full right from the start, this is a wonderful weekend project. I especially like it for small yards, apartment patios, and anyone who wants easier picking without bending so much. Once it’s planted up and spilling over with strawberry starts, it has that “where did you buy that?” look, even though it’s truly a simple homemade build.
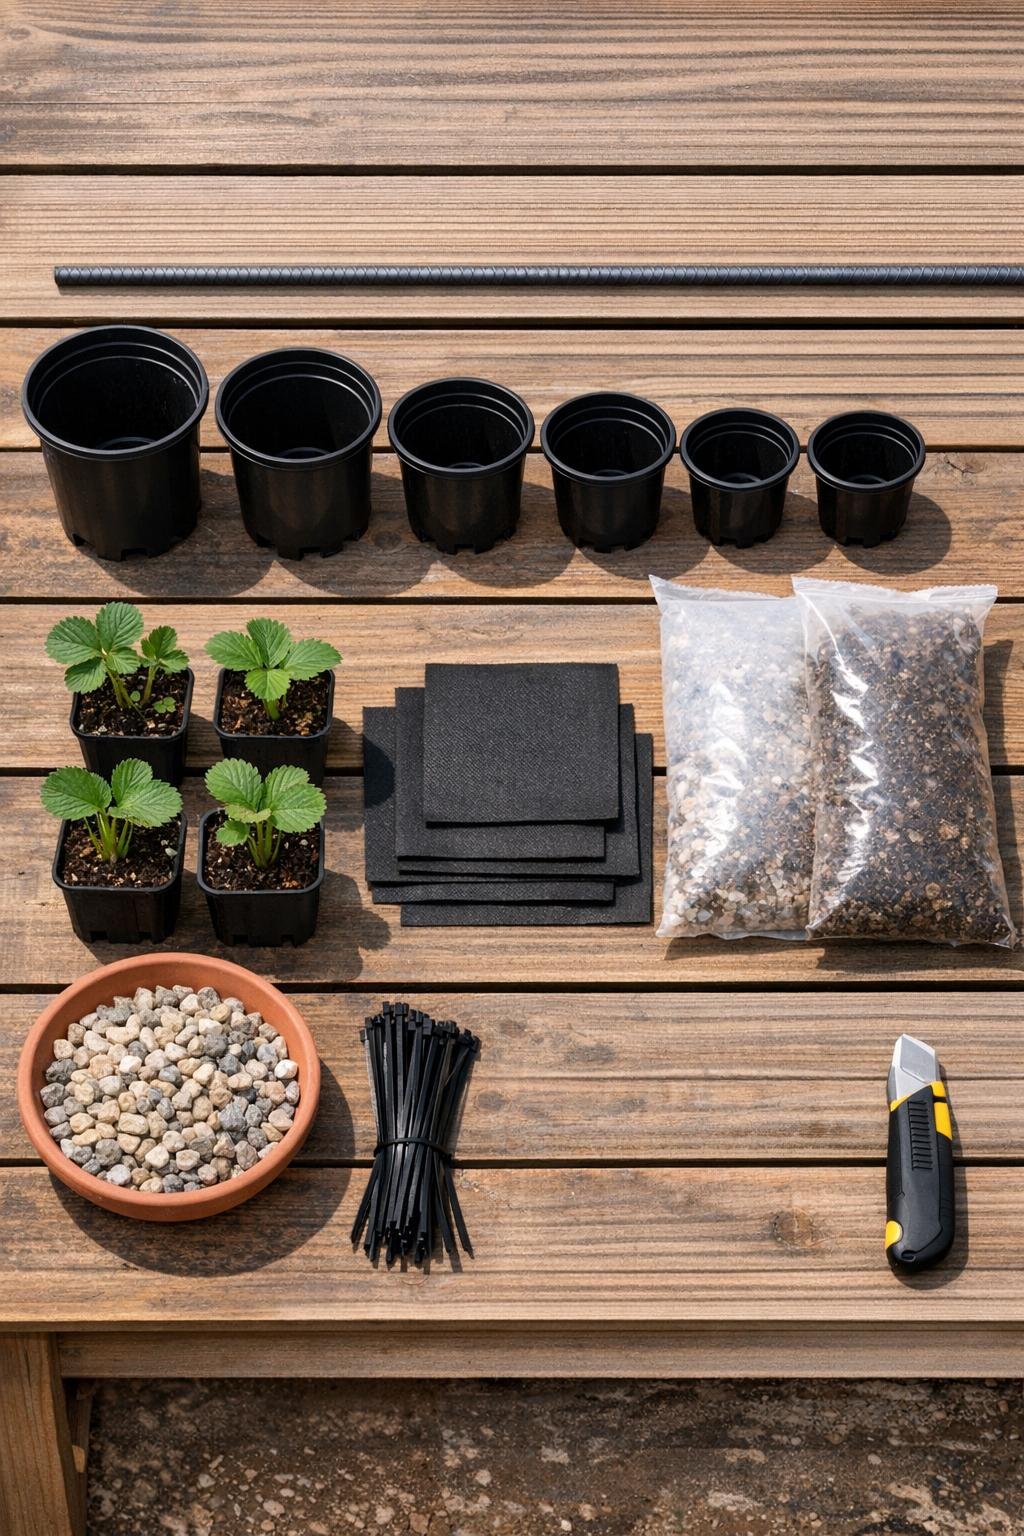
Materials
Instructions
1. Line up the nursery pots from largest to smallest and check that the bottom drainage hole in each pot is centered enough to slide over the rebar stake. If a hole is too tight, widen it carefully with the utility knife or drill.
2. Pick the exact spot where you want the tower to live, because once it’s filled it will be heavy. Push the 48-inch rebar stake straight into the ground about 10 to 12 inches deep so 36 to 38 inches stay above the soil.
3. Add 2 inches of pea gravel inside the largest pot for weight and drainage, then slide that pot down over the rebar until it rests on the ground. Fill it halfway with potting mix, pressing lightly so it sits level.
4. Cut a small X in the sidewall of the largest pot just above the soil line if it doesn’t already have roomy side openings, making 3 to 4 planting pockets spaced evenly around the pot. Tuck a square of landscape fabric loosely behind each opening so soil stays in while water can still pass through.
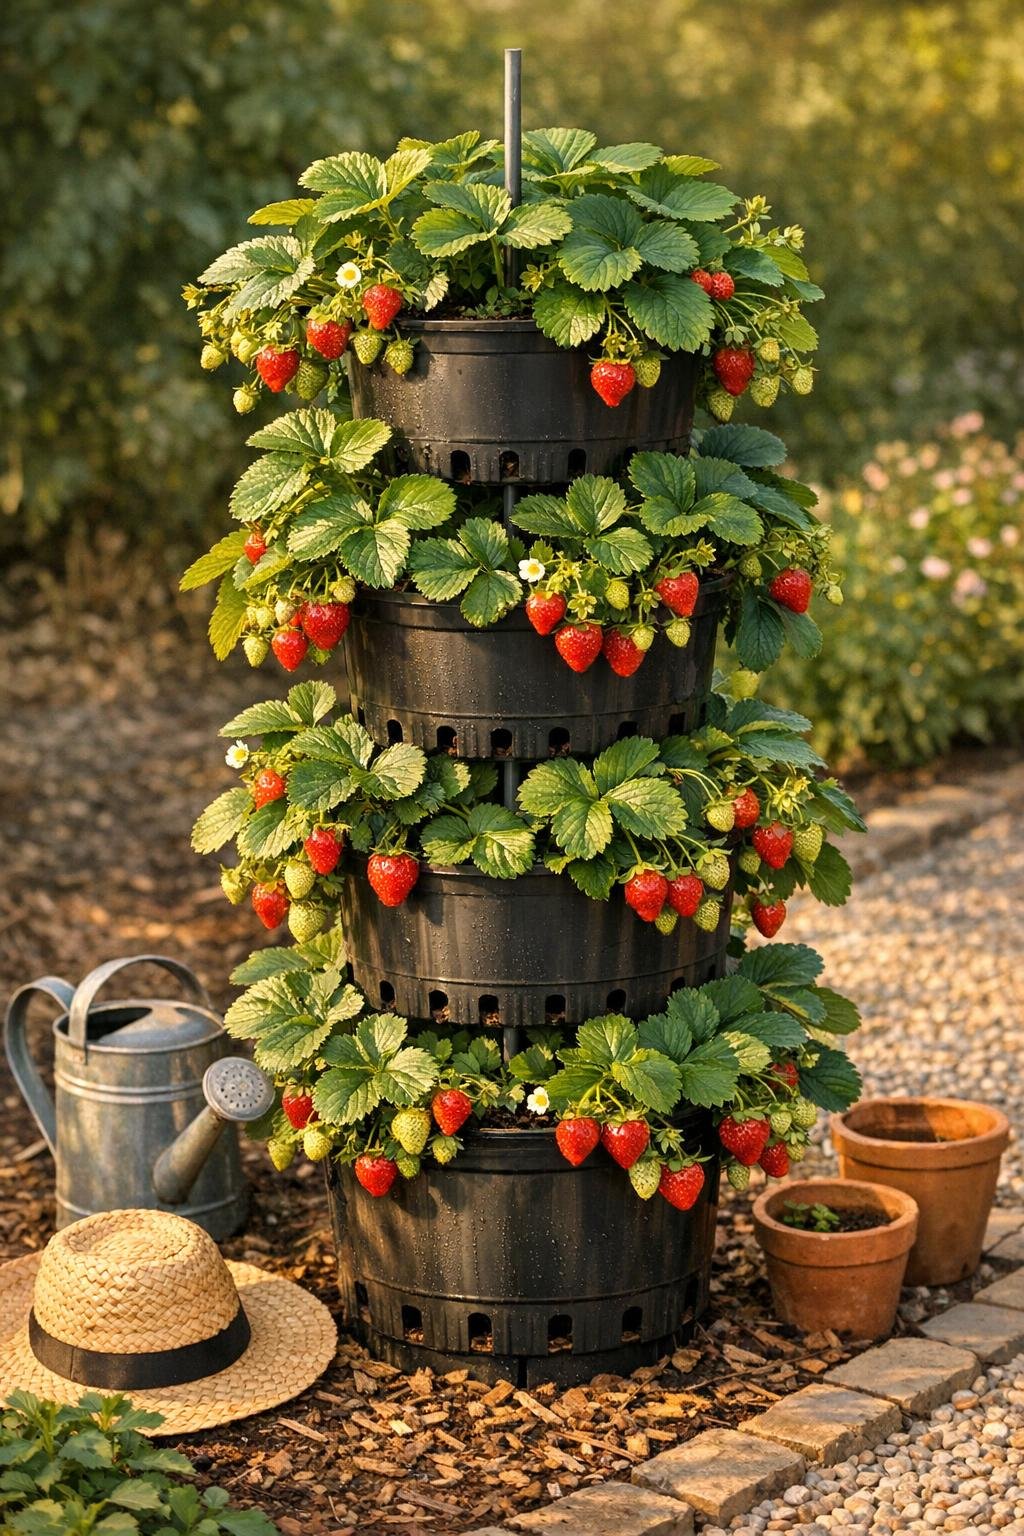
5. Slide the second pot onto the rebar and tip it slightly on its side so the rim overlaps the first pot in a more sculptural, cascading arrangement like the hero setup suggests. Secure the rim to the lower pot with 2 zip ties, then fill it halfway with potting mix.
6. Repeat with the remaining pots, stacking each one over the rebar, turning each pot slightly so the openings face different directions, and fastening each pot to the one below with 1 to 2 zip ties. Keep the whole tower balanced while letting the pots angle just enough to create generous planting pockets all around.
7. Once all the pots are stacked, fill each pot fully with potting mix, adding a handful of compost to each level if you have it. Firm the soil enough to support the plants, but do not pack it hard.
8. Plant strawberry starts into the side openings first, tucking the roots inward and keeping the crowns at soil level. Use 3 to 4 plants in the bottom pot, 3 in the next, then 2 to 3 in each middle pot, and 1 to 2 in the smallest top pots until the tower looks lush and evenly filled.
9. Add 2 or 3 extra strawberry plants at the top opening of the smallest pot to create a full crown of greenery that softens the tower. Water slowly from the top until moisture reaches every level and the soil settles.
10. Finish by checking ties, rotating any plant so leaves face outward, and wrapping a little jute twine around the top rim if you want a tidier finished look. Water again after an hour if the potting mix has dropped, then top off any low spots with more soil.
Variations & Tips
For picky-water spots: If one side of your yard dries out fast, add a narrow perforated watering tube down the center beside the rebar before filling the pots. It helps carry water to the lower levels, which is especially handy in hot spells.
If you have fewer plants: Start by filling every lower and middle pocket first, then the top. A full-looking bottom makes the whole tower seem abundant, and you can always tuck runners into open spaces later.
For a cleaner finish: Matching black zip ties disappear nicely against the pots, but you can also tuck the tie locks toward the back so the tower looks more polished from the front. That tiny step really makes it feel store-bought.
Best soil choice: Use a light potting mix rather than heavy garden soil. The tower drains better, weighs less, and keeps strawberry roots happier.
Cold-weather note: Since this is a pre-frost tower, I like to build and plant it before the first hard freeze but while the ground is still workable. In colder areas, mulch the base well or move a smaller tower to a sheltered patio wall for winter protection.
Kid-friendly planting job: If you have children helping, let them place the strawberry starts into the side pockets while you handle the cutting and staking. It’s one of those garden projects that feels a little magical once the plants start poking out from every side.
Easy maintenance: Snip runners regularly if you want bigger berries, or let a few trail for a softer cottage-garden look. I usually feed with a diluted berry fertilizer every couple of weeks once the plants settle in.