
Christmas is when I start looking at the corners of my house and garden with fresh eyes. A porch pot, a bare path, an empty hallway table—suddenly all of them feel like opportunities. This year, I leaned into two humble materials I love for opposite reasons: aluminum foil, which can give you instant texture and surprisingly useful molds, and concrete, which brings weight, permanence, and that cool wintry look that works beautifully with holiday decorating.
Below are 20 DIYs I’d happily make again, each one designed to look far more expensive and dramatic than the ingredients suggest. I kept them practical, photographable, and winter-friendly, with exact materials, curing times, and placement ideas so you can actually pull them off at home during the Christmas season.
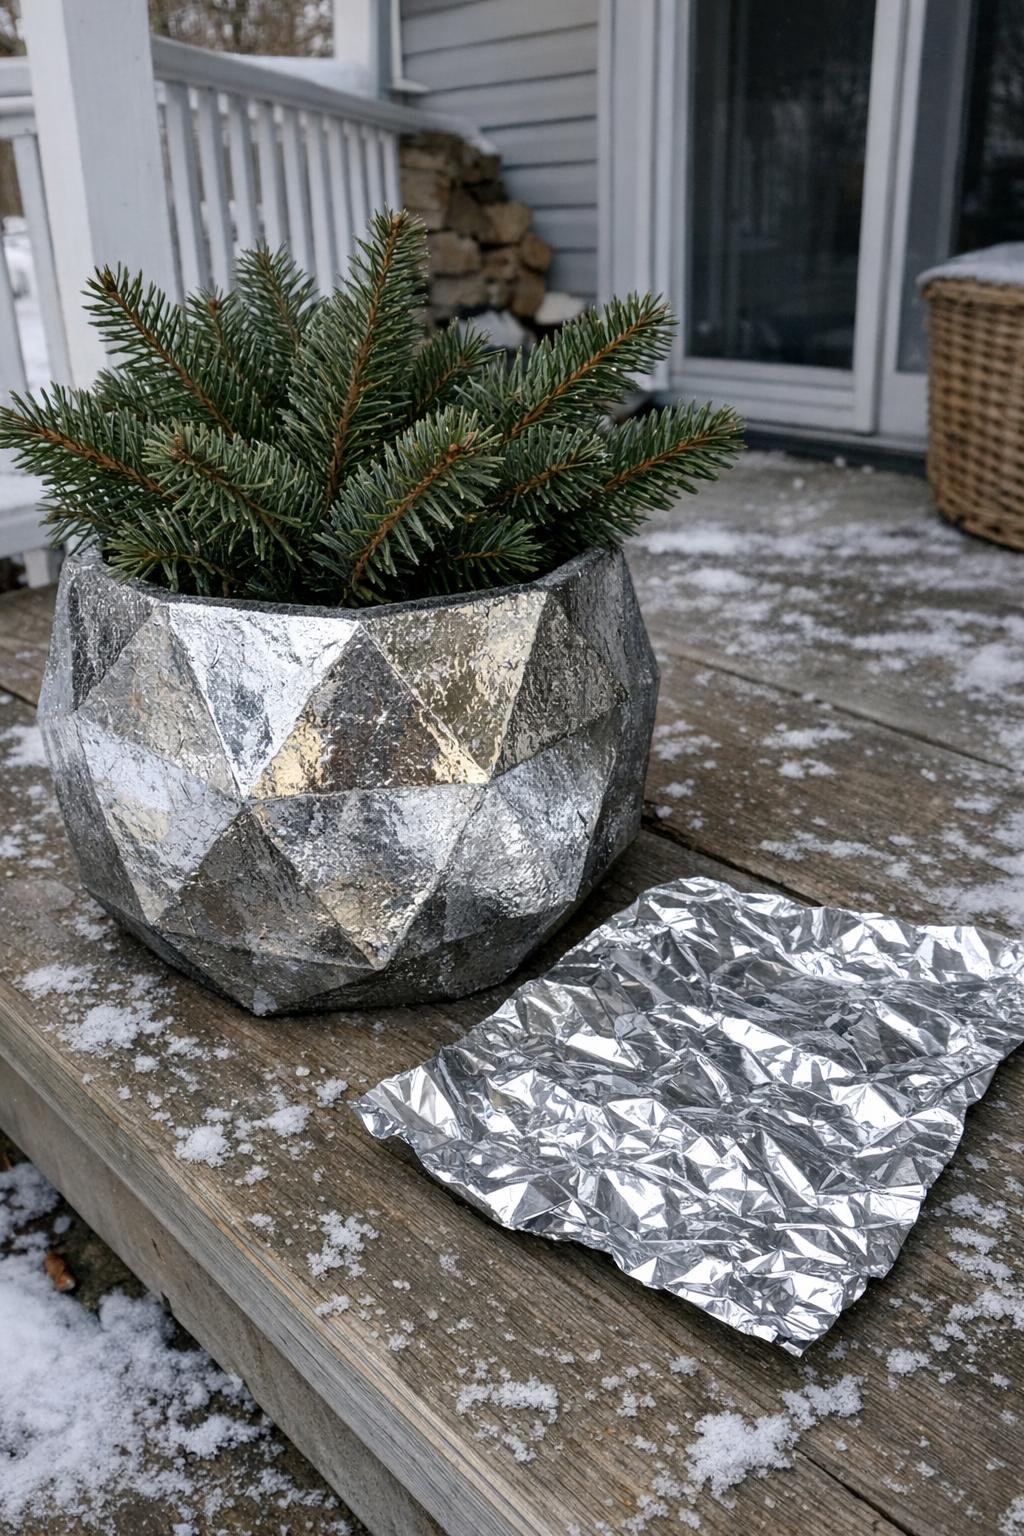
1. Faceted foil-texture concrete planter
This project uses both aluminum foil and concrete. Gather 1 medium mixing bowl for the outer mold, 1 smaller bowl or nursery pot to create the cavity, 2 to 3 large sheets of aluminum foil, about 12 to 15 pounds of quick-setting concrete mix, water as directed on the bag, cooking oil or mold release, and a handful of small pebbles for drainage feet if you like.
Line the larger bowl with crumpled and then slightly reopened foil so the inside is full of angular folds, oil the foil and the outside of the smaller bowl, then mix the concrete to a thick oatmeal-like consistency. Pack 1 1/2 to 2 inches of concrete into the foil-lined bowl, press the smaller bowl into the center, weight it down with stones, and let it cure 24 hours before unmolding; give it another 2 to 3 days before planting. I like this on a front step with evergreen cuttings and red dogwood stems, and the faceted metallic texture catches winter light in a way that looks almost sculptural.
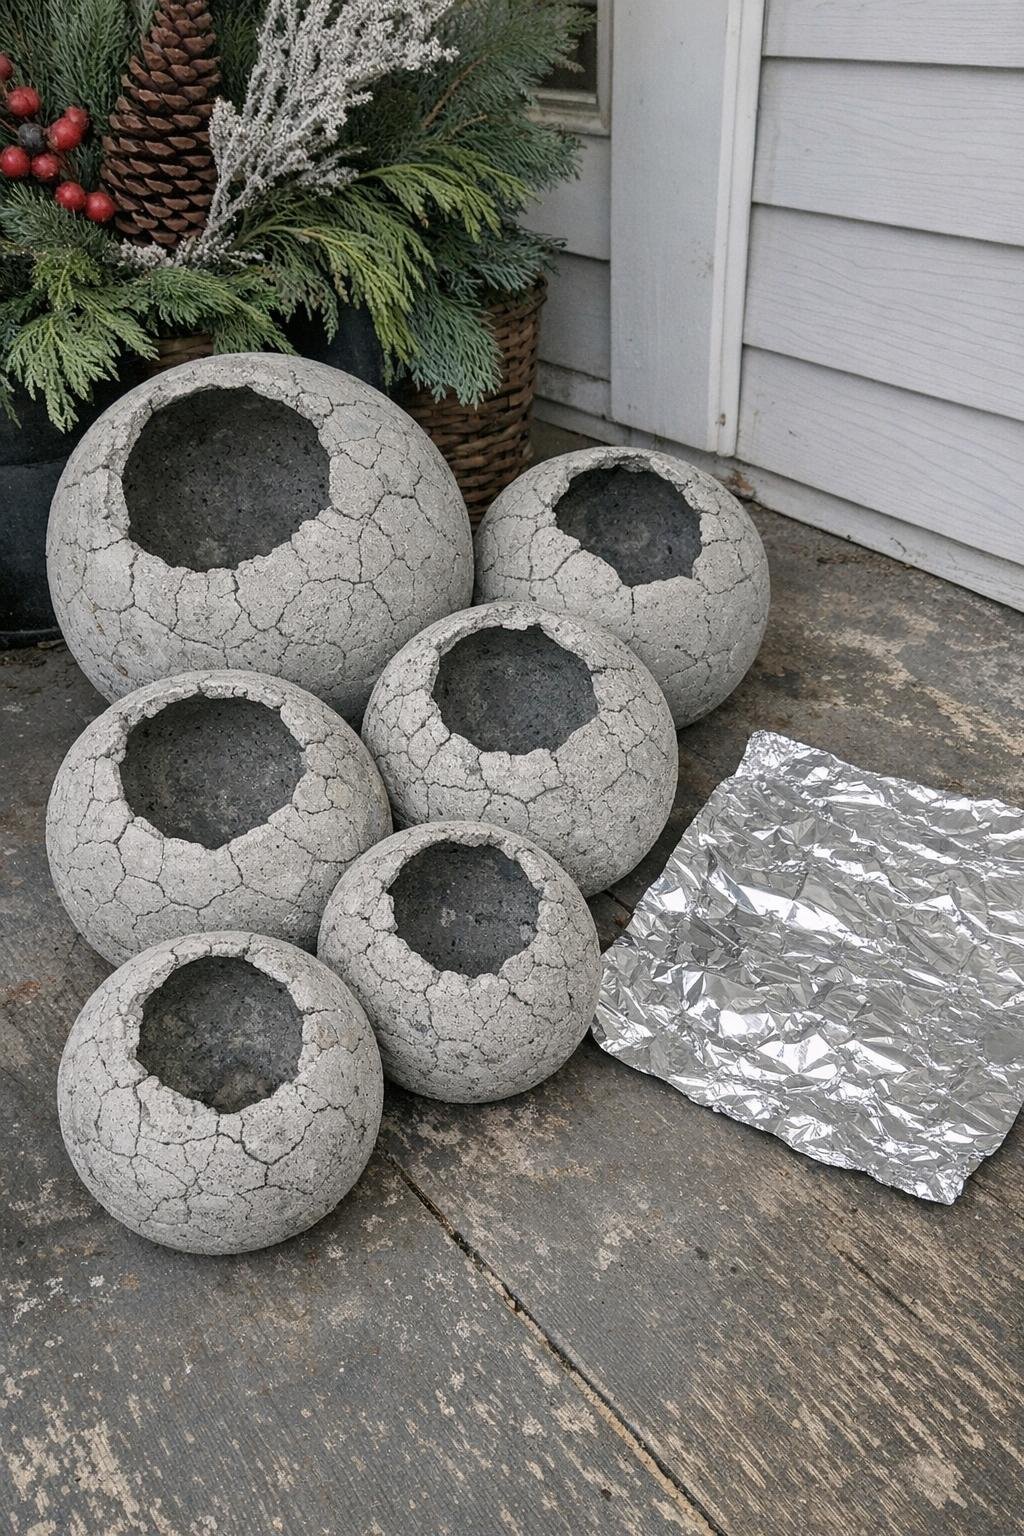
2. Hollow crackle-finish concrete porch orbs
This project uses both aluminum foil and concrete. You’ll need 3 to 5 balloons in assorted sizes from 8 to 12 inches, aluminum foil to wrap them, about 20 pounds of quick-setting concrete mix, water per package directions, a disposable tub for dipping or coating, petroleum jelly or oil, and a scrap board or plastic sheet for drying.
Inflate the balloons, wrap each loosely in foil with a lightly crinkled surface, brush on a little oil, then mix the concrete slightly thinner than for a planter so it spreads easily. Coat each balloon to about 1/2 inch thick, leaving a 2- to 3-inch opening at the bottom, let them set 24 hours, pop the balloons, peel out the foil, and cure the hollow orbs another 2 days before grouping them by the porch in a bed of pine boughs. The crackled, shell-like finish is what makes them so striking—they look like winter garden sculptures rather than a quick weekend DIY.
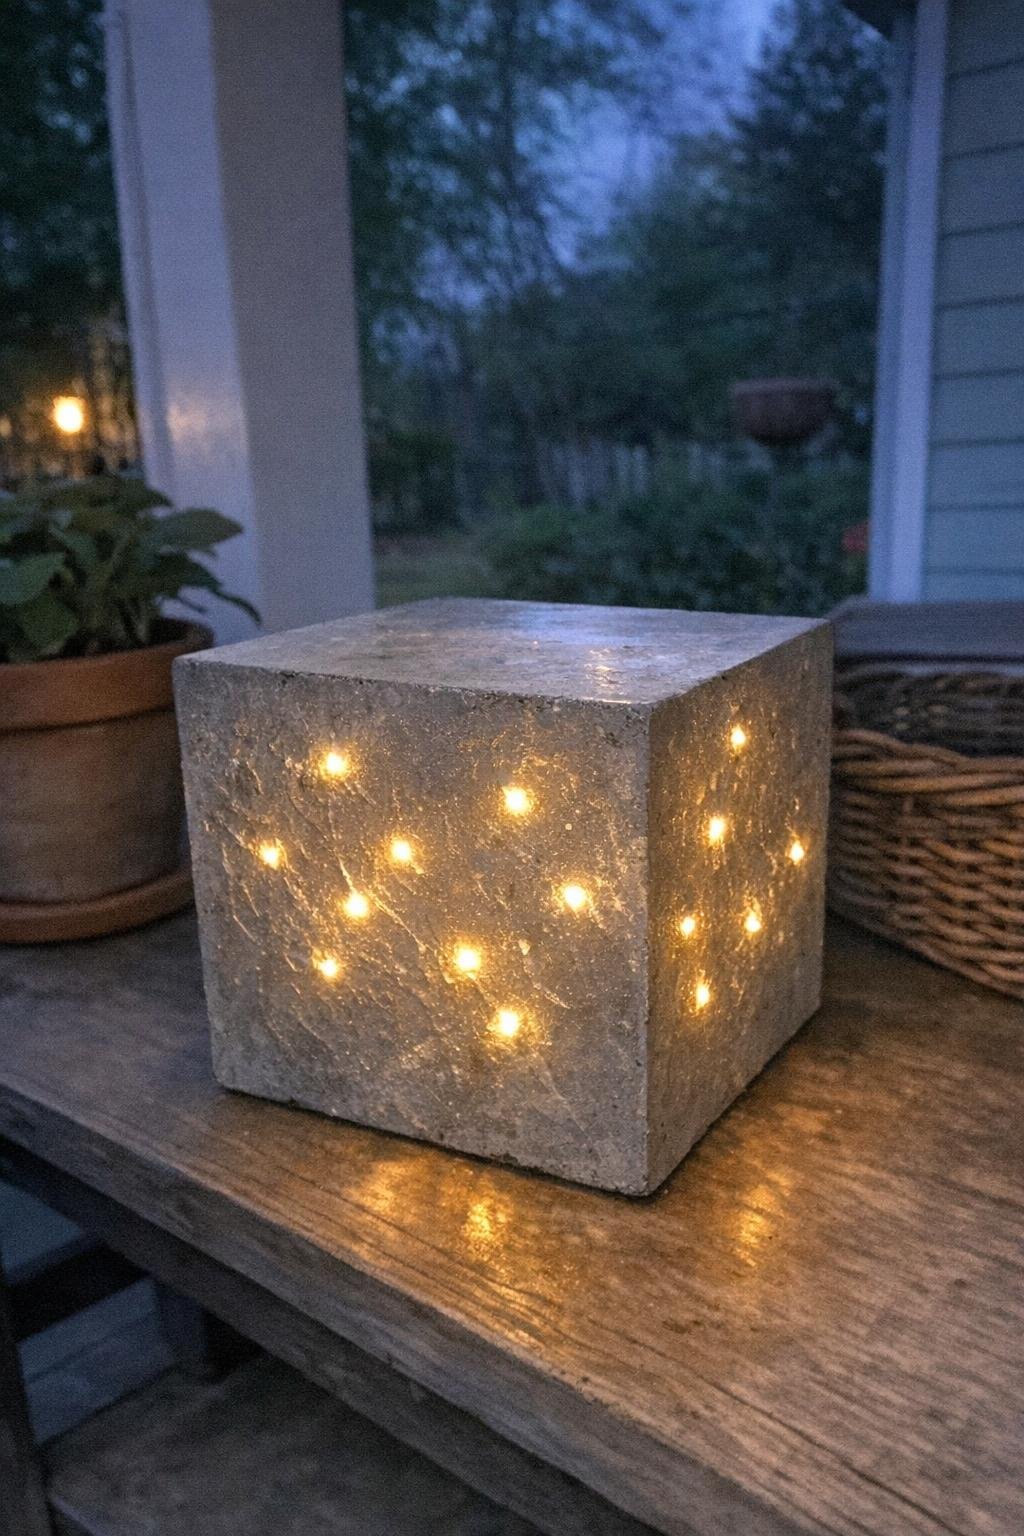
3. Glowing concrete Christmas luminary
This project uses both aluminum foil and concrete. Gather 1 sturdy square or rectangular gift box, enough aluminum foil to line it, 10 to 12 pounds of quick-setting concrete mix, water per instructions, a short strand of battery fairy lights, plastic wrap for the lights, and a small container or block to make a hollow center if you want a lighter piece.
Line the box neatly with foil, mix the concrete, and pour it 2 to 3 inches deep, or around a center block if you want a cavity. Press the wrapped fairy lights gently into the top surface so the bulbs make channels and dimples, let it set 24 hours, unmold, remove the foil, and weave the lights back into the impressions or tuck them into the center hollow; place it by the entry or on an outdoor table under cover. Once lit at dusk, the soft glow against the cool gray concrete is what stops people in their tracks.
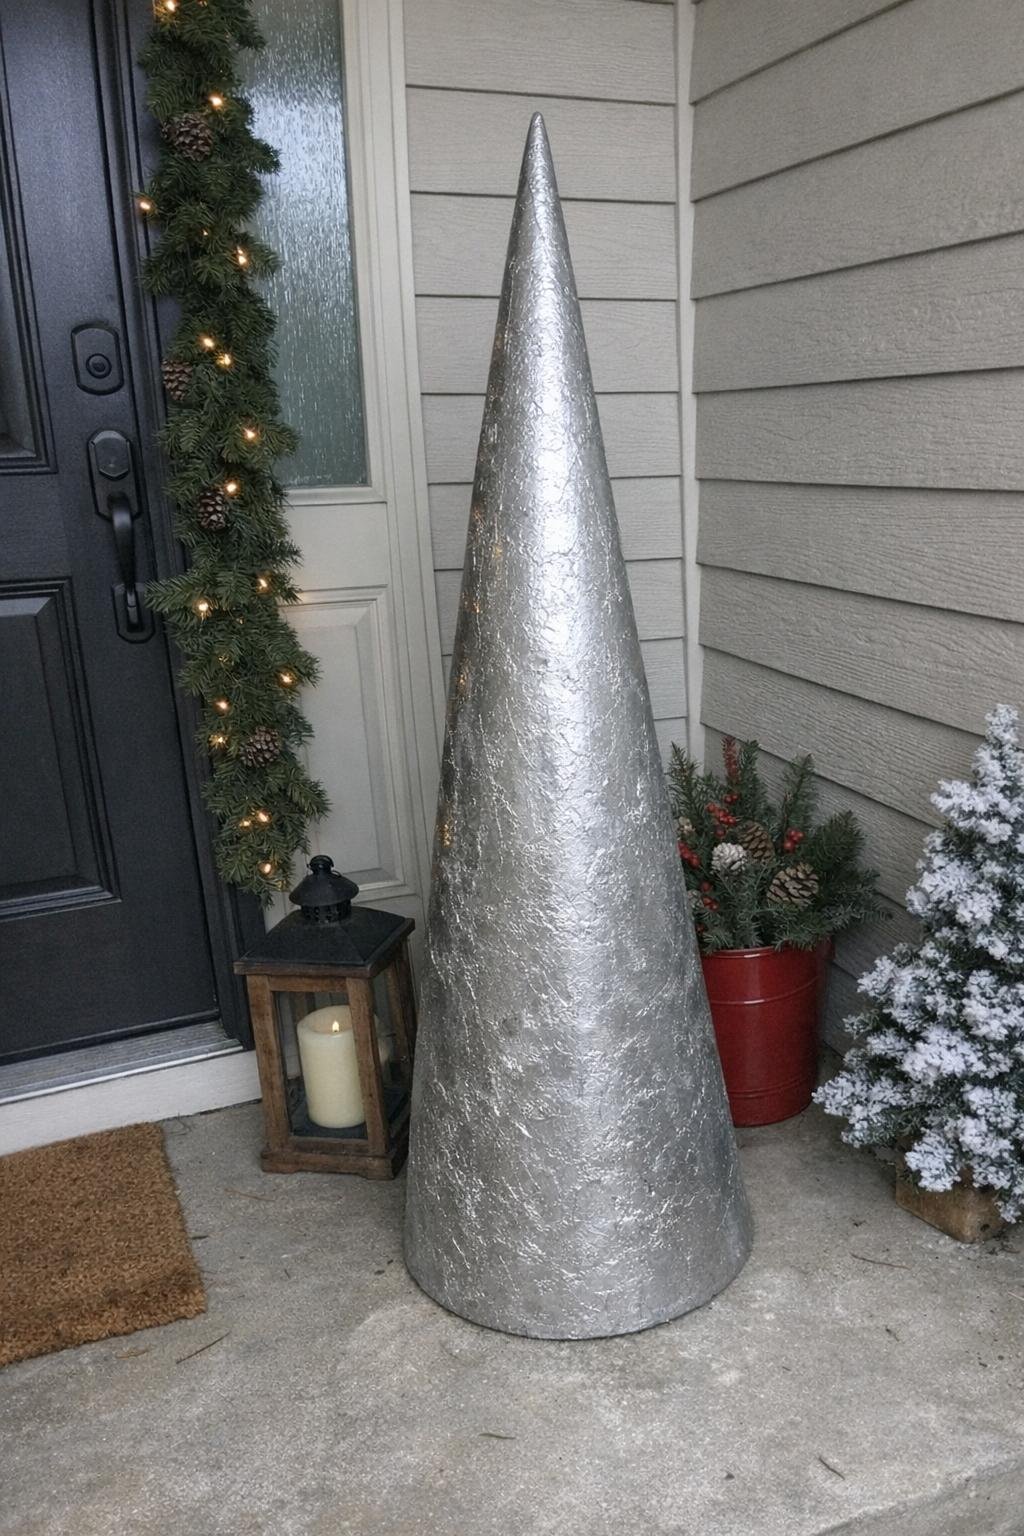
4. Modern concrete Christmas tree cone
This project uses both aluminum foil and concrete. You’ll need 1 tall cardboard cone form about 24 to 36 inches high, aluminum foil to wrap it, 15 to 25 pounds of quick-setting concrete mix depending on size, water, a putty knife, and an optional wood base or tray for display.
Wrap the cone tightly in foil, crinkling some areas for texture, then mix the concrete thick enough to cling and spread a 1/2- to 3/4-inch coat over the entire cone. Let it firm up for 2 to 3 hours, smooth or texture any rough spots, cure it overnight, and display it on the porch or beside the fireplace with a string of tiny warm-white lights around the base rather than drilled into the concrete. Its clean silhouette paired with that rugged foil-imprinted skin gives it the look of a gallery holiday piece.
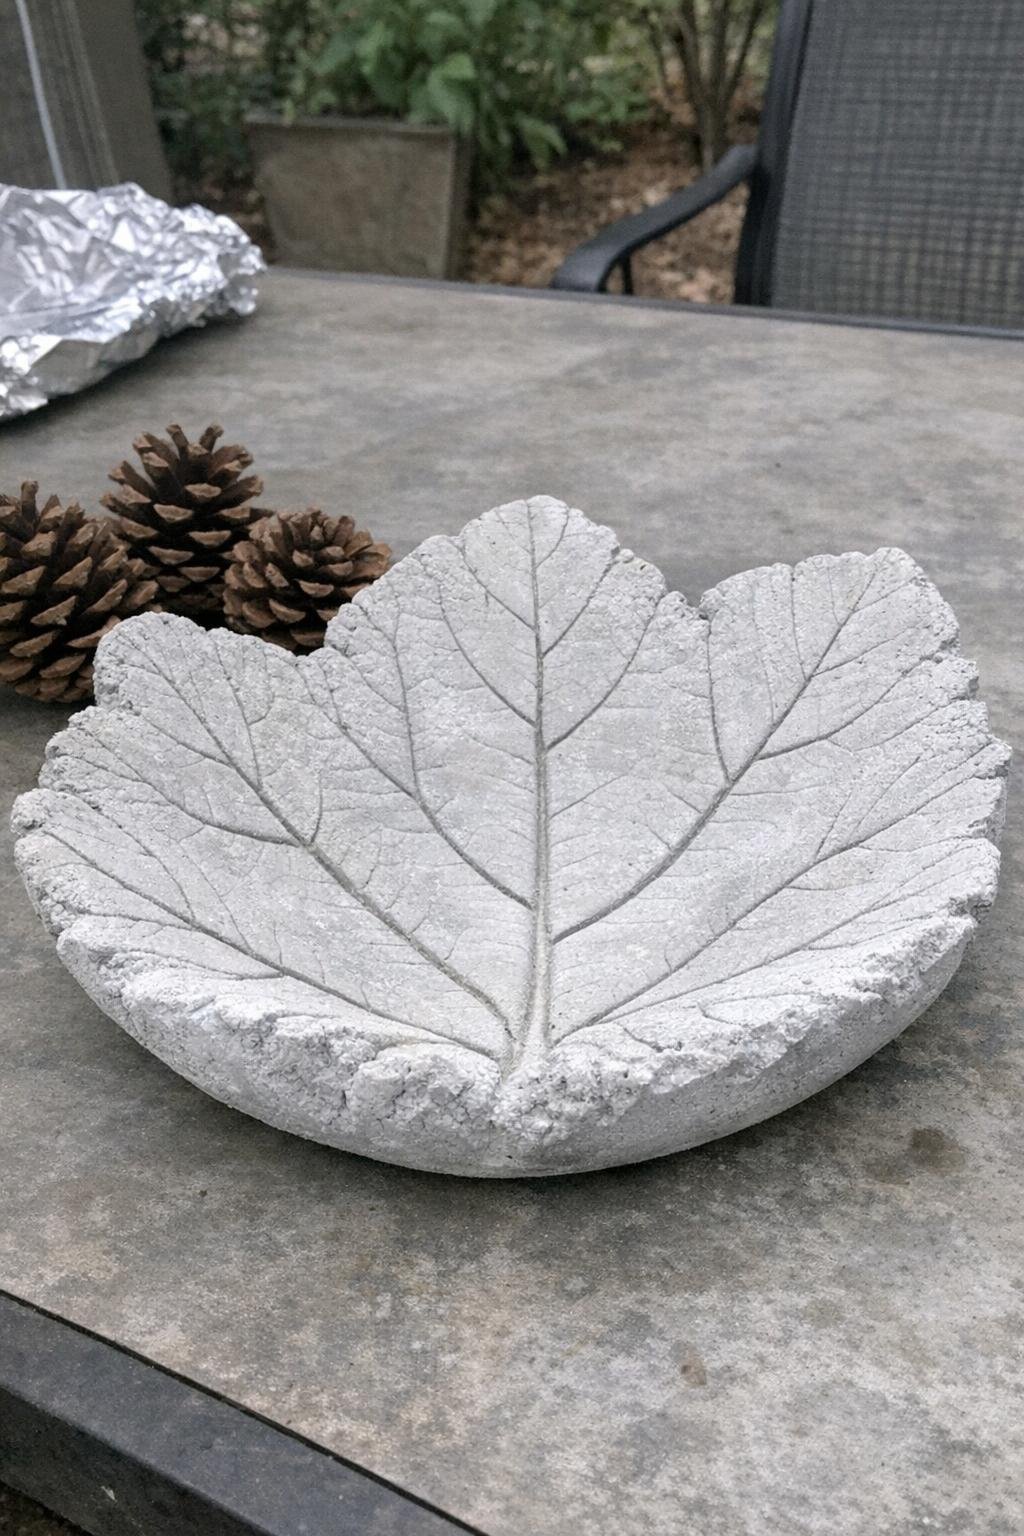
5. Frosted concrete leaf winter bowl
This project uses both aluminum foil and concrete. Gather 3 to 5 large leaves with bold veins such as rhubarb, hosta, or burdock, several sheets of foil to support them, 10 to 12 pounds of quick-setting concrete mix, water, disposable gloves, and white exterior paint or limewash for a frosted finish.
Lay each leaf vein-side up on foil mounded over an overturned bowl or bucket so it curves naturally, then mix the concrete and spread it over the leaf to about 3/4 inch thick, following the shape to form a bowl. Let the casting set 24 hours, peel away the leaf and foil, cure another 2 days, then dry-brush with white paint so the veining still shows; use it on an outdoor table filled with pine cones or ornaments. The crisp botanical texture with a pale frosted finish is what makes it look especially wintry and elegant.
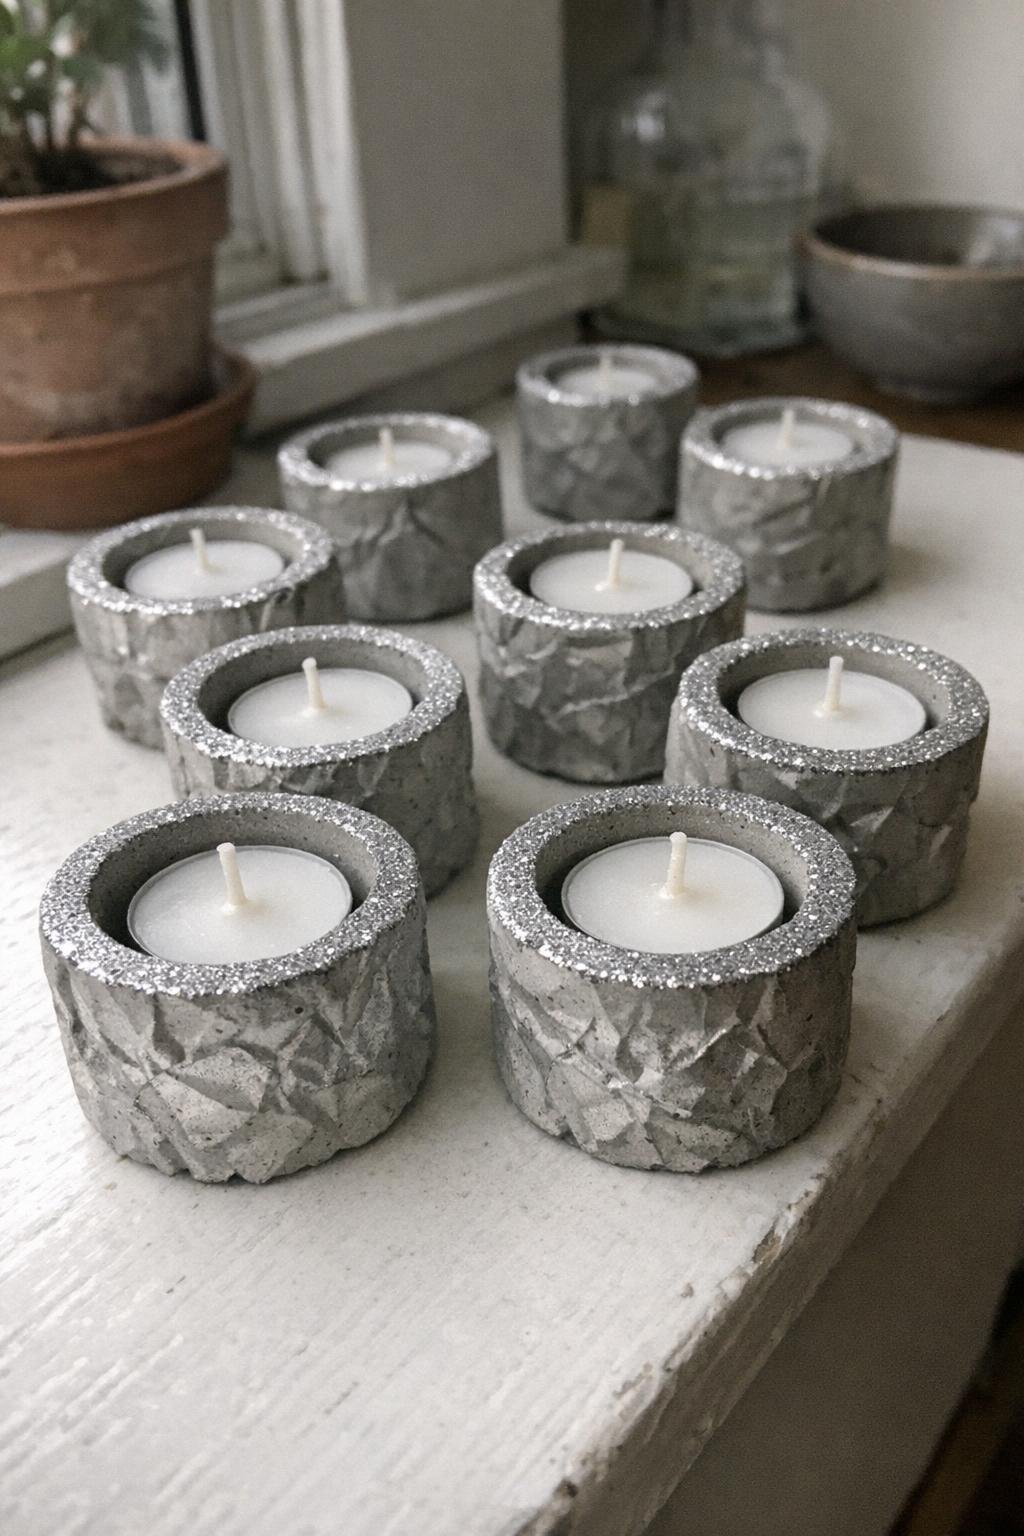
6. Foil-lined concrete tea light holders
This project uses both aluminum foil and concrete. You’ll need 1 standard muffin tin, 12 small squares of aluminum foil, 8 to 10 pounds of quick-setting concrete mix, water, 12 tealight candles or battery tea lights, and a clear sealer plus fine craft glitter for a subtle top coat.
Press foil into each muffin cup so the sides wrinkle attractively, fill each cup halfway to two-thirds with mixed concrete, and press a wrapped tealight into the center of each to make the candle recess. Remove the tealights after 2 to 3 hours before the concrete fully hardens, unmold at 24 hours, let cure another day, then brush on sealer and dust with a very light touch of glitter just on the top rim; they look best clustered in threes on a dining table or windowsill. The sparkle catches candlelight while the crinkled sides read like cast metal.
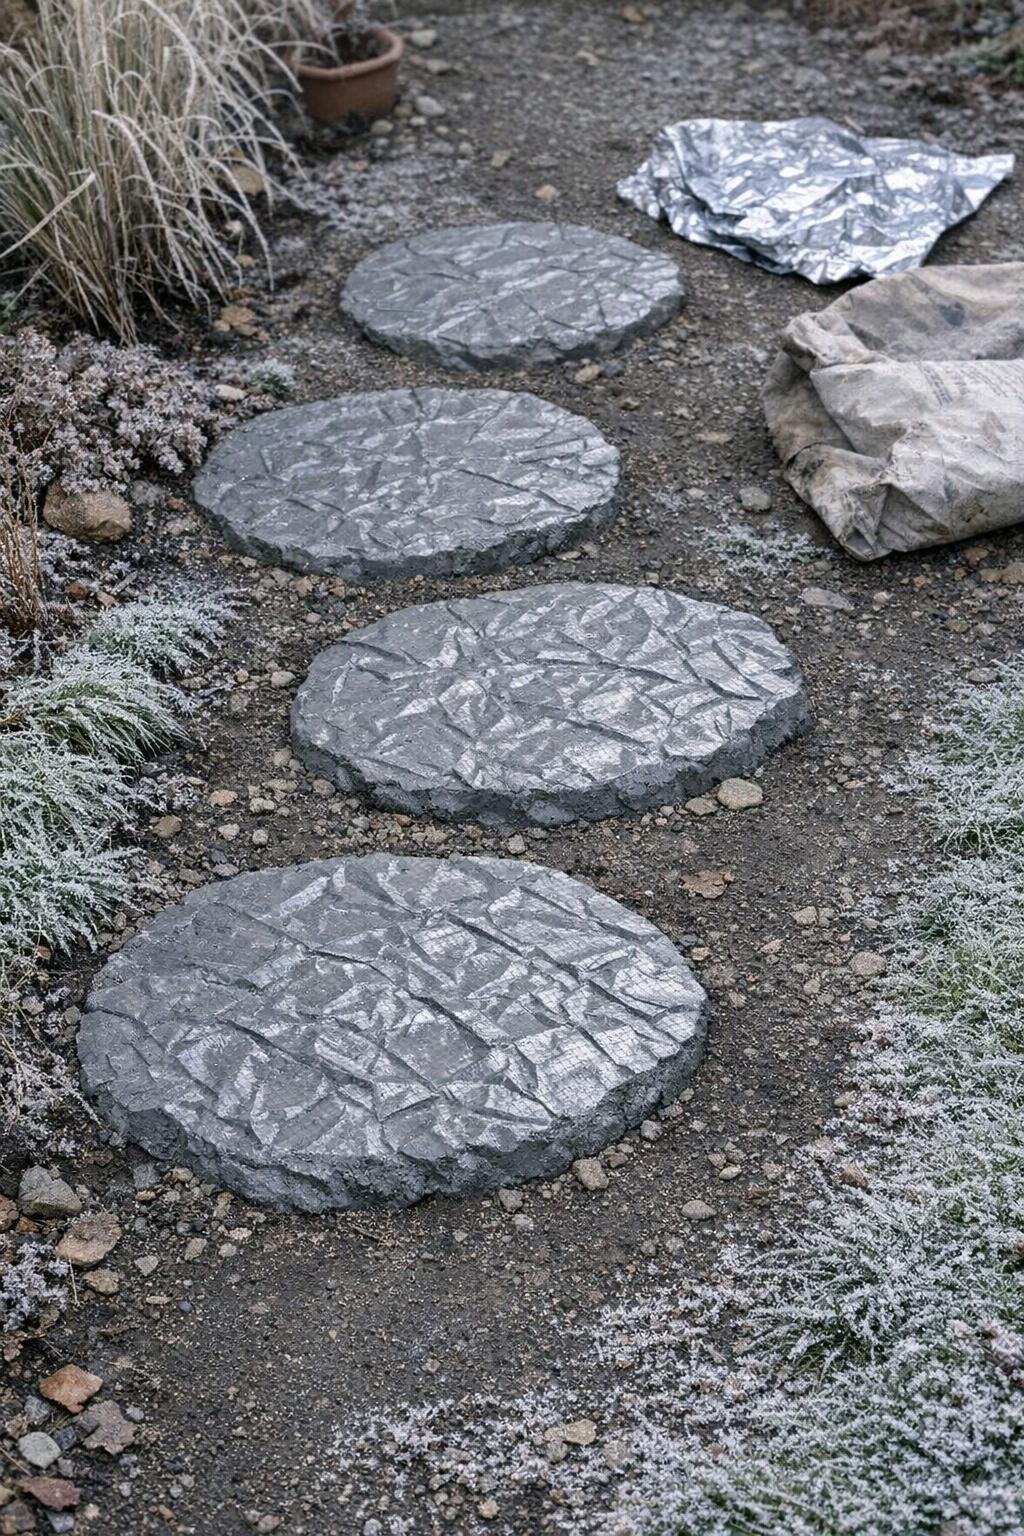
7. Textured Aluminum Foil Stepping Stones
This project uses both aluminum foil and concrete. Materials: 1 bag quick-setting concrete mix, large sheets of aluminum foil, water per the mix instructions, 1 cup of fine sand, and optional natural pigment, small stones, or tiles for variation.
Lay out foil sheets at least 2 by 2 feet, crumple each gently into a shallow bowl with random folds inside, then mix the concrete with water per the package and stir in 1 cup fine sand. Pour the mix 1 to 2 inches deep into each foil mold, let it set 24 to 48 hours, peel away the foil to reveal the textured stone, and bed the stones slightly into the earth along the path; if you like, tint the mix with natural pigment or press small stones or tiles into the wet surface before curing. What makes these so striking is the hammered, reflective-looking texture that turns an ordinary garden path into something sculptural, especially on a frosty morning.
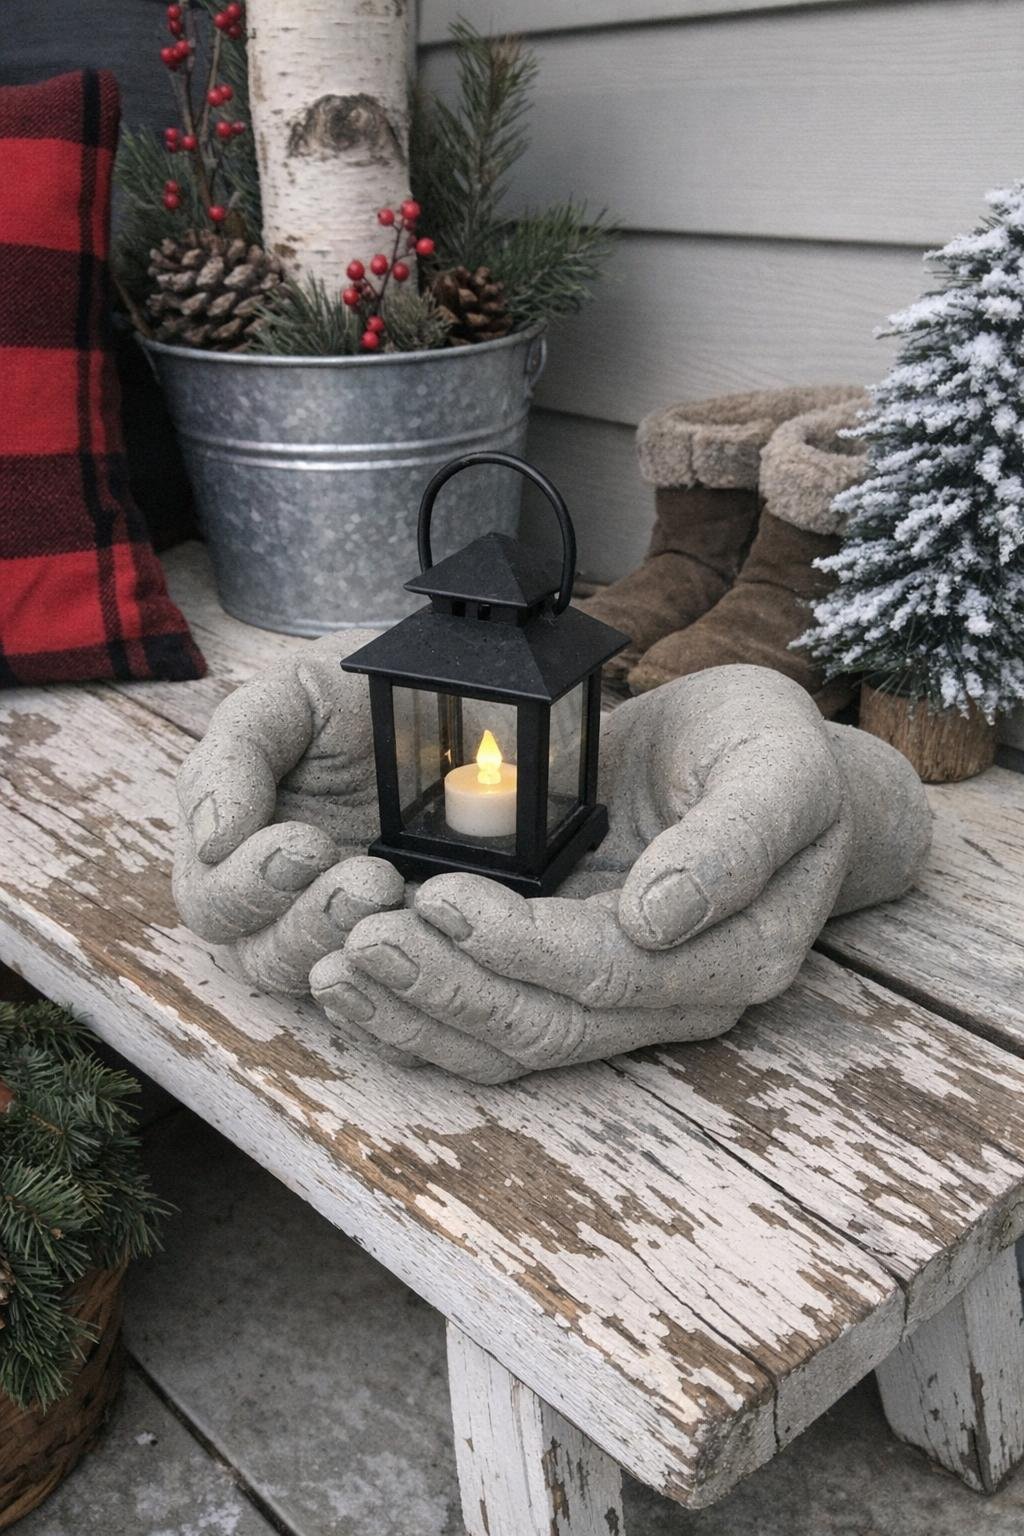
8. Sculpted concrete hands for lanterns or pots
This project uses concrete, and rubber gloves act as the mold. Gather 2 heavy rubber gloves, 8 to 10 pounds of quick-setting concrete mix, water, a bucket or tall container to support the gloves while curing, twine or clips, and a lantern or 4- to 6-inch pot for sizing the grip.
Mix the concrete until pourable but not watery, fill the gloves about three-quarters full, tap out air bubbles, and pose them around the lantern or pot shape you want by propping them in a bucket with towels or sand. Let them set 24 hours, cut away the gloves, cure the hands another 2 days, and place them on a porch bench, side table, or by the front door holding a candle lantern or ivy pot. Their realism and weight make them look like a found art piece, which is exactly why they photograph so well.
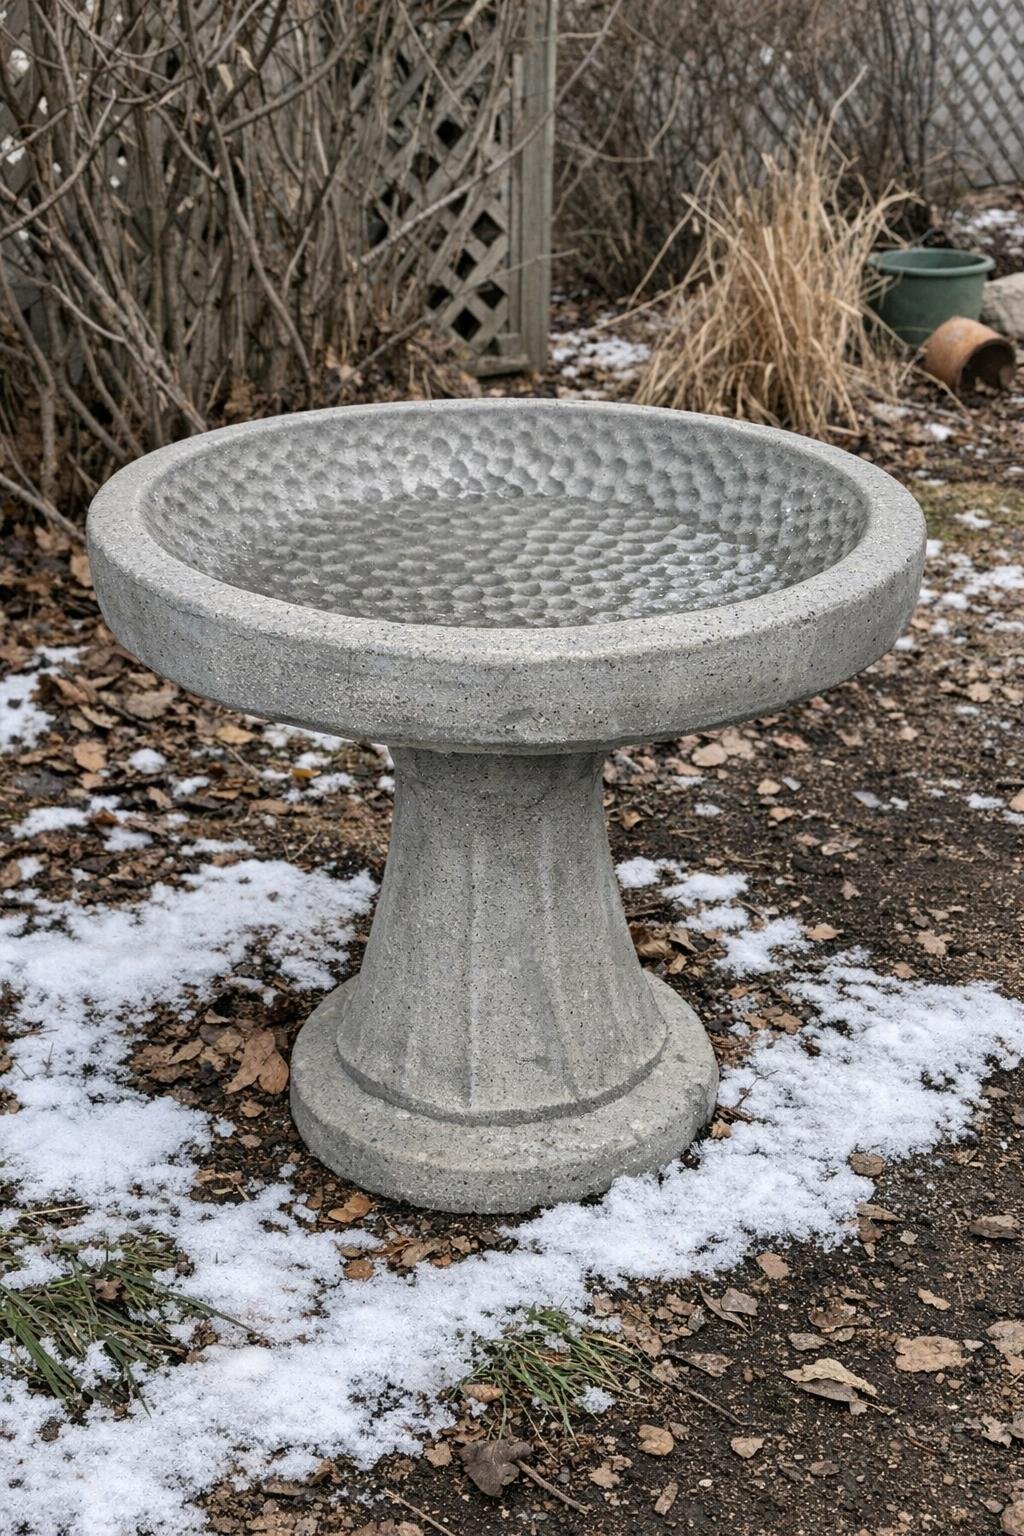
9. Hammered-look concrete birdbath
This project uses both aluminum foil and concrete. You’ll need 1 large shallow basin or wide bowl mold, a second smaller bowl to shape the interior if needed, plenty of crumpled foil, 25 to 35 pounds of quick-setting concrete mix, water, and a sturdy pedestal base such as stacked blocks or a salvaged stand.
Line the outer mold generously with foil to create that hammered pattern, pour in 2 to 3 inches of mixed concrete, and press a second bowl into the center to form the basin. Let it cure 24 to 36 hours, unmold carefully, allow another 3 to 5 days for strength, then mount it on the base in a sheltered garden bed or near a window where you can see winter birds. The silvery, dimpled texture is what gives it presence even when the basin is empty or edged with ice.
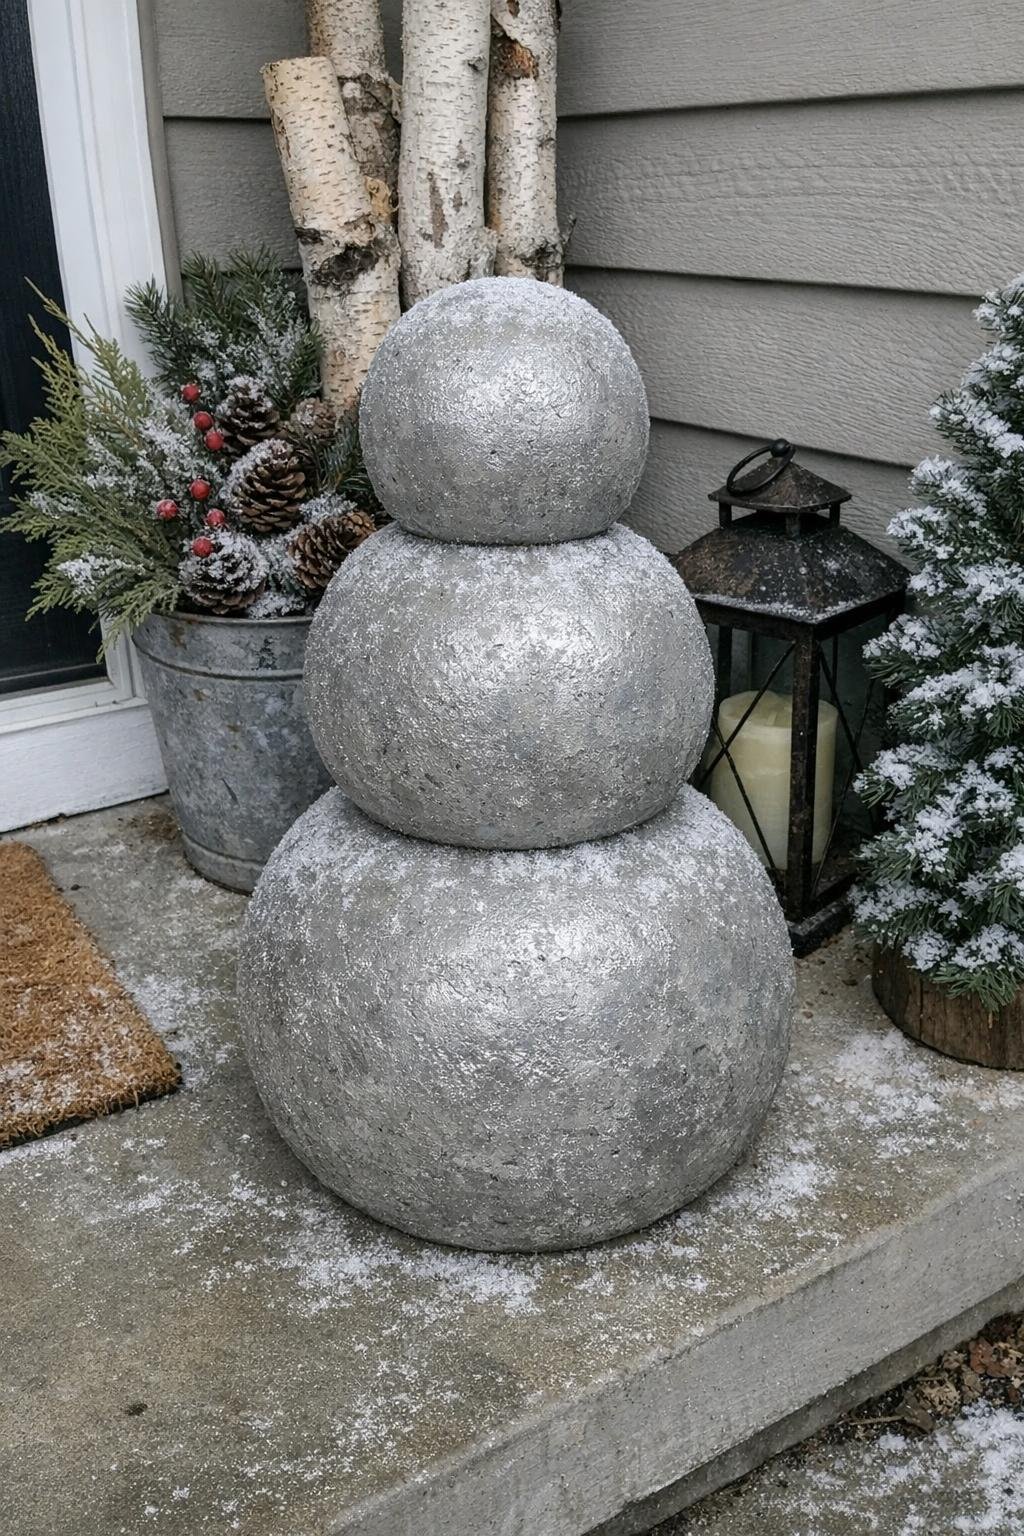
10. Concrete snowman porch spheres
This project uses both aluminum foil and concrete. Gather 3 mixing bowls in graduated sizes for the head, middle, and base, aluminum foil to line them, 35 to 45 pounds of quick-setting concrete mix, water, construction adhesive for stacking after curing, and optional pebble or metal details for eyes and buttons.
Line each bowl with foil, pour concrete 2 to 3 inches thick for each half-sphere or make fuller forms depending on your mold setup, and let the pieces cure 24 hours before unmolding. Cure them another 2 to 3 days, stack and adhere them on the porch, and let the winter weather do the rest; if you like, add a scarf or a branch beside them rather than embedding anything delicate. Their sheer scale and the way frost settles on the rounded concrete is what makes them look magical outdoors.
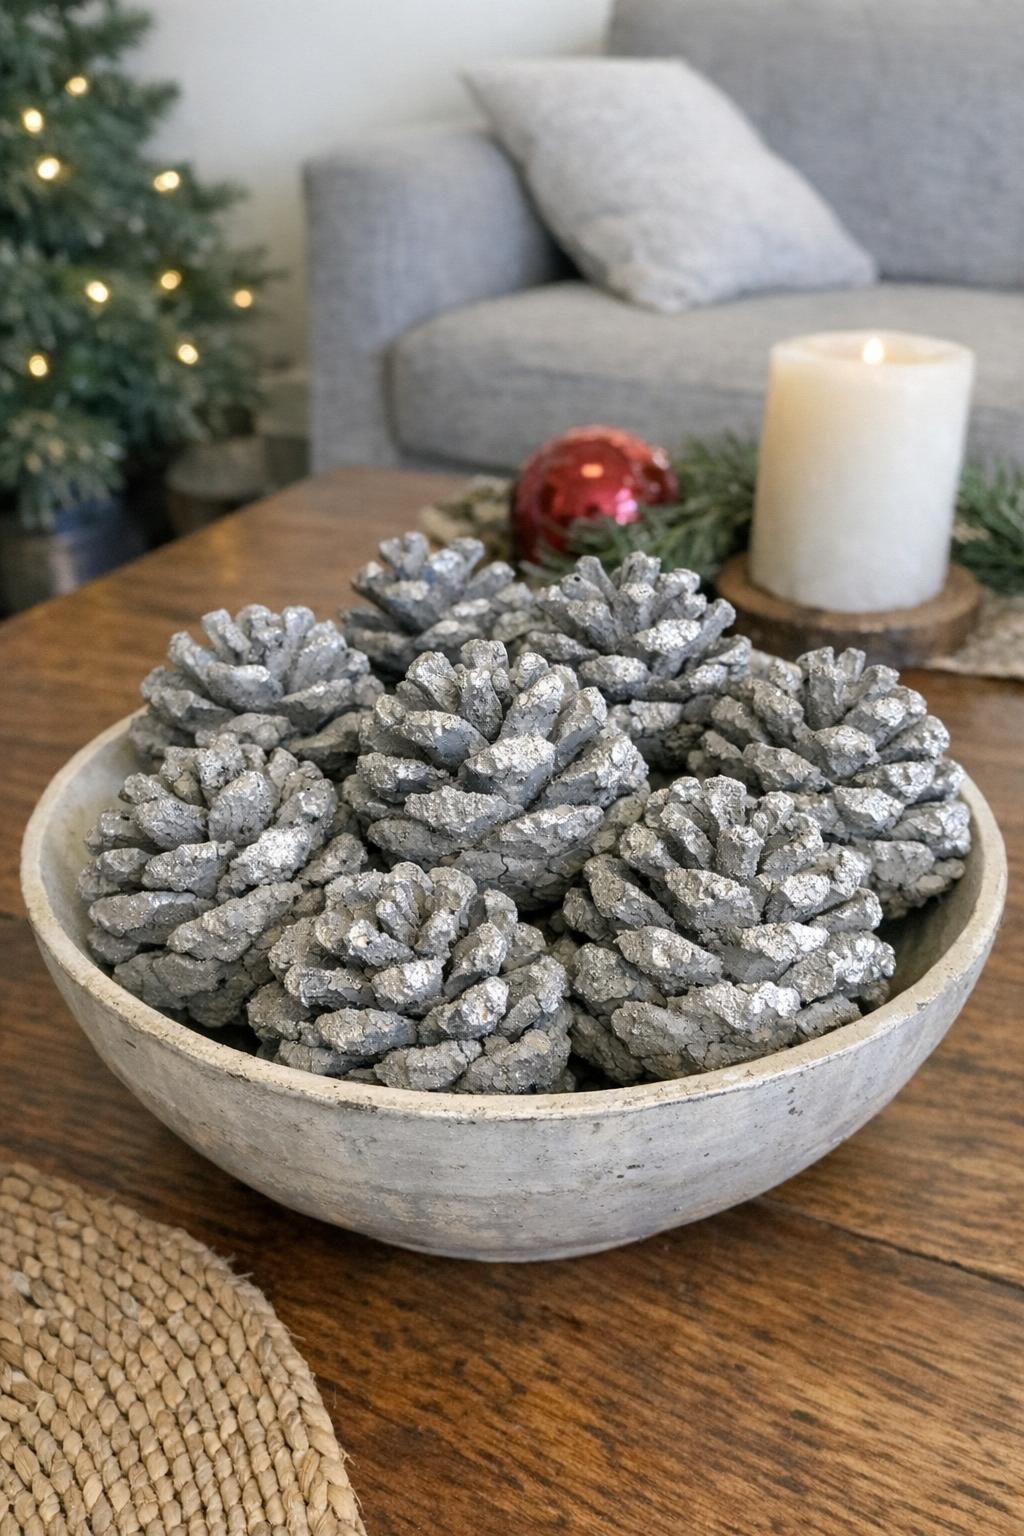
11. Concrete-dipped pine cone silver-stone centerpiece
This project uses both aluminum foil and concrete. You’ll need 12 to 20 pine cones, small bits of foil to wrap or accent them, 6 to 8 pounds of quick-setting concrete mix, water, a shallow tub, and 1 decorative bowl or tray for arranging the finished pieces.
Wrap each pine cone loosely with a bit of foil so some scales stay pronounced, mix the concrete to a thin dipping consistency, and dip or spoon-coat each cone lightly rather than burying the details. Let them dry on foil for 24 hours, cure another day, and heap them in a bowl on the coffee table, console, or holiday buffet. The contrast between natural pine cone structure and cool stone-gray coating makes them look like little winter artifacts.
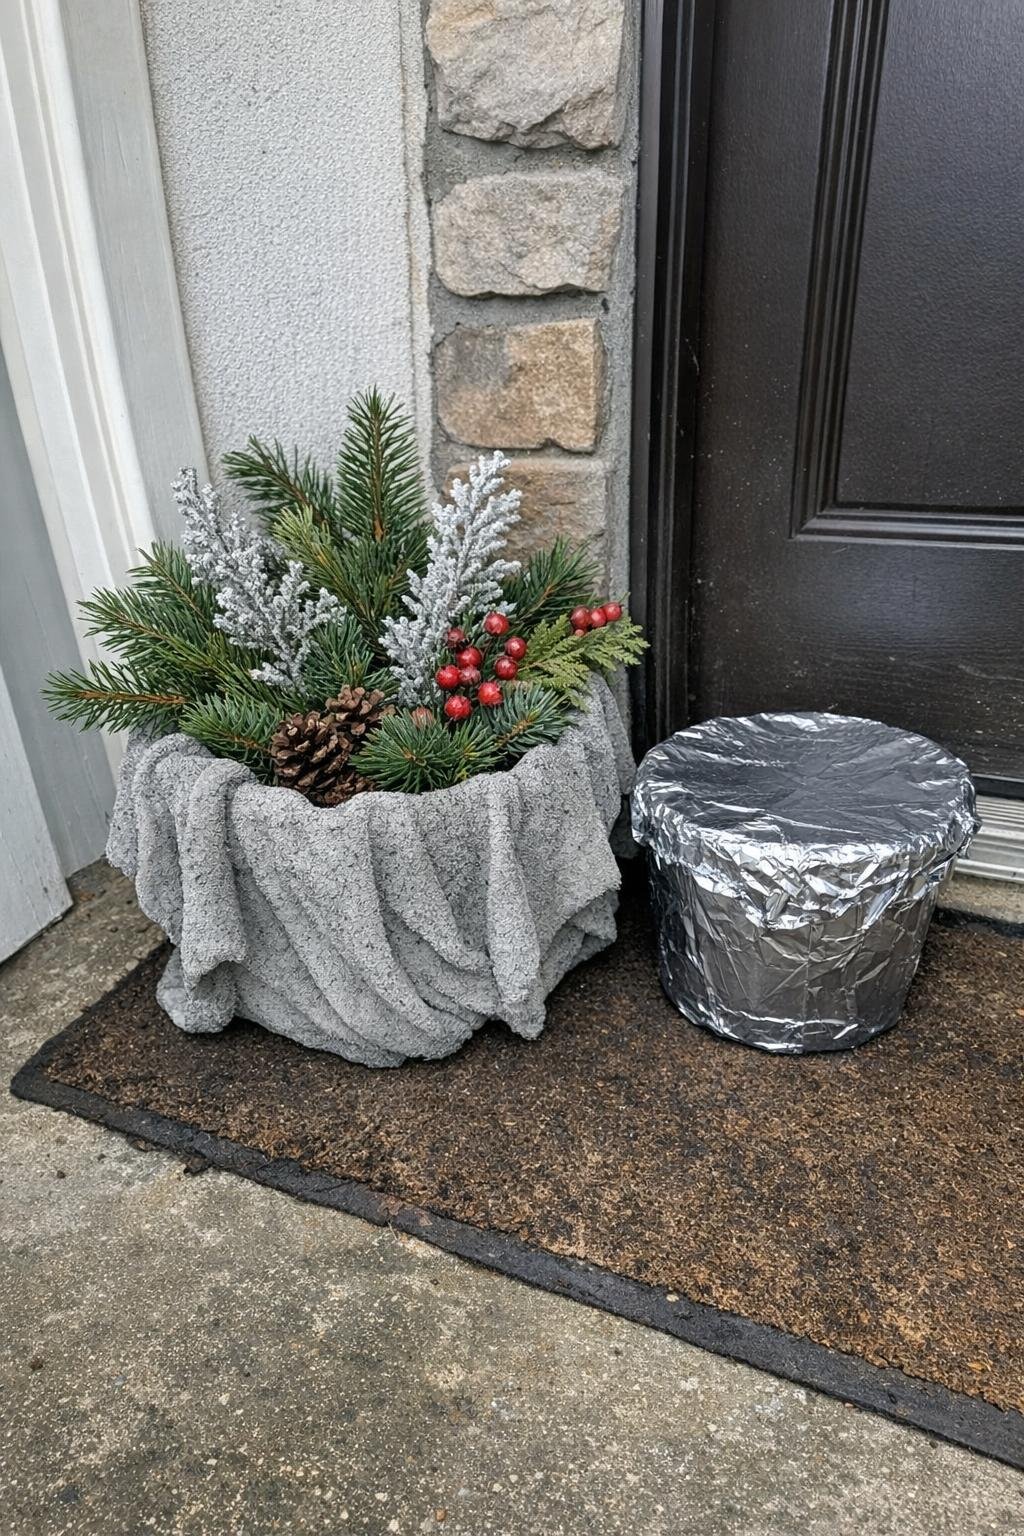
12. Draped concrete towel planter
This project uses both aluminum foil and concrete. Gather 1 old bath towel or thick hand towel, 15 to 20 pounds of quick-setting concrete mix, water, 1 bucket turned upside down, aluminum foil to cover the bucket, and a plastic drop cloth for the floor.
Cover the upside-down bucket with foil so the towel won’t stick, mix the concrete to a loose slurry, saturate the towel fully, and drape it over the bucket so the folds fall naturally. Let it harden 24 hours, lift it off, trim ragged edges if needed, and cure it 2 to 3 more days before filling with gravel and a potted evergreen or hellebore near the front door. The frozen-fabric folds are what make this one look dramatic—as if a cloth planter turned to stone mid-motion.
13. Foil-lined concrete door numbers panel
This project uses both aluminum foil and concrete. You’ll need 1 rectangular cake pan, aluminum foil to line it, 12 to 15 pounds of quick-setting concrete mix, water, bottle caps or marbles for decoration, hanging hardware for the back, and a mounting spot by the front door or gate.
Line the cake pan with foil, pour in 1 1/2 to 2 inches of mixed concrete, and press bottle caps or marbles into the surface in a simple border pattern rather than relying on any lettering mold. Set hanging hardware into the back while the concrete is still wet if your system allows, let it cure 24 to 36 hours, unmold, cure another few days, and mount it vertically in a sheltered spot. The foil-lined surface gives the slab a subtly rippled, cast-metal look that makes a plain numbers panel feel far more custom.
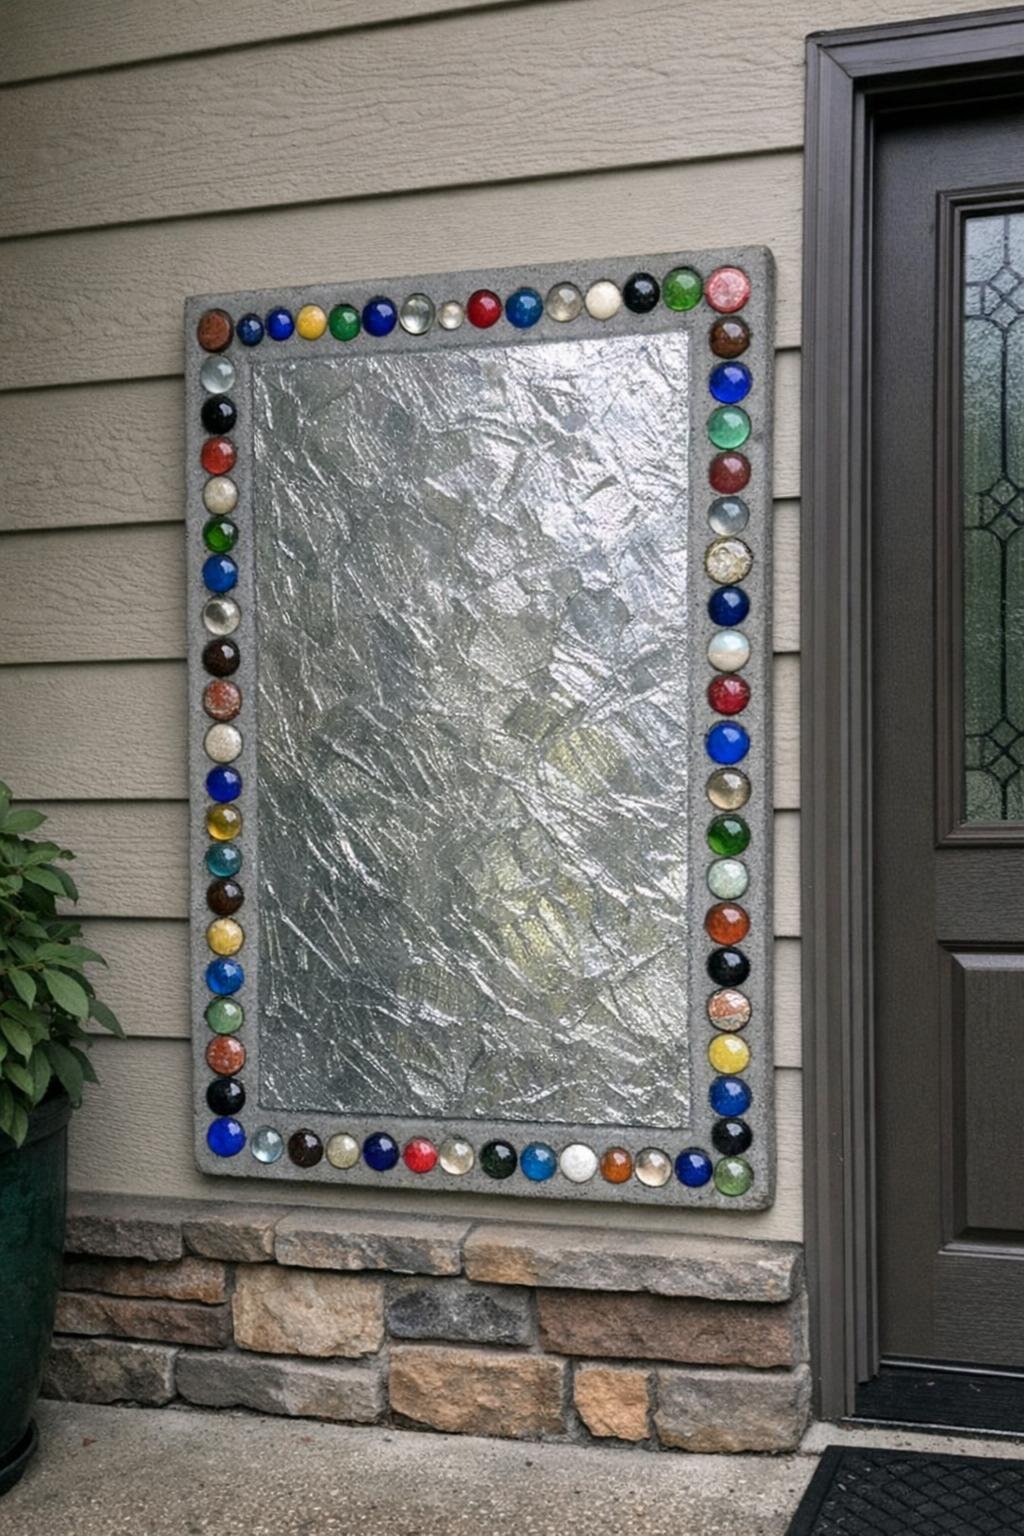
14. Stone-look evergreen impression wreath
This project uses both aluminum foil and concrete. Gather 1 round wreath form or two nested bowls to create the ring, aluminum foil to line the mold, 15 to 18 pounds of quick-setting concrete mix, water, and a bundle of fresh evergreen sprigs such as cedar, fir, or spruce.
Line the wreath form with foil, pour in concrete about 2 inches thick, and press evergreen sprigs gently into the wet top so the needles leave crisp impressions without sinking too deep. Remove the sprigs after 2 to 4 hours, let the ring cure 24 hours, unmold, and display it flat on an outdoor table or upright on a sturdy easel on the porch. The botanical impressions against the heavy stone form make it look like winter foliage preserved in time.
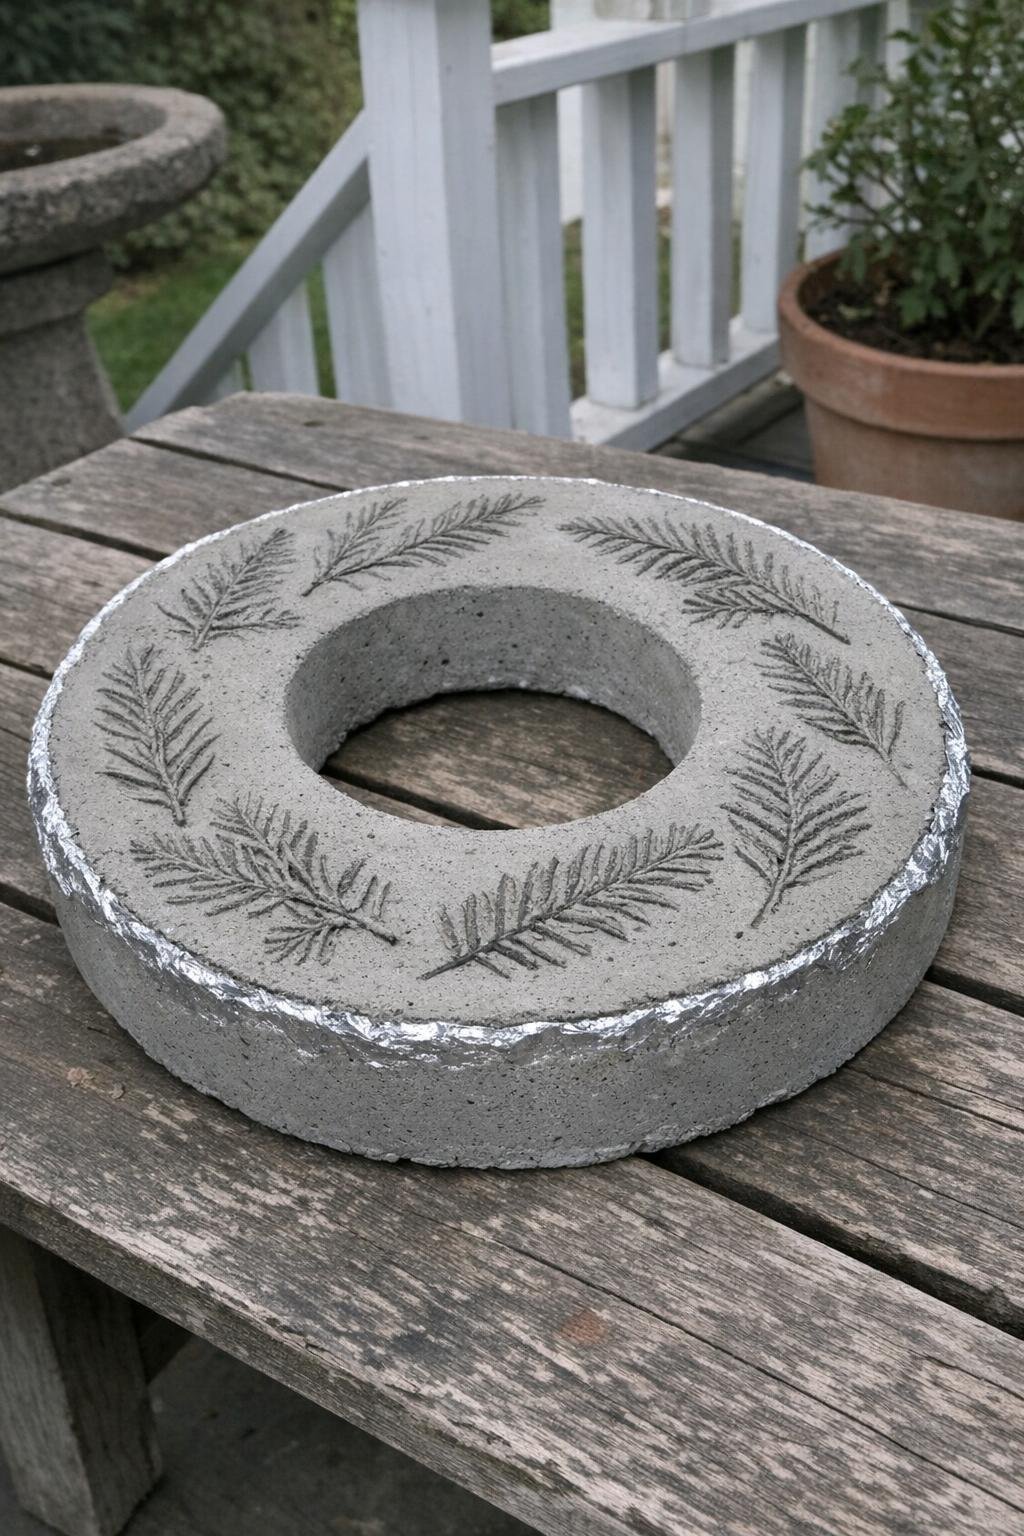
15. Foil-molded concrete candle pillars
This project uses both aluminum foil and concrete. You’ll need several cardboard tubes or improvised foil cylinders in 3 heights such as 6, 8, and 10 inches, extra foil for lining, 15 pounds of quick-setting concrete mix, water, and pillar candles or battery candles to size the top recesses.
Shape or line the molds with foil for a deliberately crinkled surface, pour the concrete into each cylinder, and press a wrapped candle into the center top of each one to create a shallow seat. Remove the candles after a few hours, let the pillars cure 24 hours, unmold, and line them down the center of your Christmas table on a runner with cedar clippings. Their graduated heights and gleaming, wrinkled texture give them the presence of expensive cast-stone decor.
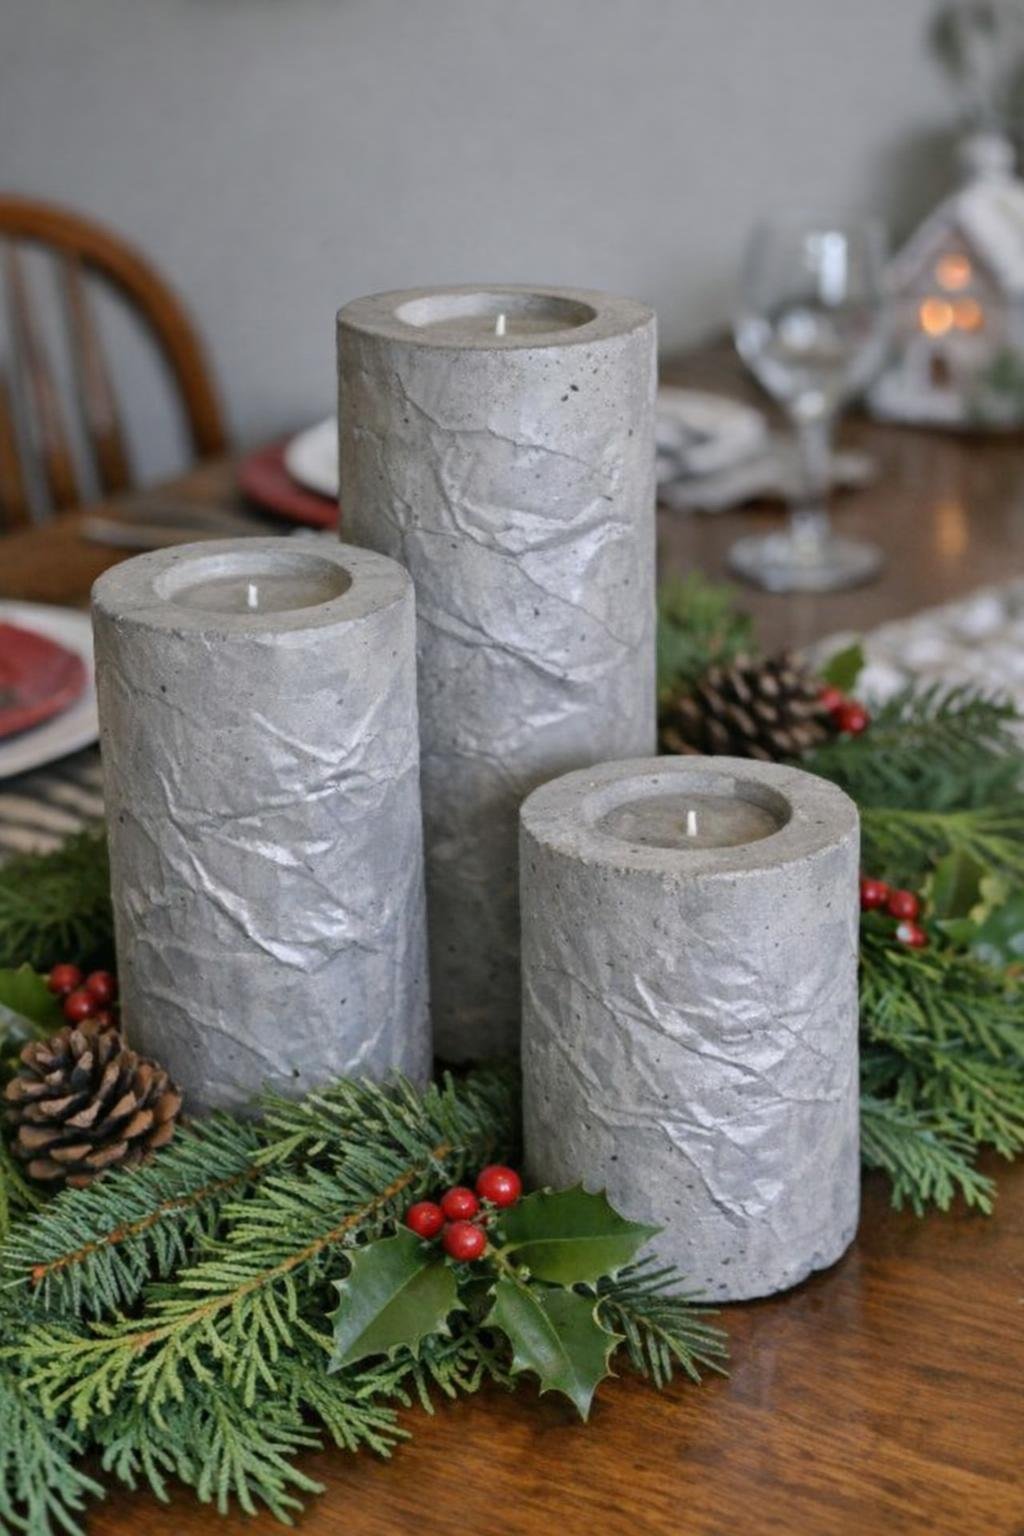
16. Concrete garden gnome from a foil-wrapped sock mold
This project uses both aluminum foil and concrete. Gather 1 long sock or stocking, aluminum foil for shaping the hat and body contours, 8 to 12 pounds of quick-setting concrete mix, water, exterior paint in red and white, and a flat stone or board for the base.
Stuff and shape the sock around wads of foil to create a nose, rounded body, and pointed hat form, then coat or fill the mold with concrete depending on your setup until it holds its shape. Let it cure 24 hours, refine any edges, cure another 2 days, and paint the hat red while keeping the body mostly stone-gray; tuck it beside a porch pot, on a stair, or in a garden bed. The whimsical shape paired with the rough concrete surface makes it look playful without becoming too precious.
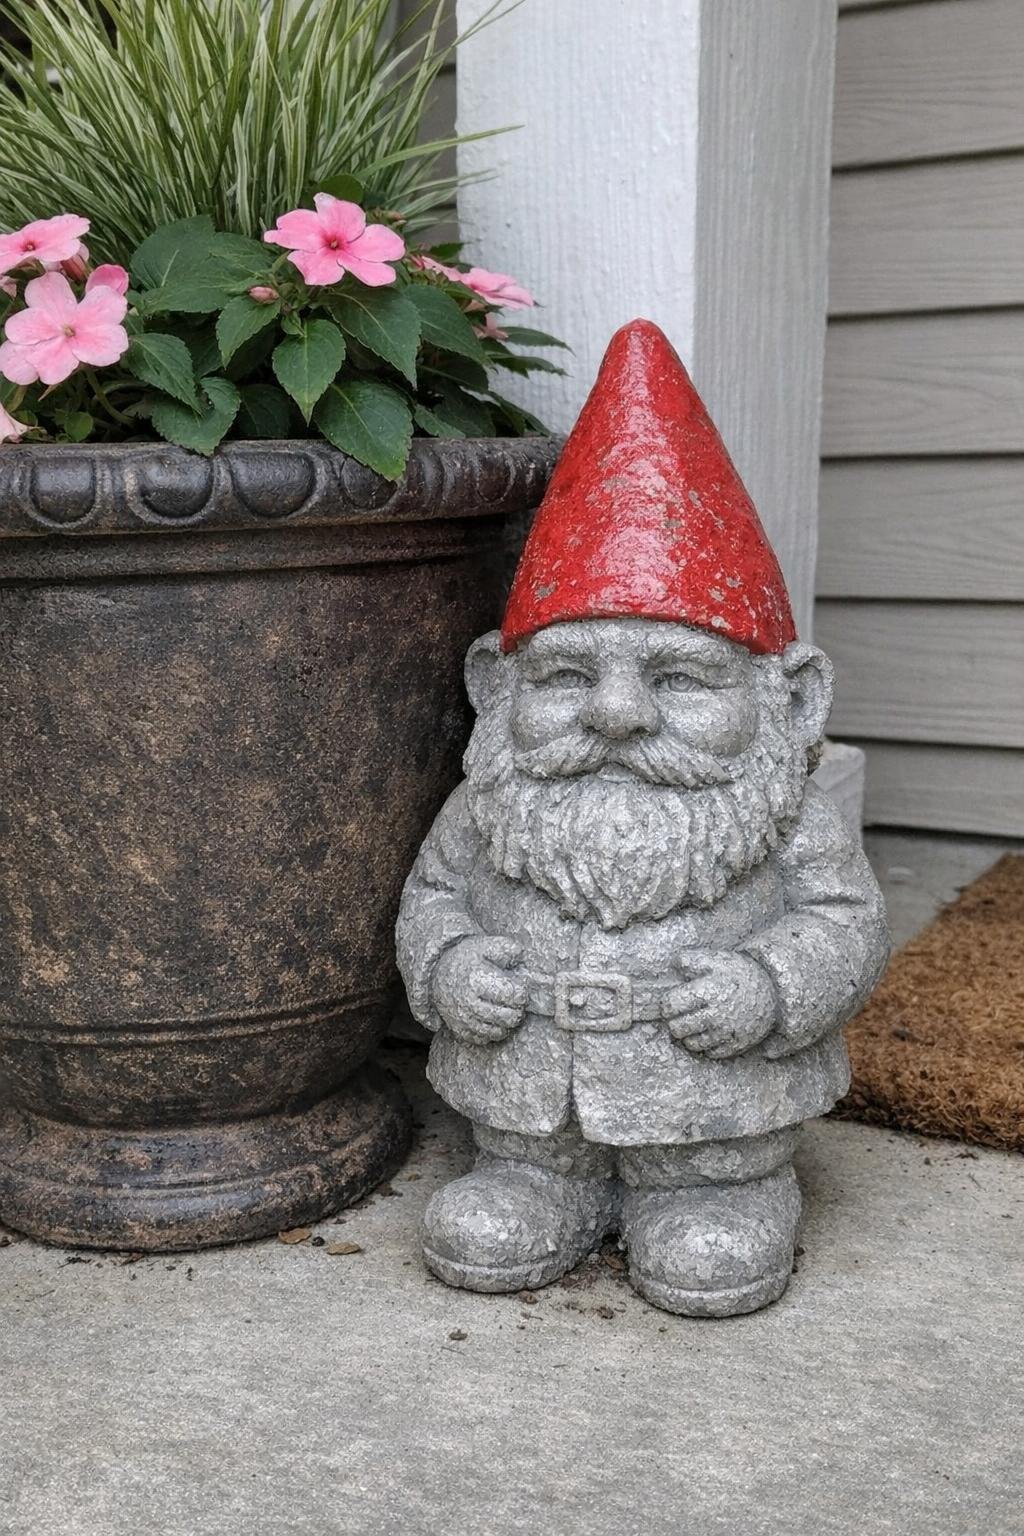
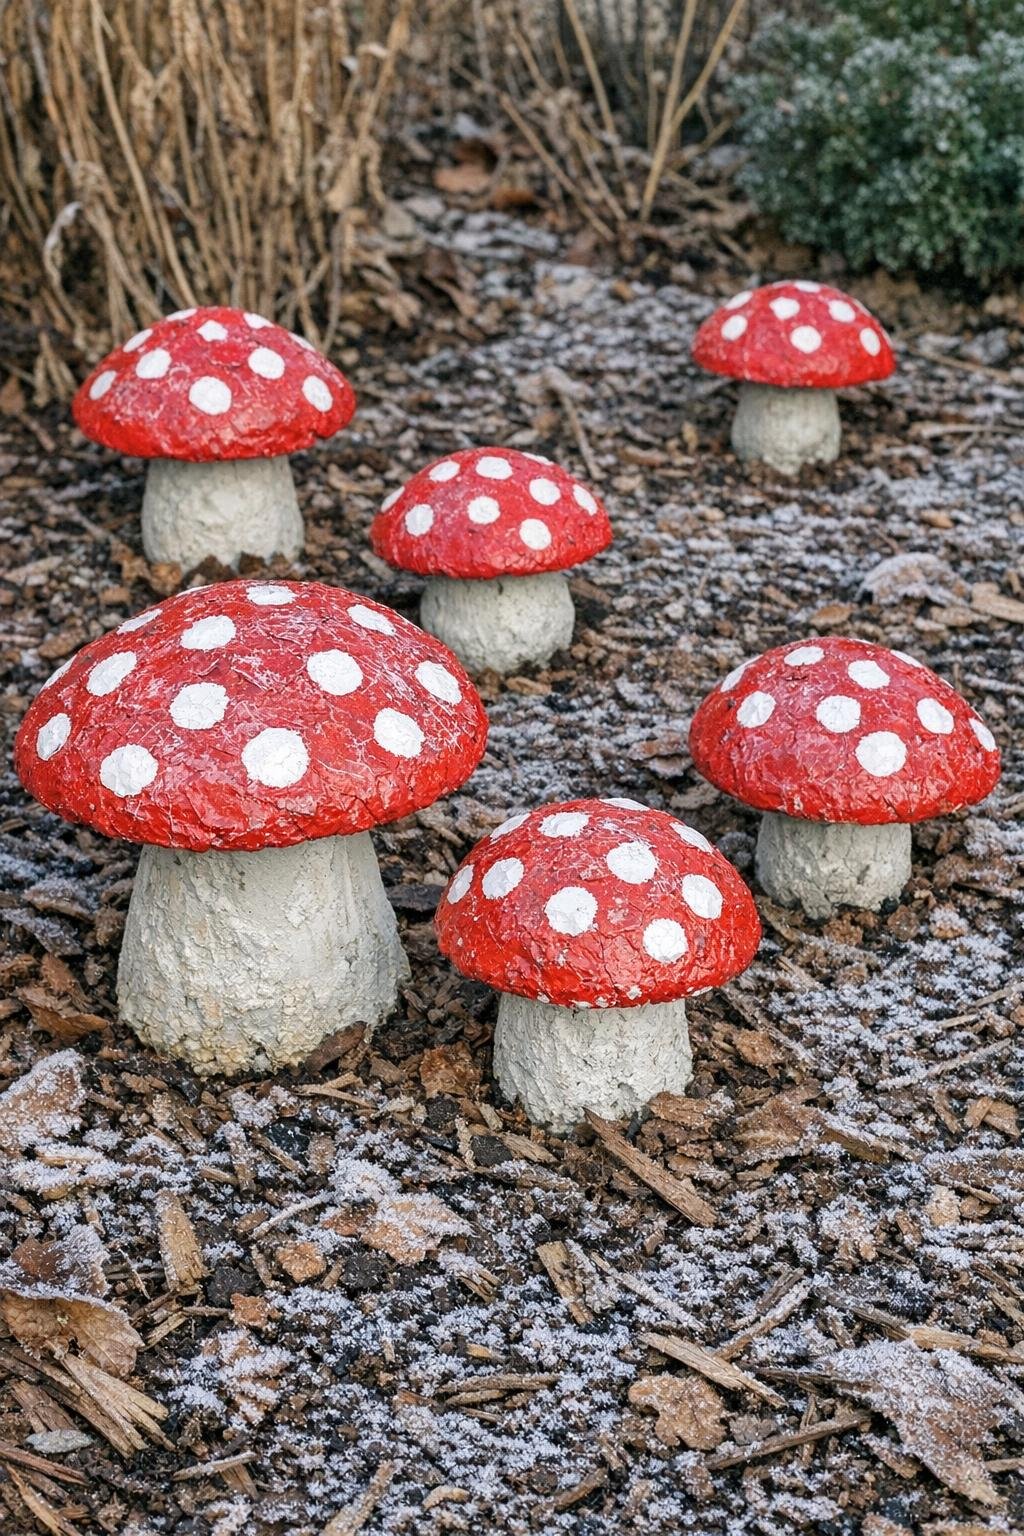
17. Red-and-white concrete garden mushrooms
This project uses both aluminum foil and concrete. You’ll need 2 to 6 small bowls for caps, 2 to 6 cups or tubes for stems, aluminum foil to line the cap molds, 15 to 20 pounds of quick-setting concrete mix, water, and red and white exterior paint.
Line the bowls with foil, pour the concrete for the caps, cast the stems separately in cups or tubes, and let both parts cure 24 hours before unmolding. After 2 to 3 more days of curing, adhere the stems to the caps, paint the tops red with white spots, and nest them in mulch or under shrubs where a little snow can gather around them. The bright toadstool colors against wintry concrete give the garden a cheerful, storybook quality.
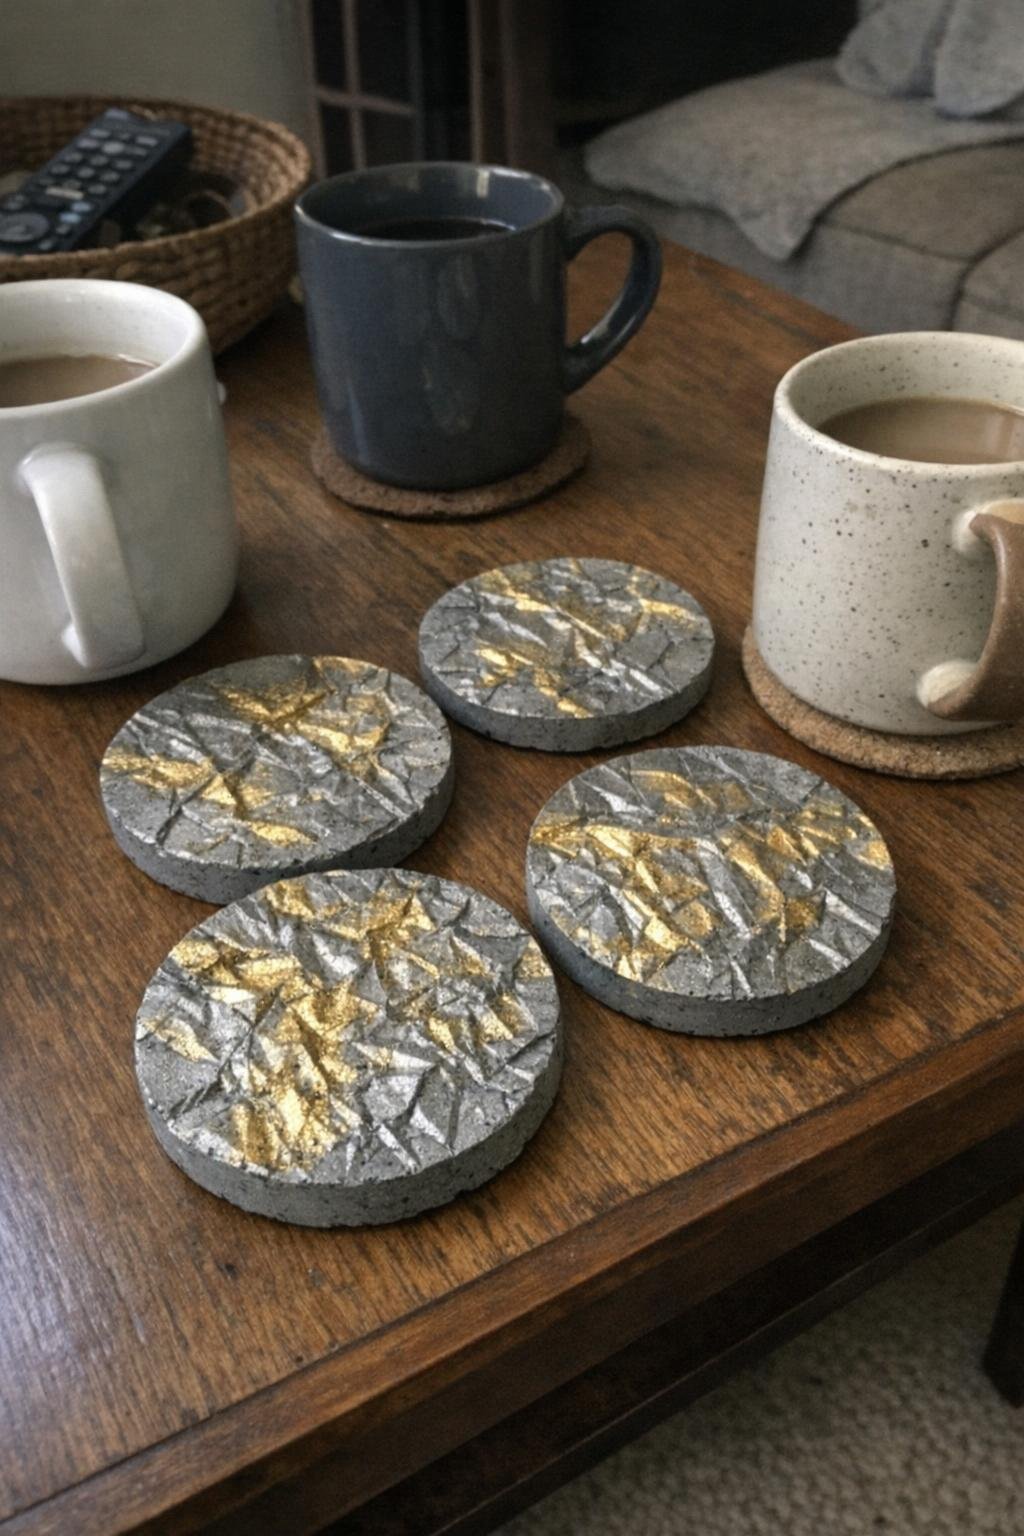
18. Foil-crinkled concrete coasters with gold leaf
This project uses both aluminum foil and concrete. Gather 4 to 8 small saucers, jar lids, or coaster molds, aluminum foil for lining, 4 to 6 pounds of quick-setting concrete mix, water, adhesive sizing, and a little gold leaf or gold wax to rub into the texture.
Line each mold with tightly crinkled foil, pour in 1/2 to 3/4 inch of concrete, and let the coasters set 24 hours before peeling away the foil. Cure them another day, sand the bottoms lightly if needed, and rub gold leaf or gold wax over the raised areas only; I like these stacked on a bar cart or set beneath mugs on the coffee table through the holidays. The metallic highlights catch on every ridge, which makes these tiny pieces look far more glamorous than their size suggests.
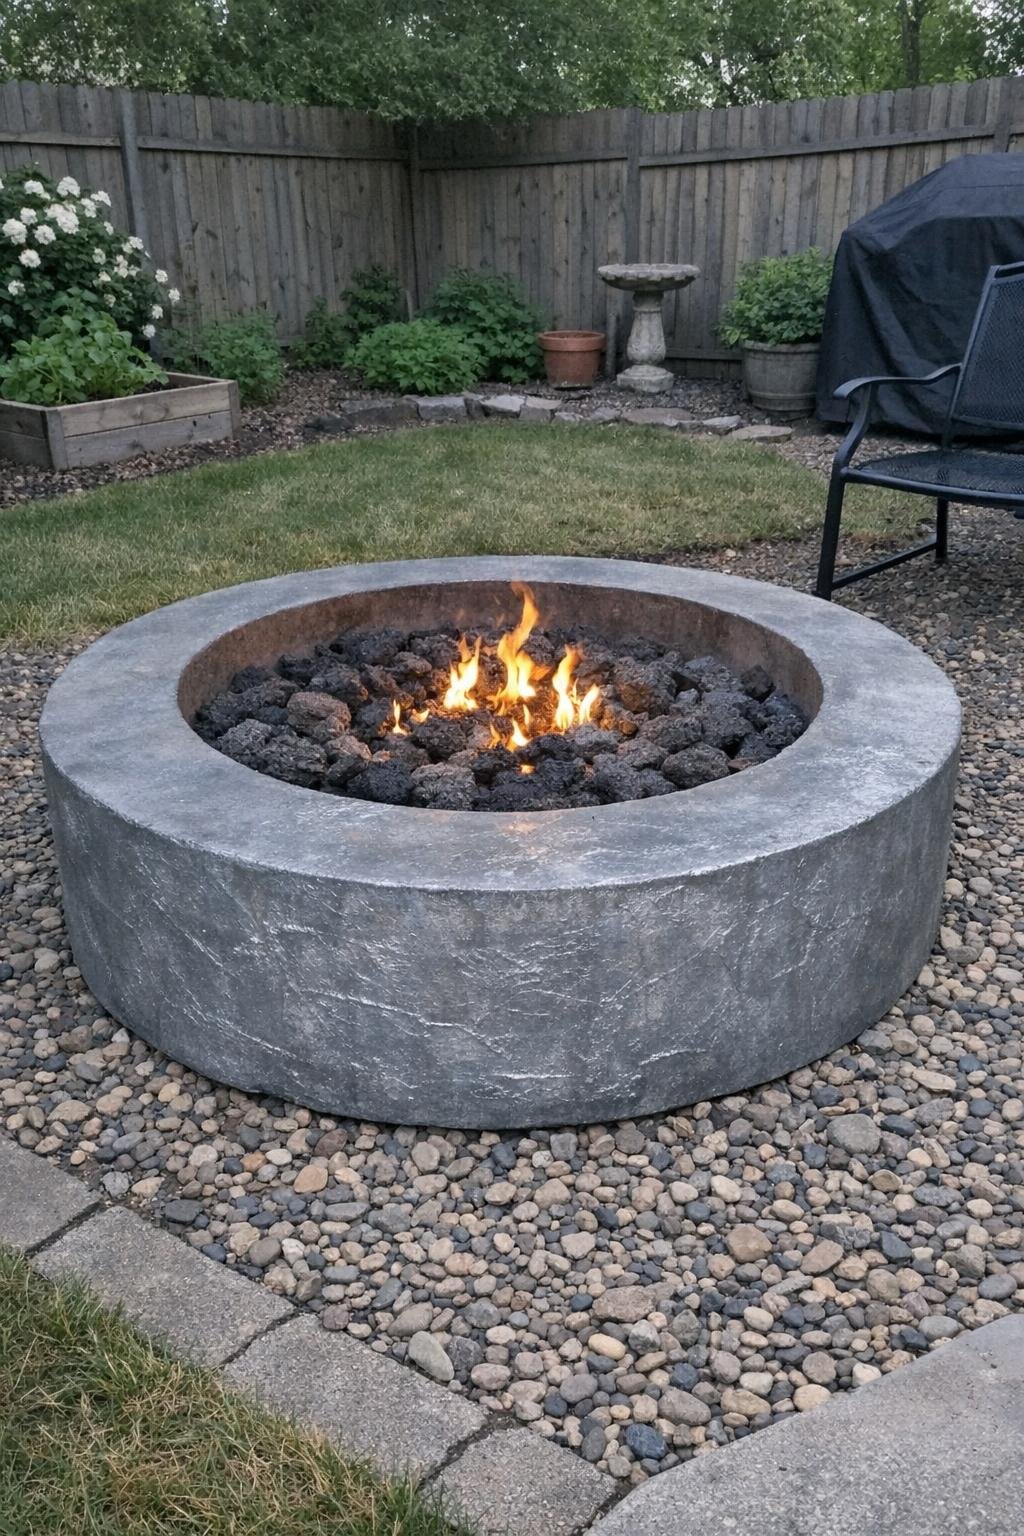
19. Foil-textured concrete fire pit ring
This project uses both aluminum foil and concrete. You’ll need a circular mold setup sized for a small garden fire feature, plenty of aluminum foil to texture the inside faces, 2 to 4 bags of concrete mix depending on diameter, water, a level base of compacted gravel, and flame-safe installation space well away from structures.
Build or set your ring mold on the gravel base, line the visible inner or outer faces with foil for texture, and pack in the concrete to a ring thickness of roughly 3 to 4 inches and a height of 10 to 14 inches. Let it cure at least 48 hours before unmolding and a full 5 to 7 days before light use, then place it in the yard with gravel or pavers around it for safety. At night, the reflective wrinkles and rough aggregate catch the firelight in a way that makes the whole ring shimmer.
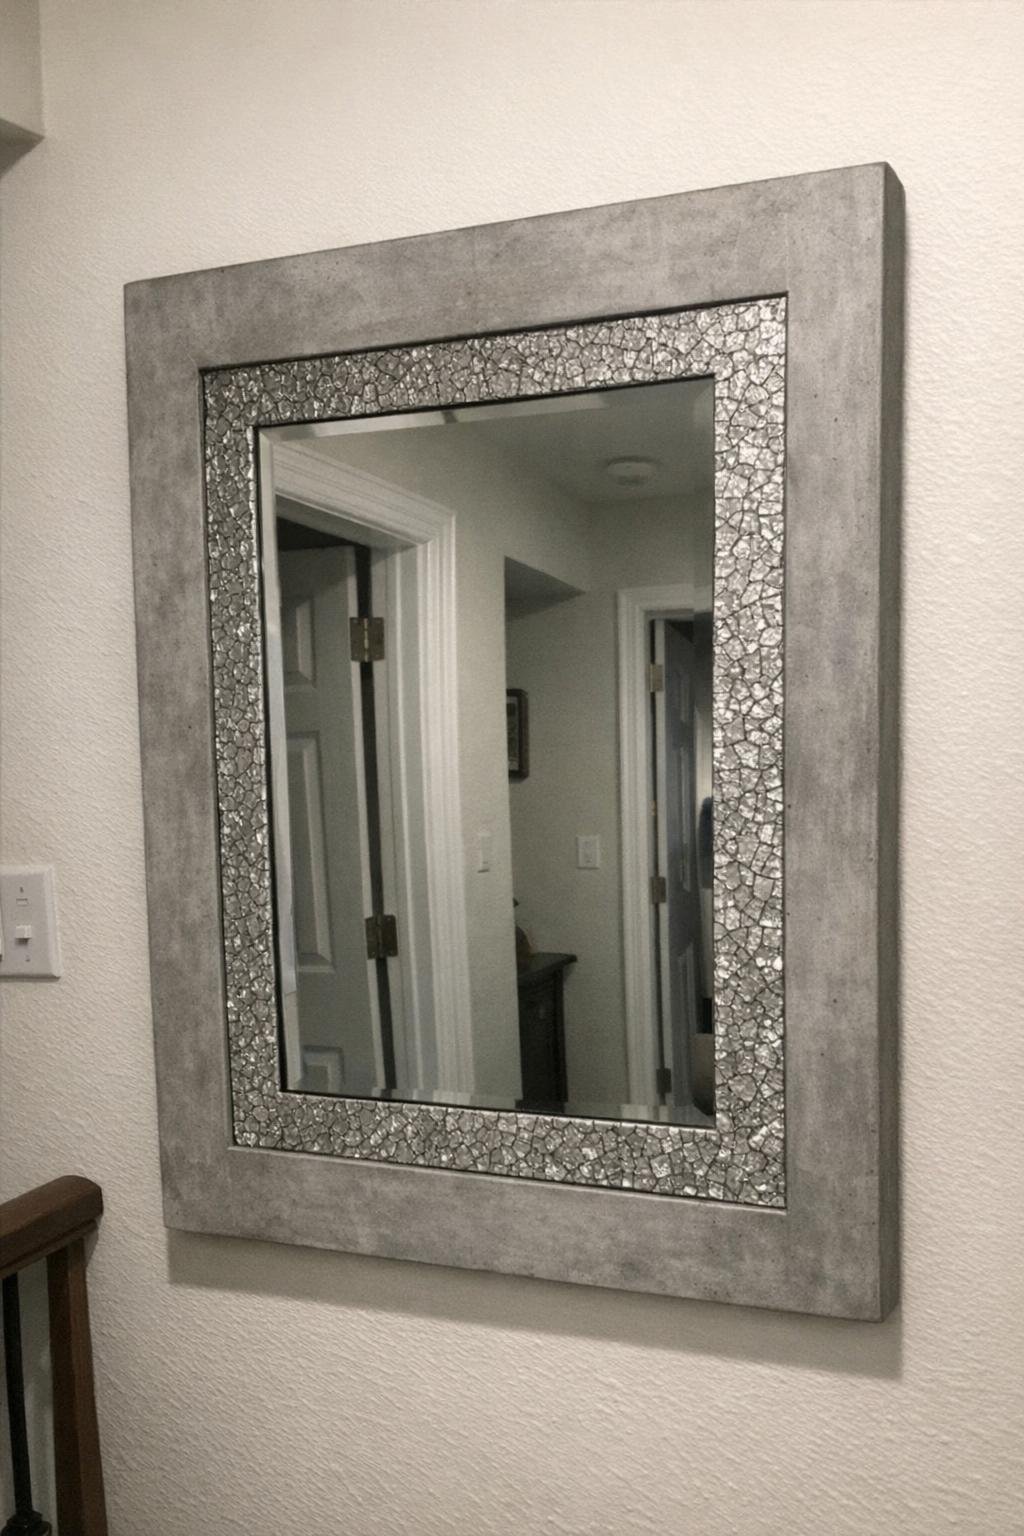
20. Concrete and foil crackle mirror frame
This project uses both aluminum foil and concrete. Gather 1 plain rectangular or round mirror, strips of rigid backing board for a frame base, aluminum foil for the crackle border, 10 to 15 pounds of quick-setting concrete mix or a concrete patch blend for a thinner coat, water, strong adhesive, and wall hardware.
Build a frame base around the mirror, crumple and attach foil over the border area, then spread on a 1/2- to 3/4-inch layer of concrete so the peaks and valleys of the foil still show through. Let the frame cure flat for 24 hours, reinforce and mount the hardware on the back, allow another 2 to 3 days before hanging, and place it in a hallway where side light can skim the surface. That crushed-foil crackle border is what makes the piece so arresting—it turns a basic mirror into something with real architectural presence.
If you ask me, the best Christmas DIYs are the ones that still look good long after the tree comes down, and these absolutely do. Pick one for the table, one for the porch, and one for the garden path, and you’ll have a house that feels festive now and beautifully handmade all winter.