
There’s something deeply satisfying about rescuing a handful of mismatched things and turning them into one showpiece that looks far more special than the sum of its parts. I’ve always had a soft spot for the odd glass or plate that gets left behind after a set breaks up over the years, and this project is exactly the kind of make-do magic I love most. With just 10 wine glasses, a little patience, and a few simple trimmings, you can create a holiday decoration that looks wonderfully grand without being fussy to make.
This is a lovely project for anyone who enjoys decorating with thrifted finds, hosting during the holidays, or simply making something conversation-worthy out of what might have been headed for the donation box. It’s easy enough for a quiet afternoon at the kitchen table, and the finished piece has that sparkling, old-fashioned charm that reminds me of the way we used to dress up every corner of the house when company was coming.
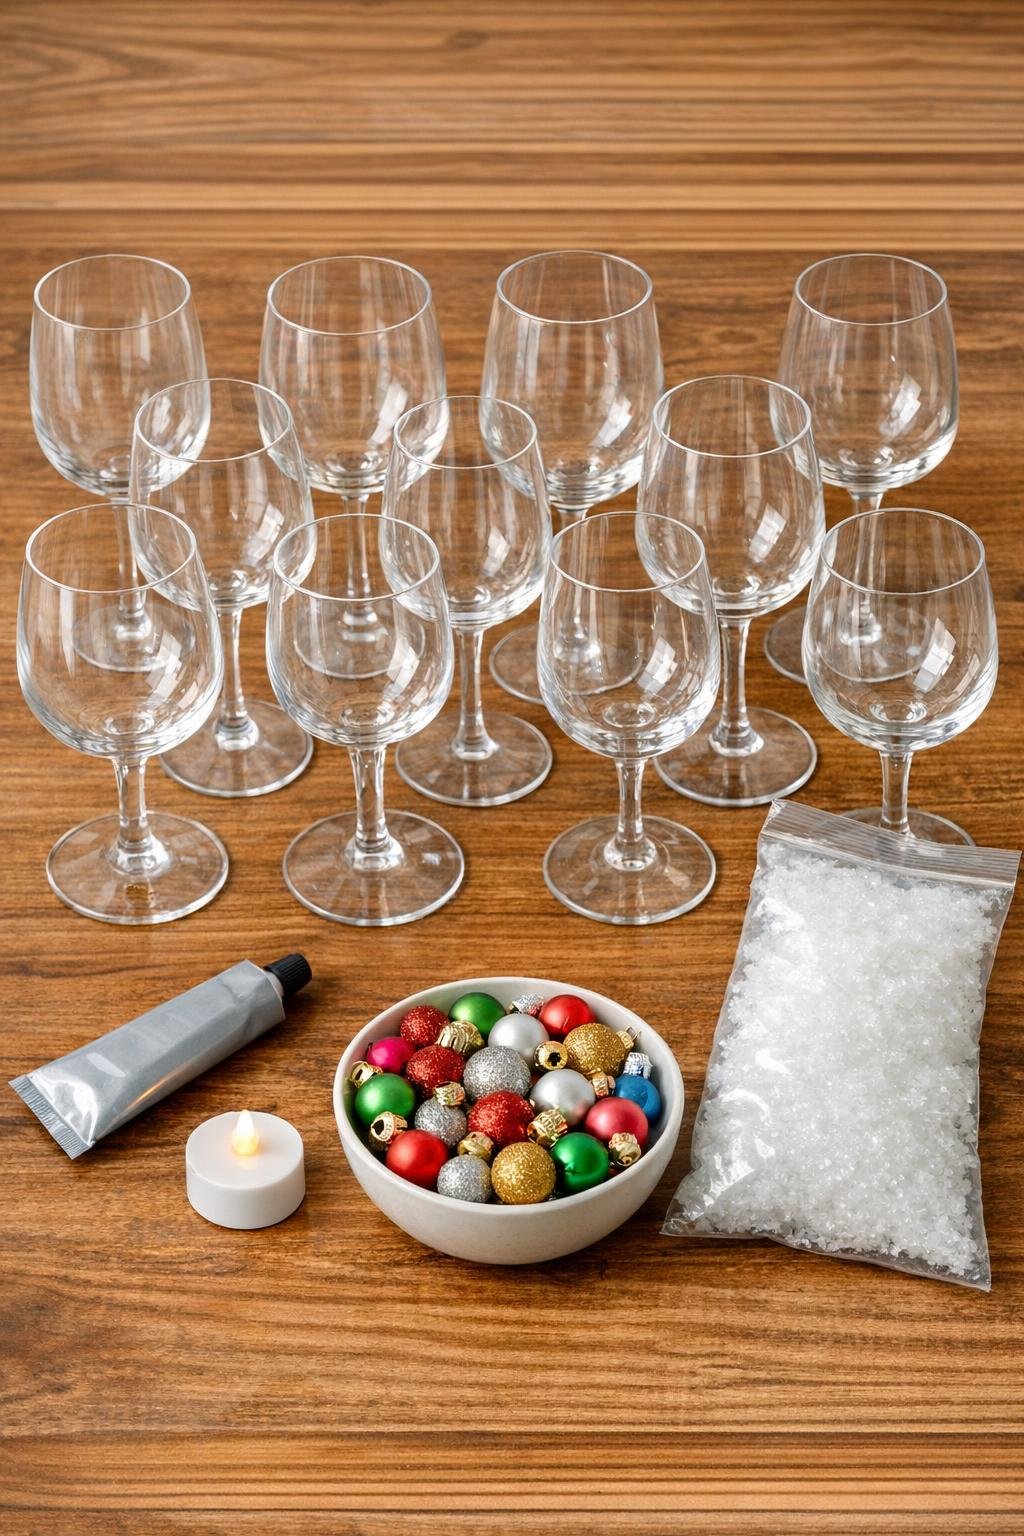
Materials
Instructions
1. Cover your table with wax paper and wipe the rims and bases of all 10 wine glasses with rubbing alcohol so the glue has a clean surface to grip.
2. Sort the glasses by size and shape, then choose 4 sturdy glasses for the bottom row, 3 for the second row, 2 for the third row, and 1 for the top so the pyramid looks balanced instead of wobbly.
3. Turn all 10 glasses upside down so the rims sit on the table and the bases face upward, because those upward-facing bases will become little display ledges inside the finished piece.
4. Make the bottom row by gluing the sides of 4 upside-down glasses together where the bowls touch, using a thin continuous bead of E6000 from top to bottom on each contact point.
5. Let that first row sit for 10 to 15 minutes until it holds its shape, then add 3 upside-down glasses centered on top of the gaps between the first 4, gluing each new glass to the ones it touches.
6. Build the third row with 2 upside-down glasses, again centering them over the seams below and applying glue only where the bowls meet so the stack stays neat and transparent.
7. Glue the final upside-down wine glass at the top center of the pyramid, checking from all sides that it sits straight before you leave the whole piece to cure.
8. Allow the glued pyramid to dry undisturbed for at least 24 hours, and use short loops of painter’s tape between glasses if any section wants to slide while the adhesive sets.
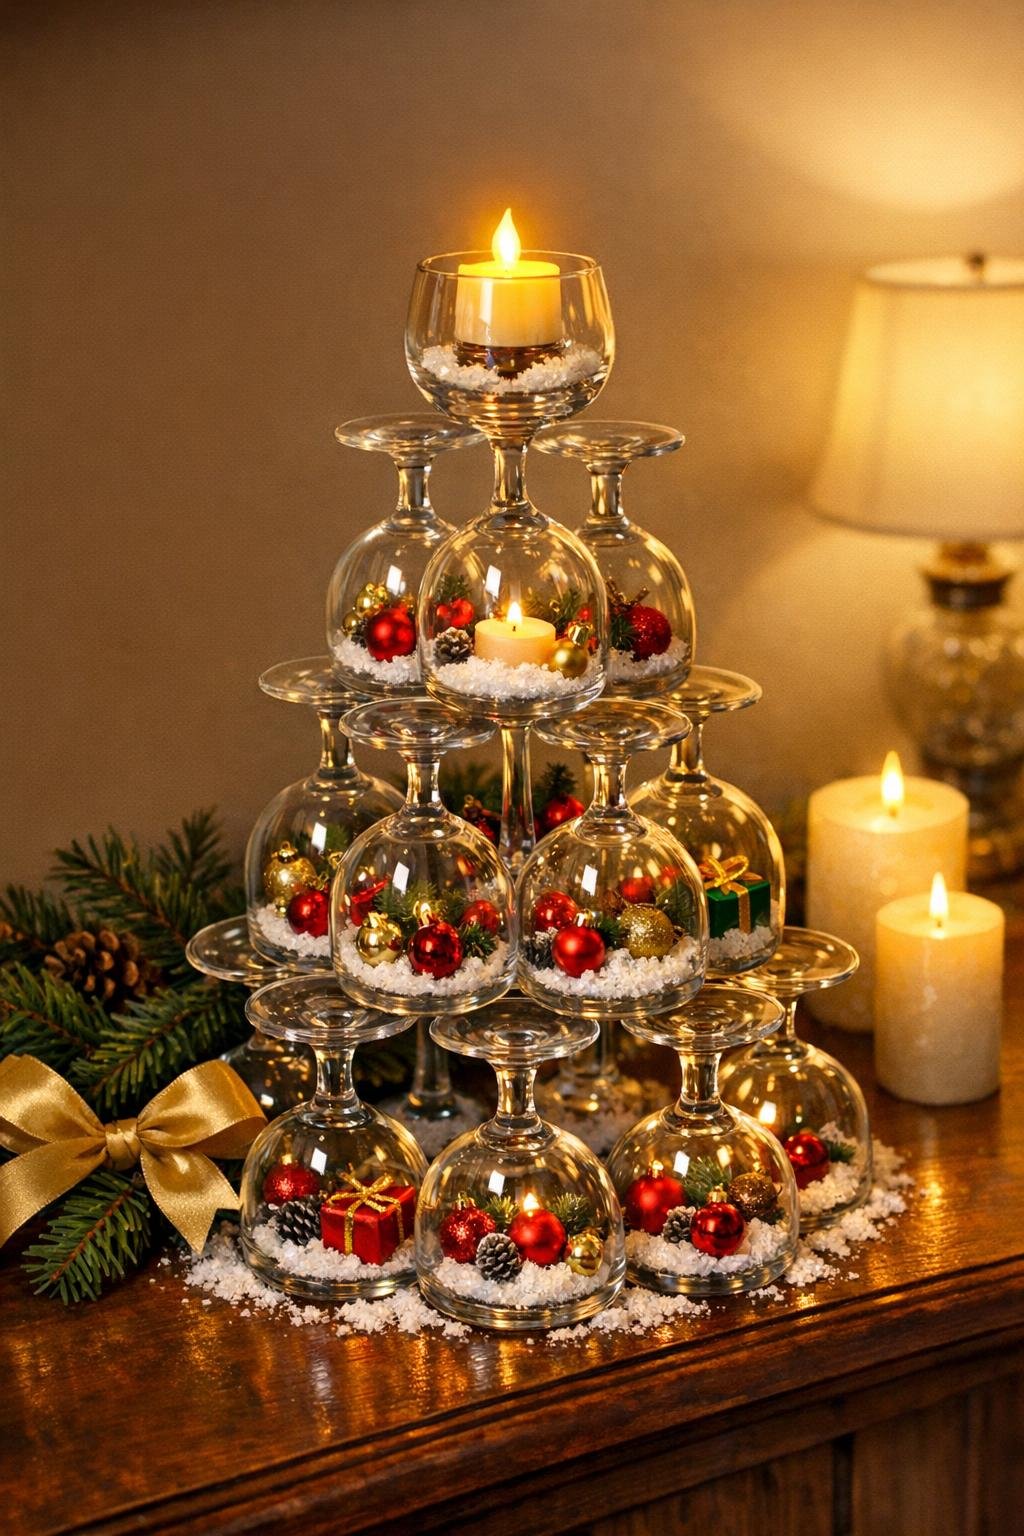
9. Once the structure is fully cured, spoon a small layer of fake snow onto the upward-facing base of each glass so every level catches a bit of wintry sparkle.
10. Tuck mini ornaments onto the glass bases throughout the pyramid, using 2 to 4 ornaments on the larger lower levels and 1 to 2 on the smaller upper levels for a full, decorated look.
11. Set the battery tea light inside the top glass base or directly behind the upper center of the pyramid, depending on which placement gives you the prettiest glow through the glass.
12. Brush away any stray glue strings or spilled snow, then move the finished piece carefully to a mantel, buffet, or holiday side table where the stacked glasses can shine and the light can sparkle through the whole display.
Variations & Tips
Color Theme: If you want a more polished look, use mini ornaments in just one palette such as silver and white, red and gold, or icy blue and champagne.
Safer Stacking: Glasses with gently rounded bowls usually glue together more securely than sharply angled ones, so save your trickiest shapes for the top where there’s less weight.
Snow Control: Add the fake snow after the glue has fully cured and the piece has been moved into place, because sliding it around too much will make the snow shift and scatter.
Extra Sparkle: A few tiny mirror-finish ornaments on the front-facing bases will bounce the tea light beautifully and make the whole display look fuller at night.
Display Tip: This piece is best in a spot where it won’t be bumped, such as a mantel, entry table, or dining room sideboard, especially if you’re using delicate thrifted glasses with different weights.
Make It Your Own: If your glasses are all clear but very different in shape, lean into that collected-over-time charm instead of fighting it; that little bit of mismatch is exactly what gives the project its character.