
There’s something deeply satisfying about taking the plainest little household item and turning it into something that looks like it came from a lovely specialty shop. I’ve always had a soft spot for projects like that—simple, sturdy, and useful, the kind of thing that feels right at home on a kitchen table or sideboard through a whole season. This one starts in the most humble way possible, with a plastic mixing bowl and a batch of wet concrete, but don’t let that fool you.
If you enjoy easy weekend projects and like décor with a little weight and presence to it, this is a good one. It’s beginner-friendly, inexpensive, and the finished piece has that old-world, gathered-together charm I’ve always loved in Midwestern homes during the holidays and long winter months.
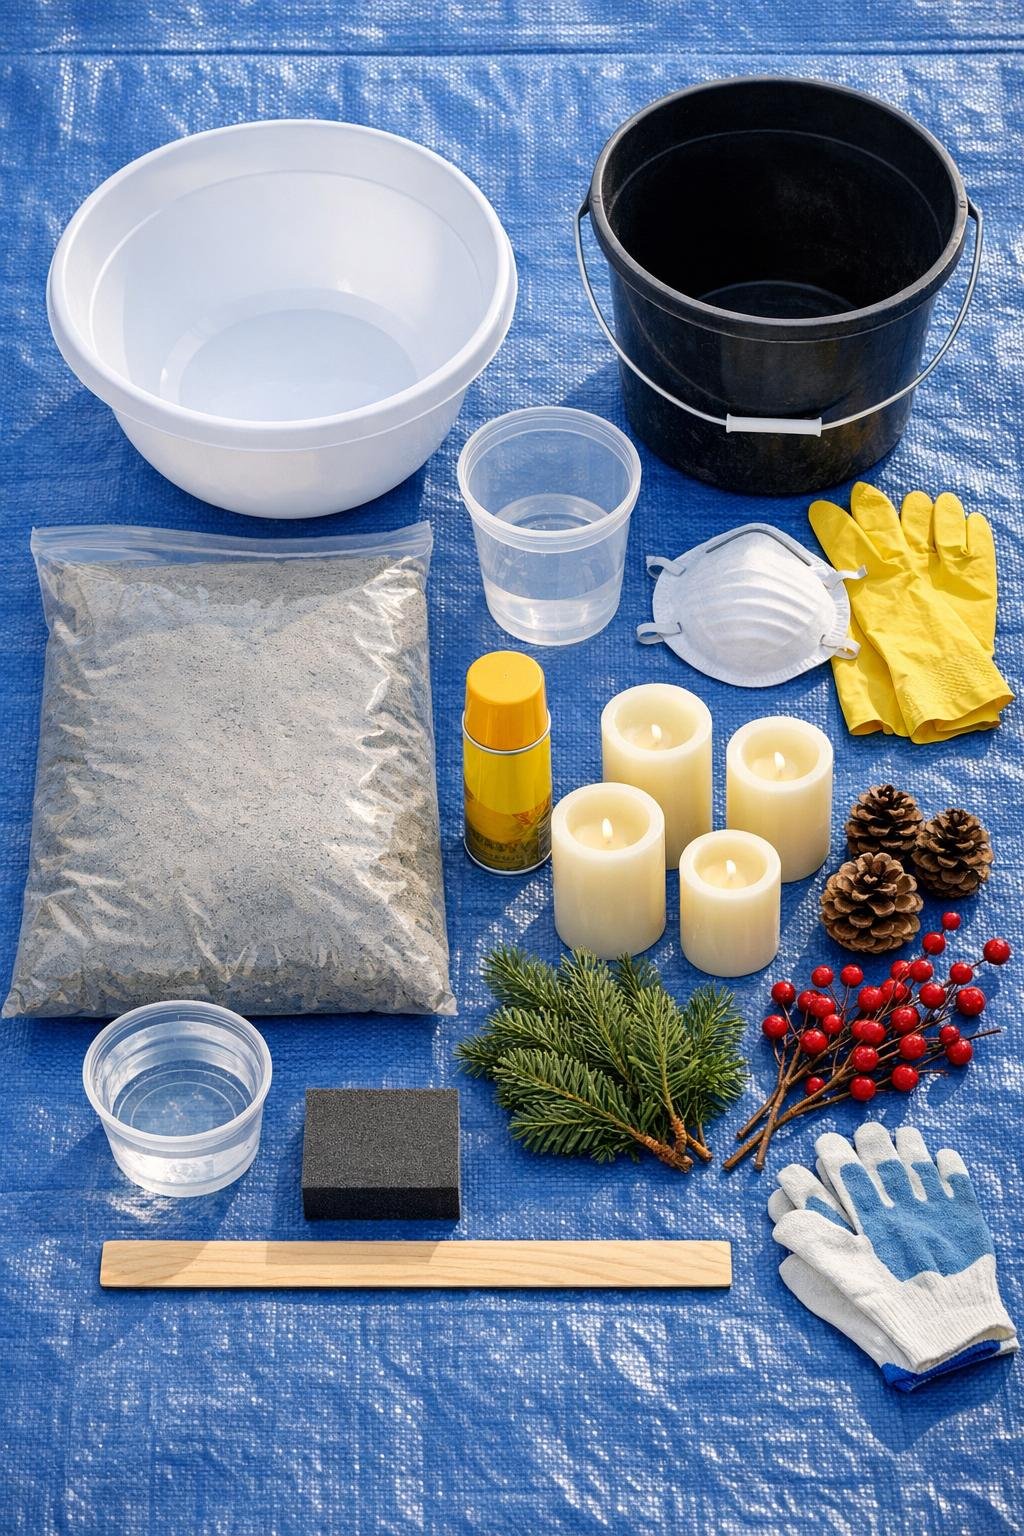
Materials
1 large plastic dollar store mixing bowl, about 4 quart size
Instructions
1. Spread a blue tarp or other protective covering over your work surface, then put on rubber gloves and a dust mask. Spray the inside of the large mixing bowl and the outside of the smaller bowl lightly with cooking spray so the concrete will release more easily later.
2. Pour the 10-pound bag of quick-setting concrete mix into a bucket and add water a little at a time, stirring with the paint stick until it looks like thick oatmeal. Mix thoroughly so there are no dry pockets, but keep it stiff enough to hold shape.
3. Spoon or pour the wet concrete into the large mixing bowl until it is roughly half to two-thirds full, then tap the bowl gently on the tarp several times to help release air bubbles.
4. Center the smaller bowl or deli container on top of the wet concrete and press down slowly to form the hollow. Leave at least 1 1/4 inches of concrete on the bottom and all around the sides so the finished bowl is strong and substantial.
5. Adjust the inner bowl until the rim thickness looks even all the way around, then weigh the smaller bowl down with a little water or a small heavy object so it stays in place while curing.
6. Let the concrete set until firm, following the timing on your mix, usually about 1 to 2 hours for initial hardening. Once it holds its shape, gently remove the smaller bowl first, then flex the large plastic bowl to release the concrete form.
7. Set the piece aside to cure fully for 24 hours. After curing, use the sanding sponge to smooth the top rim, outer edge, and any rough spots on the inside until the bowl feels clean and finished in your hands.
8. Wipe away all concrete dust with a dry cloth or paper towel, then place the cured bowl where you plan to display it. The soft gray finish is lovely left natural, and that honest, stone-like look is part of the charm.
9. Arrange the three LED pillar candles down the center of the bowl, spacing them evenly. Tuck faux evergreen sprigs around the candles until the arrangement looks full, letting some tips spill naturally over the edges.
10. Nestle the pinecones and red berry picks into the greenery, filling any gaps and balancing the color across the arrangement. Turn on the candles and make small adjustments until the whole centerpiece looks lush, even, and welcoming.

Variations & Tips
For a longer centerpiece: If you happen to find an oval plastic tub instead of a round mixing bowl, you can use the same method for a more elongated table arrangement.
For a smoother finish: Tap the filled outer bowl a few extra times before inserting the smaller bowl, and again after pressing it in, to bring more air bubbles to the surface.
For added protection: If you want to use this beyond the winter season, brush on a clear matte sealer once the concrete has fully cured. I like a matte finish here because it keeps that soft stone look.
Candle safety: Stick with LED pillar candles in this project, especially when greenery and berry picks are tucked close around them. It gives you all the cozy glow without the worry.
Seasonal swaps: After the holidays, I’d trade the evergreen and berries for moss, eucalyptus, dried orange slices, or even a nest of spring florals. A solid concrete bowl like this earns its keep all year long.
My favorite styling trick: Make the arrangement a little fuller than you think you need. That generous, abundant look is what makes a handmade centerpiece feel polished instead of homemade in the unfinished sense.