
There’s something deeply satisfying about turning a scruffy, almost-forgotten garden staple into something that looks like it belongs in a winter display window. When I first started experimenting with hot glue as a decorative medium, I learned quickly that it can mimic ice beautifully if you let it flow instead of trying to control every strand. This project takes that idea and pushes it into something dramatic enough for a porch, but still easy enough to make in an afternoon.
If you like holiday decorating that feels a little clever, a little thrifty, and a lot more expensive than it actually is, this one is for you. The materials are simple, the shape is already built for you by the tomato cage, and the real magic happens when the lights catch all those clear glue drips after dark.
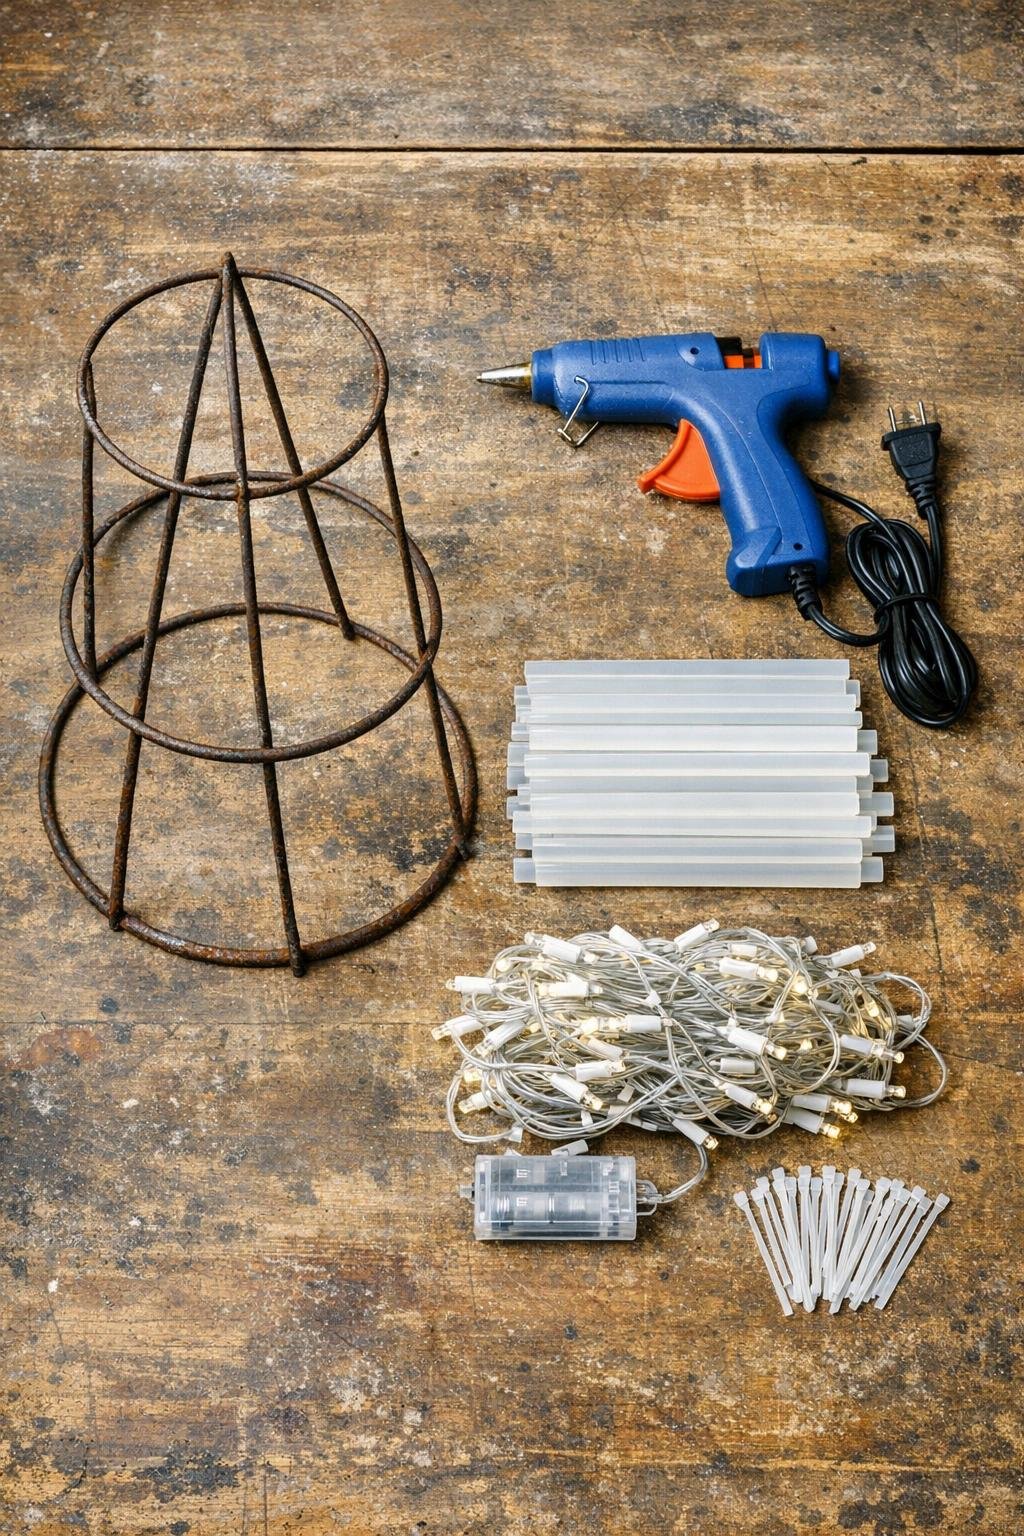
Materials
1 rusty old metal tomato cage, standard 42 to 54 inch size
Instructions
1. Set the tomato cage on its side on a protected work surface and make sure it’s dry and free of loose dirt or flaking rust. Leave the aged finish in place, because that weathered metal shows through the finished piece and gives it character.
2. Warm up the hot glue gun fully so the glue flows in long smooth lines instead of short blobs. I like to test one drip on a scrap surface first; if the glue falls in a nice tapered strand, it’s ready.
3. Working on one vertical wire at a time, slowly pipe clear hot glue from near the top ring downward, letting gravity pull it into long icicle-like drips. Vary the lengths from about 2 inches to 8 inches so the result looks natural and generously layered.
4. Repeat the glue drips on every vertical section and around each ring, adding extra drips where the wires intersect so the cage looks encrusted rather than sparse. Let some drips connect from ring to ring for a more frozen, crystalline effect.
5. Stand the cage upright with the wide end on the ground and the pointed end at the top, then check for any bare spots. Add another round of glue drips to the front-facing sections so the tree reads full from the porch or walkway, not just up close.
6. Allow the glue to cool completely for 10 to 15 minutes before adding lights. This keeps the drips crisp and prevents your fairy light wire from sinking into still-soft glue.
7. Starting at the bottom ring, wrap the white fairy lights upward in a spiral, weaving the wire in and out of the cage so the lights sit both inside and outside the frame. Keep the spacing fairly tight—about 3 to 4 inches between passes—so the finished tree glows evenly.
8. Attach the light strand with clear zip ties at the bottom, middle, and top, then add a few more wherever the wire wants to spring loose. Trim the zip tie tails close so they disappear into the frame.
9. Shape the top point neatly by tucking the final section of lights close to the upper wires, and secure the battery pack or plug lead along the back side of the frame. Turn the lights on and fill any dark gaps with a quick adjustment of the wire.
10. Move the finished piece to your porch, front steps, or entry and anchor it if needed so it stays steady in winter weather. Plug it in at dusk, step back, and let those glue icicles do what they do best.

Variations & Tips
For extra sparkle: Use cool white fairy lights if you want a sharper icy look, or warm white if you prefer something softer and cozier against the rusty frame.
For a fuller tree: Add a second pass of hot glue after the first layer cools, especially on the lower third. That bottom area benefits from the densest coverage because it’s what people notice first from the curb.
For outdoor durability: Use fairy lights rated for outdoor use and keep all plug connections lifted off wet ground. I usually tuck the connection point behind a planter or under a covered edge of the porch.
For a trio display: Make the same project with three tomato cages in different heights and cluster them together. Grouped trees always look more intentional and give you that styled, professionally decorated feel.
To hide the cord neatly: Run the plug lead down the back leg of the cage and secure it with two or three extra zip ties. It’s a tiny detail, but it makes the whole project look polished once it’s on display.
If your glue strings: Don’t worry about a few wispy threads while you work. Once the piece cools, you can pull those away gently with your fingers, and the heavier drips will still look beautifully frozen.